EPL6127110_YS12PF_Ope_E.pdf - 第105页
2-40 2 asic operation 4.3 Setting the tray components n Precautions when handling pallets Observe the following points w hen handling the pallets. • Store the pallets in a clean environment where dust, grime and oil wi…
2-39
2
asic operation
4.2.2 Installation on a mounter
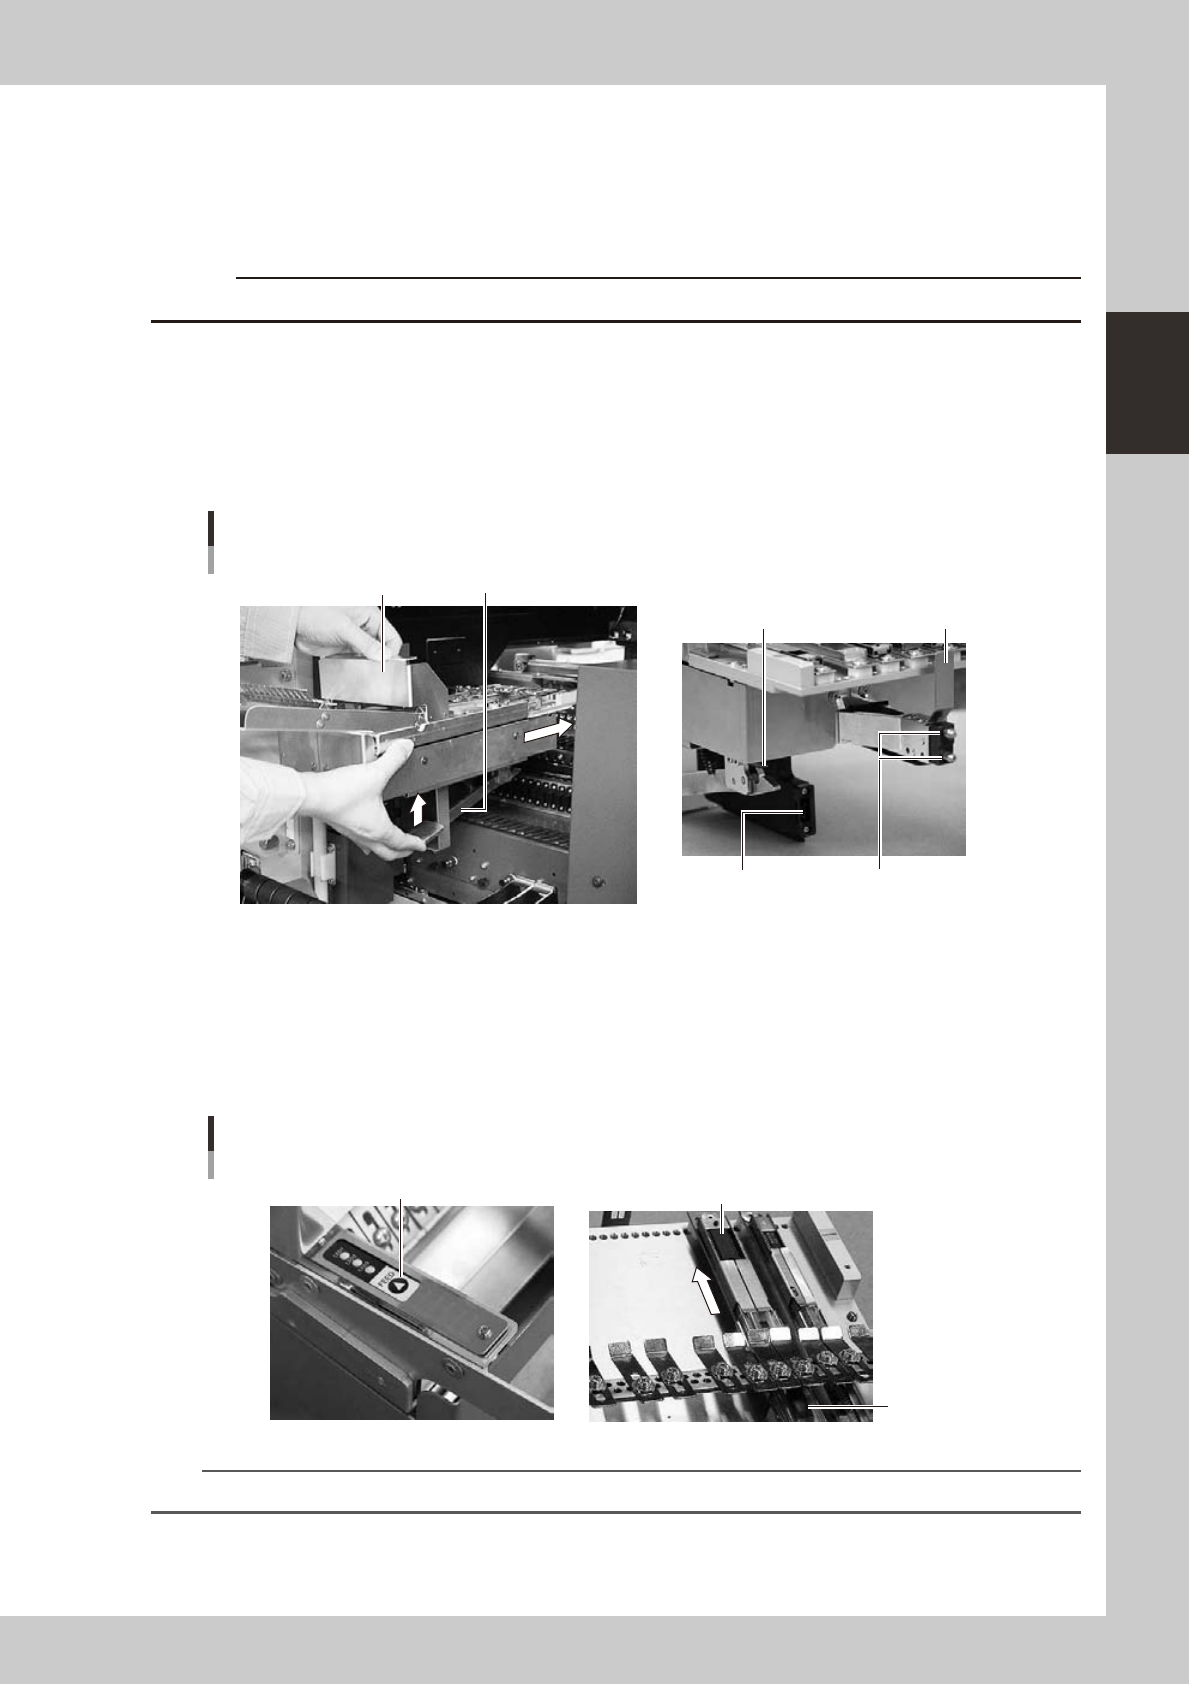
Observe the following instructions for installing the wide multi-stick feeder on a mounter.
e
1
Install the tracks on the slope plate.
Press the emergency stop button on the mounter to stop mounter operation.
c
2
Clean the surface of the feeder bank.
Parts or debris caught in the machine will tilt the feeder, interfering with stable pickup.
3
Set the feeder.
Raise the clamping lever, align the target mark to the feeder installation position and slide it to insert it
to the location pin hole.
Attachment of the feeder
Clamping lever
Connector for power/signal
Location pin
Tail pin
Target mark
Handle part
23227-L6-00
4
Check the assembled condition.
Release the clamping lever and try to move the feeder back and forth to check if it is fixed securely.
5
Set components.
Press the [FEED] button so that the first component reaches the pickup position. The feeder will vibrate
for two seconds to feed components at the touch of the button.
Confirmation of operation and setting components
First component
Stick
[FEED] button
23228-L6-00
TIP
For detailed information on the wide multi-stick feeder, refer to the User’s Manual for SS feeder.
2-40
2
asic operation
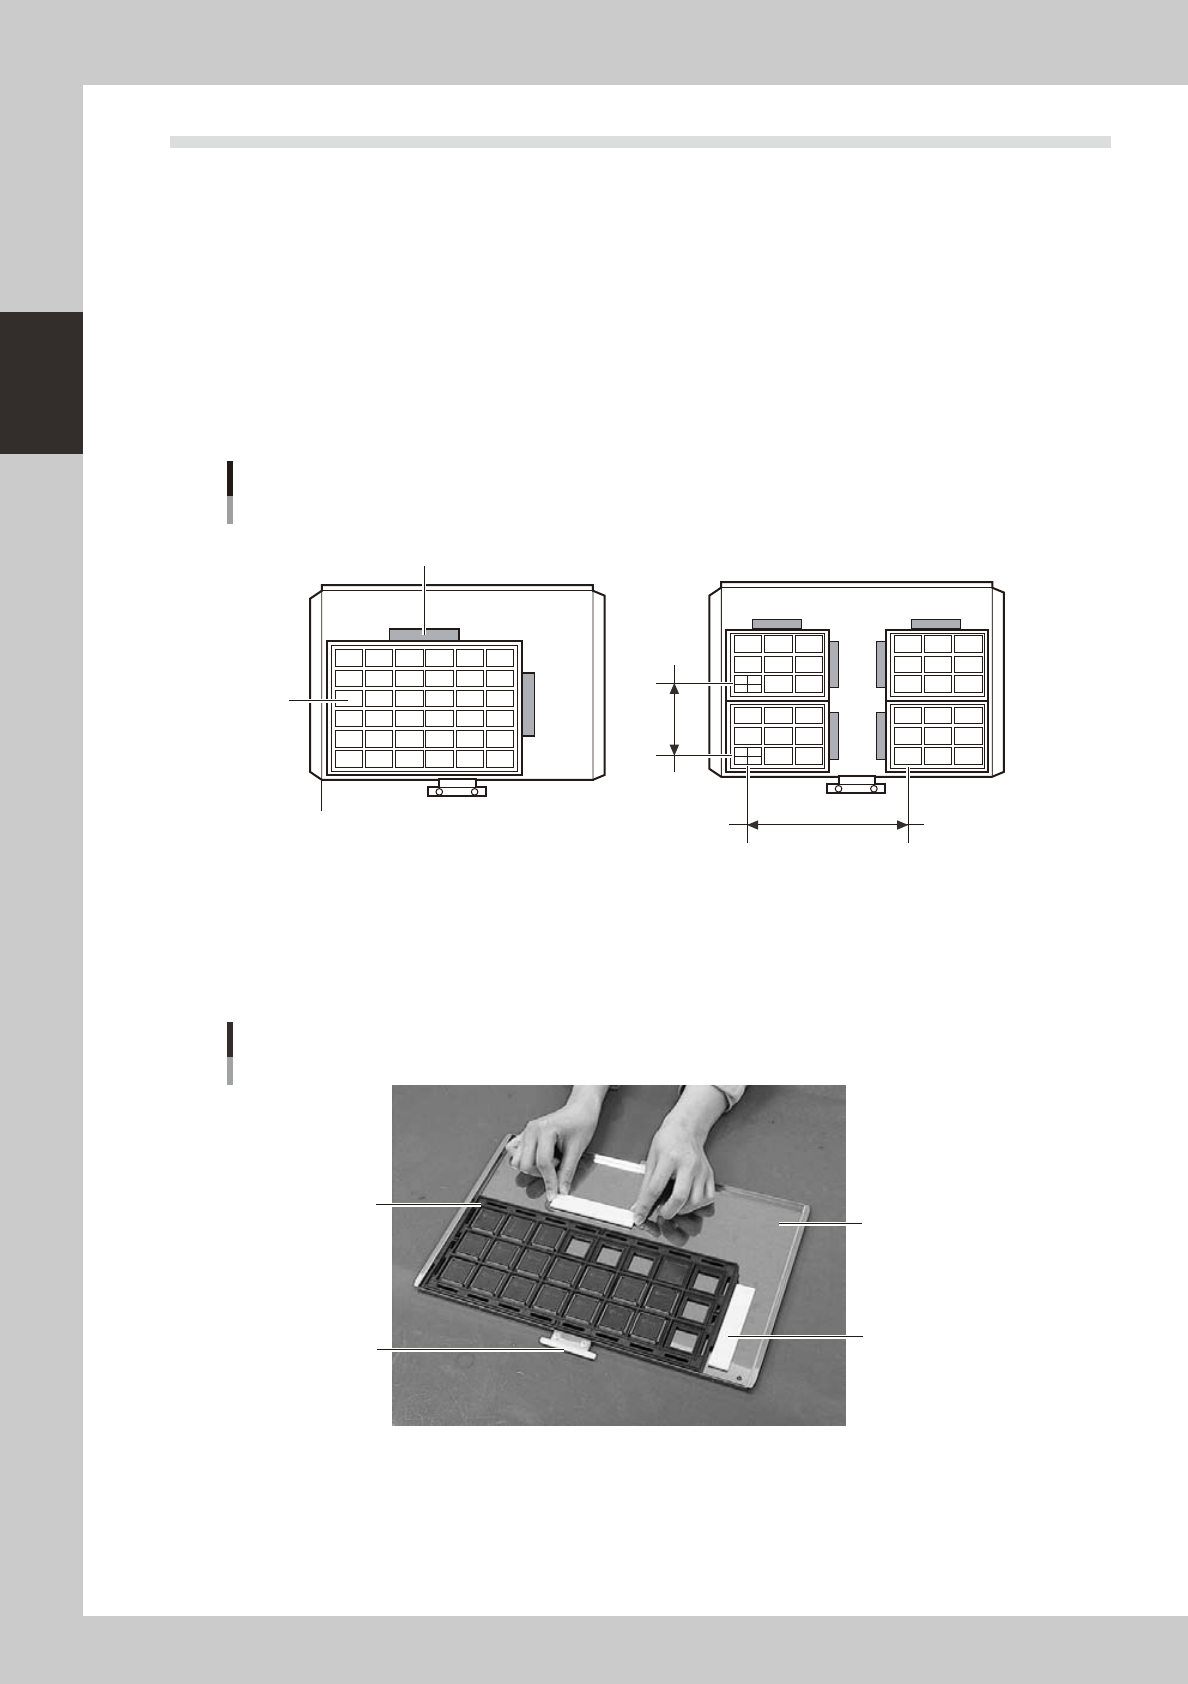
4.3 Setting the tray components
n
Precautions when handling pallets
Observe the following points when handling the pallets.
• Store the pallets in a clean environment where dust, grime and oil will not adhere.
• Take care not to drop the pallets or apply excessive force or impacts. Do not use a pallet if it is warped or deformed
after having been dropped.
• Avoid hurting yourself on the edges of the pallets.
4.3.1 Setting the component trays in the pallet
Several component trays can be set on one pallet (depending on the size of trays). Set the trays as described
below.
Clamping the component tray
Using one tray
Using several trays
Tray pitch X
Clamping magnet
Tray
Tray pitch Y
Pallet reference position (pallet origin position)
23219-L7-00
1
Remove the tray clamp magnets.
2
Set the component tray on the pallet.
Set so the corner of the component tray is aligned with the pallet reference position (pallet origin
position). After setting the tray, clamp it in place with the magnets.
Clamping the component tray
Pallet pullout piece
Tray clamp magnet
Pallet
Tray
23217-L7-00
3
Check that the component tray is clamped.
Press on the tray to make sure it is securely clamped by the magnet.
2-41
2
asic operation
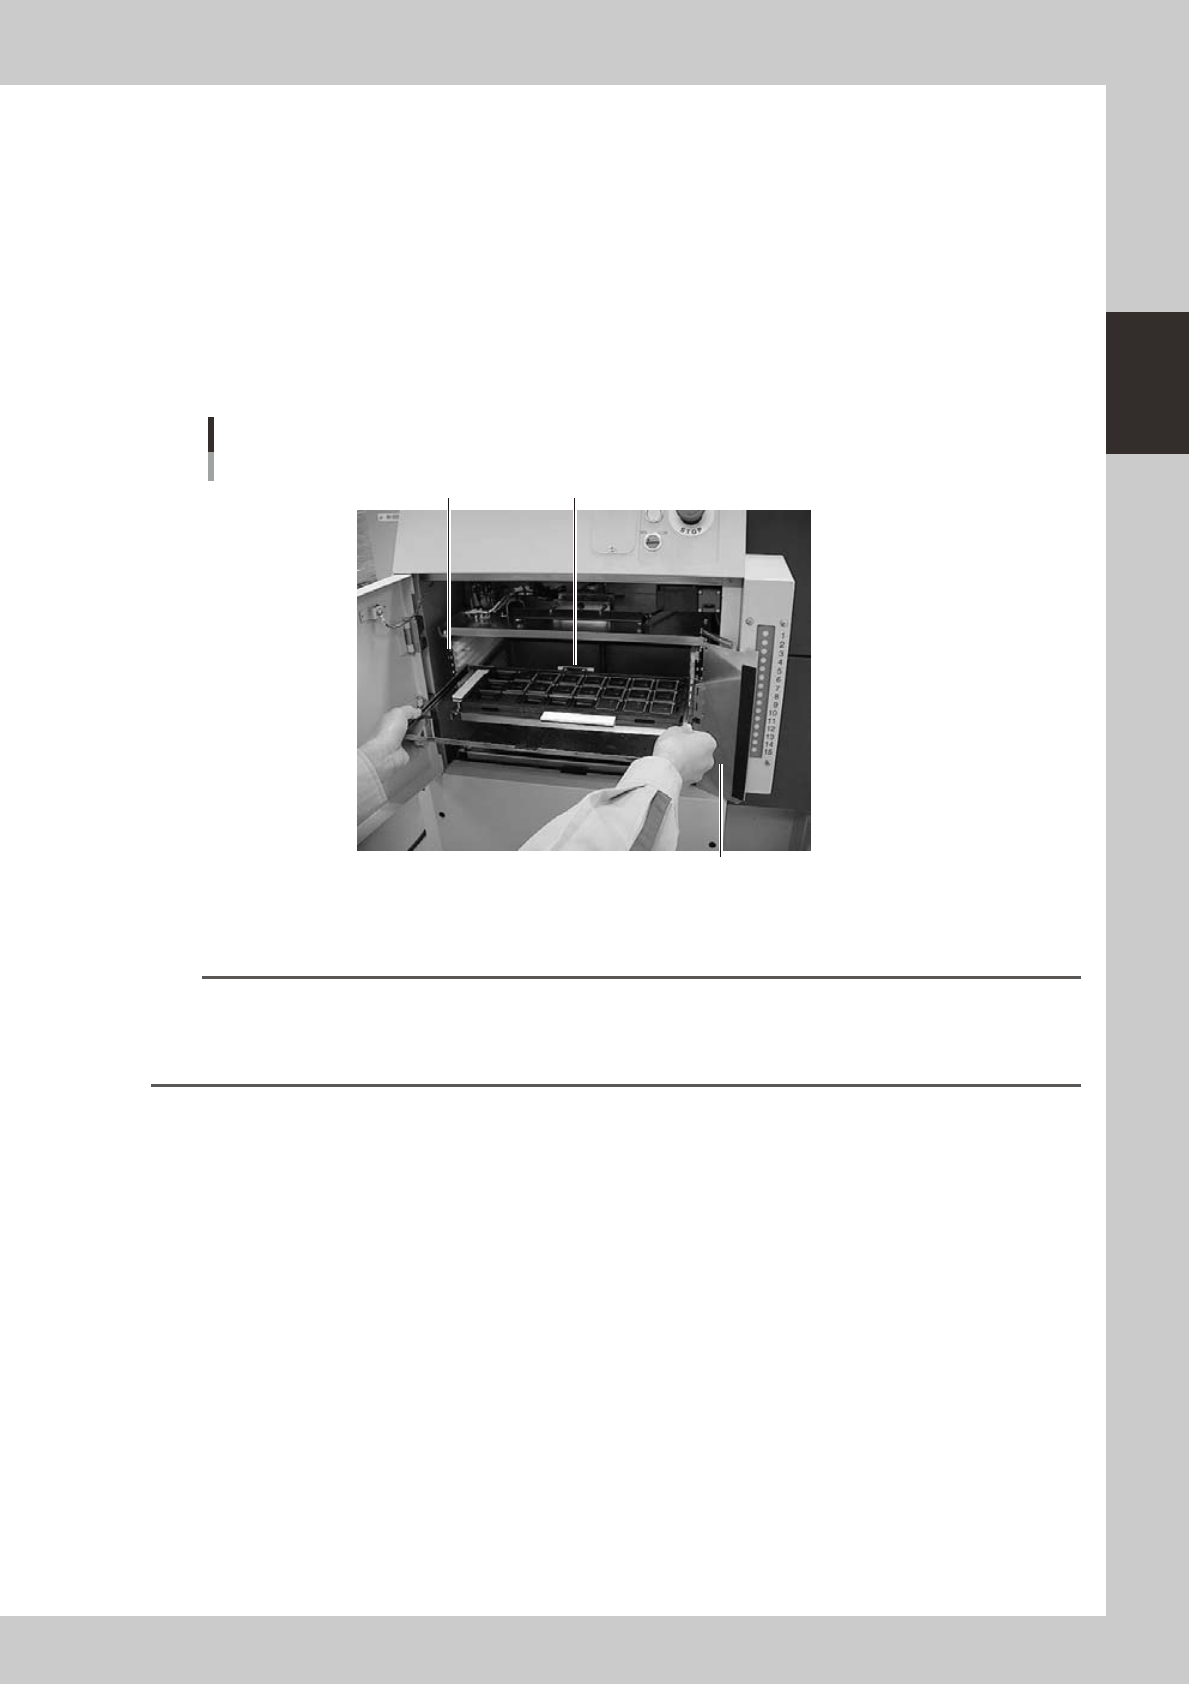
4.3.2 Setting a pallet in the ATS15
1
Open the ATS15 door.
Set the door switch to "OPEN" to unlock the door. Check the door switch lamp is off and then open the
door.
2
Open the pallet retainer door.
Open the pallet retainer door on the right side.
3
Insert the pallet.
While keeping the pallet level, insert it into the correct magazine shelf, with the pallet pullout piece
facing inward.
Inserting the pallet
Pullout piece
Pallet retainer door
Pallet insertion shelf number
23218-L7-00
4
Insert all the required pallets into the correct magazine shelf.
n
NOTE
• Labelwithblackandsilvernumbersareafxedtobothsidesofthemagazinetoshowtheshelfnumberand
prevent inserting a pallet into the wrong position.
• Insertthepalletintotheshelfthatwassetinthe"PalletNo.Start"and"PalletNo.End"parameterinthe[Parts]-[Tray]
information.
5
Close the pallet retainer door.
After closing the pallet retainer door, close the ATS15 door.
6
Set the door switch to "CLOSE".
This locks the door, and the door switch lamps turn on indicating that the pallets are set.