00190802-02.pdf - 第26页
1 Hardware / Software Installati o n User’s Manu al Line Computer UNIX 1.2 Hardware Installation Software Version 402.xx Edition 06/ 96 1 - 12 1.2.5 Monitor - T ype MCM 17 54 (ND) 17" MUL TIS CAN 1.2. 5.1 Connection…

User’s Manual Line Computer UNIX 1 Hardware / Software Installation
Software Version 402.xx Edition 06/96 1.2 Hardware Installation
1 - 11
8
Rotating the display (mode indicator must be on)
●
Rotate the display clockwise = press the
right
side of the button.
●
Rotate the display anticlockwise = press the
left
side of the button.
Adjusting the brightness (mode indicator must be off)
●
Increasing the brightness = press the
right
side of the button.
●
Reducing the brightness = press the
left
side of the button.
9
Correcting the trapezium distortion (mode indicator must be on)
●
Stretching bottom of image = press the
right
side of the button.
●
Stretching top of image = press the
left
side of the button.
Adjusting the contrast (mode indicator must be off)
●
Increasing the contrast = press the
right
side of the button.
●
Reducing the contrast = press the
left
side of the button.
☞
NOTE
To store the settings, the right side of the
RELOAD/SAVE
button must be pressed.
1 Hardware / Software Installation User’s Manual Line Computer UNIX
1.2 Hardware Installation Software Version 402.xx Edition 06/96
1 - 12
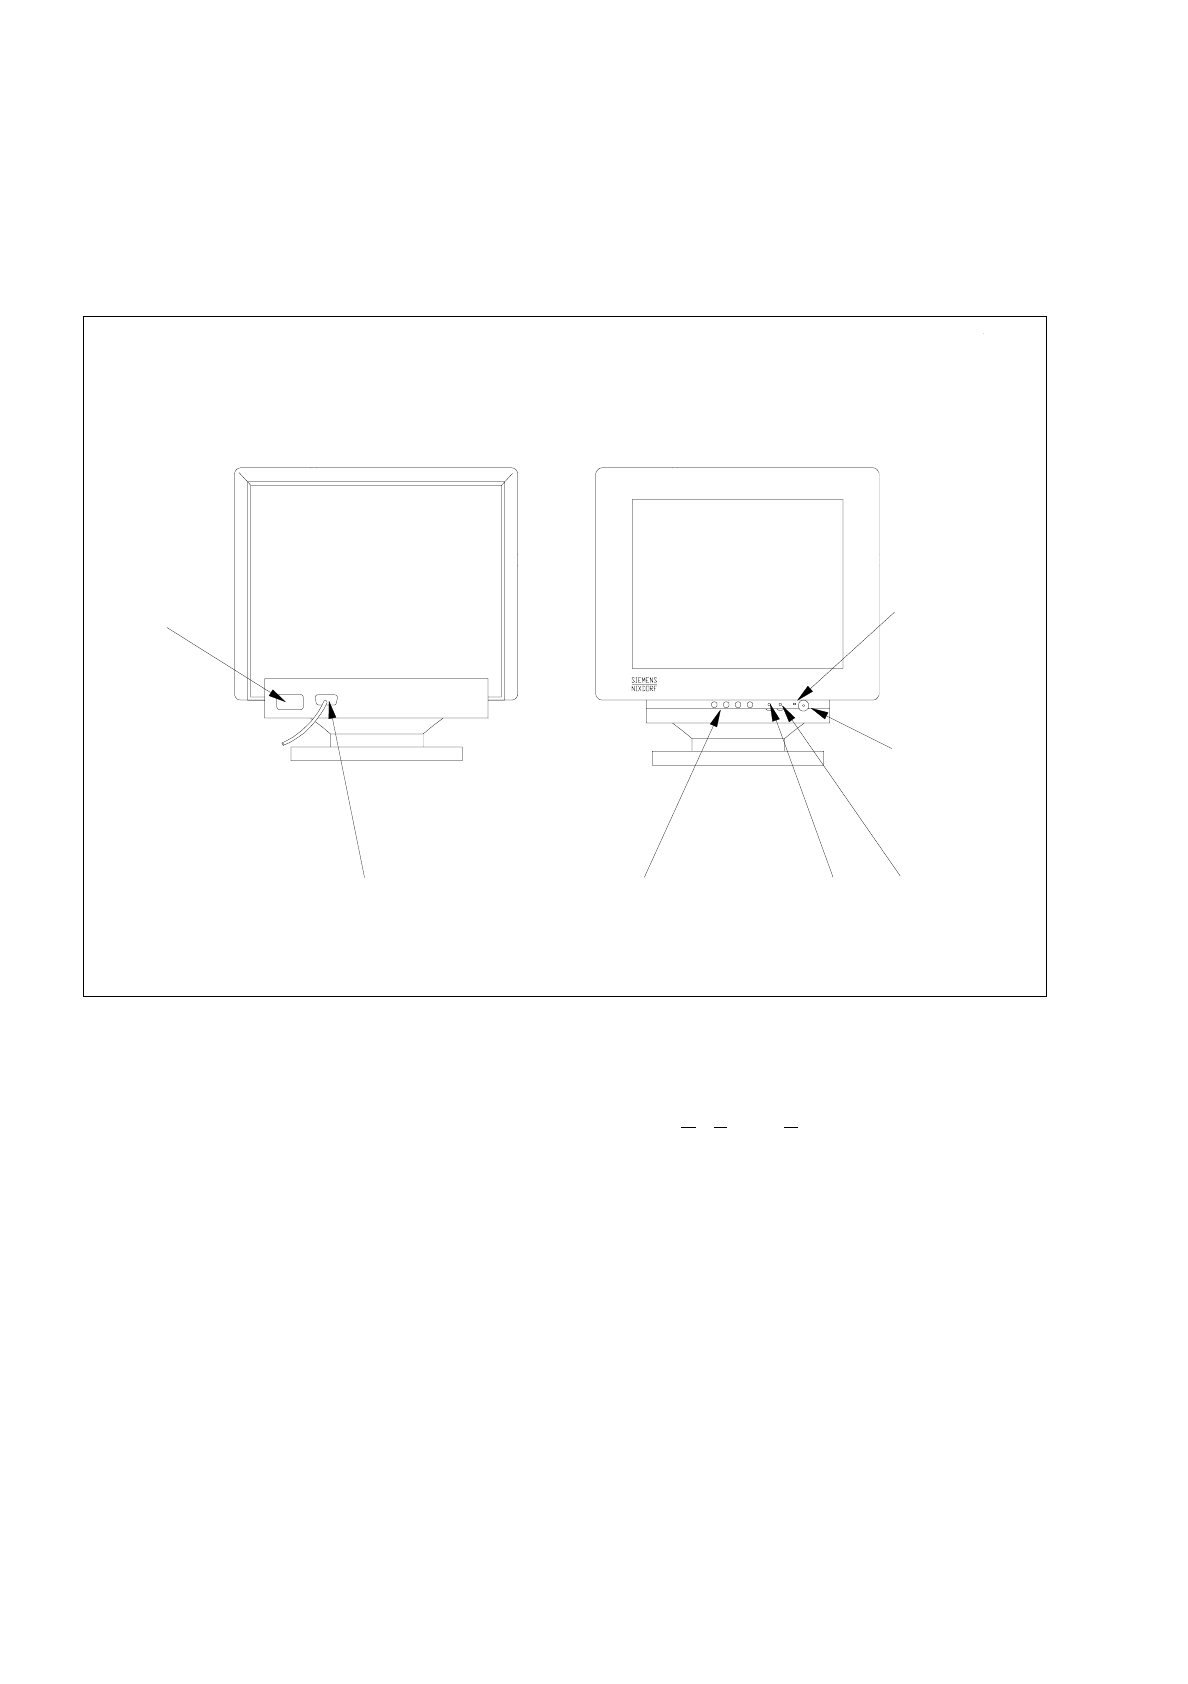
1.2.5 Monitor - Type MCM 1754 (ND) 17" MULTISCAN
1.2.5.1
Connections and Settings
Fig. 1.2.5 Monitor - connections, control elements, setting elements
The monitor can be adjusted using the functions of the OSD menu (On-Screen-Display).
The OSD menu is called up and operated by means of the buttons on the operator panel.
Adjustment of brightness and contrast is carried out using controls located to the right of the keys of the operator
panel. The respective functions are identified above the individual controls by means of symbols.
Adjusting the brightness
●
Increasing the brightness = turn control clockwise.
●
Reducing the brightness = turn control anticlockwise.
Adjusting the contrast
●
Increasing the contrast = turn control clockwise.
●
Reducing the contrast = turn control anticlockwise.
Rear
Front
video interface
((connection to computer)
control panel
(OSD menu)
power
power lamp
power switch
brightness
control
contrast
control
connection
User’s Manual Line Computer UNIX 1 Hardware / Software Installation
Software Version 402.xx Edition 06/96 1.2 Hardware Installation
1 - 13
☞
NOTE
The life of the screen can be extended if brightness and contrast are adjusted to low or medium.
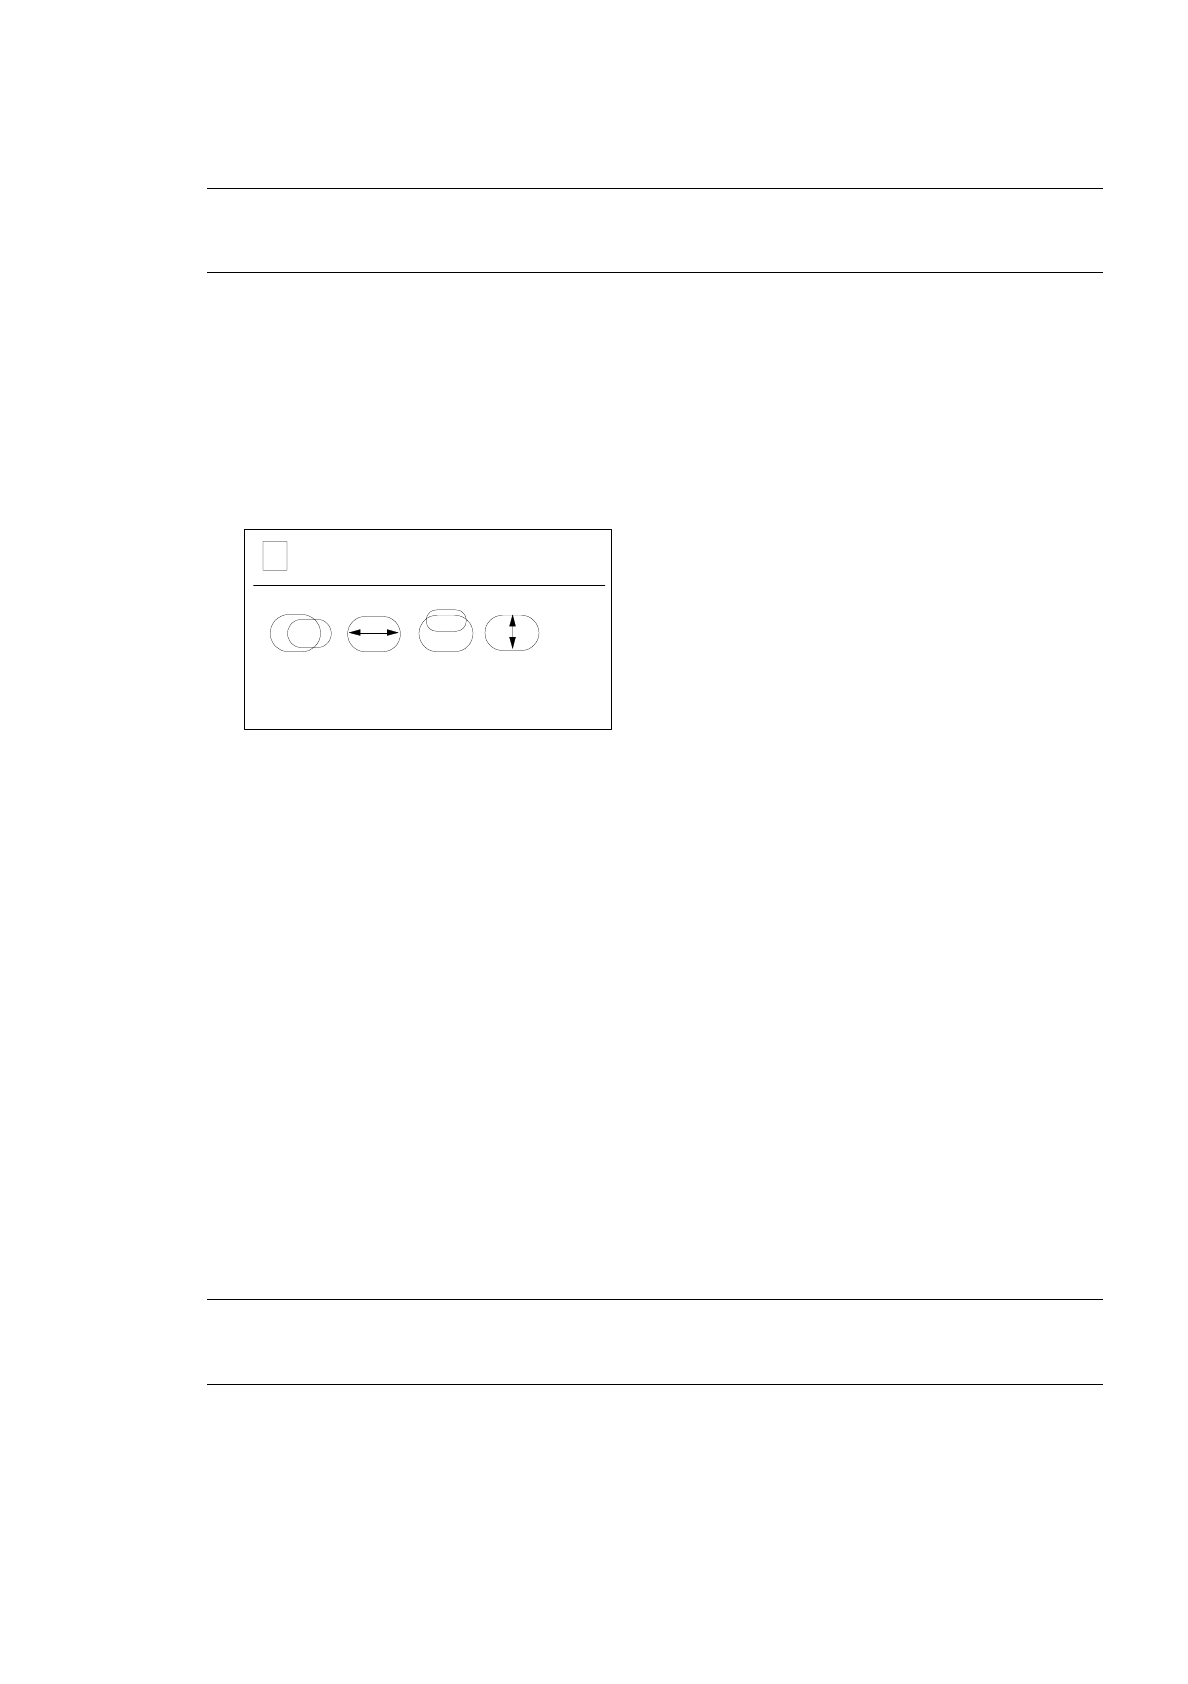
Changing the monitor settings using the OSD menu
Procedure:
●
Press the MENU button (1).
The OSD window appears on the screen together with the first display level of the OSD menu.
The digit in the left-hand corner shows the display level within the OSD menu. There are three levels.
Next to the number of the level the current operating mode (resolution and refresh rate) of the screen
is indicated (depending on the setting of the graphic card).
The second and third lines contain the symbols and abbreviations for the setting functions.
The first symbol is marked in color.
●
Using the MINUS (2) or PLUS (3) button select the symbol or abbreviation representing the
function you wish to set.
The selected symbol or abbreviation is marked in color.
●
Press the CONFIRM button (4).
Depending on the function, a scale indicating the setting area will appear in the OSD window, or a
submenu will be displayed (level two).
●
In the submenu select the symbol or abbreviation of the function you wish to adjust, if applicable,
using the MINUS or PLUS button.
●
Press the CONFIRM button to activate the selected function.
●
Press MINUS or PLUS as often as necessary to obtain the desired result.
☞
NOTE
The adjusting procedure may be aborted by pressing the MENU button.
●
Press the CONFIRM button to confirm the setting.
●
To exit from the OSD menu press the MENU button repeatedly, if required.
All settings confirmed by pressing the CONFIRM button are automatically saved upon exiting
from the menu.
1 1024 x 768 / 75Hz
➩➪
GC CA DG IS