DECAN_S2_Operation(ENG_Ver4.1).pdf - 第19页
Chap ter 2 This chapter describes how to supply the power and the items to be checked before starting production. Supplying Pow e r and W arming up Advanced Chip Shooter DE CAN S2 O pe rat ion H an db ook 2- 6 Pr oced ur…
Chapter 2
This chapter describes how to supply the power and the items to be
checked before starting production.
Supplying Power and Warming up
Advanced Chip Shooter
DECAN S2 Operation Handbook
2-5
Procedure Preparing for Production > Warming-Up
Procedure Preparing for Production
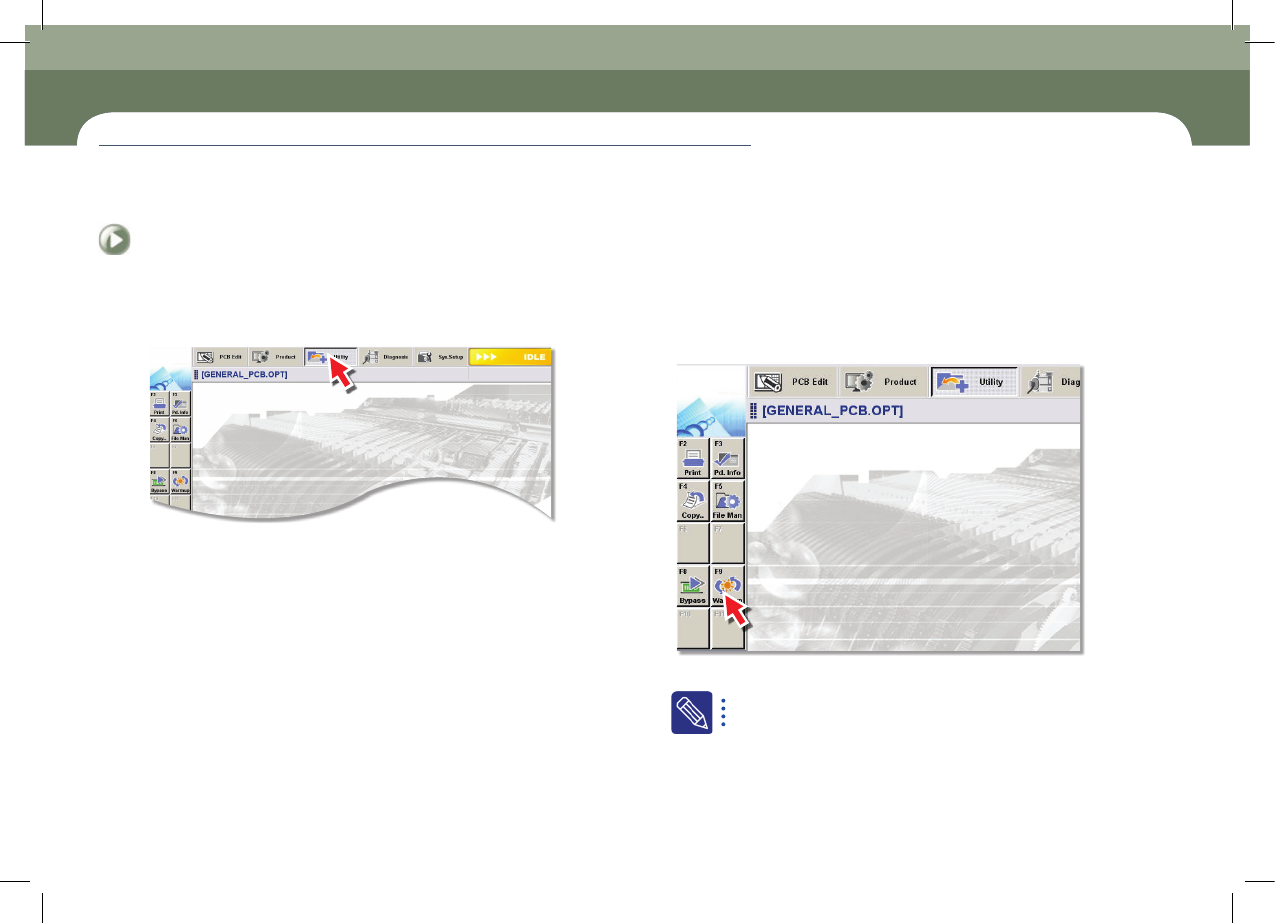
5. Warming-Up
Step 1.
Selecting the 'Utility' Menu: Displays the Utility screen
Step 2.
Selecting the 'Warmup' submenu: Open the Warm Up dialog
box
The warm-up should be performed for about 10 minutes before
starting the part placement in order to increase the placement
accuracy.
Temperature condition: 20 ~ 28℃
Chapter 2
This chapter describes how to supply the power and the items to be
checked before starting production.
Supplying Power and Warming up
Advanced Chip Shooter
DECAN S2 Operation Handbook
2-6
Procedure Preparing for Production > Warming-Up
Procedure Preparing for Production
Supplying Power and Warming up
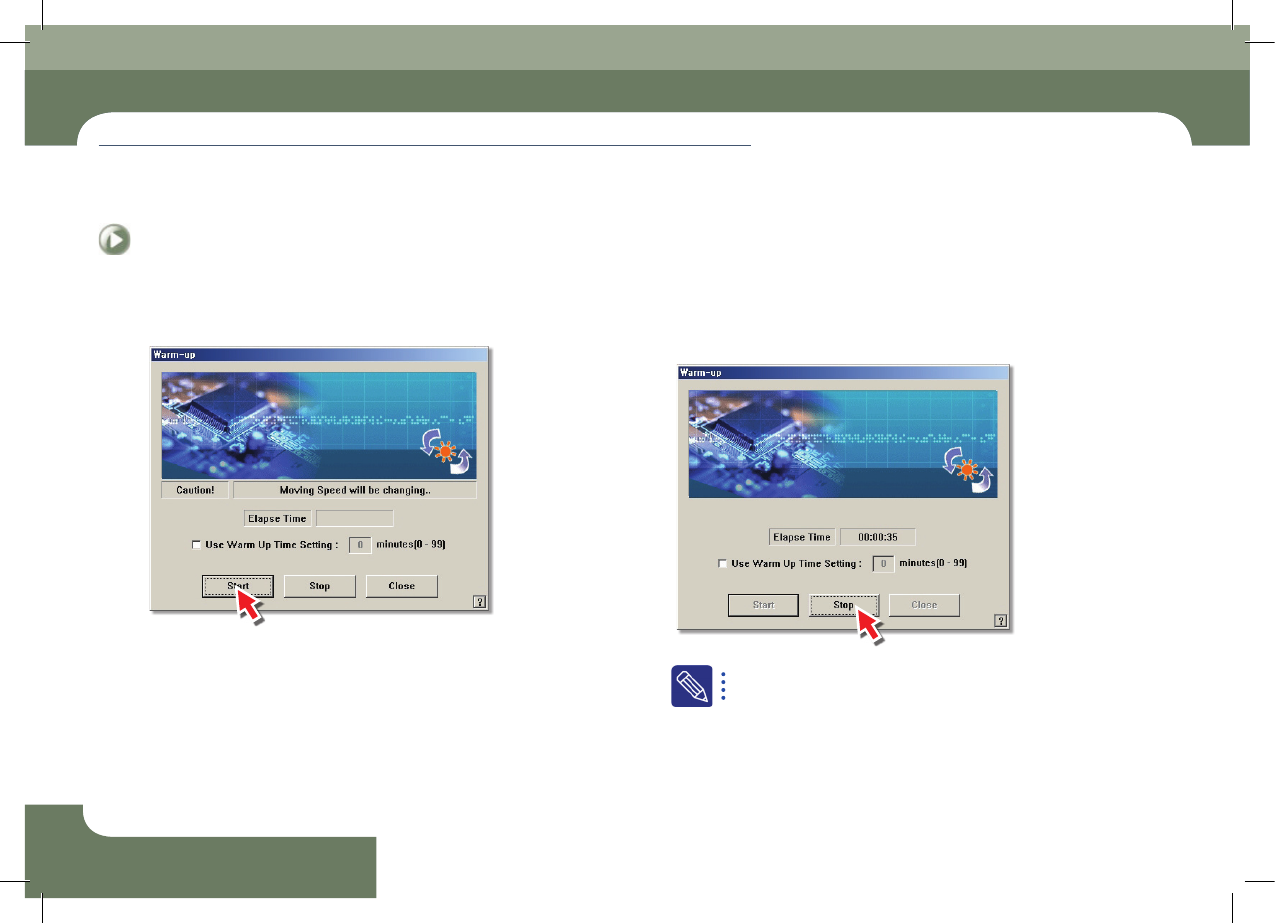
Step 3.
Click the <Start> button. Perform the warm-up
Step 4.
Click the <Stop> button and close the dialog box after
performing the warm-up for about 10 minutes
After selecting the <Use Warm Up Time Setting:> check box,
select the commissioning time in the right edit box and perform
commissioning.
Enter the commissioning time by minute unit. Set it to approximately
10 minutes. Commissioning is then stopped automatically after the
set time has elapsed.
DECAN S2 Operation Handbook
3-1
Chapter 3
This chapter describes the production procedure.
Production
Advanced Chip Shooter
Preparation For Operation Ⅰ > Check related works (30 minutes before shift of work)
Preparation For Operation Ⅰ
Chapter 3
Production
This chapter describes the production procedure.
1. Check related works (30 minutes before shift of work)
Step 1.
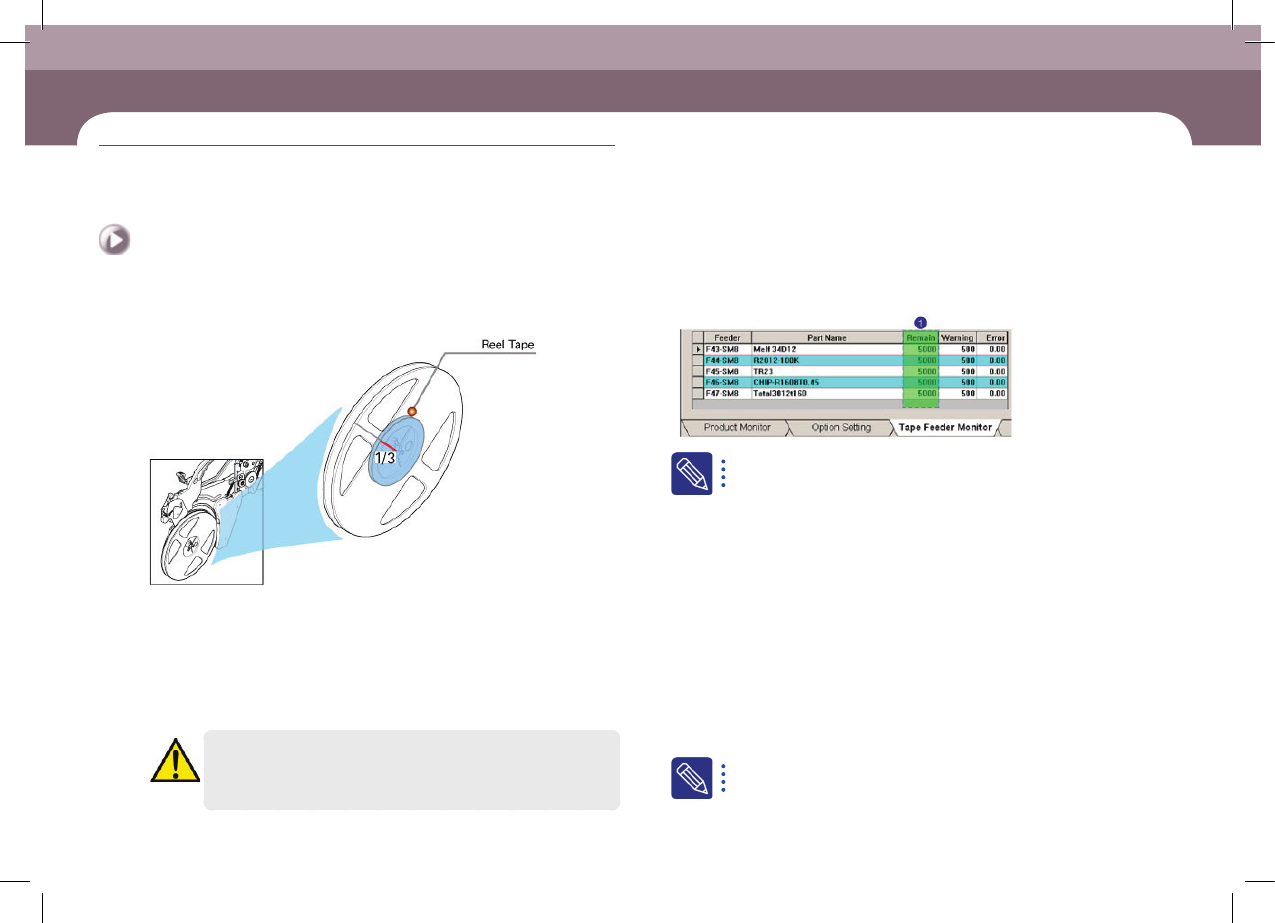
Check remaining quantity of parts
ㆍ In general cases, check whether parts remain more than one third in the reel tape.
Then, for parts whose remaining quantities are less than one third, prepare the part
order list in advance.
ㆍ When using an IT feeder, arrange the <Remain> column in ascending order (▲) and
prepare a list for those parts that are expected to be exhausted most rapidly. In the
case of ascending order, the data is displayed from parts that are expected to be
exhausted most rapidly.
Caution
When using a part remaining count in the MMI, perform splicing or,
after reel change, reflect the result to the part count correctly.
The No. 1 item indicates the number of remaining parts in the part
reel loaded to the current feeder.
Step 2.
Check previous work quantity
Check the following items to be taken over that occurred during work performed
by the previous operator.
ㆍ Number of produced PCBs.
ㆍ Information on the PCB being worked on currently (part remaining count, part
order and secured part). )
Step 3.
Check special items for work
Check details regarding special work conditions that must be examined in advance.
ㆍ PCB model change, specially ordered PCB, existence of items to which special work
conditions are applied.
Step 4.
Check production goal (record production goal every 2 hours)
For more details regarding the feeder installation, refer to "Checking
Feeder" (page 6-1)
Preparation For Operation Ⅰ