DECAN_S2_Operation(ENG_Ver4.1).pdf - 第34页
DE CAN S2 O pe rat ion H an db ook 3-1 5 Chap ter 3 This chapter describes the production procedure. Pr oduction Advanced Chip Shooter Pr epara tion F or Oper atio n Ⅱ > Adju stin g the conv eyor wi dth Preparation F …
DECAN S2 Operation Handbook
3-14
Chapter 3
This chapter describes the production procedure.
Production
Advanced Chip Shooter
Preparation For Operation Ⅱ > Adjusting the conveyor width
Preparation For Operation Ⅱ
Production
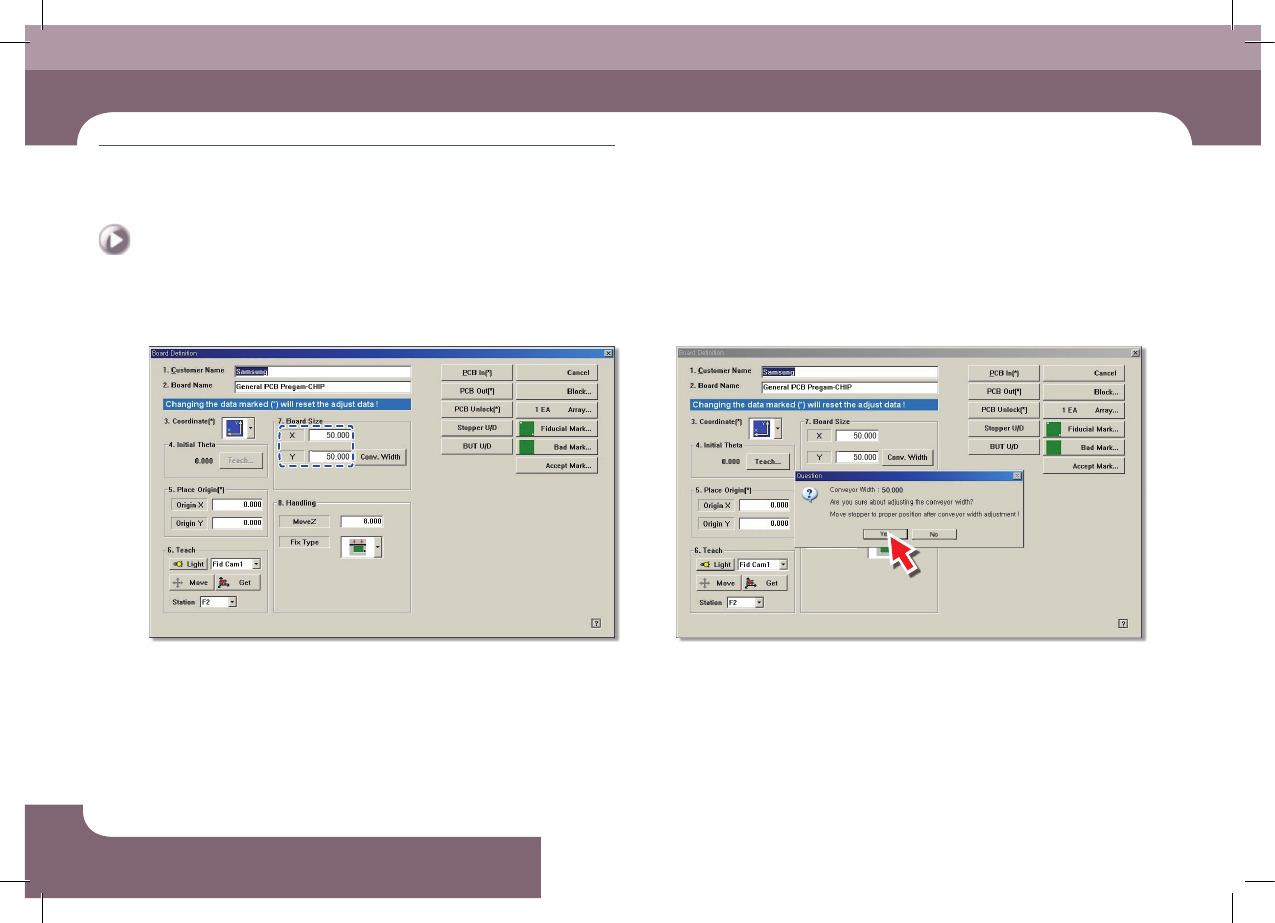
Step 3.
Enter Y size of PCB in the <7.Board Size> group
Step 4.
Click the <Conv. Width> button
DECAN S2 Operation Handbook
3-15
Chapter 3
This chapter describes the production procedure.
Production
Advanced Chip Shooter
Preparation For Operation Ⅱ > Adjusting the conveyor width
Preparation For Operation Ⅱ
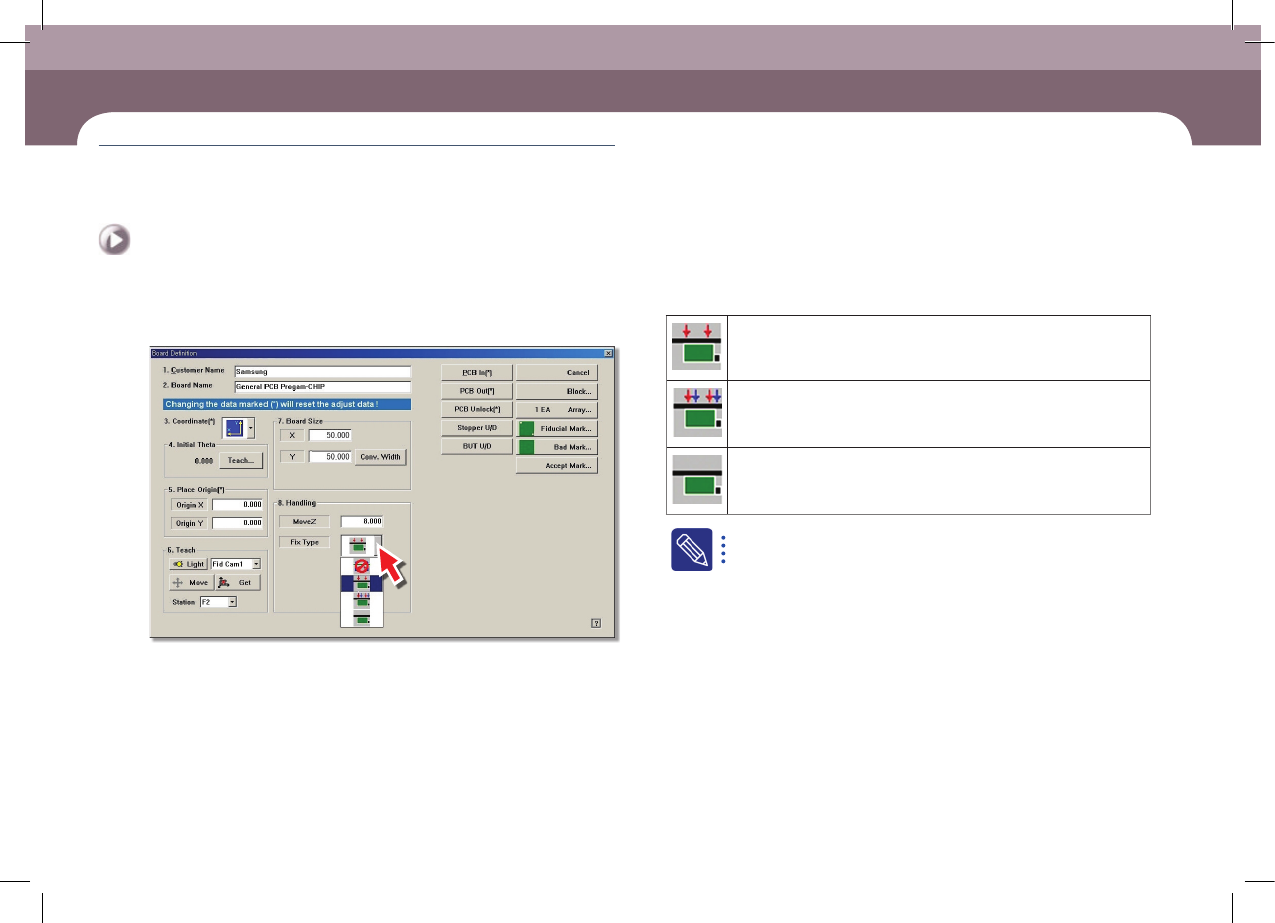
Step 5.
PCB fixing method setup: Select the method to align the PCBs
Edge Fixer1: A method of alignment by pushing the PCB from the side
with a device attached on the conveyor.
Edge Fixer2: It is the same as the “Edge Fixer” method, but it is a
method of pushing twice from the side.
None: It uses only the PCB clamping method for fixing a PCB.
The 'Fix Type' is selected based on the weight of the PCB. If the
weight of the PCB is more than 1kg, select the Edge Fixer 2.
DECAN S2 Operation Handbook
3-16
Chapter 3
This chapter describes the production procedure.
Production
Advanced Chip Shooter
Preparation For Operation Ⅱ > Arranging the backup-pins
Preparation For Operation Ⅱ
Production
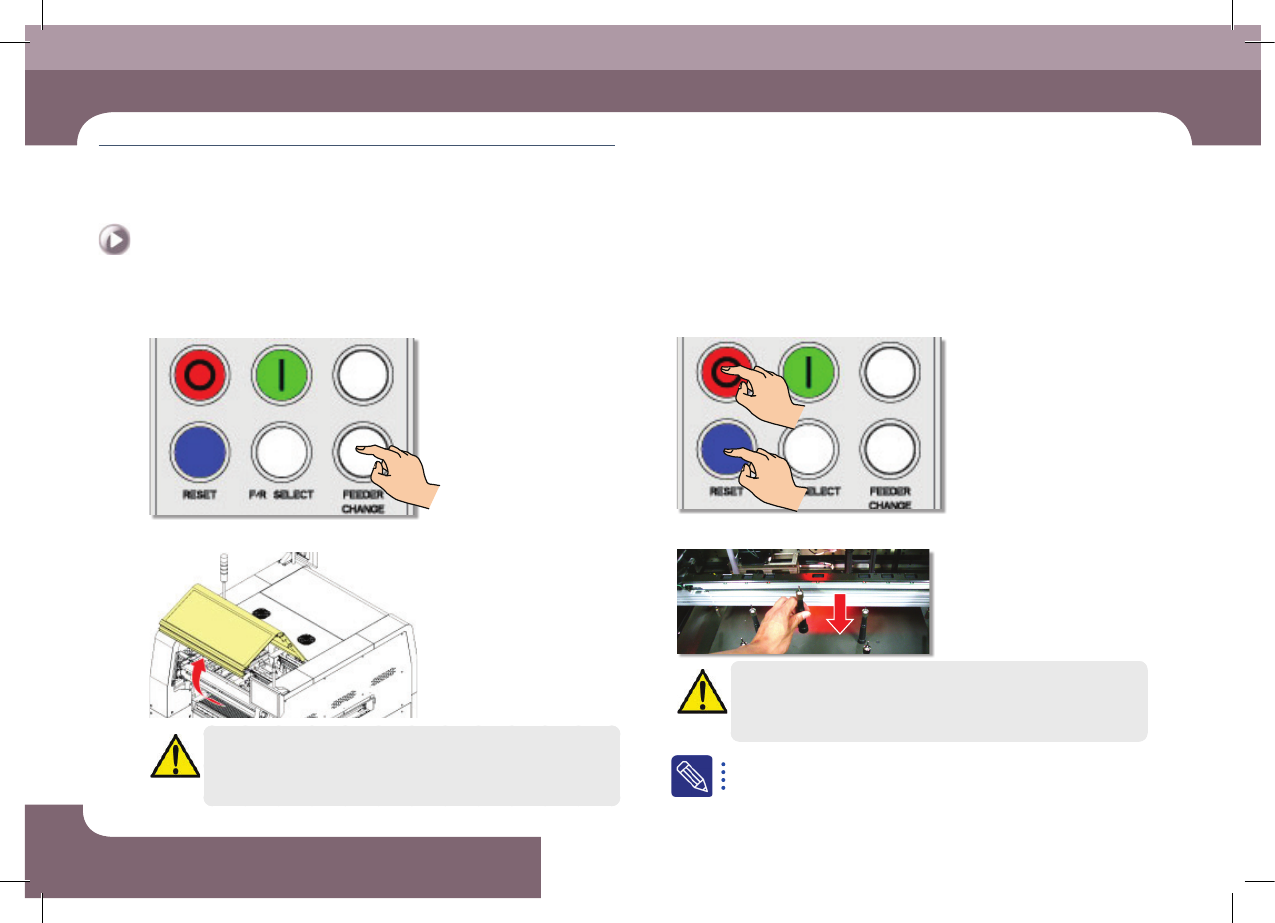
3. Arranging the backup-pins
Step 1.
Press the 'FEEDER CHANGE' button
Step 2.
Open front/rear safety door
Danger
Before remove the backup pins, press the EMG switch to turn off
the power supply to the servo motor before performing work.
Step 3.
Press the 'STOP', 'RESET' button
Step 4.
Install the backup pins to support the PCB
Warning
Arrange the backup pins after moving the backup able up.
For more details regarding the backup pin arrangement, refer to
"Arranging Backup Pins" (page 6-11).