SIPLACE S-23 HM - 第135页
User Manual SIPLAC E S-23 HM 4 Placement Functions Software Version SR.406.xx 02/00 US Edition 4.1 Setup Display 135 4.1.2.3 Refil ling an Empty T rack With "Refil l track" As soon as a feed er in an e mpty t r…
4 Placement Functions User Manual SIPLACE S-23 HM
4.1 Setup Display Software Version SR.406.xx 02/00 US Edition
134
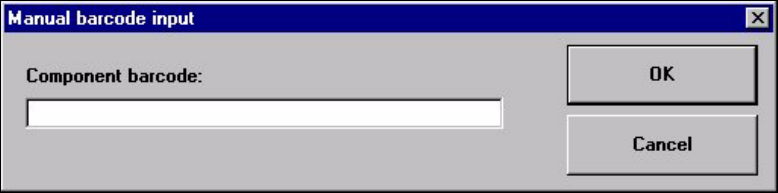
4.1.2.2 Manual Input of the Component Barcodes
Å Click on the Manual input button to enter the barcode by hand.
The following input box is opened.
Å Enter the barcode in the input field and close the input box using OK.
The barcode comparison is started.
The results of the barcode comparison will be displayed in the display field of the "Component
verification with barcode" window (see Section 4.1.2.1).
Å The further procedure is described in Section 4.1.2.1.
User Manual SIPLACE S-23 HM 4 Placement Functions
Software Version SR.406.xx 02/00 US Edition 4.1 Setup Display
135
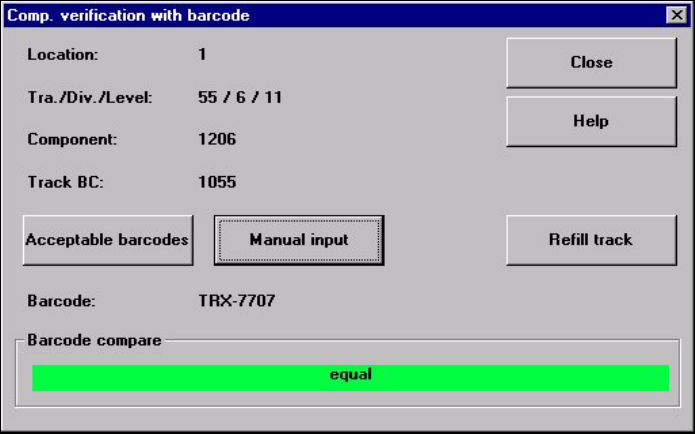
4.1.2.3 Refilling an Empty Track With "Refill track"
As soon as a feeder in an empty track has been refilled with components, this fact must be con-
firmed so that the placement head can access this track again. This is done with the help of the
"Refill track" function. 4
Procedure
Å The track barcode of the corresponding track is read in.
Å The component barcode of the corresponding component reel is read in.
The "Refill track" button is active when the barcodes match (see the following figure).
4
Fig. 4.1 - 3 "Component verification with barcode" window, matching barcodes
4
Å If the feeder in the current track is full, then click on the Refill track button to confirm this or
read in the return barcode on the barcode bar.
Å Close the window with Close.
4
4
4
4
4
4
4 Placement Functions User Manual SIPLACE S-23 HM
4.2 Error Display Software Version SR.406.xx 02/00 US Edition
136
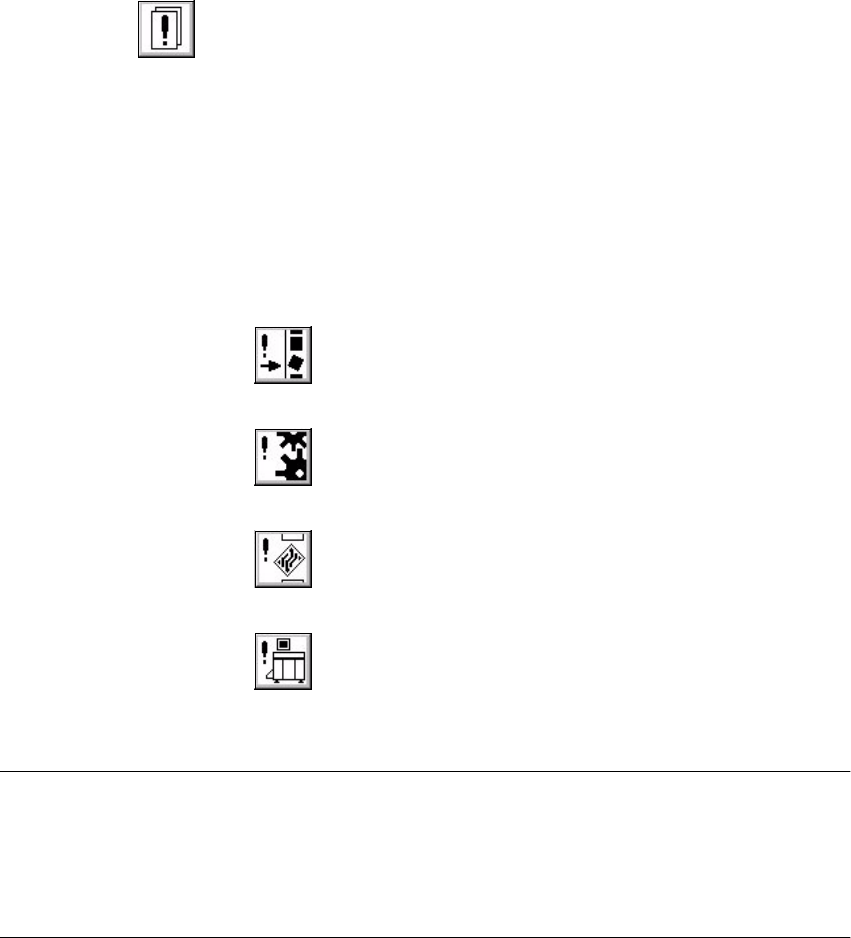
4.2 Error Display
The errors are listed in tabular form according to their type, and each type has its own view con-
taining its list of errors.
4
Å Click on the icon in the toolbar in the Main view.
The user interface switches to the error display (see Fig. 4.2 - 1, Track errors, for example). All
errors of the current error type that have occurred are displayed in the display area.
Å If you want to switch the display area to a different type of error, then click on the icon for the
desired error type in the toolbar.
The display area switches to the selected error type.
4
Error type icon
4
– Track error
– Machine error
– Transport error
– General error
4
NOTE
The error that occurred last is always displayed in the top position in the table.
The error counter is incremented whenever the same error arises ("#E" column).
Information and an error diagnostics can be called up for every error displayed
(see Section 4.2.1 for this procedure). 4