Nordson_EFD_GV_Series_Operating_Manual - 第62页
GV Series Automated Dispensing Systems 62 www.nordsonefd.com info@nordsonefd.com +1-401-431-7000 Sales and service of Nordson EFD dispensing systems are available worldwide. Setting the Units of Measur e By default, the …
GV Series Automated Dispensing Systems
61www.nordsonefd.com info@nordsonefd.com +1-401-431-7000 Sales and service of Nordson EFD dispensing systems are available worldwide.
Sharing Offset Values Across Multiple Programs
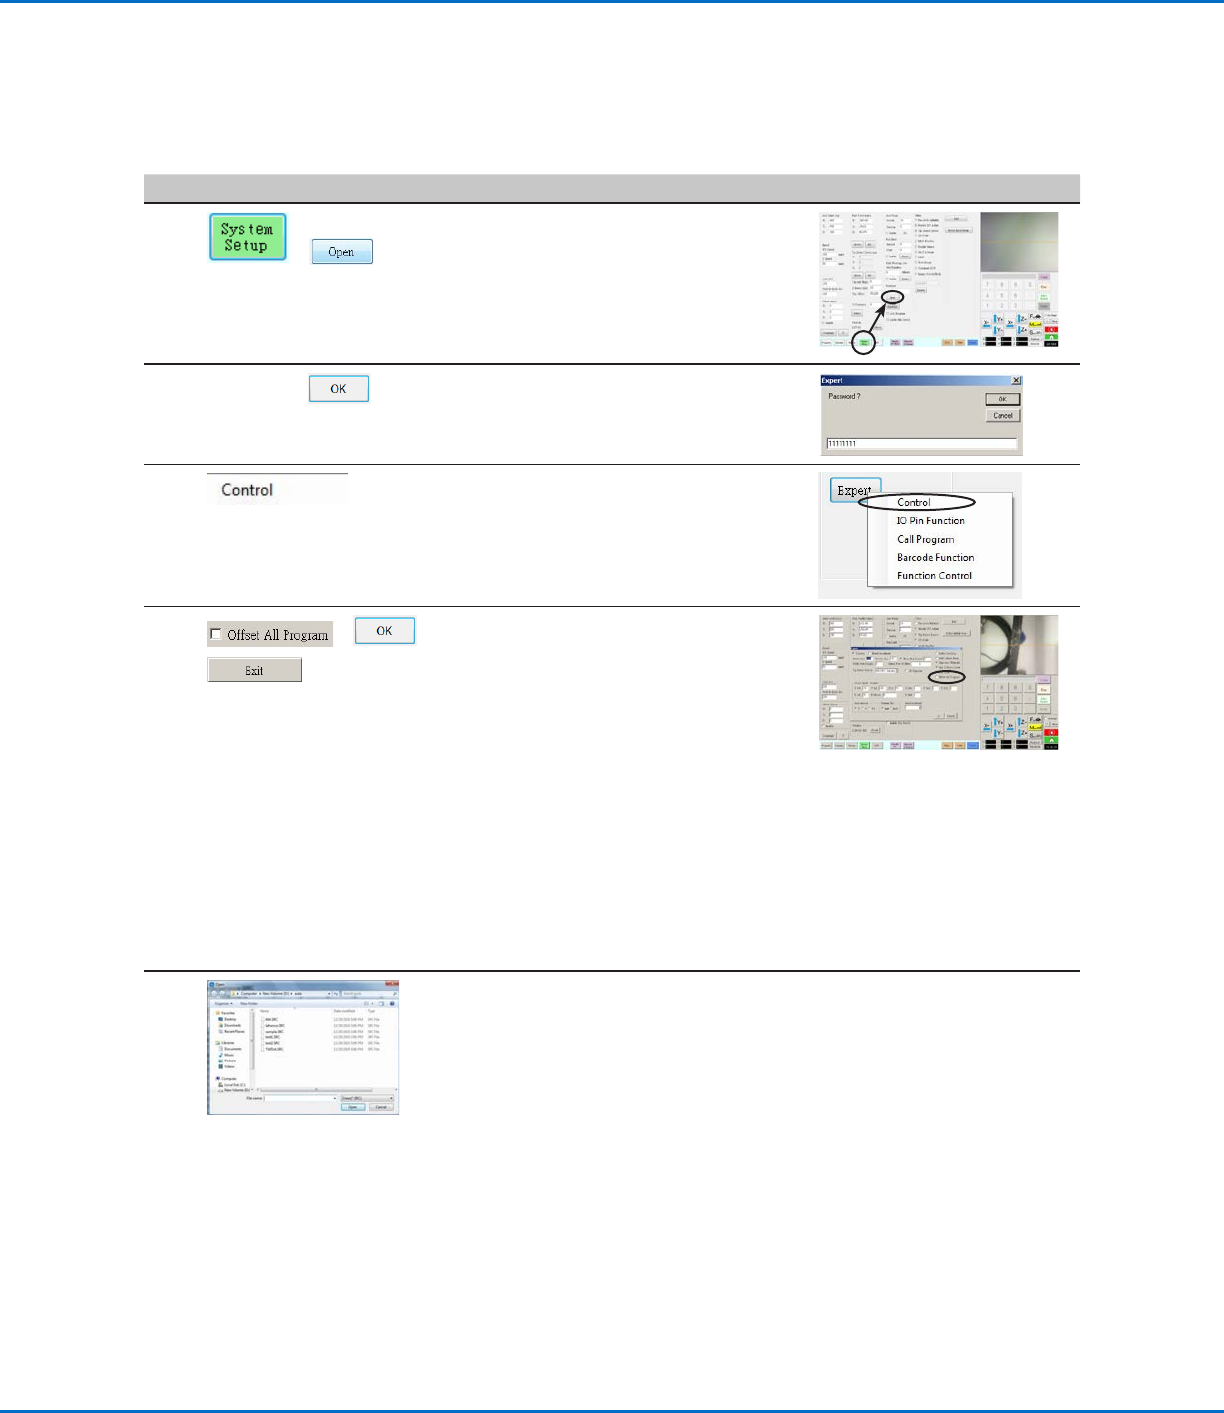
If you want multiple dispense programs to have the same offset values (tip-to-workpiece, camera-to-tip), you can
enable Offset All Program through the System Setup screen. Doing so creates a new directory (D:\auto) — programs
that should have the same offsets are stored in this directory. Enabling Offset All Program causes the Needle Z
Detect (if applicable) and NeedleXY Adjust offsets to affect all files stored in the d:\auto directory.
# Click Step Reference Image
1
>
• Click SYSTEM SETUP > OPEN.
2
11111111 >
• Enter 11111111, then click OK.
3 • Click CONTROL.
4
> >
• In the Expert window, select or
deselect the OFFSET ALL PROGRAM
checkbox.
• Click OK to save the setting.
NOTE: The change takes effect
immediately, but does not change
the directory of the currently open
program. To save the currently open
program in the d:\auto directory, use
Save As.
• Click EXIT to close the
DispenseMotion application, allowing
the system to update the default
directory based on the Offset All
Program selection.
When Offset All Program is enabled:
• The system automatically creates a new directory: D:\auto. Programs
that should share the same offsets must be saved in this directory.
• To ensure that a program is saved to the correct directory for sharing
offsets, create a new program and then select Save or Save As. The
system automatically opens the D:\auto directory.
NOTE: When Offset All Program is disabled, the system automatically
returns to saving programs in the default D:\save directory.
GV Series Automated Dispensing Systems
62 www.nordsonefd.com info@nordsonefd.com +1-401-431-7000 Sales and service of Nordson EFD dispensing systems are available worldwide.
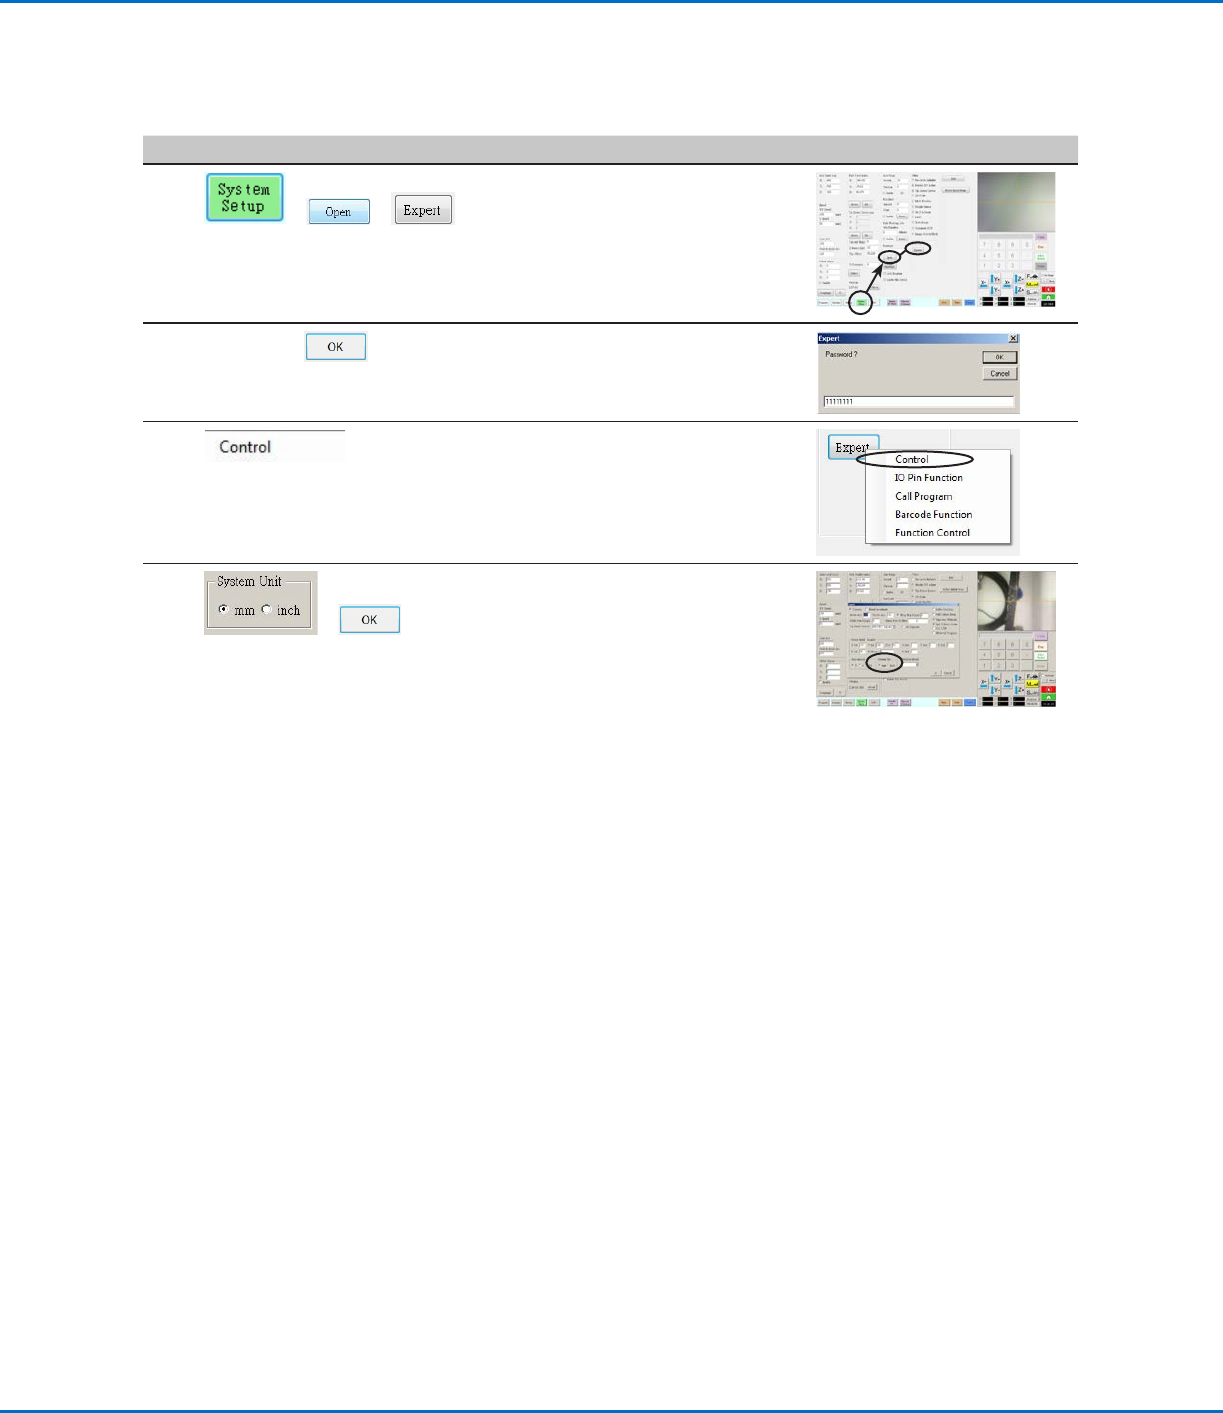
Setting the Units of Measure
By default, the system displays units of measure using the metric system. Follow this procedure to change how the
system displays units of measure.
# Click Step Reference Image
1
> >
• Click SYSTEM SETUP > OPEN >
EXPERT.
2
11111111 >
• Enter 11111111, then click OK.
3 • Click CONTROL.
4
>
• In the Expert window, select the
desired unit of measure under System
Unit.
• Click OK to save the setting.
The system automatically exits the
software to allow the change to take
effect.
Restoring the System to the Factory Default Settings
To restore all settings to their factory default values, open and then close the following file located on the D:\ drive:
D:\ever_sr\Initial Setup.
GV Series Automated Dispensing Systems
63www.nordsonefd.com info@nordsonefd.com +1-401-431-7000 Sales and service of Nordson EFD dispensing systems are available worldwide.
Programming
This section provides how-to procedures for the most commonly performed programming tasks. Refer to “How to
Create and Run a Program” for an example of how to use the dispensing software to create a complete program. If
you have difficulty creating a program for your application, contact your Nordson EFD representative. Before using
this section:
• Complete all applicable installation tasks. Refer to “Installation” on page19.
• Complete all required setup tasks. Refer to “Setup” on page44.
• Refer to “Concepts” on page26 for important robot programming concepts and for an overview of the
dispensing software screens and icons.
How to Create and Run a Program
The procedure provides the basic steps for creating and running a program. Every program is different. Use these
basic steps and refer to “How to Create Patterns” on page66 and “AppendixA, Command Function Reference”
on page98 to create the desired application pattern for the workpiece or group of workpieces.
PREREQUISITES
The system is properly set up. Refer to “Setting Up and Calibrating the System (Required)” on page48.
If the tip or any element of the Zaxis head was changed, repeat system setup and calibration using the Robot
Initial Setup wizard. Refer to “Setting Up the System Using the Robot Initial Setup Wizard” on page49.
The system is in the correct mode (Tip or CCD).
A workpiece is properly positioned on the fixture plate.
# Click Step
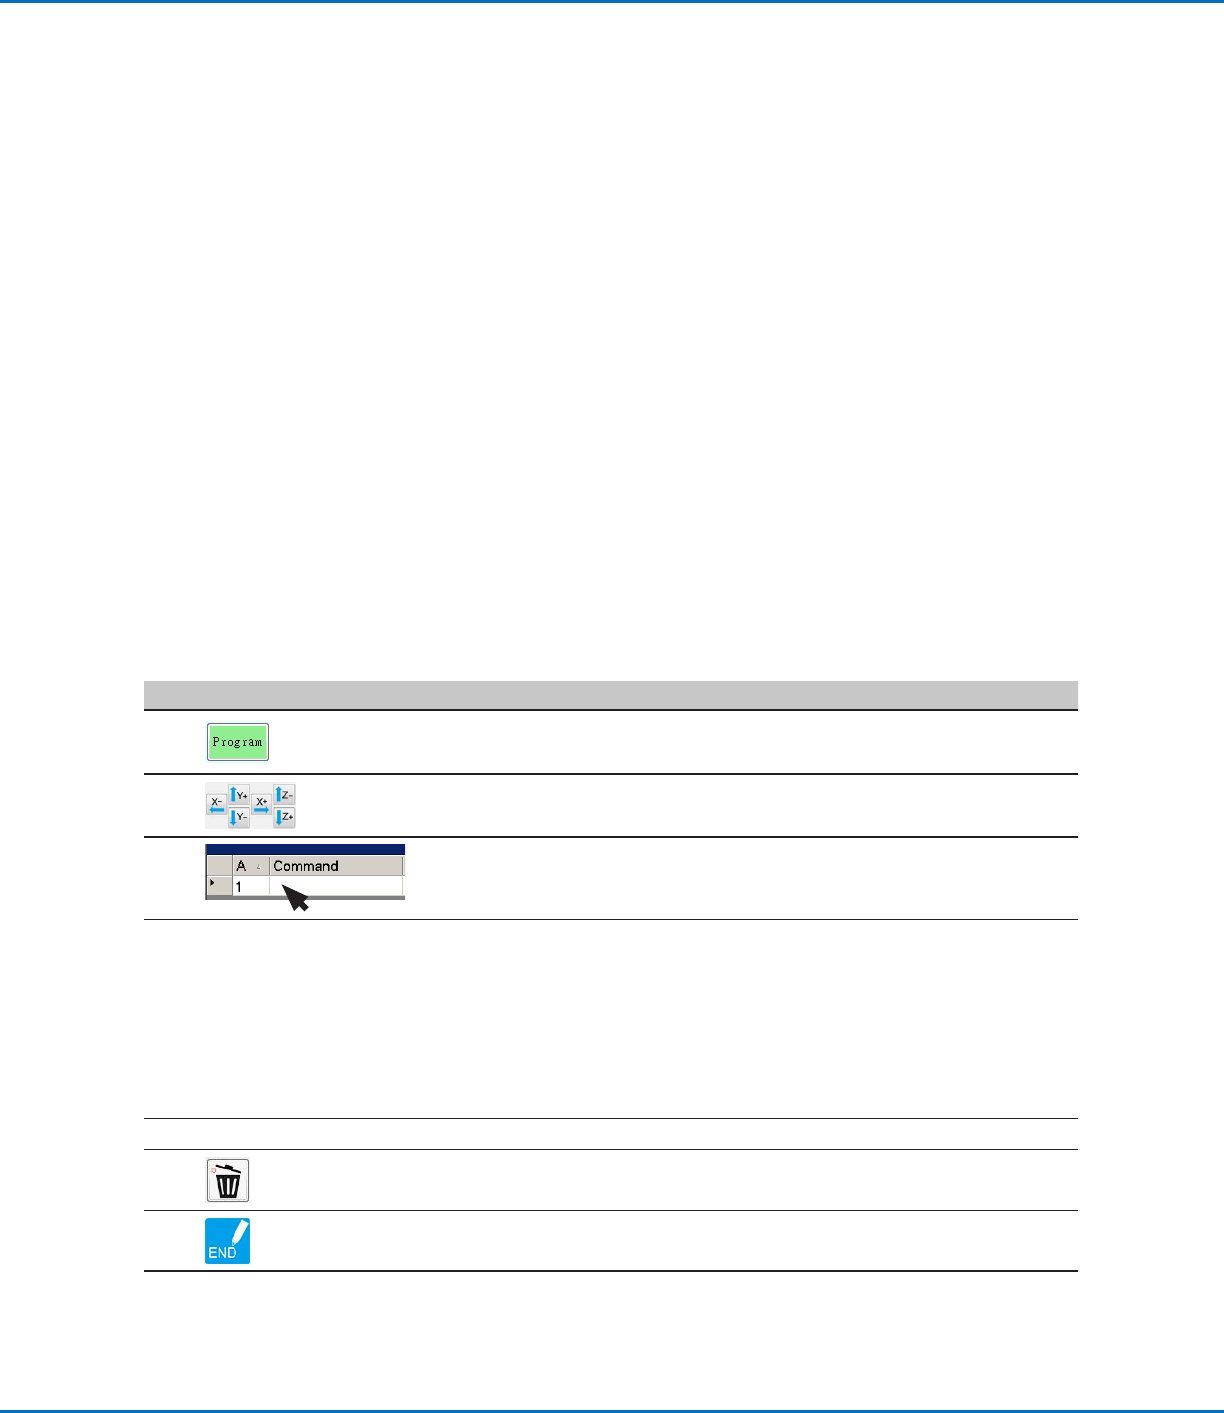
1
• Click the PROGRAM tab.
Address 1 is available to insert a command.
2
• Jog the dispensing tip to a desired XYZ location by clicking the navigation
icons.
3
• Insert a setup or dispense command that tells the robot what to do. Click
a command icon, or double-click anywhere in the address line to select a
command from the drop-down menu.
4
• Edit the command parameter settings. Refer to the following sections of this
manual for information to help you create programs:
- “About Programs and Commands” on page26 (includes best practices)
- “How to Create Patterns” on page66
- “How to Create a Mark” on page70
- “AppendixA, Command Function Reference” on page98 (provides
detailed information on all commands)
5
• Repeat steps 2 through 4 until the program is complete.
6
• To delete a command, click the command and then click the Delete icon.
7
• Click END PROGRAM to end the program.
Continued on next page