00193891-0702_AI_LP_Barcode_DE+EN.pdf - 第167页
Scanner fitted SIPLACE 2 PCB barcode scanner assembly instructions 10/2009 Edition 2.7 Installing the PCB barcode scanner 167 2 2
2 PCB barcode scanner assembly instructions SIPLACE
2.7 Installing the PCB barcode scanner 10/2009 Edition
166
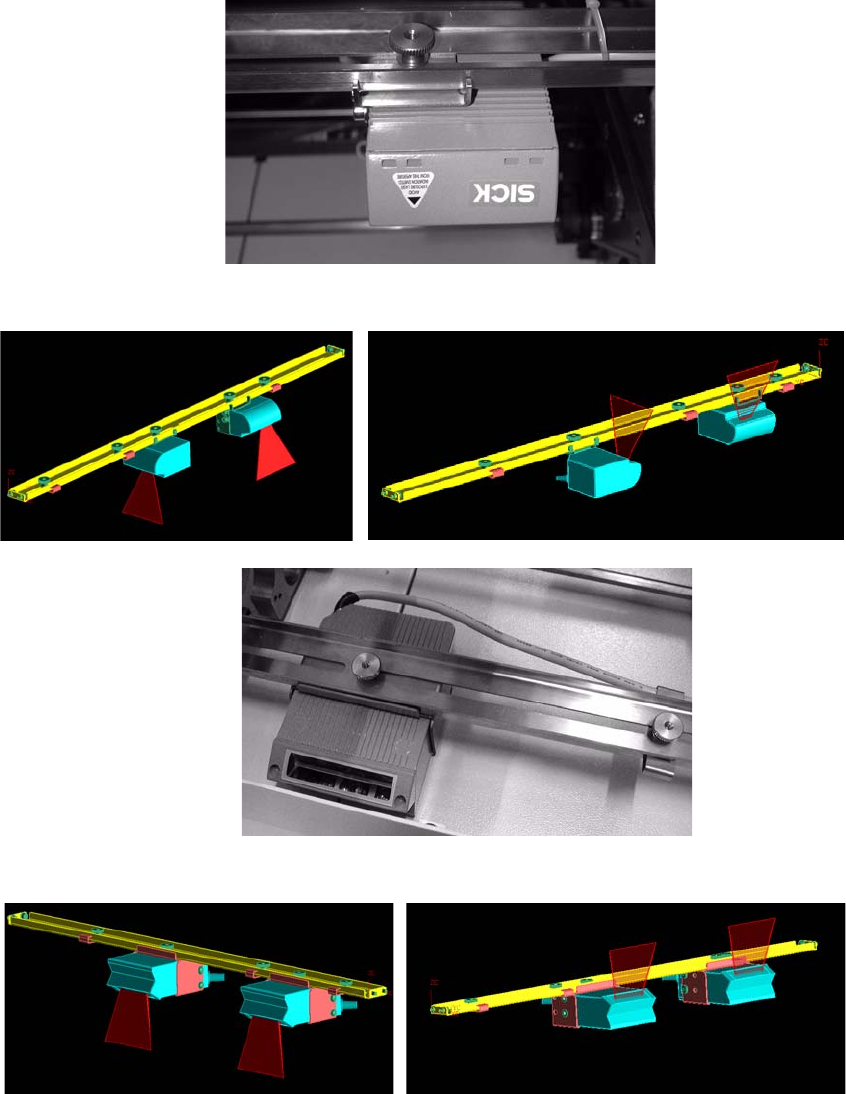
To read barcodes that are printed lengthwise on the PCB (viewed in the PCB direction of travel),
the 1D barcode scanner can also be installed lengthwise (see below). 2
: Fit the fixing bracket to the barcode scanner (see photographs below).
: Screw the barcode scanner to the rail.
1 D barcode scanner
2 D barcode scanner
1 D barcode scanner topside
1 D barcode scanner underside
2 D barcode scanner topside
2 D barcode scanner underside
2
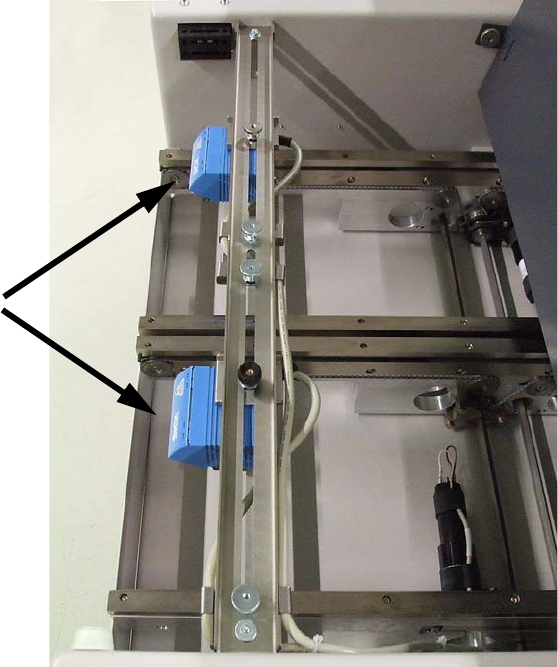
Scanner fitted
SIPLACE 2 PCB barcode scanner assembly instructions
10/2009 Edition 2.7 Installing the PCB barcode scanner
167
2
2
2 PCB barcode scanner assembly instructions SIPLACE
2.7 Installing the PCB barcode scanner 10/2009 Edition
168
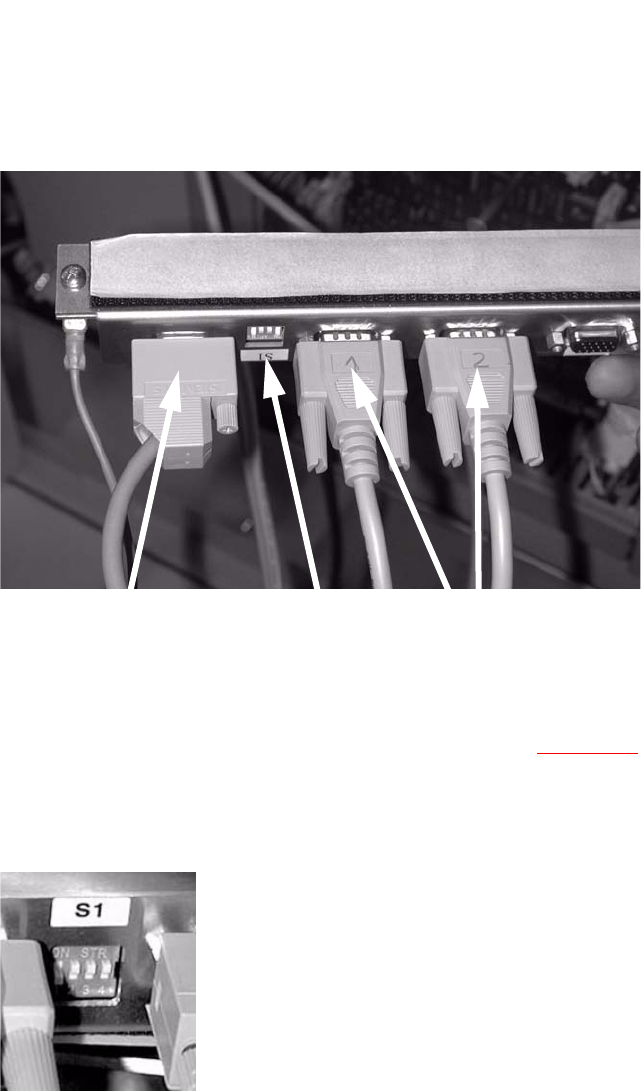
2.7.3.2 Electrical connection: HS-60 / D4 / D1 / D2 barcode distributor / conveyor control
: Plug the connecting cables for the barcode scanner into the distributor rail as follows:
X1
Single conveyor topside
X2
Single conveyor underside
X3
Dual conveyor topside
X4 Dual conveyor underside
X5 Connection to the conveyor control
Connection
(current + control)
Switch
Barcode scanner
2
: Plug the cable (item no.: 03016825-01 for SIPLACE D4 or 03016827 SIPLACE D1/D2) into the
PCB barcode distributor X5 (see also the wiring diagram,
Section 2.9) and run it to the con-
veyor control.
: Set the relevant switch for the connected scanner to OFF and the others to ON.
2
: Stick the distributor rail inside the drawer unit (see photograph below).