00193891-0702_AI_LP_Barcode_DE+EN.pdf - 第189页
SIPLACE 2 PCB barcode scanner assembly instructions 10/2009 Edition 2.7 Installing the PCB barcode scanner 189 : Set the relevant switch fo r the connected scanner to OFF and the others to ON. 2 2 : Release the pneumatic…
2 PCB barcode scanner assembly instructions SIPLACE
2.7 Installing the PCB barcode scanner 10/2009 Edition
188
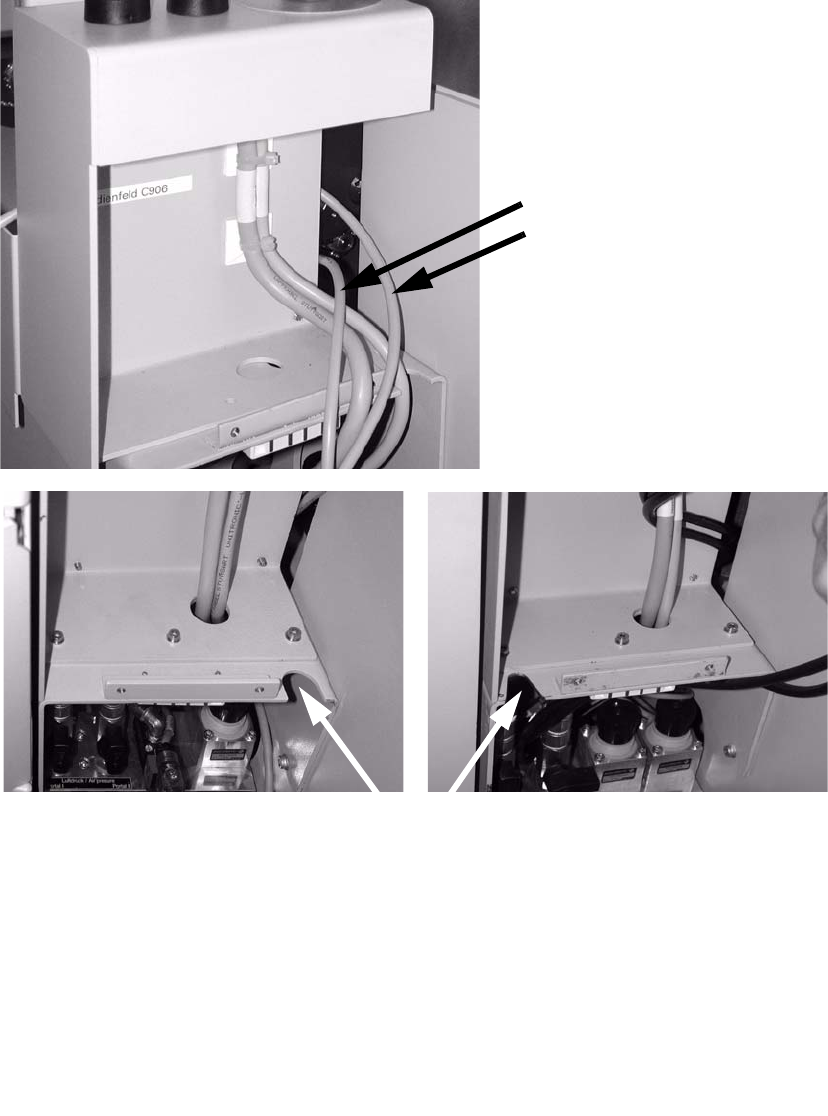
: Run the connecting cable(s) of the barcode scanner(s) past the extension kit and pass them
through the slot in the direction of the pneumatic unit.
Connecting cables for
barcode scanners (1 to 4)
Route cables through one of the penetration slots.
2
2
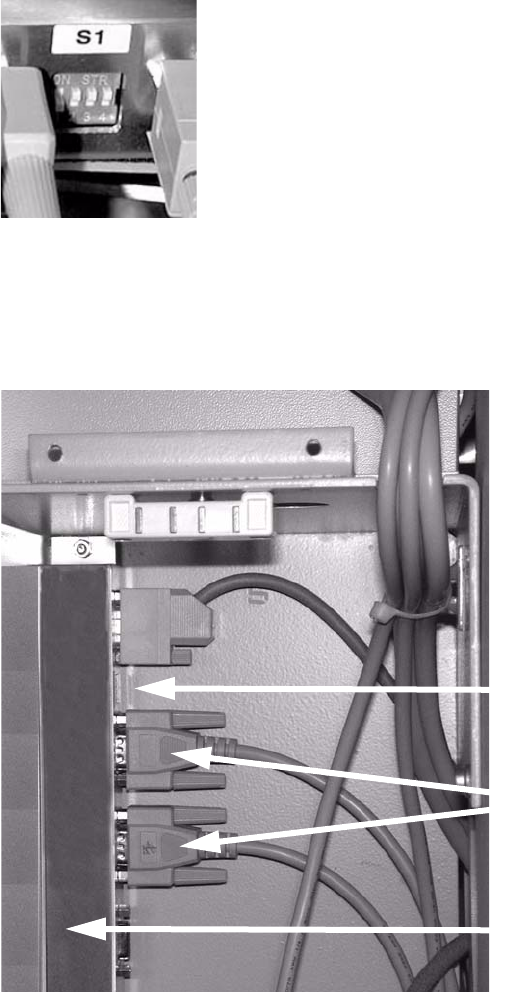
: Connect the connecting cable for the barcode scanner to the distributor rail as shown below:
X1
Single conveyor topside
X2
Single conveyor underside
X3
Dual conveyor topside
X4 Dual conveyor underside
X5 Connection to the conveyor control
SIPLACE 2 PCB barcode scanner assembly instructions
10/2009 Edition 2.7 Installing the PCB barcode scanner
189
: Set the relevant switch for the connected scanner to OFF and the others to ON.
2
2
: Release the pneumatic unit.
: Affix the distributor rail to the top left-hand corner of the pneumatic module.
Distributor rail
Switch
Plug connectors
2
2
2
2
2
2
2 PCB barcode scanner assembly instructions SIPLACE
2.7 Installing the PCB barcode scanner 10/2009 Edition
190
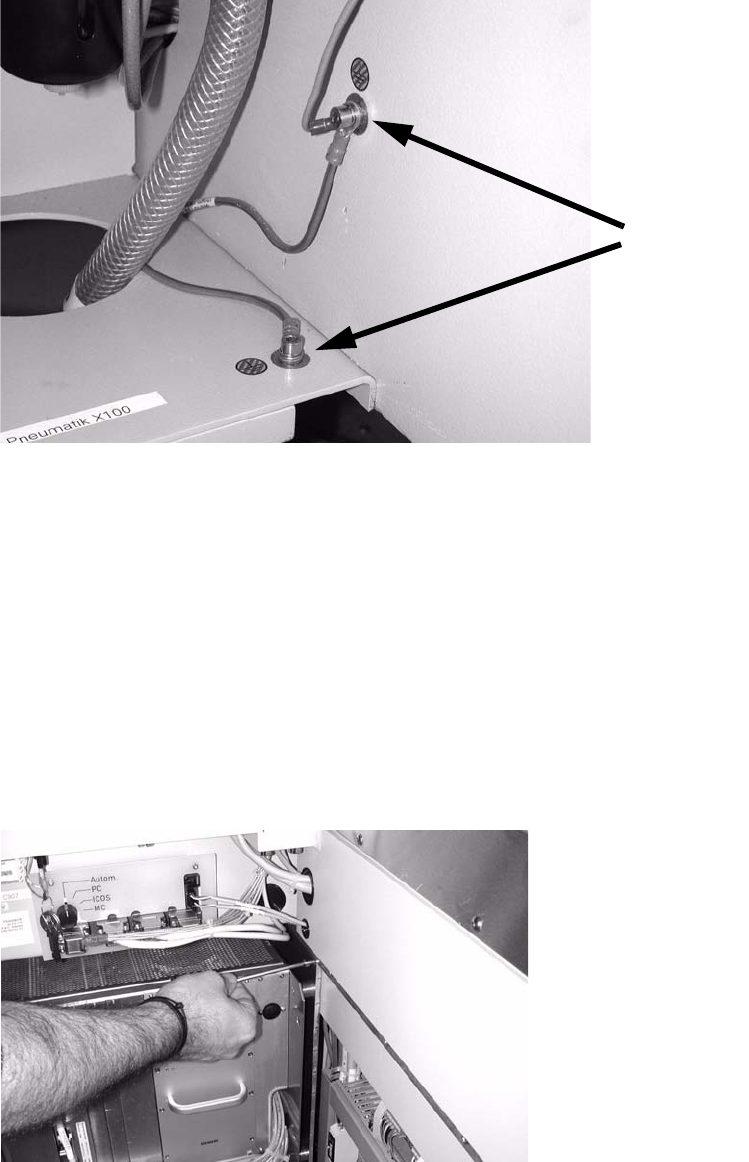
: Connect the grounding cable for the distributor rail to the available grounding points.
Grounding points
2
2
: Slide the barcode control cable through the machine frame (using a suitable tool if necessary)
to the module on the other side of the machine.
S-27 HM
Cable no.: 03016827-01
F4, F5, F5 HM, S-20, S-23, S-25 HM
Cable no.: 00373479-01
2
: Open the door of the module on the other side of the machine, to the left as viewed in the di-
rection of travel.
: Undo the module screw, remove the module and place it carefully on the floor.
2
2