00193891-0702_AI_LP_Barcode_DE+EN.pdf - 第231页
SIPLACE 2 PCB barcode scanner assembly instructions 10/2009 Edition 2.11 PCB barcode scanner configuration 231 2.1 1.7 Settings on the 2D barcode scanner The 2D barcode scanner ICR 850 is configure d us ing the CL V soft…
2 PCB barcode scanner assembly instructions SIPLACE
2.11 PCB barcode scanner configuration 10/2009 Edition
230
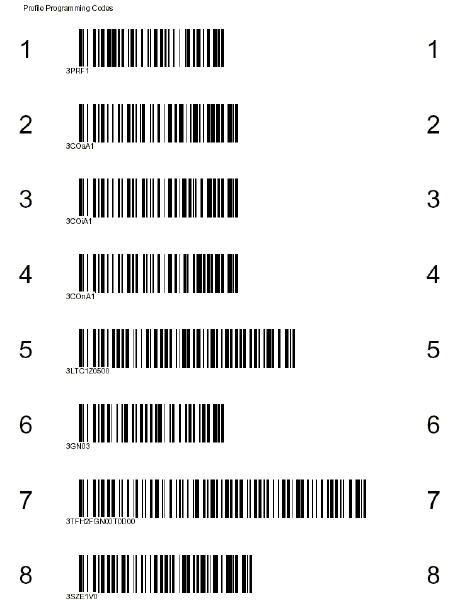
Fig. 2.11 - 19 1D barcode configuration for device 3 CLV42x (conveyor track 2 above)
2
: Stick the printed labels on the master plate in the retrofit kit.
: Configure the PCB barcode scanner for the st
ation in Sitest machine configuration.
: Boot up the station. Approx. five seconds after you
switch on the station, switch on the PCB
barcode scanner.
: Push PCB barcode label no. 1 over the first PCB barcode scanner. If the PCB barcode scanner
reads
it, it will beep twice to confirm.
: Shut down the operating system and switch the station off and on again.
: Push the next PCB barcode label over the second PCB barcode scanner.
: Repeat this procedure until all the PCB barcode scanners have been programmed in this way.
: Test that the PCB barcode scanner is working correctly under Conveyor in Sitest and select
Re
ad barcode with conveyor.
: If the barcode is not read, you
will have to reconfigure the barcode scanner.
SIPLACE 2 PCB barcode scanner assembly instructions
10/2009 Edition 2.11 PCB barcode scanner configuration
231
2.11.7 Settings on the 2D barcode scanner
The 2D barcode scanner ICR 850 is configured using the CLV software (version 4.1) from SICK.
An online connection to the 2D barcode scanner is required.
NOTE:
The CLV software can be downloaded from the download center or from the Internet at
www.sick.de.
2.11.7.1 Configuring barcodes on the 2D barcode scanner
NOTE:
The 2D barcode scanner can read both 1D and 2D barcodes.
: Install the CLV software by running CLVsetup.exe.
: The installation is dialog-driven
. Remember to select the unit " Inch or metric".
: Before you start the CLV program, connect to the 2D barcode scanner using a network cable
(twiste
d pair, cross-over).
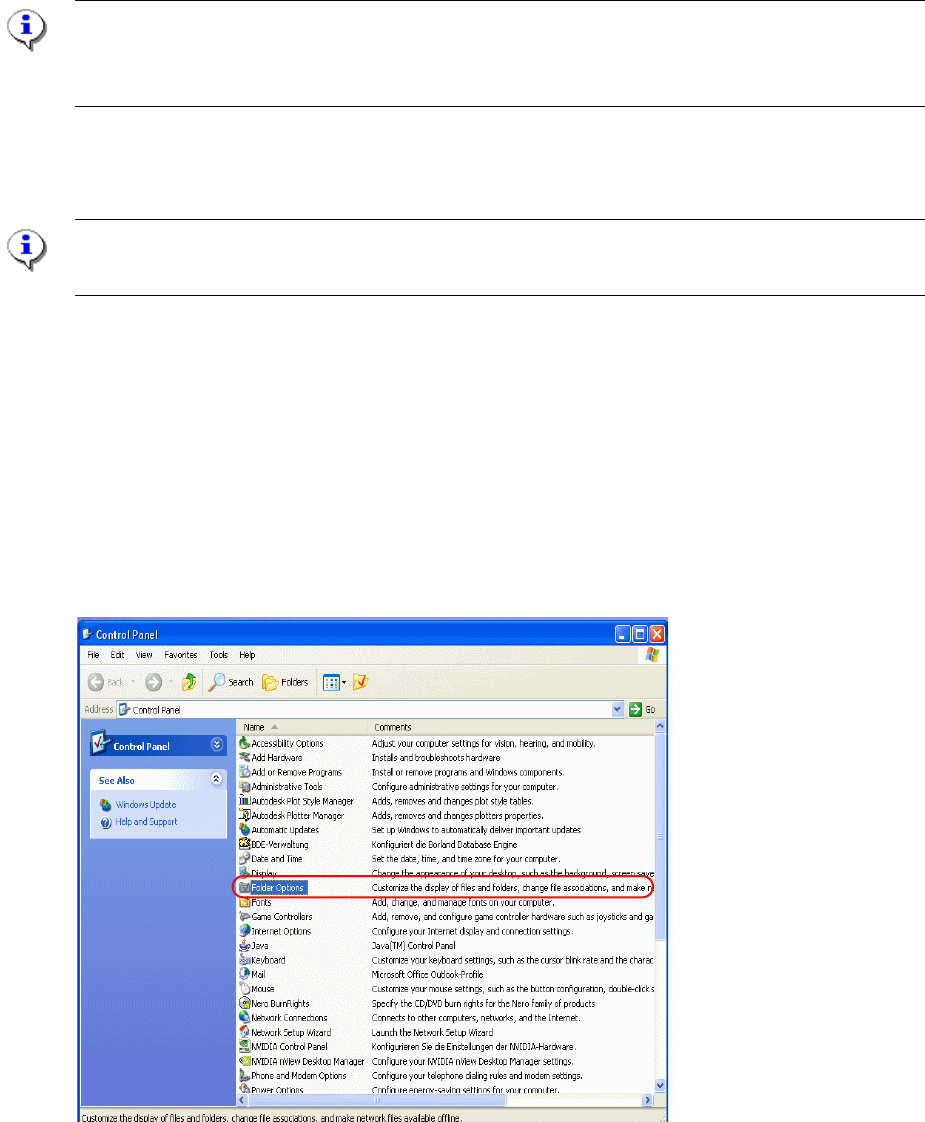
2.11.7.2 Setting the network address
: Select Start --> Settings --> Control Panel and click on "Network and Dial up connection"
2 PCB barcode scanner assembly instructions SIPLACE
2.11 PCB barcode scanner configuration 10/2009 Edition
232
Fig. 2.11 - 20 "Network and Dial up connection"
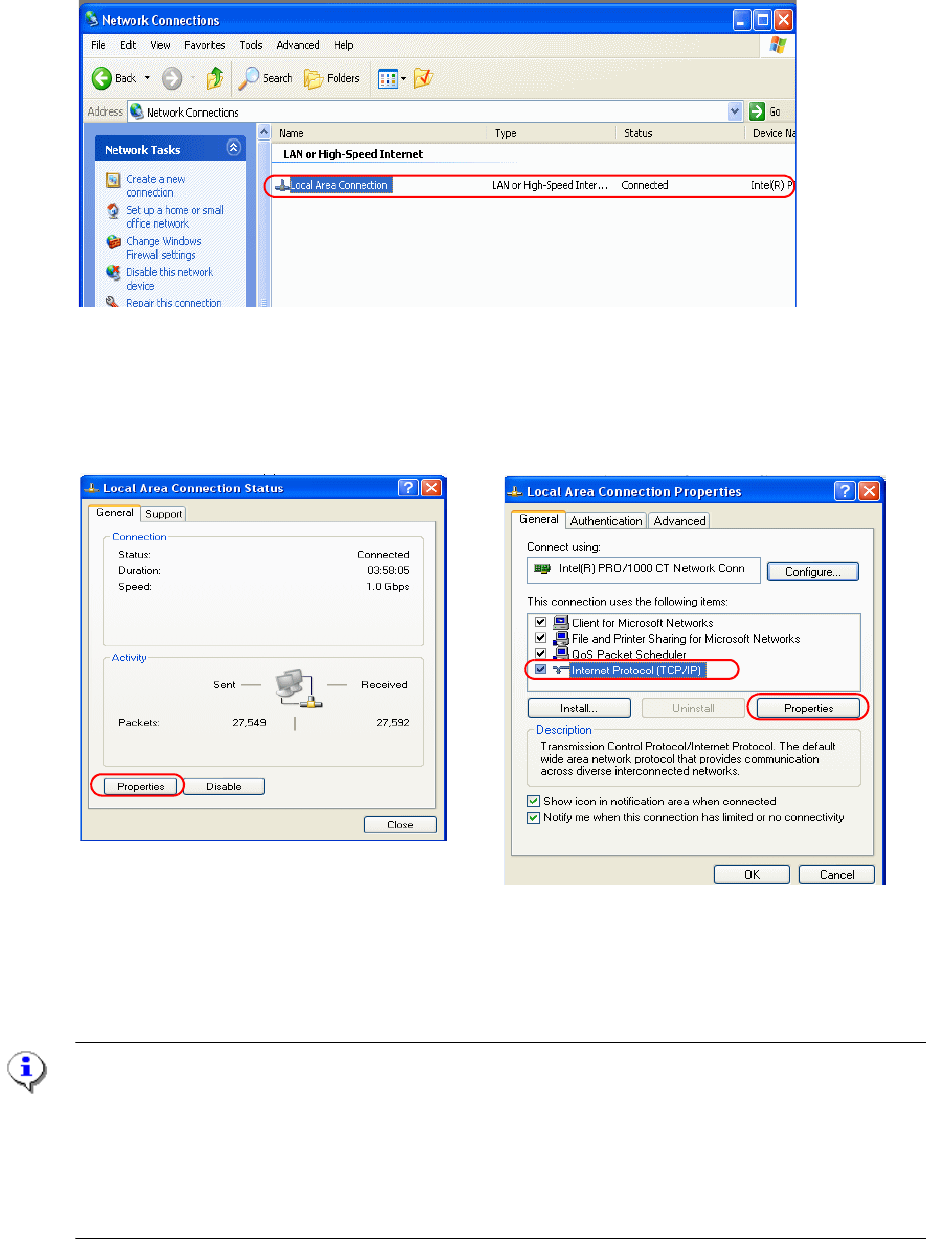
: Double-click to select Local Area Connection.
: Select it from the Properties window on the left.
Fig. 2.11 - 21 Set up the network
: Select "Internet Protocol (TCP/IP)" from the right-hand window and then "Properties".
: The following window appears:
NOTE
The 2 D barcode has the following default settings
IP Address: 192.168.0.1
IP Mask (subnet mask): 255.255.255.0
IP Port: 2112
Data transfer speed: 10MBit/s (cannot be changed)