00193891-0702_AI_LP_Barcode_DE+EN.pdf - 第233页
SIPLACE 2 PCB barcode scanner assembly instructions 10/2009 Edition 2.11 PCB barcode scanner configuration 233 Fig. 2.1 1 - 22 Enter IP address : Enter the IP address and subn et mask as illustrated above. : Click on OK …
2 PCB barcode scanner assembly instructions SIPLACE
2.11 PCB barcode scanner configuration 10/2009 Edition
232
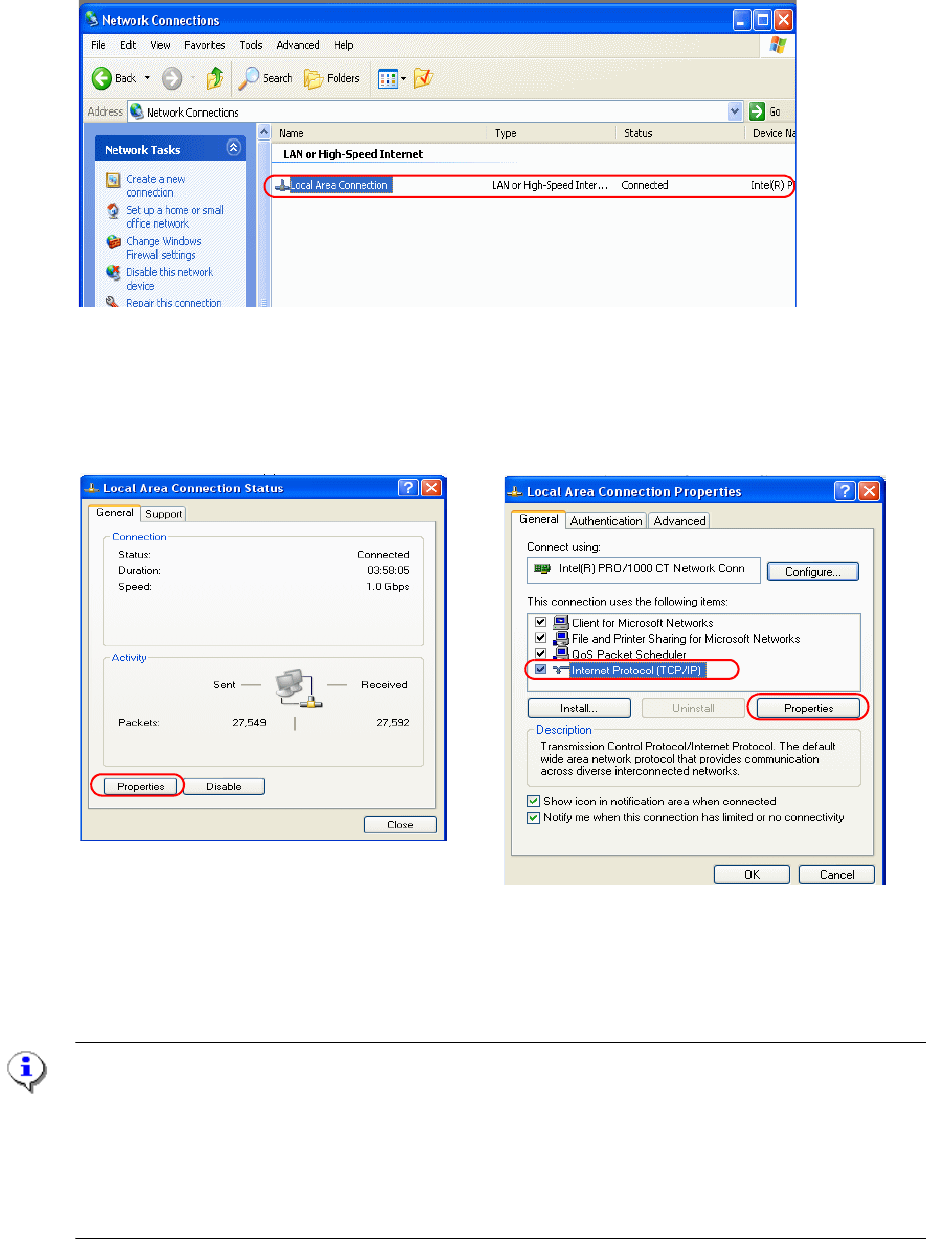
Fig. 2.11 - 20 "Network and Dial up connection"
: Double-click to select Local Area Connection.
: Select it from the Properties window on the left.
Fig. 2.11 - 21 Set up the network
: Select "Internet Protocol (TCP/IP)" from the right-hand window and then "Properties".
: The following window appears:
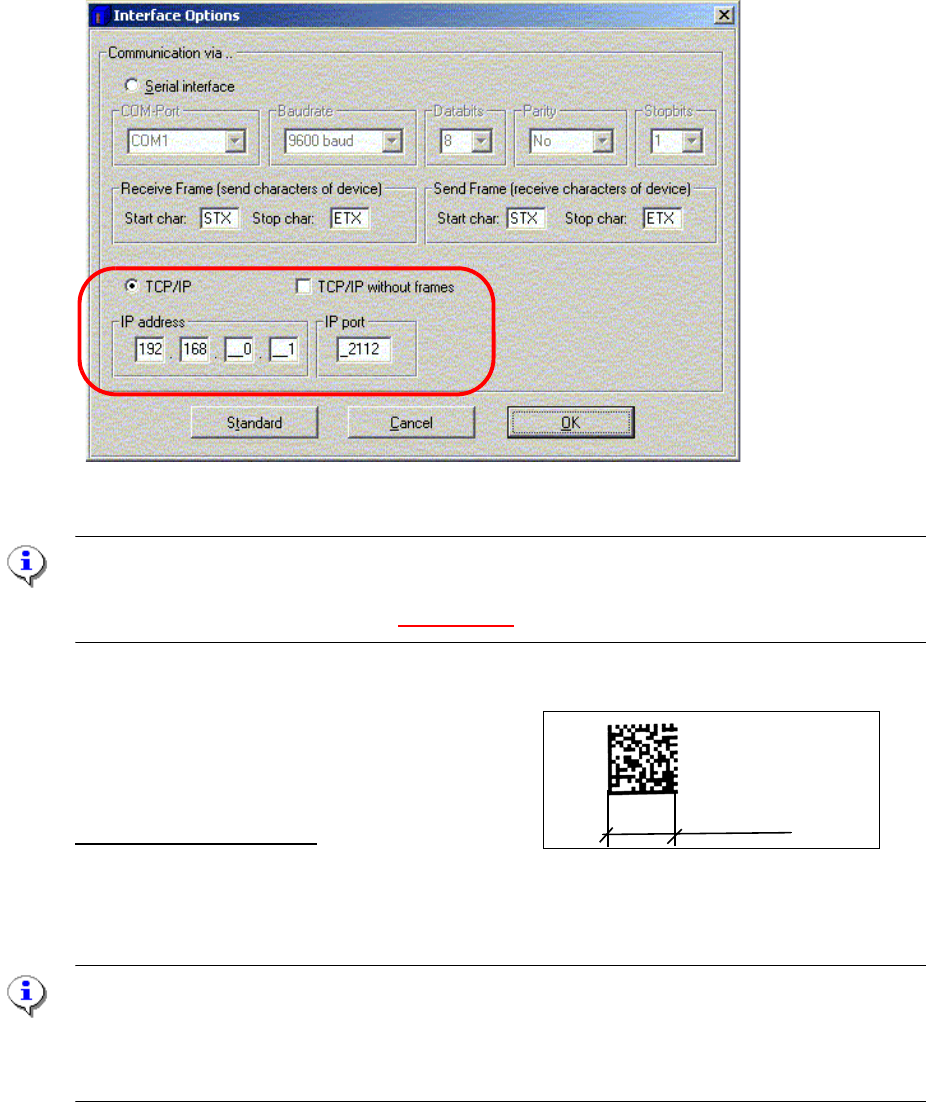
NOTE
The 2 D barcode has the following default settings
IP Address: 192.168.0.1
IP Mask (subnet mask): 255.255.255.0
IP Port: 2112
Data transfer speed: 10MBit/s (cannot be changed)

SIPLACE 2 PCB barcode scanner assembly instructions
10/2009 Edition 2.11 PCB barcode scanner configuration
233
Fig. 2.11 - 22 Enter IP address
: Enter the IP address and subnet mask as illustrated above.
: Click on OK to confirm all the dialogs.
If you
now used a DOS (command prompt) window to pi
ng the 2D barcode, it should be success-
ful.
2.11.7.3 Starting the CLV program
: Start the CLV program using Start--> Programs--> CLV Setup --> CLV Setup V4.1 .
: Select the type of barcode scanner at the top right.
Selecting the barcode
scanner type
When you start the
CLV software for the
first time, the status is
"No connection"
Fig. 2.11 - 23 Start the CLV software
2 PCB barcode scanner assembly instructions SIPLACE
2.11 PCB barcode scanner configuration 10/2009 Edition
234
: Select "Options" --> "Interface" from the pull-down menu.
: Check the settings as shown below.
: Click on OK to confirm. An attempt is
made to establish the connection.
Fig. 2.11 - 24 Establishing a connection to the 2D barcode scanner
NOTE:
If the network connection to the 2D barcode scanne
r is OK, the green "Connected" box appears
at the top right of the user interface (Fig. 2.11 - 23).
2.11.7.4 Configuring a 2D barcode, example "DEMO"
12 mm
Details of the configuration:
The barcode consists of 18 lines and 18 rows
Minimum cell size, i.e. the size of a matrix dot.: 12 mm
/18 rows = approx. 67 [1 /100 mm]
ATTENTION:
Make sure that the focus height of the 2D barcode sca
nner is set correctly. Use the gauge to
check. The focus height is 60 +/- 2mm.
2D barcode scanners with a focus height of 85 +/-2mm are used on S/F machines.