00193891-0702_AI_LP_Barcode_DE+EN.pdf - 第235页
SIPLACE 2 PCB barcode scanner assembly instructions 10/2009 Edition 2.11 PCB barcode scanner configuration 235 2.1 1.7.5 Working with the CL V Assista nt Once you have inst alled the CL V sof tware and est ablished a con…
2 PCB barcode scanner assembly instructions SIPLACE
2.11 PCB barcode scanner configuration 10/2009 Edition
234
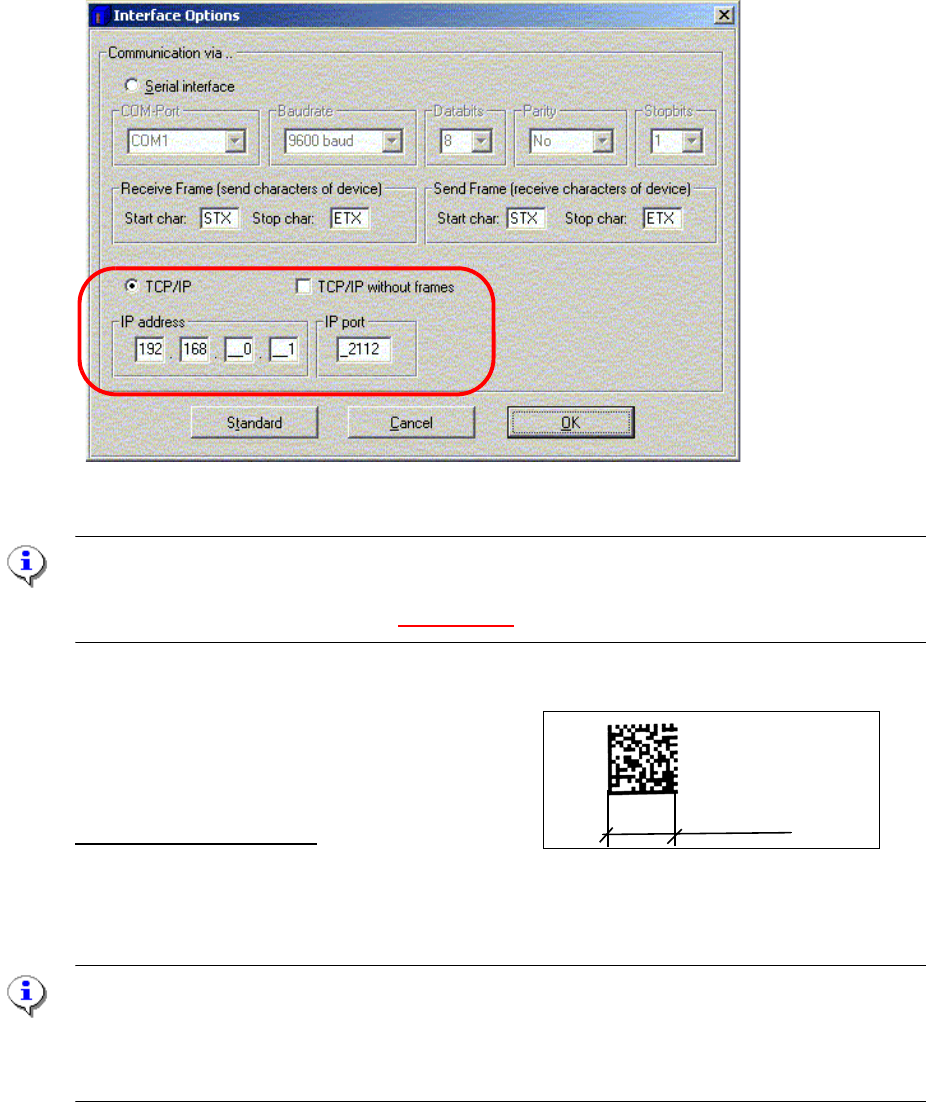
: Select "Options" --> "Interface" from the pull-down menu.
: Check the settings as shown below.
: Click on OK to confirm. An attempt is
made to establish the connection.
Fig. 2.11 - 24 Establishing a connection to the 2D barcode scanner
NOTE:
If the network connection to the 2D barcode scanne
r is OK, the green "Connected" box appears
at the top right of the user interface (Fig. 2.11 - 23).
2.11.7.4 Configuring a 2D barcode, example "DEMO"
12 mm
Details of the configuration:
The barcode consists of 18 lines and 18 rows
Minimum cell size, i.e. the size of a matrix dot.: 12 mm
/18 rows = approx. 67 [1 /100 mm]
ATTENTION:
Make sure that the focus height of the 2D barcode sca
nner is set correctly. Use the gauge to
check. The focus height is 60 +/- 2mm.
2D barcode scanners with a focus height of 85 +/-2mm are used on S/F machines.

SIPLACE 2 PCB barcode scanner assembly instructions
10/2009 Edition 2.11 PCB barcode scanner configuration
235
2.11.7.5 Working with the CLV Assistant
Once you have installed the CLV software and established a connection to the device, you can
then use the CLV Assistant to check that the barcode scanner is at the correct focus height and
adjust it if necessary.
The 2D barcode scanner can also be automatically configured for a specific barcode type.
: From the pull-Down menu, select
--> "T
ools" --> "CLV Assistant" or click on the icon.
Fig. 2.11 - 25 CLV Assistant
: Select "Config" and carry out the following steps.
Fig. 2.11 - 26 Step 1 in the CLV Assistant
2
2 PCB barcode scanner assembly instructions SIPLACE
2.11 PCB barcode scanner configuration 10/2009 Edition
236
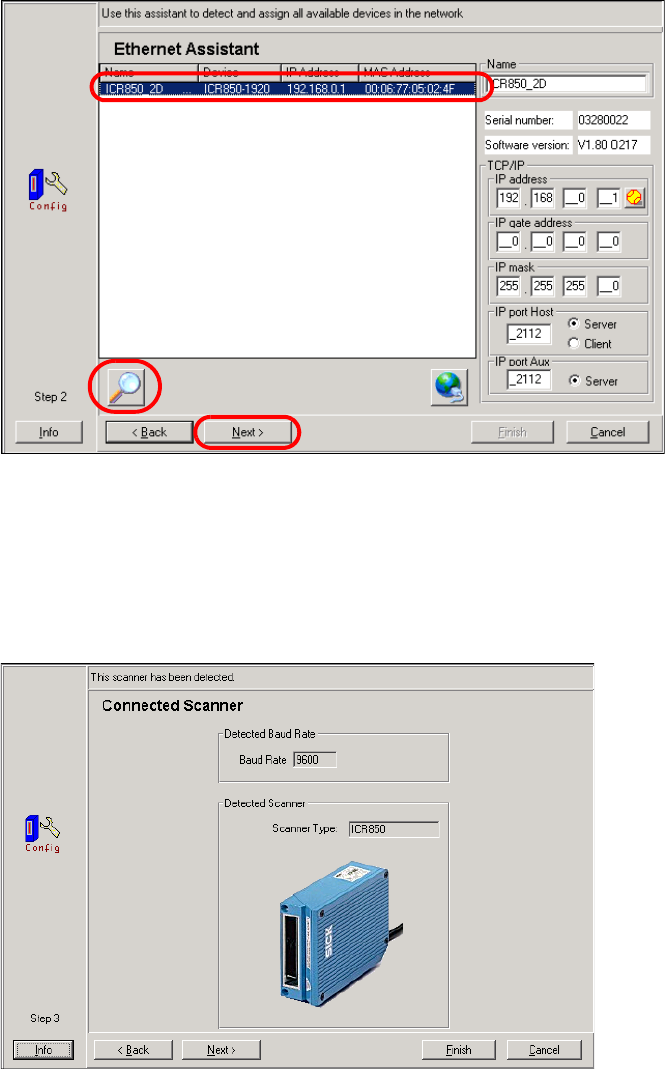
: Select "TCP/IP" as the protocol for establishing a connection.
: The software will then attempt to find all the barcode s
canners on the network and will list them
in the following dialog.
Fig. 2.11 - 27 Step 2 in the CLV Assistant
: Select the barcode scanner (Scanner Type) that you wish to configure.
: Click on the button at the bottom left to browse the network for barcode scanners again.
: A picture of the die scanner then appears.
Fig. 2.11 - 28 Step 3 in the CLV Assistant
: Click on "Next".