00193891-0702_AI_LP_Barcode_DE+EN.pdf - 第253页
SIPLACE 2 PCB barcode scanner assembly instructions 10/2009 Edition 2.11 PCB barcode scanner configuration 253 2.1 1.7.14 Option : Acq uiring an image during the st art-up phase or production This option allows you to sa…
2 PCB barcode scanner assembly instructions SIPLACE
2.11 PCB barcode scanner configuration 10/2009 Edition
252
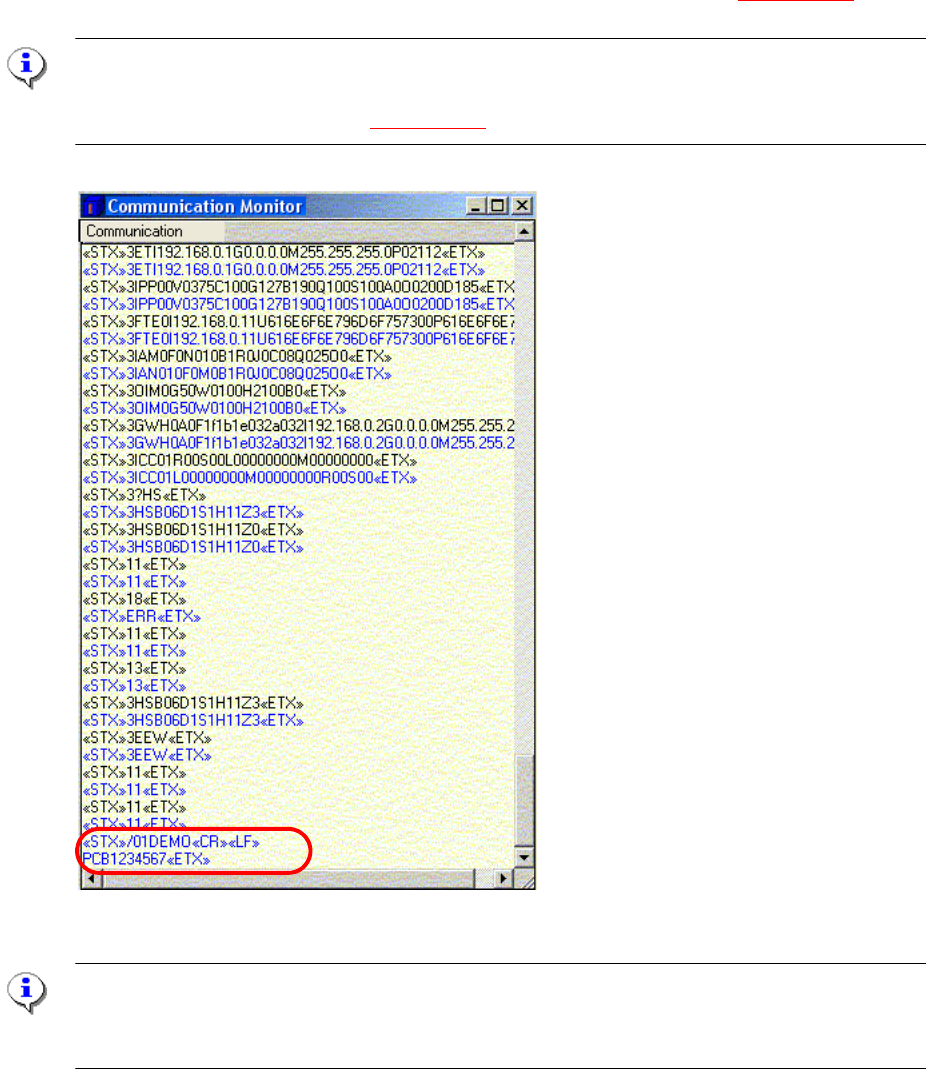
2.11.7.13 Communication Monitor
: Open the Communication Monitor from the View menu.
: On the "Host Interf
ace" tab, set the destination for the result string to Ethernet so that the scan-
ning result is displayed in the Communication Monitor.
The scanned barcode appears in clear text in the Communication Monitor (
Fig. 2.11 - 46).
PLEASE NOTE:
During the start-up phase, the "Ethernet" function can be activated in order to display the result in
the Communication Monitor (see Fig. 2.11 - 41)
Fig. 2.11 - 46 Communication Monitor with the scanned barcode
PLEASE Note:
When you close the Communication Monitor, the "Destination of
the result string" must be reset
to "Asynch. Host Interface" on the "Host Interface" tab.
SIPLACE 2 PCB barcode scanner assembly instructions
10/2009 Edition 2.11 PCB barcode scanner configuration
253
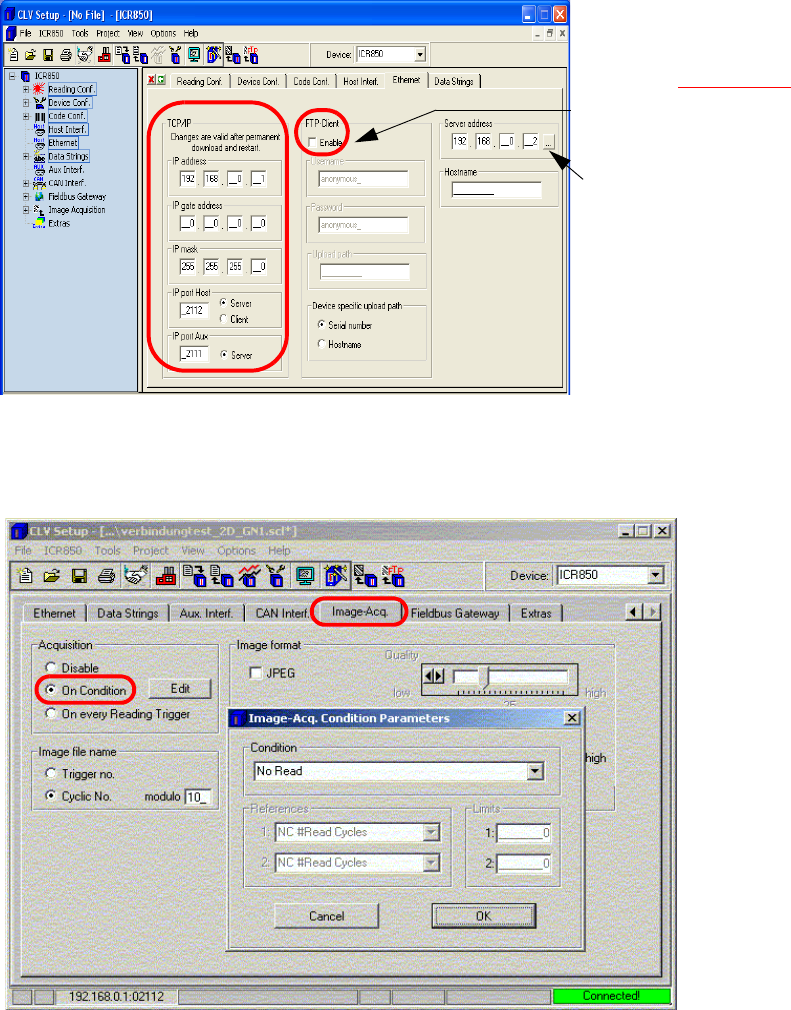
2.11.7.14 Option : Acquiring an image during the start-up phase or production
This option allows you to save an image of a barcode for later analysis, even if you do not read
the barcode.
: On the "Ethernet" tab, check the settings for
communication with the 2D barcode scanner.
If you wish to use the "Output
image during production"
option (see Fig. 2.11 - 48
), you
must activate the FTP client.
Enter the server address (IP
address) of the connected
computer.
Fig. 2.11 - 47 Working with ftp client
: Define the conditions under which an image should be acquired.
Fig. 2.11 - 48 Image acquiring
2 PCB barcode scanner assembly instructions SIPLACE
2.11 PCB barcode scanner configuration 10/2009 Edition
254
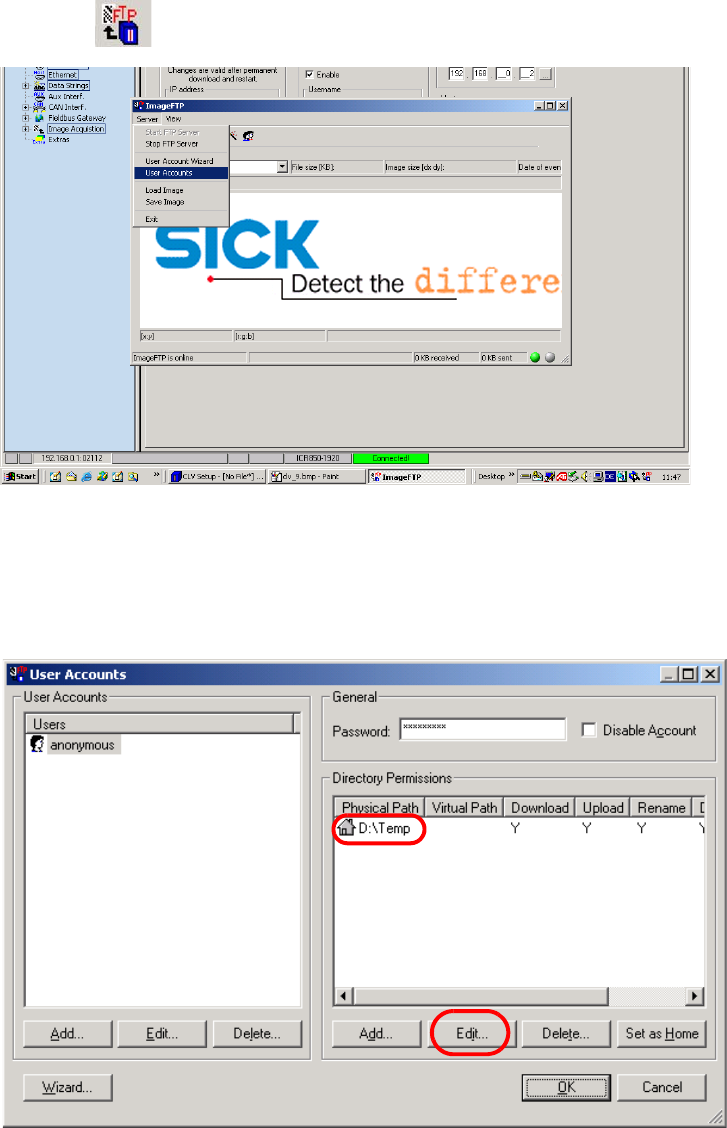
: Send the data to the barcode scanner (permanent download).
Select the
icon for this option.
Fig. 2.11 - 49 FTP Image
Define the path under which the images are to be saved.
: Select Server --> U
ser Accounts.
Fig. 2.11 - 50 Setting up the directory
: Click on the "Edit" button to change the existing directory.