00193891-0702_AI_LP_Barcode_DE+EN.pdf - 第261页
SIPLACE 2 PCB barcode scanner assembly instructions 10/2009 Edition 2.12 Tips & tricks for the barcode scanner 261 2.12.6 Import ant icons on the t askbar 2 2 – The "Open" button is used to open an existing…
2 PCB barcode scanner assembly instructions SIPLACE
2.12 Tips & tricks for the barcode scanner 10/2009 Edition
260
2.12.5 CLV software
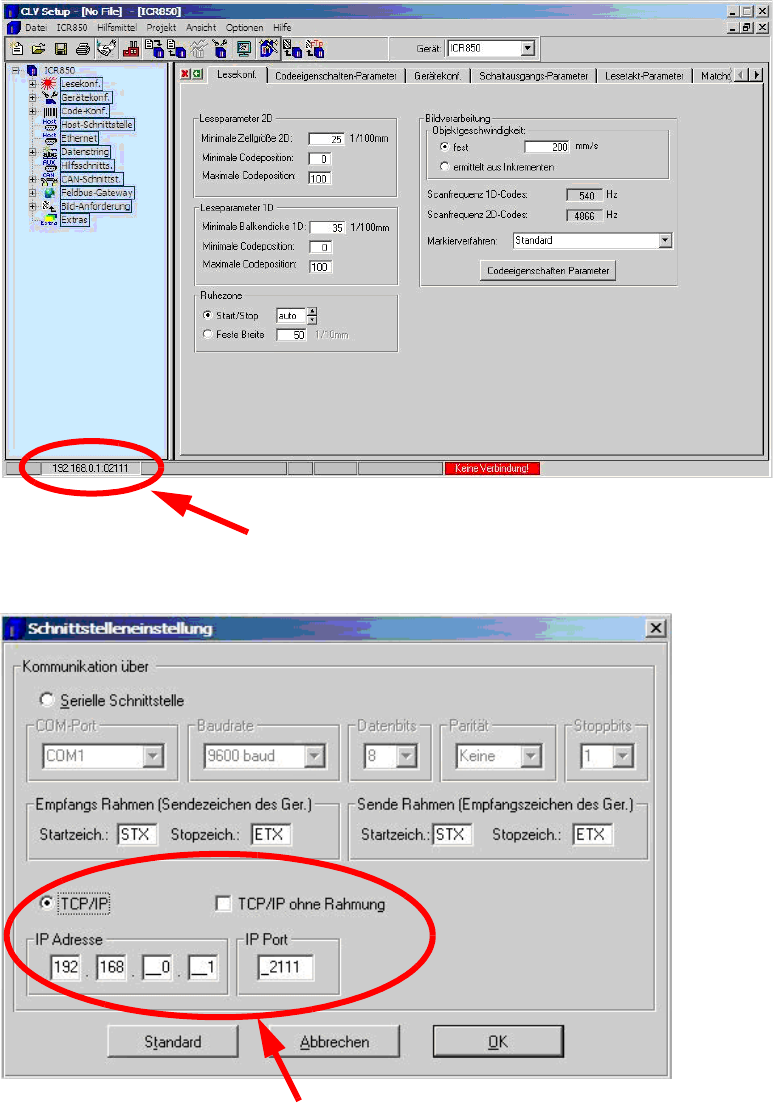
Double-click on the IP at the bottom left to open the window for the
interface settings.
Use these settings to connect via TCP/IP (cross-over cable).
2
2
SIPLACE 2 PCB barcode scanner assembly instructions
10/2009 Edition 2.12 Tips & tricks for the barcode scanner
261
2.12.6 Important icons on the taskbar
2
2
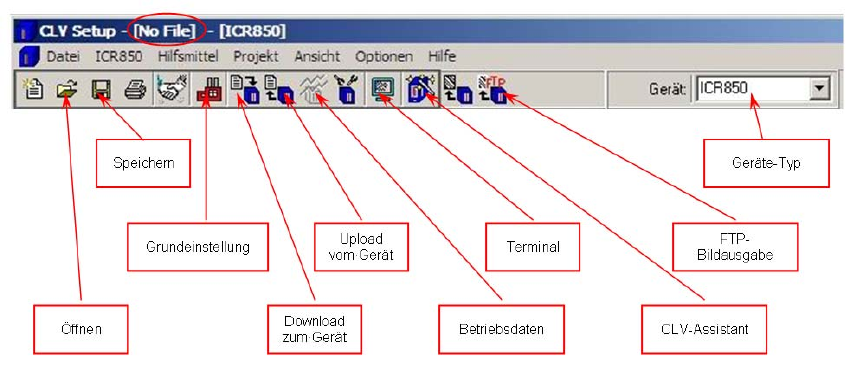
– The "Open" button is used to open an existing setting on the computer.
– The "Save" button is used to save a setting you ha
ve created on the computer. You should
note, however, that the setting is saved to the file specified on the taskbar (see highlight / no
file has been selected yet in this example).
– Once the network connection has been established, first transfer the current scanner setting
to the comp
uter using the “Upload from device“ button and save it using the File / Save As
menu.
– You can then modify the settings as required. They will only c
hange on the computer, however,
and must then be transferred to the scanner using the “Download to device“ button.
– When you download, we recommend that you always select “Permanent“ so that the settings
are pe
rmanently saved on the scanner.
– Use the “Basic settings“ button to reset all th
e settings to the default values.
– Use the “Download to device“ to send the settings from the computer to the scanner.
2
2
2
2
2
2
2
2 PCB barcode scanner assembly instructions SIPLACE
2.12 Tips & tricks for the barcode scanner 10/2009 Edition
262
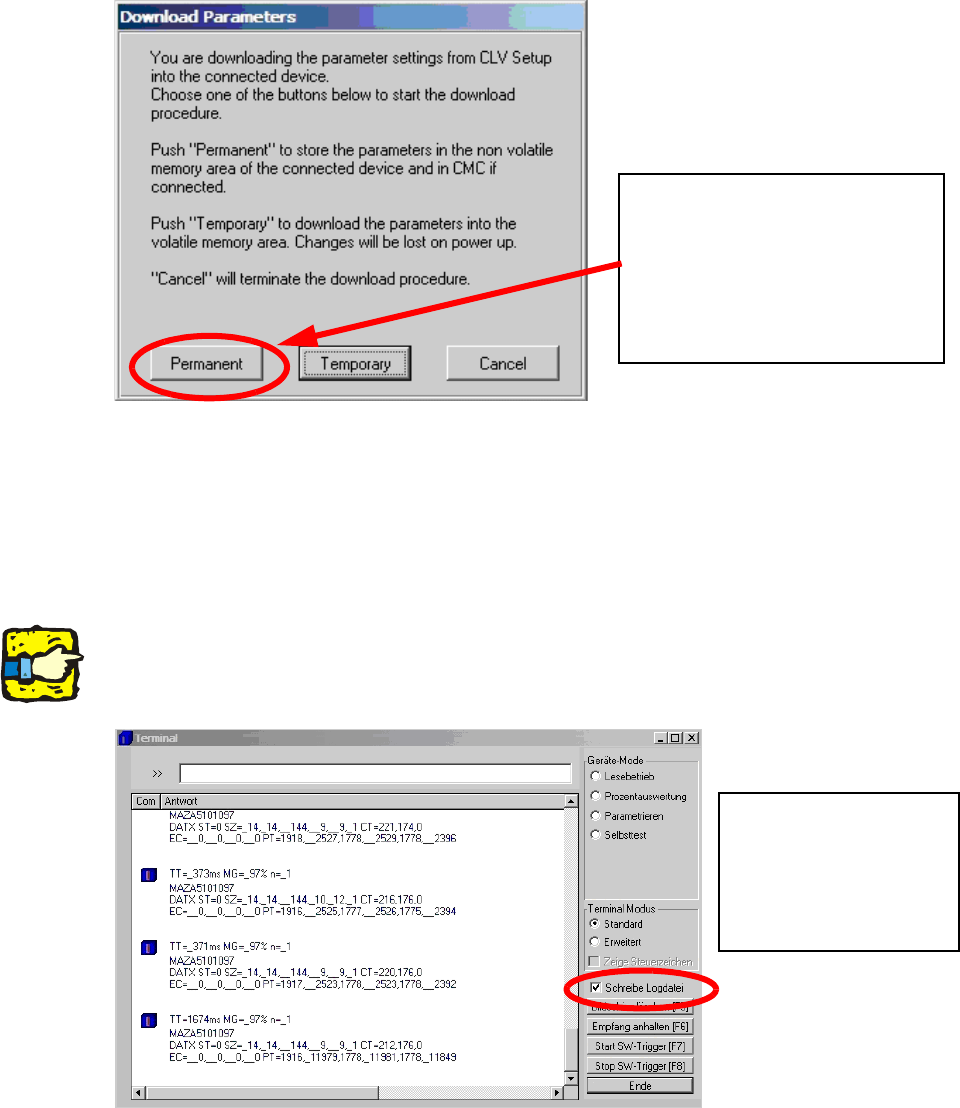
– Always select the download with the status “Permanent“.
Only the permanent download will
ensure that the settings are perma-
nently saved on the scanner.
With a temporary download, the set-
tings will be lost after a restart.
2
2
– Use the “Upload from device“ to send the settings from the scanner to the computer.
– Use the "Operating data" button to read the firmware on the connected scanner.
– Use the “Terminal“ button to displa
y the
data strings read by the scanner, write them to a log
file and save them on the computer.
2
Further information can be found in section 5 / Analyzing the data string in the terminal monitor.2
To save the data, high-
light the “Write log file"
box and select the cor-
responding path or file
name.
2
2
2
2