00196019-02.pdf - 第21页
Controller 2 Assembly Instructions Tape cutter frequency cont rolle r SIPLACE S / F / HS / C- / HF- / X- / D-series 02/2008 Edition 21 : Attach the cover on th e new tape cutter fre quency on top of the control boa rd bo…
2 Assembly Instructions Tape cutter frequency controller SIPLACE S / F / HS / C- / HF- / X- / D-series Controller
02/2008 Edition
20
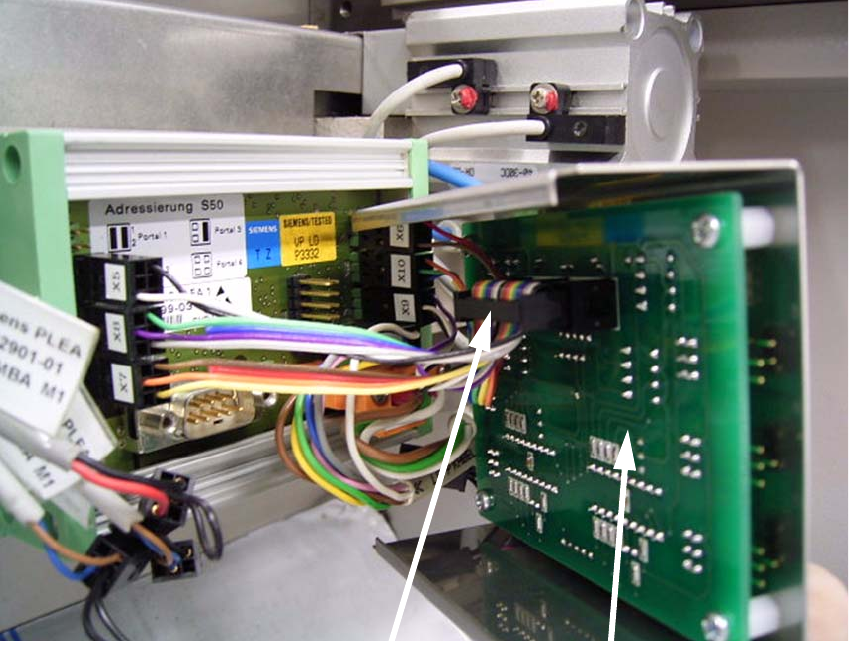
: Connect the adapter cable of the new tape cutter frequency controller with the new controller
unit.
2
2
2
2
2
2
2
2
2
2
2
2
new controller unit
connector
Controller 2 Assembly Instructions Tape cutter frequency controller SIPLACE S / F / HS / C- / HF- / X- / D-series
02/2008 Edition
21
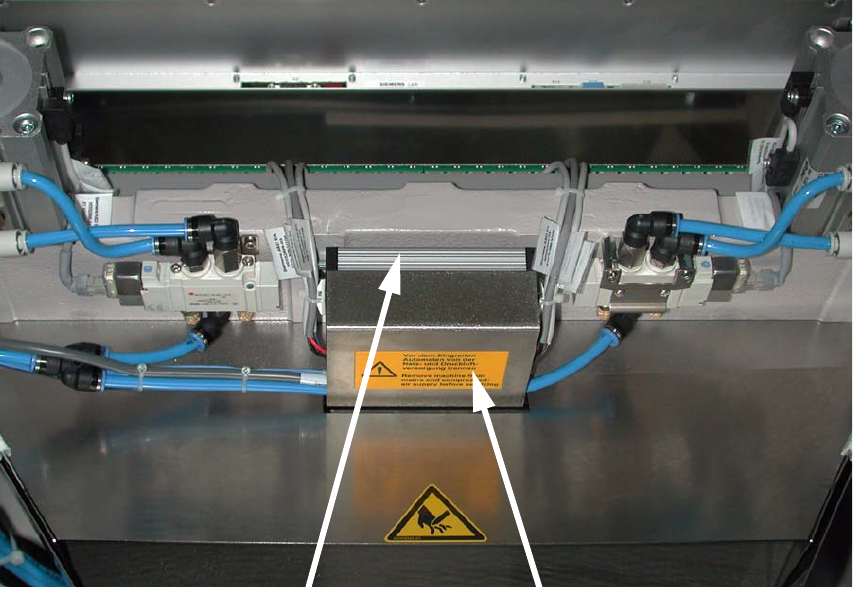
: Attach the cover on the new tape cutter frequency on top of the control board box.
2
2
2
2
2
2
2
2
2
2
2
2
2
2
Cover
Box
2 Assembly Instructions Tape cutter frequency controller SIPLACE S / F / HS / C- / HF- / X- / D-series Controller
02/2008 Edition
22
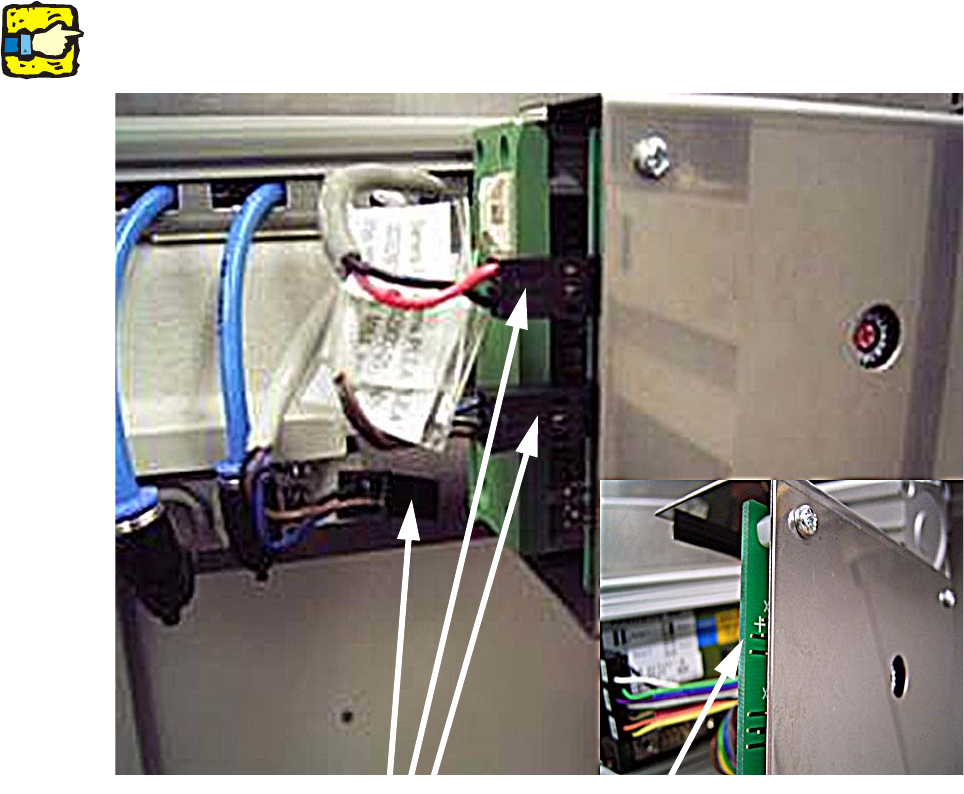
: Connect the existing connectors of electronic valve and sensor to the new tape cutter fre-
quency controller board.
Watch on for the agreement of the numbers between connector and PCB board.
Connect a pair of numbers.
2
Please be careful the electronic valve connector direction. Because the connector can connect
reverse direction. 2
2
2
: Conect the red access cable (+) of the connector on pin (+) of the connector socket at the PCB
board.
2
2
+ mark
connectors