00197835-04_JC_PM_WF3_SX12_EN.pdf - 第40页
12 WF3 SX1/2 Clean / replace the compressed air filter - version 1. 3 min 2 / 3 C A U T I O N ! R e f e r t o s a f e t y i n s t r u c t i o n s i n u s e r m a n u a l b e f o r e c o m m e n c i n g M a i n t e n a …
12 WF3 SX1/2 Clean / replace the compressed air filter - version 1. 3 min 1 / 3
CAUTION! Refer to safety instructions in user manual before commencing Maintenance
Machine Status OFF Transport Empty
NOTICE! ESD guidelines are to be followed Tool:
T11, T86
Wear Part:
W20
Consumables:
www.asm-smt.com
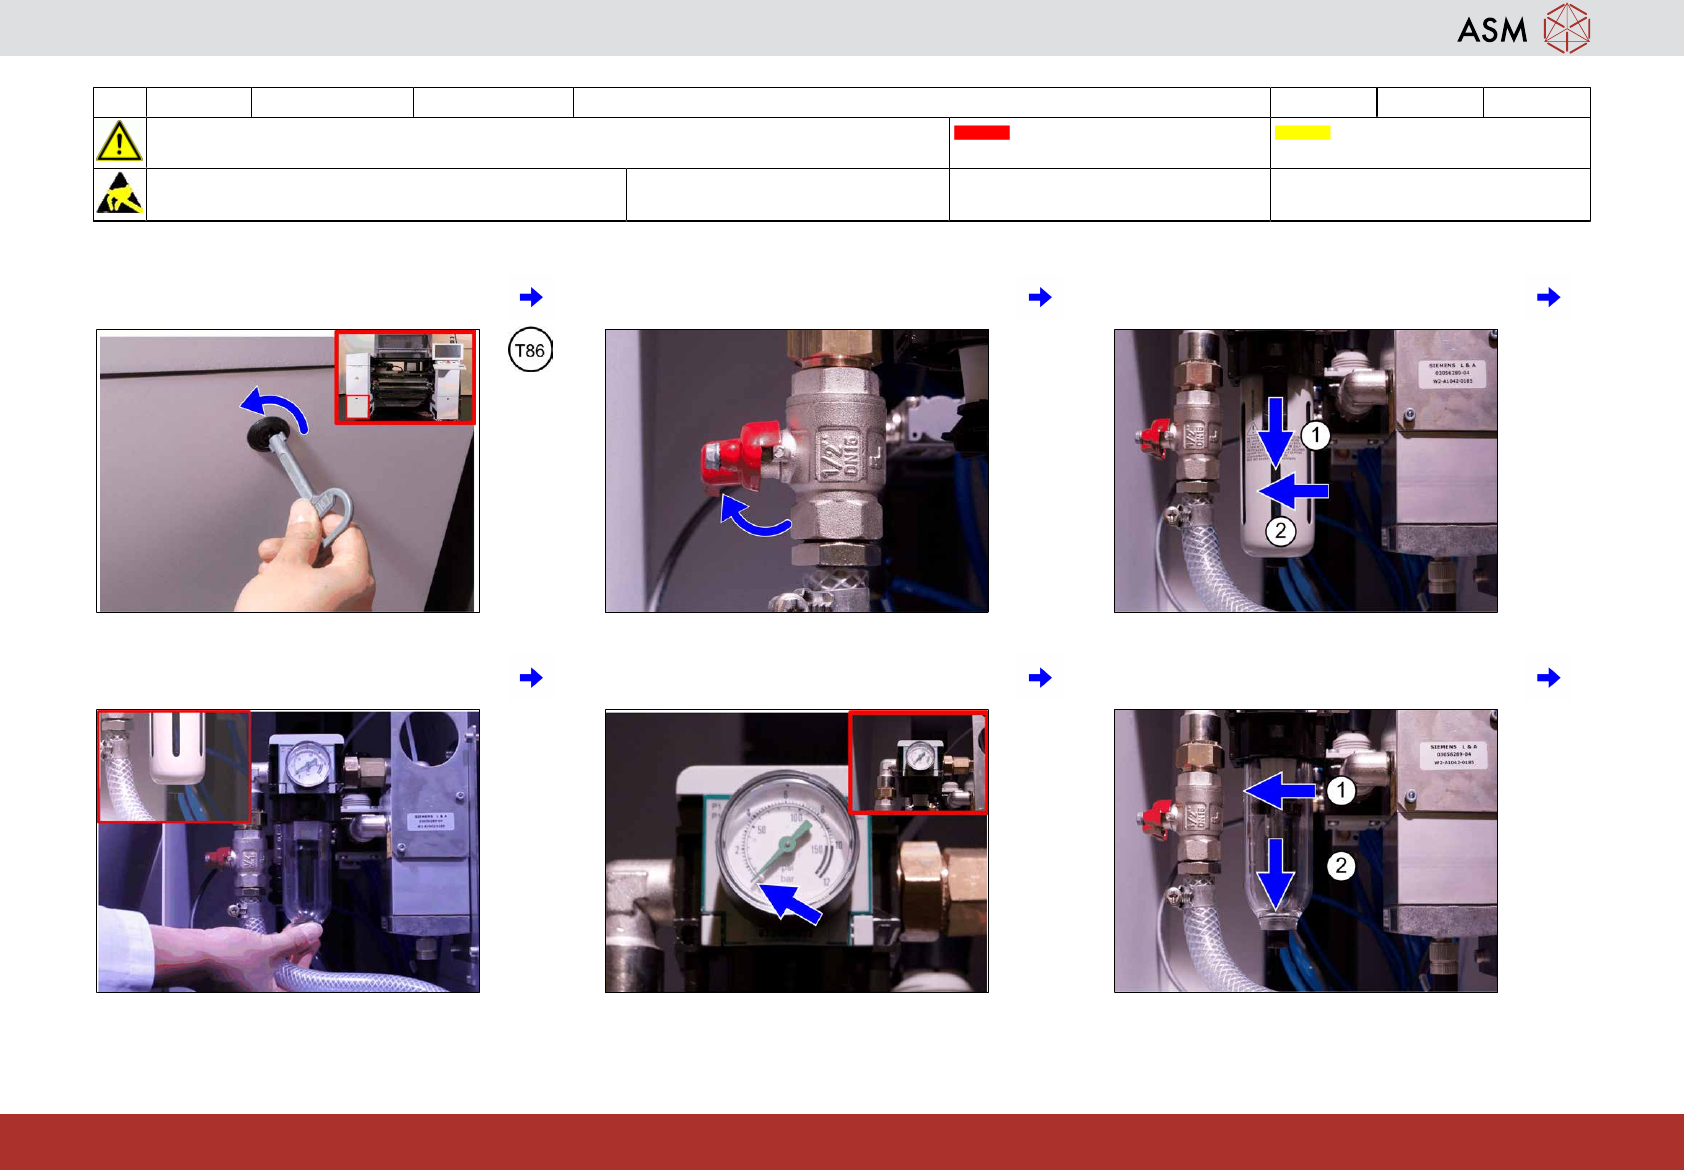
1 Open the cover. 2 Turn off the air by pushing the lever to ho-
rizontal position.
3 Push the protection cap lock (1) down and
twist the protection cap (2).
4 Push the activator or open the nut to ex-
haust the system.
5 Control the manometer shows 0 bar. 6 Unscrew the glass (1) and remove (2) it.
12 WF3 SX1/2 Clean / replace the compressed air filter - version 1. 3 min 2 / 3
CAUTION! Refer to safety instructions in user manual before commencing Maintenance
Machine Status OFF Transport Empty
NOTICE! ESD guidelines are to be followed Tool:
T11, T86
Wear Part:
W20
Consumables:
www.asm-smt.com
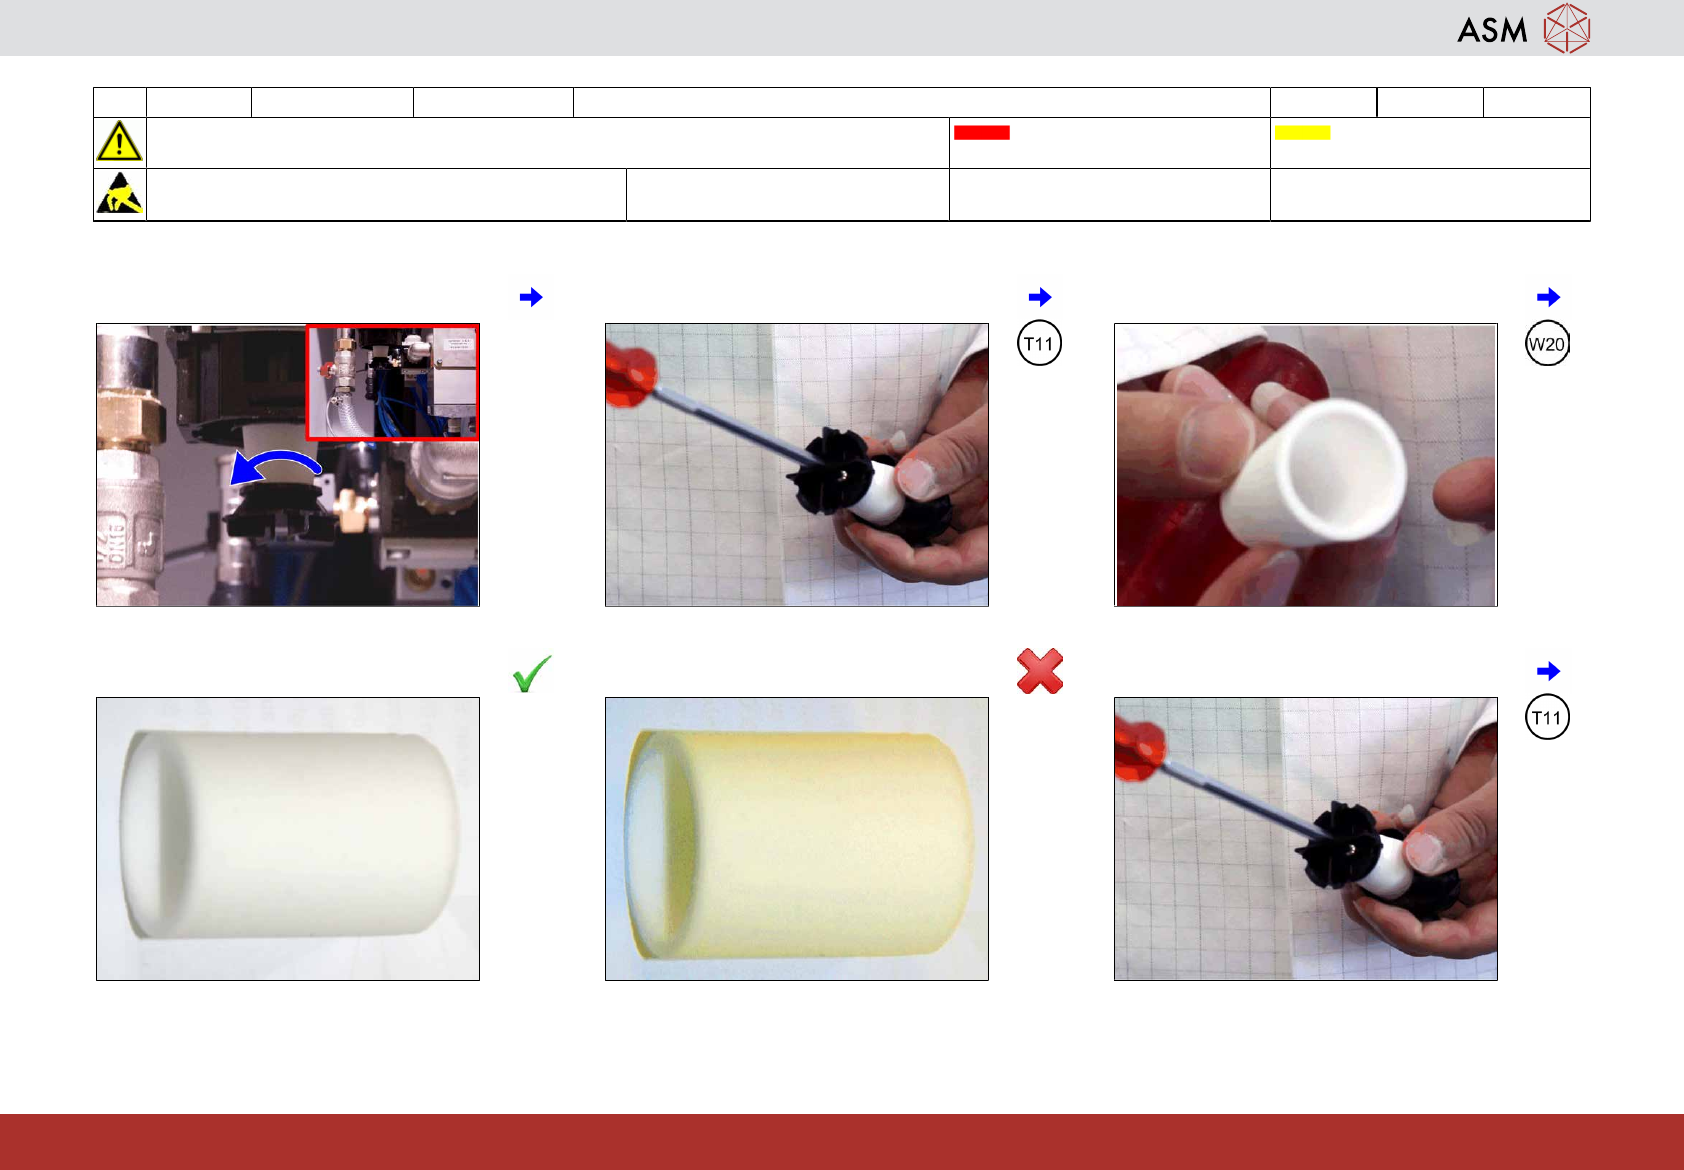
7 Unscrew the filter by hand. 8 Disassemble the filter set. 9 Check the filter for contamination.
10 If OK put it back to the filter unit. 11 If NOT OK replace it with a new one. 12 Assemble the filter set.
12 WF3 SX1/2 Clean / replace the compressed air filter - version 1. 3 min 3 / 3
CAUTION! Refer to safety instructions in user manual before commencing Maintenance
Machine Status OFF Transport Empty
NOTICE! ESD guidelines are to be followed Tool:
T11, T86
Wear Part:
W20
Consumables:
www.asm-smt.com
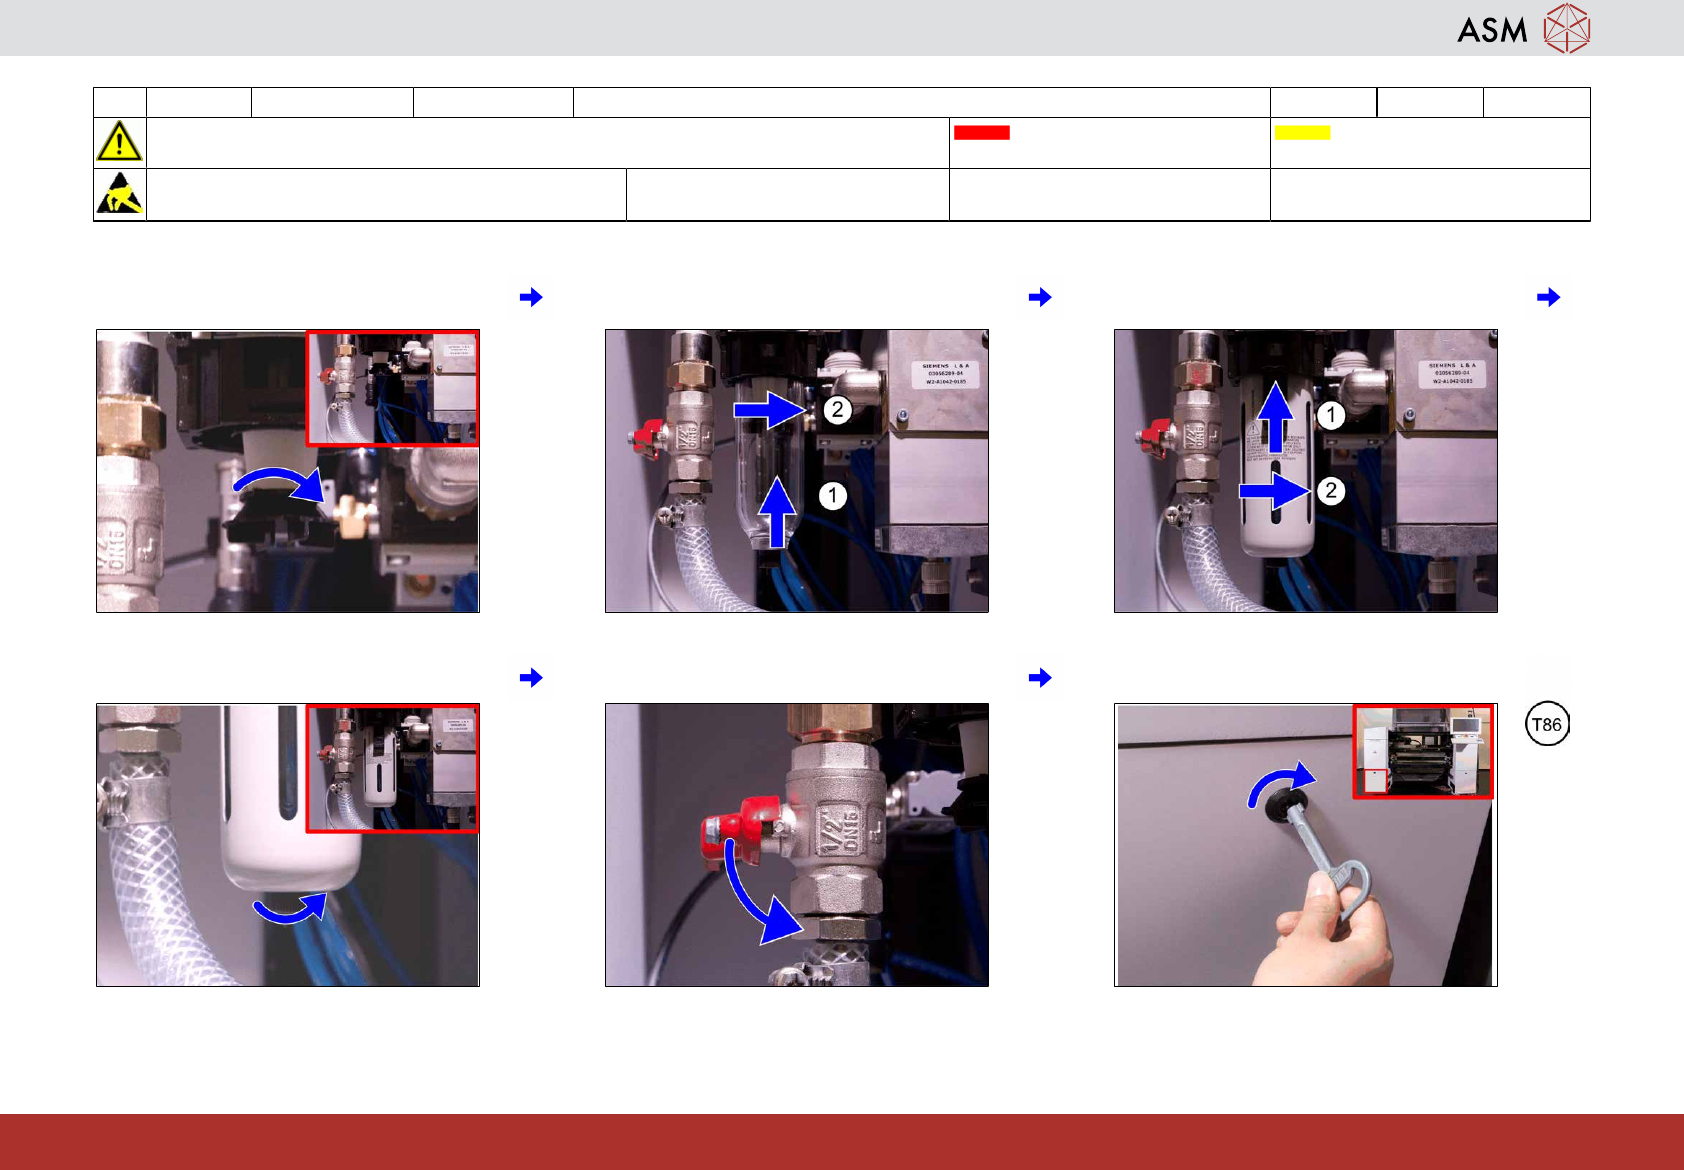
13 Screw the filter on by hand. 14 Return the glass (1) and tighten (2) it. 15 Return the protection cap (1), twist and
close it (2).
16 Close the nut if available. 17 Open the lever. 18 Close the cover.