00197835-04_JC_PM_WF3_SX12_EN.pdf - 第43页
13 WF3 SX1/2 Clean / replace the compressed air filter - version 2. 3 min 1 / 3 C A U T I O N ! R e f e r t o s a f e t y i n s t r u c t i o n s i n u s e r m a n u a l b e f o r e c o m m e n c i n g M a i n t e n a …

www.asm-smt.com
13 WF3 SX1/2 Clean / replace the compressed air filter - version 2. 3 min 1 / 3
CAUTION! Refer to safety instructions in user manual before commencing Maintenance
Machine Status OFF Transport Empty
NOTICE! ESD guidelines are to be followed Tool:
T86
Wear Part:
W60
Consumables:
www.asm-smt.com
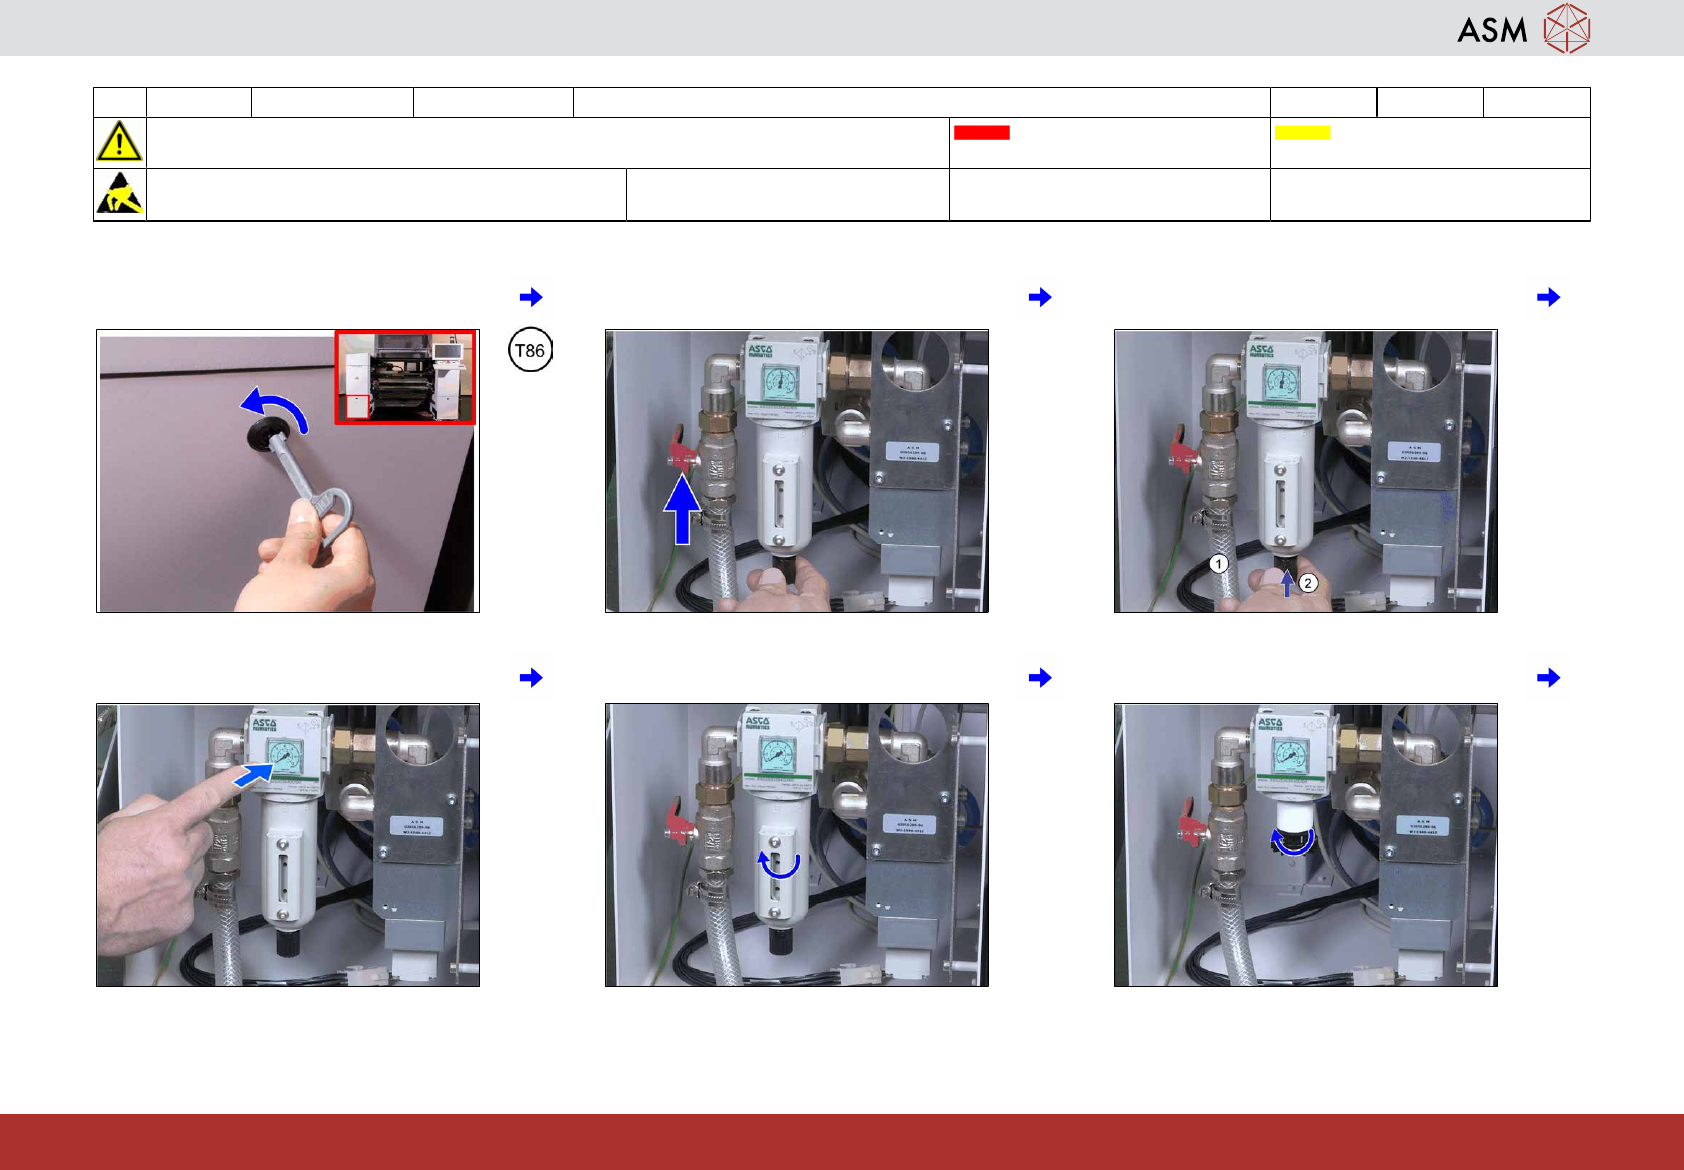
1 Open the cover. 2 Turn off the air by pushing the lever to ho-
rizontal position.
3 Turn the activator to the left (1) and push it
to exhaust the system (2).
4 Control the manometer shows 0. 5 Unscrew the pressure tank and remove it. 6 Unscrew the filter.
13 WF3 SX1/2 Clean / replace the compressed air filter - version 2. 3 min 2 / 3
CAUTION! Refer to safety instructions in user manual before commencing Maintenance
Machine Status OFF Transport Empty
NOTICE! ESD guidelines are to be followed Tool:
T86
Wear Part:
W60
Consumables:
www.asm-smt.com
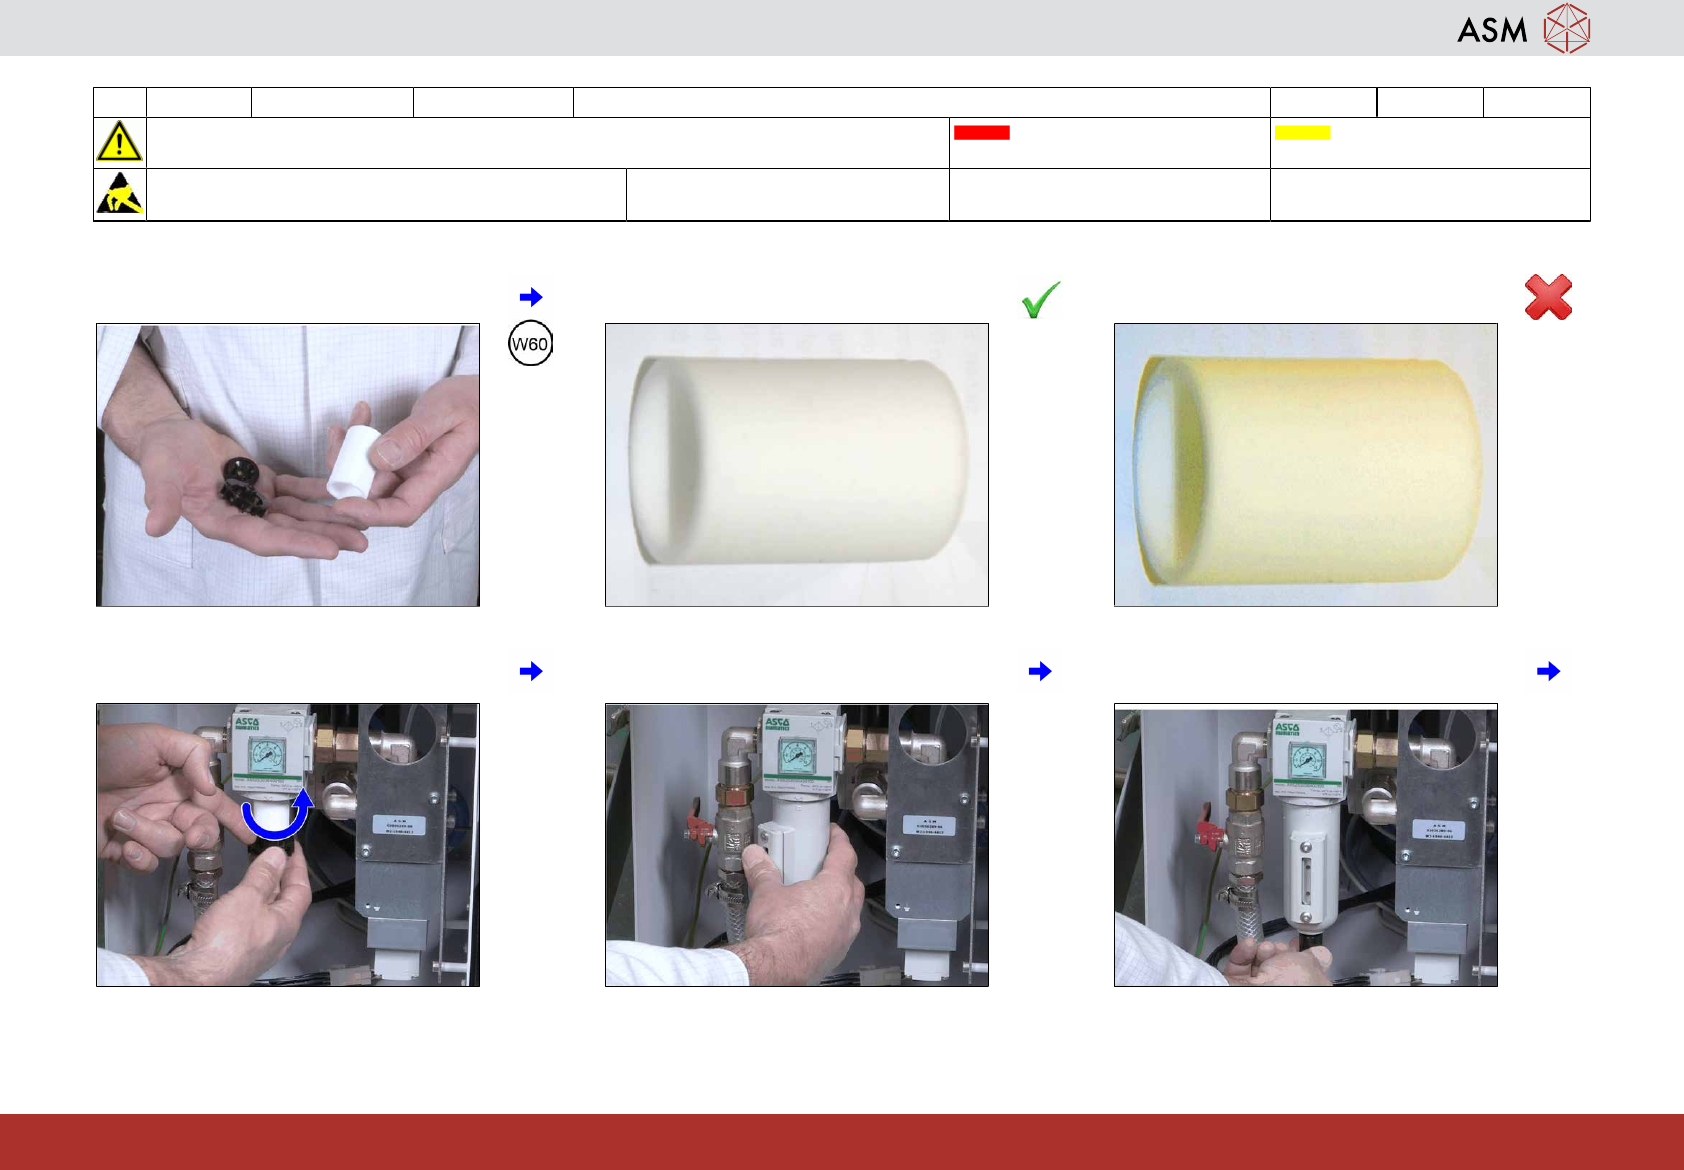
7 Check the filter for contamination. 8 If OK put it back to the filter unit. 9 If NOT OK replace it with a new one.
10 Screw the filter on by hand. 11 Return the pressure tank and secure it in
position.
12 Turn the activator to the right to lock the
system.