00197835-04_JC_PM_WF3_SX12_EN.pdf - 第47页
14 WF3 SX1 2 Grease the cutter and cutting blades. 5 min 1 / 4 C A U T I O N ! R e f e r t o s a f e t y i n s t r u c t i o n s i n u s e r m a n u a l b e f o r e c o m m e n c i n g M a i n t e n a n c e Machine Sta…

www.asm-smt.com
14 WF3 SX1 2 Grease the cutter and cutting blades. 5 min 1 / 4
CAUTION! Refer to safety instructions in user manual before commencing Maintenance
Machine Status OFF Transport Empty
NOTICE! ESD guidelines are to be followed Tool:
T12, T34, T56, T89, T90
Wear Part: Consumables:
C3, C26, C31, C49
www.asm-smt.com
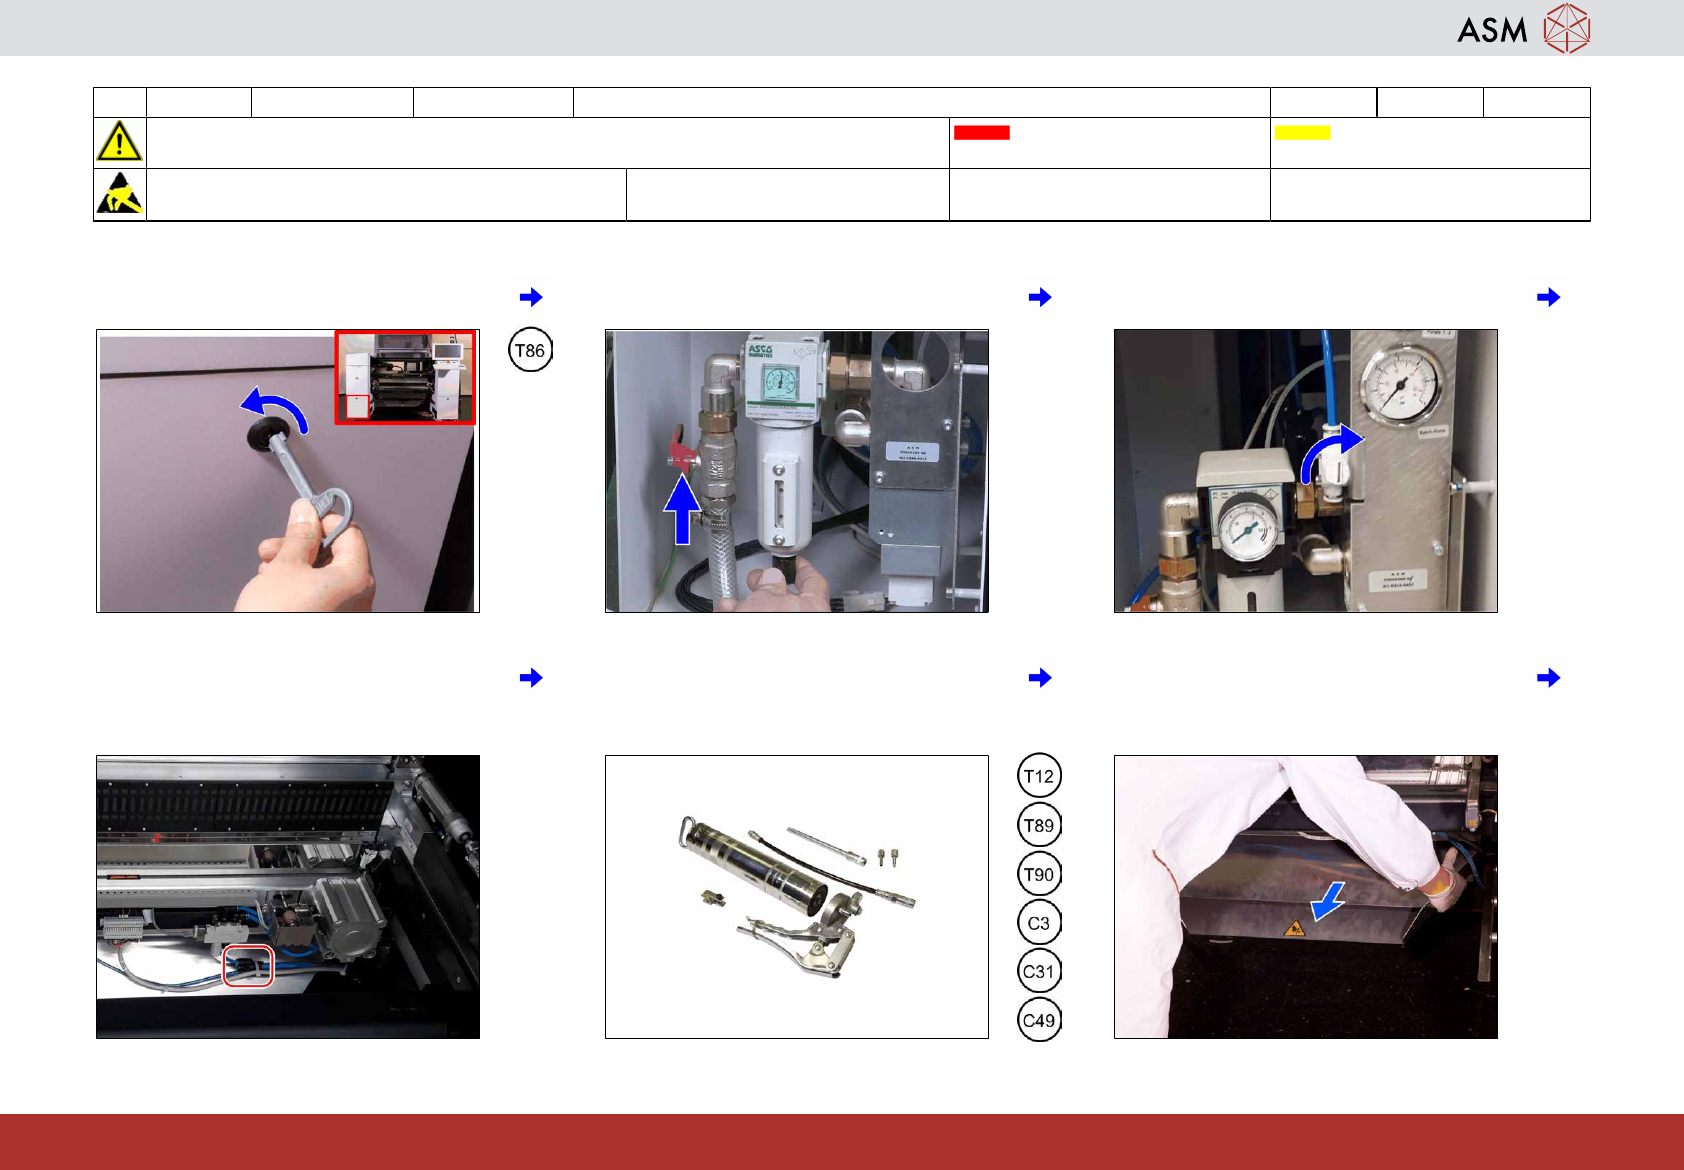
1 Open the cover. 2 Turn off the air by pushing the lever to ho-
rizontal position.
3 If a vent valve is present (SIPLACESX1/
SX2V3only): Open the valve.
4 If no vent valve is present (SIPLACESX1/
SX2V2 and earlier versions), pull off one
of the smaller hoses at the tape cutter T-
piece.
5
Prepare the grease gun, see [34].
6 Remove the waste slide.
14 WF3 SX1 2 Grease the cutter and cutting blades. 5 min 2 / 4
CAUTION! Refer to safety instructions in user manual before commencing Maintenance
Machine Status OFF Transport Empty
NOTICE! ESD guidelines are to be followed Tool:
T12, T34, T56, T89, T90
Wear Part: Consumables:
C3, C26, C31, C49
www.asm-smt.com
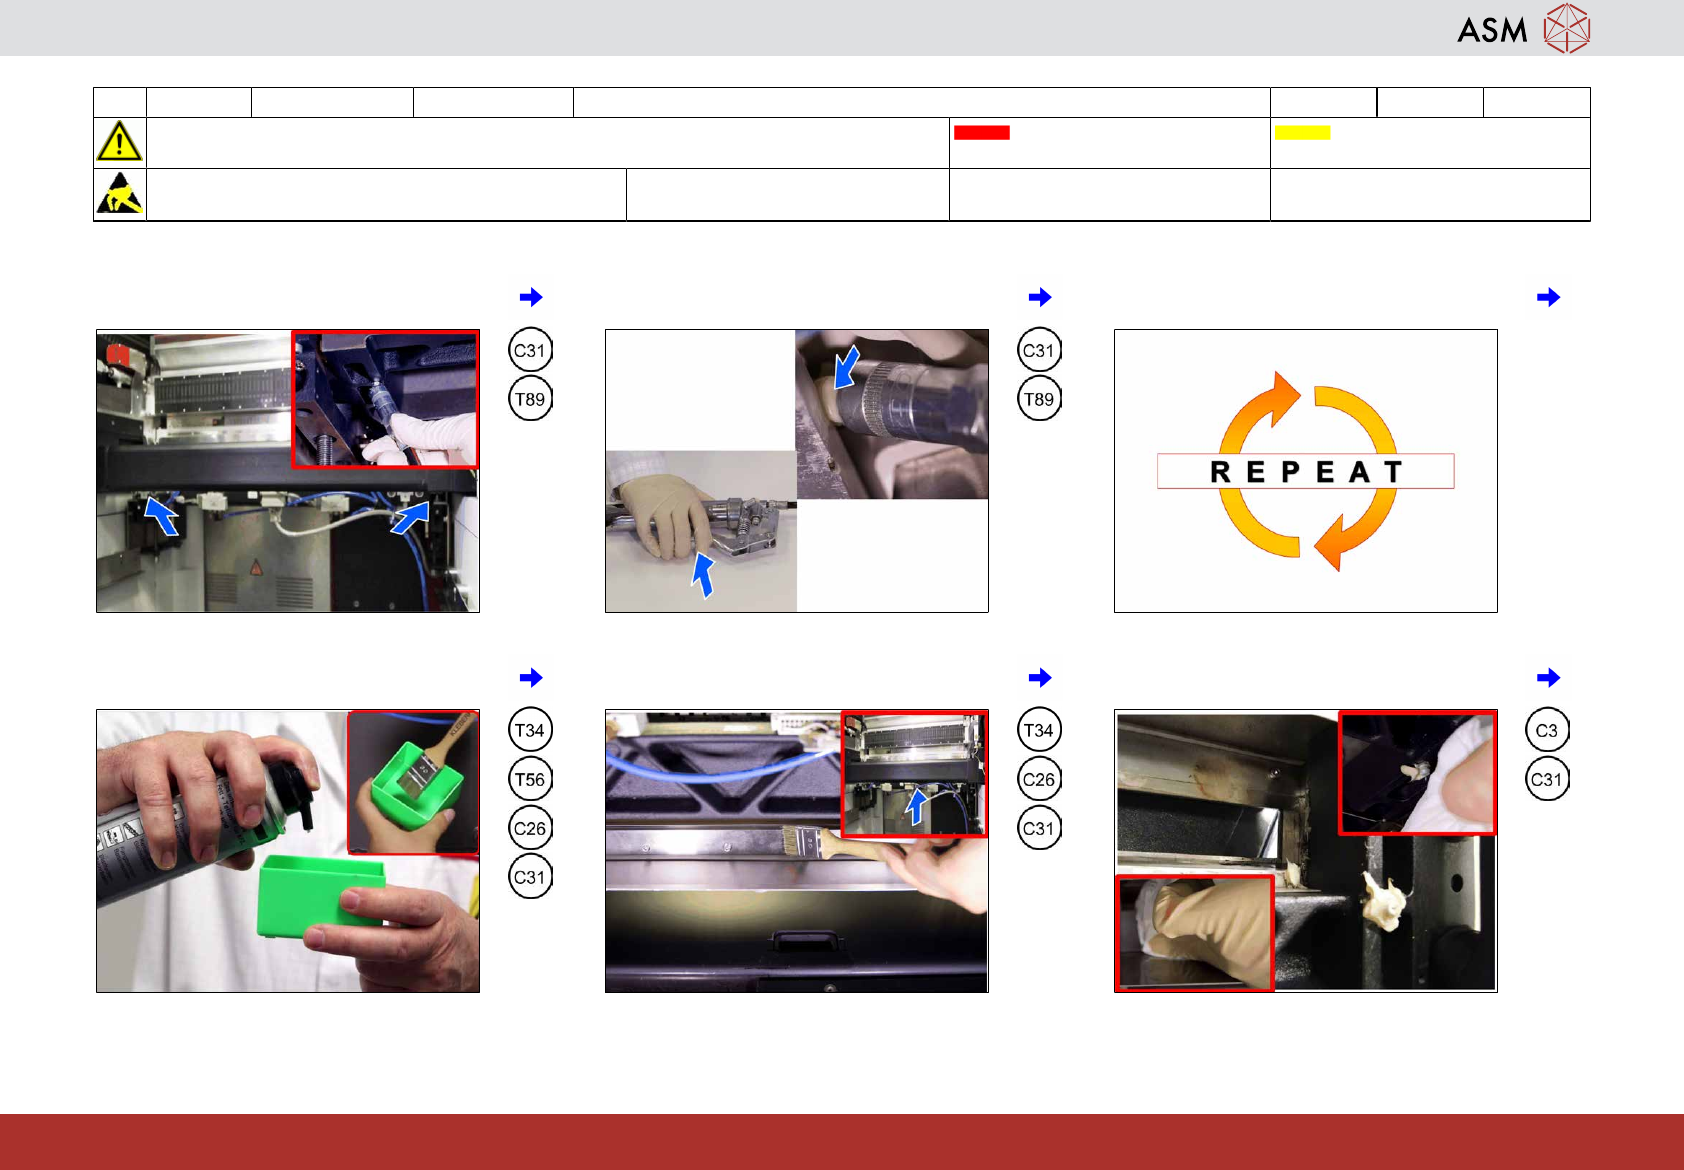
7 Position the grease gun at the left grease
nipple.
8 Press the trigger till grease comes out. 9 Repeat steps 2-3 on the right grease
nipple.
10 Put grease on a brush. 11 Distribute the grease to the fixing blade
over the whole length.
12 Remove remaining grease from the
grease nipples.