00197835-04_JC_PM_WF3_SX12_EN.pdf - 第50页
14 WF3 SX1 2 Grease the cutter and cutting blades. 5 min 4 / 4 C A U T I O N ! R e f e r t o s a f e t y i n s t r u c t i o n s i n u s e r m a n u a l b e f o r e c o m m e n c i n g M a i n t e n a n c e Machine Sta…
14 WF3 SX1 2 Grease the cutter and cutting blades. 5 min 3 / 4
CAUTION! Refer to safety instructions in user manual before commencing Maintenance
Machine Status OFF Transport Empty
NOTICE! ESD guidelines are to be followed Tool:
T12, T34, T56, T89, T90
Wear Part: Consumables:
C3, C26, C31, C49
www.asm-smt.com
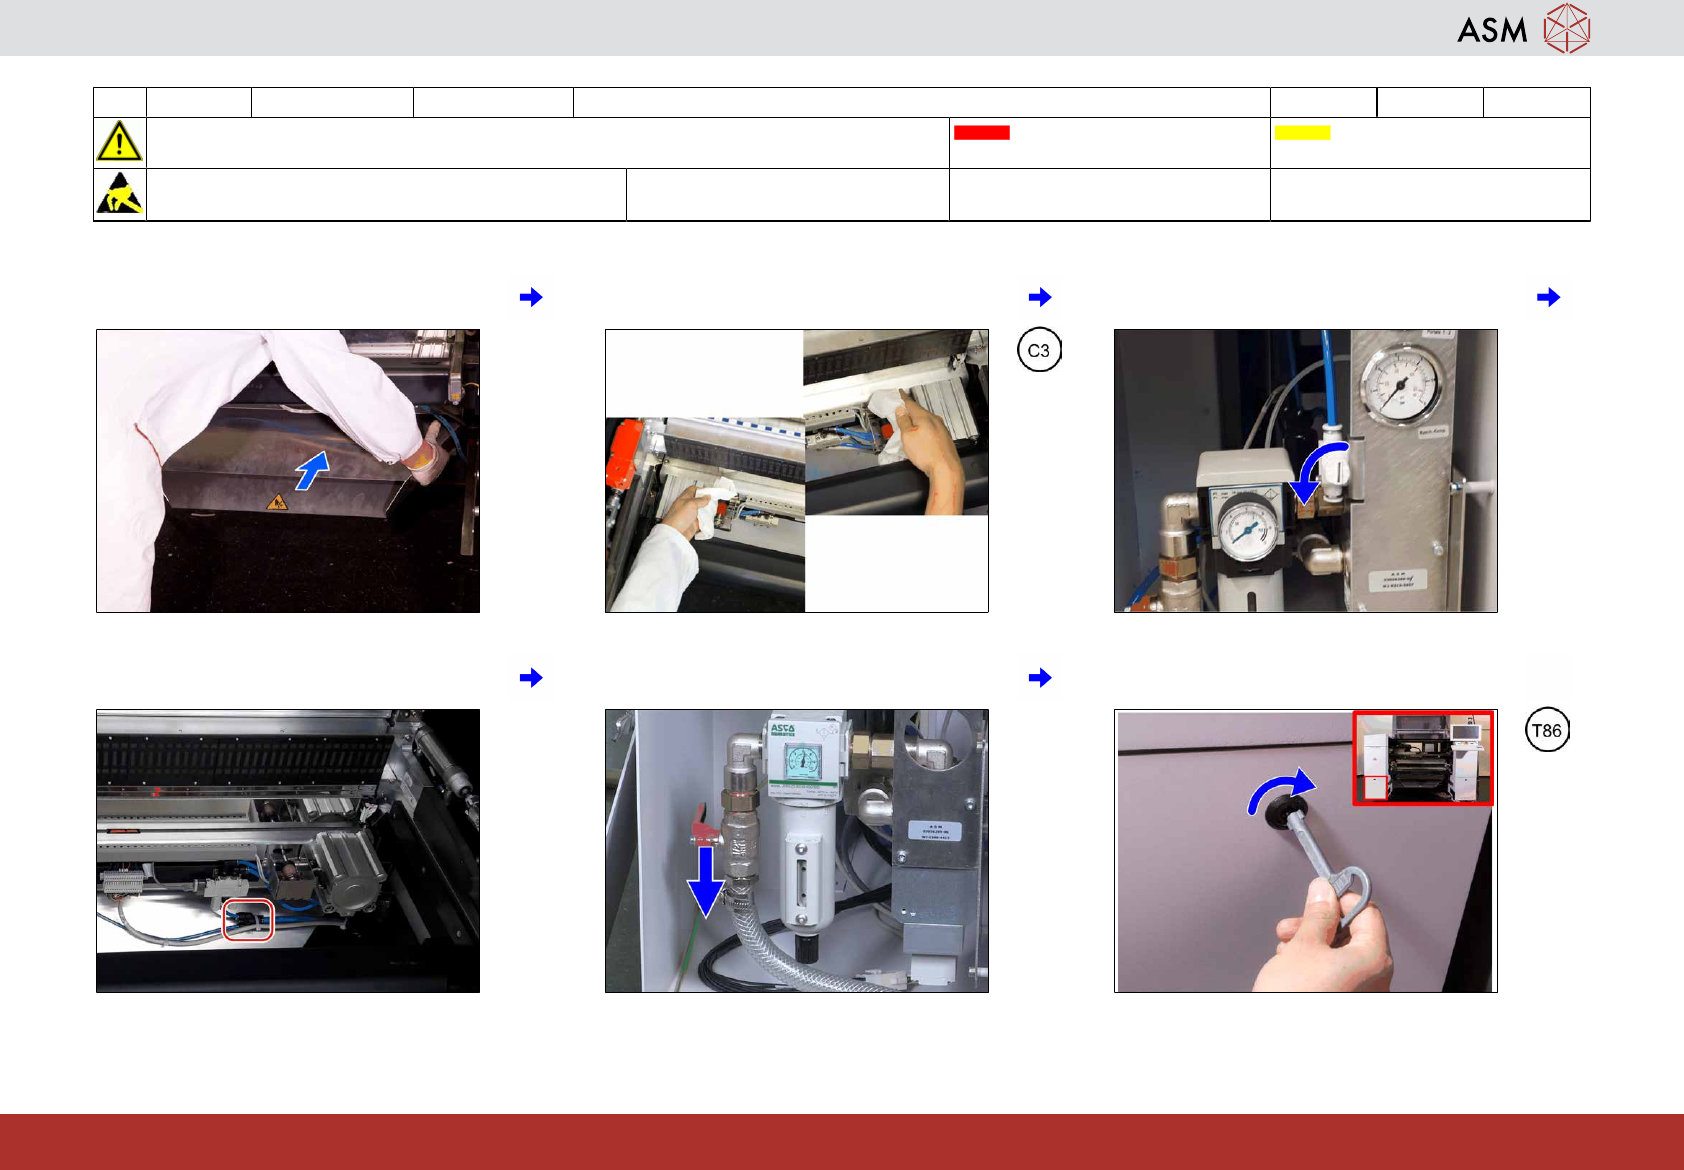
13 Insert the waste slide. 14 Clean the rods, elastomer springs and
plastic end stop.
15 If valve is present: Close the valve.
16 If valve is NOT present: Re-connect the
hose.
17 Open the lever. 18 Close the cover.
14 WF3 SX1 2 Grease the cutter and cutting blades. 5 min 4 / 4
CAUTION! Refer to safety instructions in user manual before commencing Maintenance
Machine Status OFF Transport Empty
NOTICE! ESD guidelines are to be followed Tool:
T12, T34, T56, T89, T90
Wear Part: Consumables:
C3, C26, C31, C49
www.asm-smt.com
19 Repeat the procedure at the other cutter.
15 WF3 SX1/2 Check / grease the docking unit. 1 min 1 / 1
CAUTION! Refer to safety instructions in user manual before commencing Maintenance
Machine Status OFF Transport Empty
NOTICE! ESD guidelines are to be followed Tool: Wear Part: Consumables:
C4, C31
www.asm-smt.com
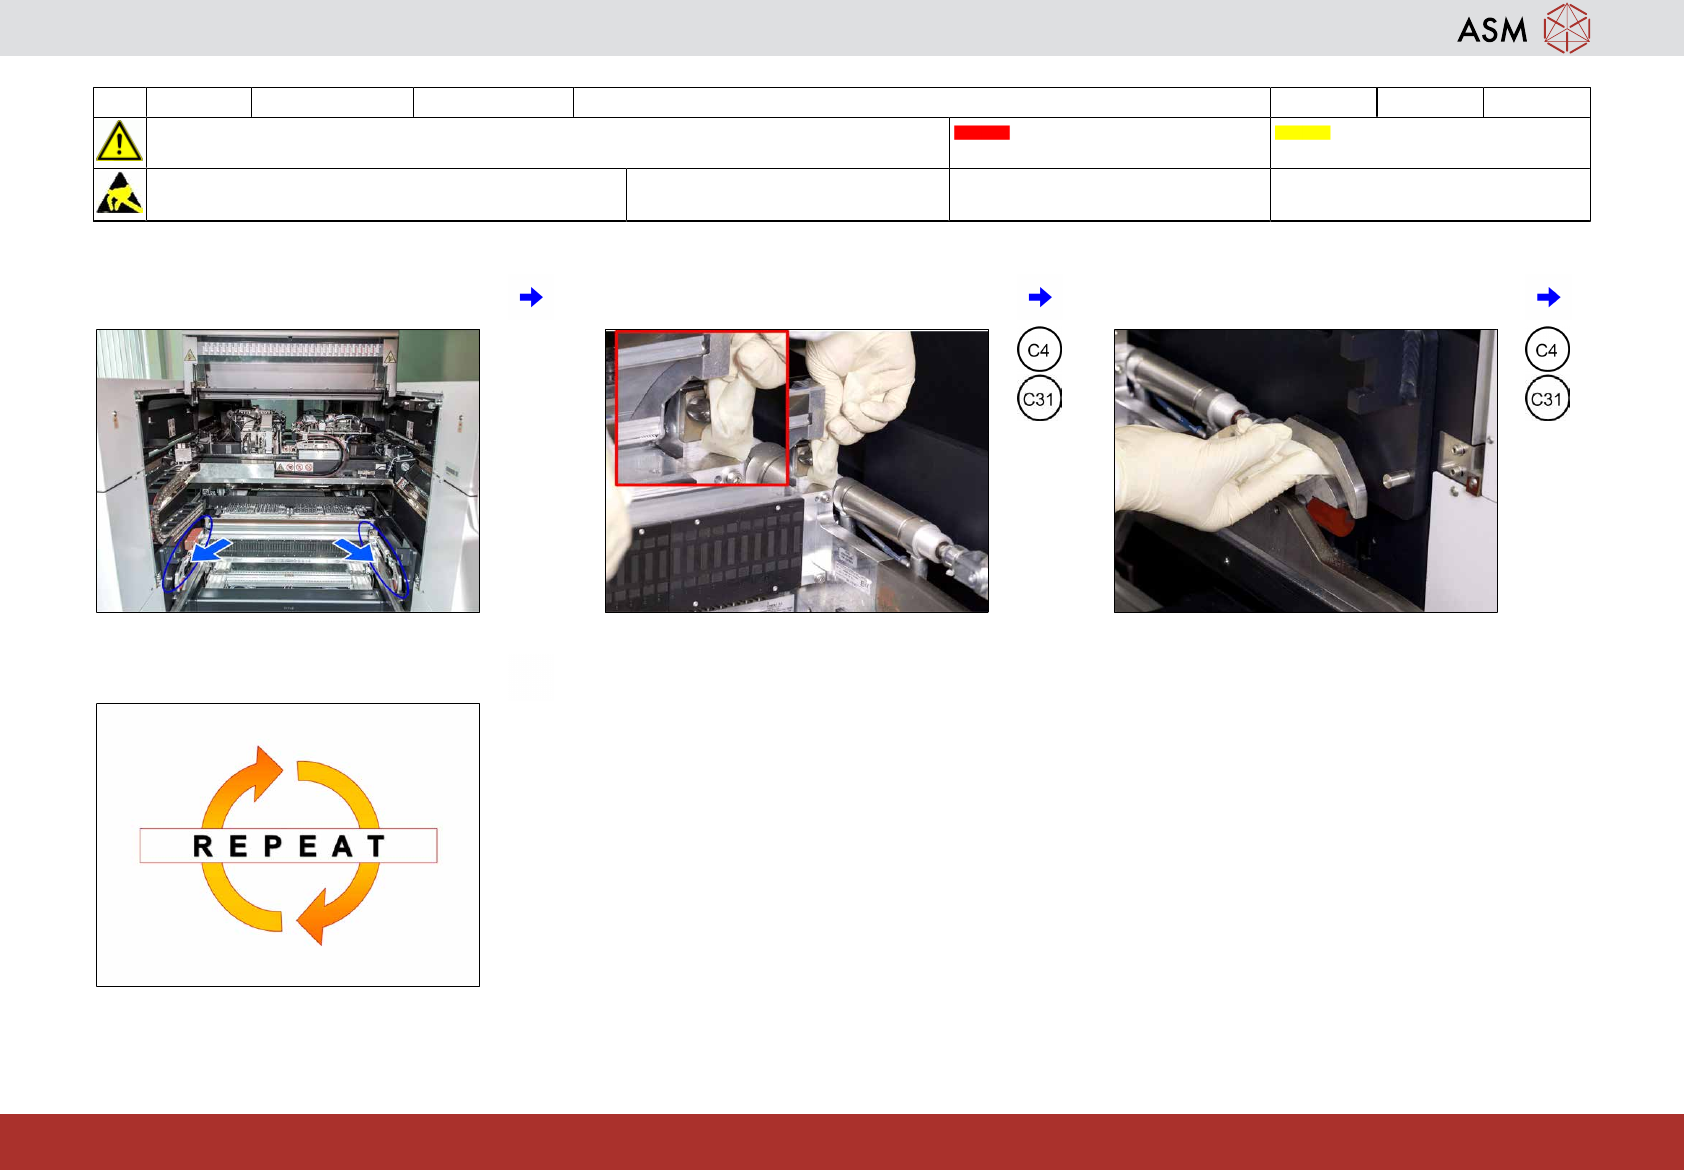
1 Location of the subassemblies to be main-
tained.
2 Lubricate the engaging pin. 3 Lubricate the hooks at both sides.
4 Repeat all steps at the other location.