YSP10_Mainte_E.pdf - 第67页
2. Monthly maintenance 3-20 Chapter 3 Periodic maintenance items █ Replacing the air filter and the oilmist filter This section describes the procedures for the replacing of each filter , which is removed their filter cu…

2. Monthly maintenance
3-19
Chapter 3 Periodic maintenance items
5
Reattach the lter cup.
Oil mist filter
Align the button of the cup to the position
where the cup detached, then push the cup
upward and turn to right until it clicked.
Air filter
Set the filter element with adapters into cup.
Then insert the cup upward and turn to right.
c
CAUTION
Make sure not to drop the O-rings for cup when attaching
the filters and cups.
6
Reconnect the air coupler and check
that no air is leaking.
2. Monthly maintenance
3-20
Chapter 3 Periodic maintenance items
█
Replacing the air filter and the oilmist filter
This section describes the procedures for the replacing of each filter, which is removed their filter cup,
showing above.
1
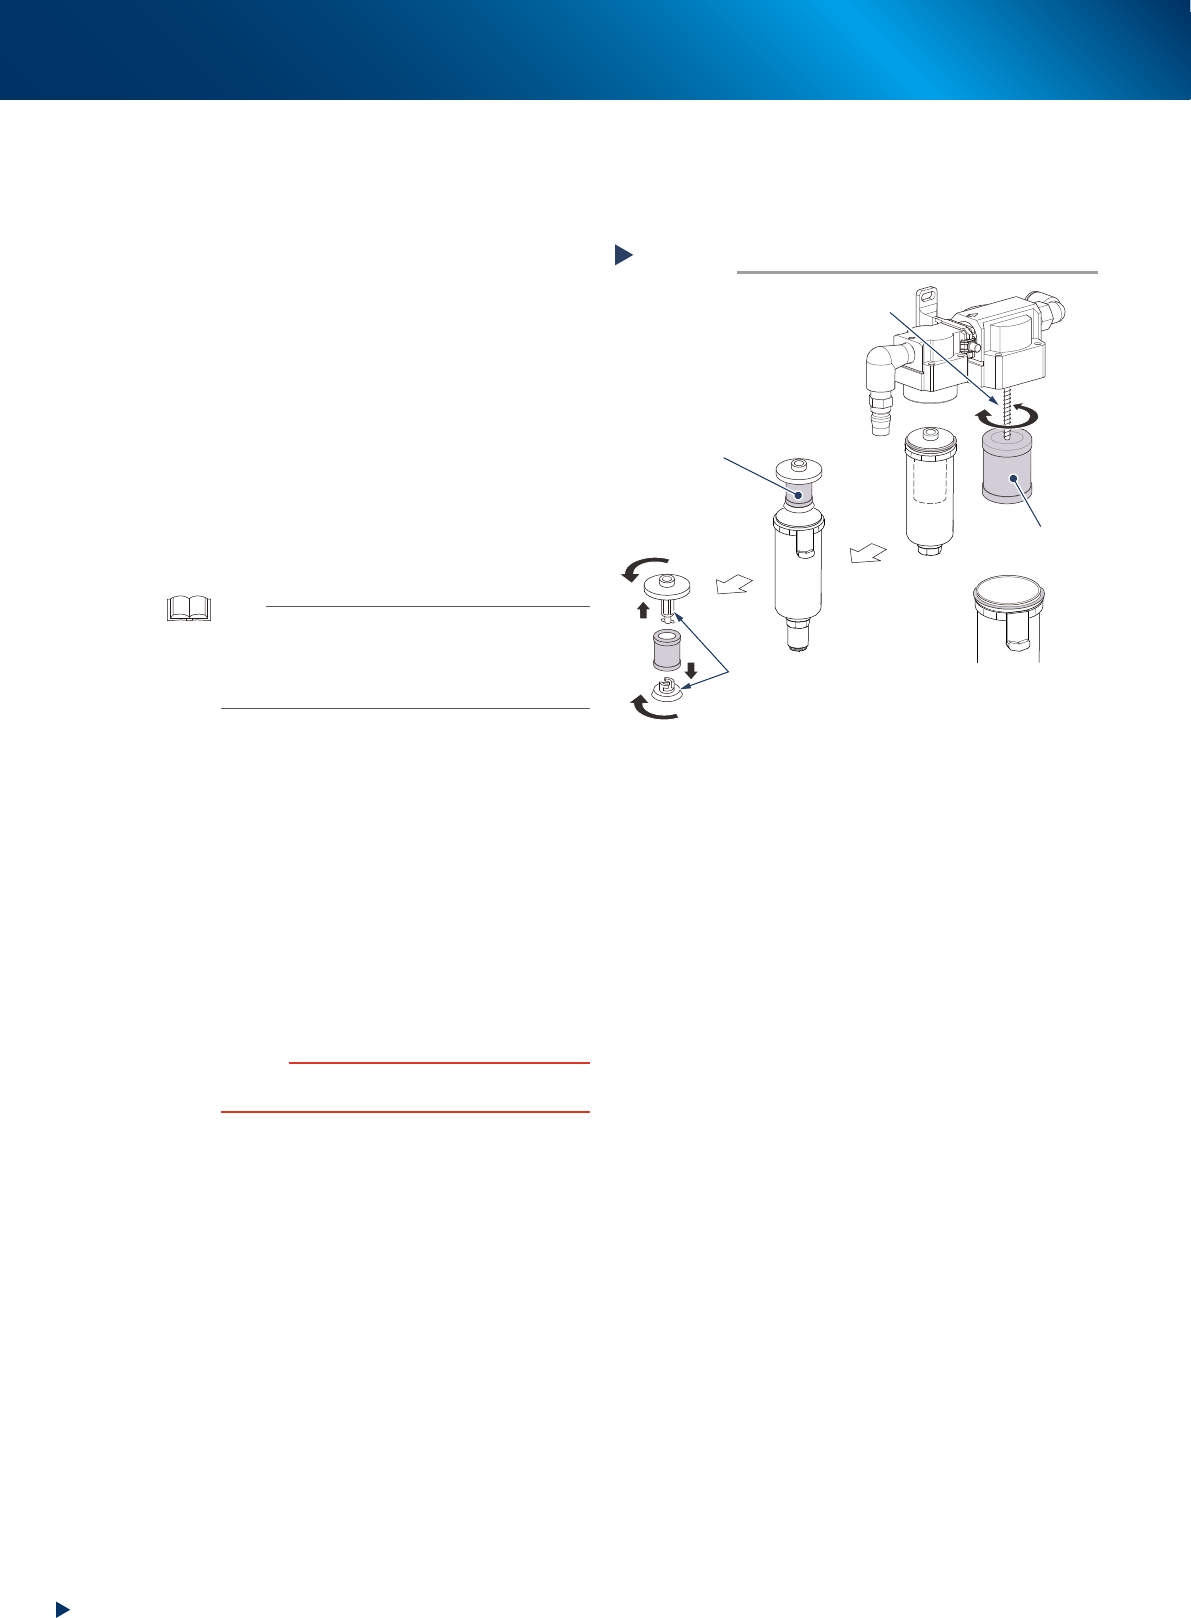
Deattach the lter elements.
Detaching the oil mist filter element
Oil mist filter element is attached by the screw
which is a part of machine. Rotate the oil mist
filter to remove it.
Detaching the air filter element
Air filter element is set inside the cup in
between the upper and lower adopter. Turn the
adapters to detach the air filter elements like
right figure.
2
Check the lter element status.
Check that no dirt or clogging is in the filter
element. Replace it with new one if it is dirty.
TIP
Parts number of filter elements.
-Air filter element
KLC-M8506-00X FILTER ELEMENT
-Oil mist filter element
LG0-M86A2-10X FILTER ELEMENT
3
Reattach the lter emelents to their
original positions by reversing
procedure of Step1.
4
Reattach the lter cup.
Oil mist filter
1. Align the button of the cup to the position
where the cup detached, then push the cup
upward.
2. Turn the cup to right until it clicked.
Air filter
Insert the cup upward and turn to right.
c
CAUTION
Make sure not to drop the O-rings for cup when attaching
the filters and cups.
5
Reconnect the air coupler and check
that no air is leaking.
Ejecting the filter element
Step 1
Screw
Oil mist
filter element
Air filter
element
Adapter
Attach
Detach
53324-KMJ-00
3. 3-month maintenance
3-21
Chapter 3 Periodic maintenance items
3. 3-month maintenance
The items which should be made periodic inspection and maintenance every 3 month are shown below.
It is also recommended to shorten the maintenance interval depending on the operating time or the
environment of the machine.
3.1 W-axis
This section describes the way of cleaning and lubrication for the conveyor automatic width axes (W1-axis,
W2-axis, and W3-axis) of YSP10. W1-axis and W3-axis are of the entrance or exit, and W2-axis is of the
center conveyor.
3.1.1 Cleaning and lubrication of W-axis
1
Prepare for work.
e
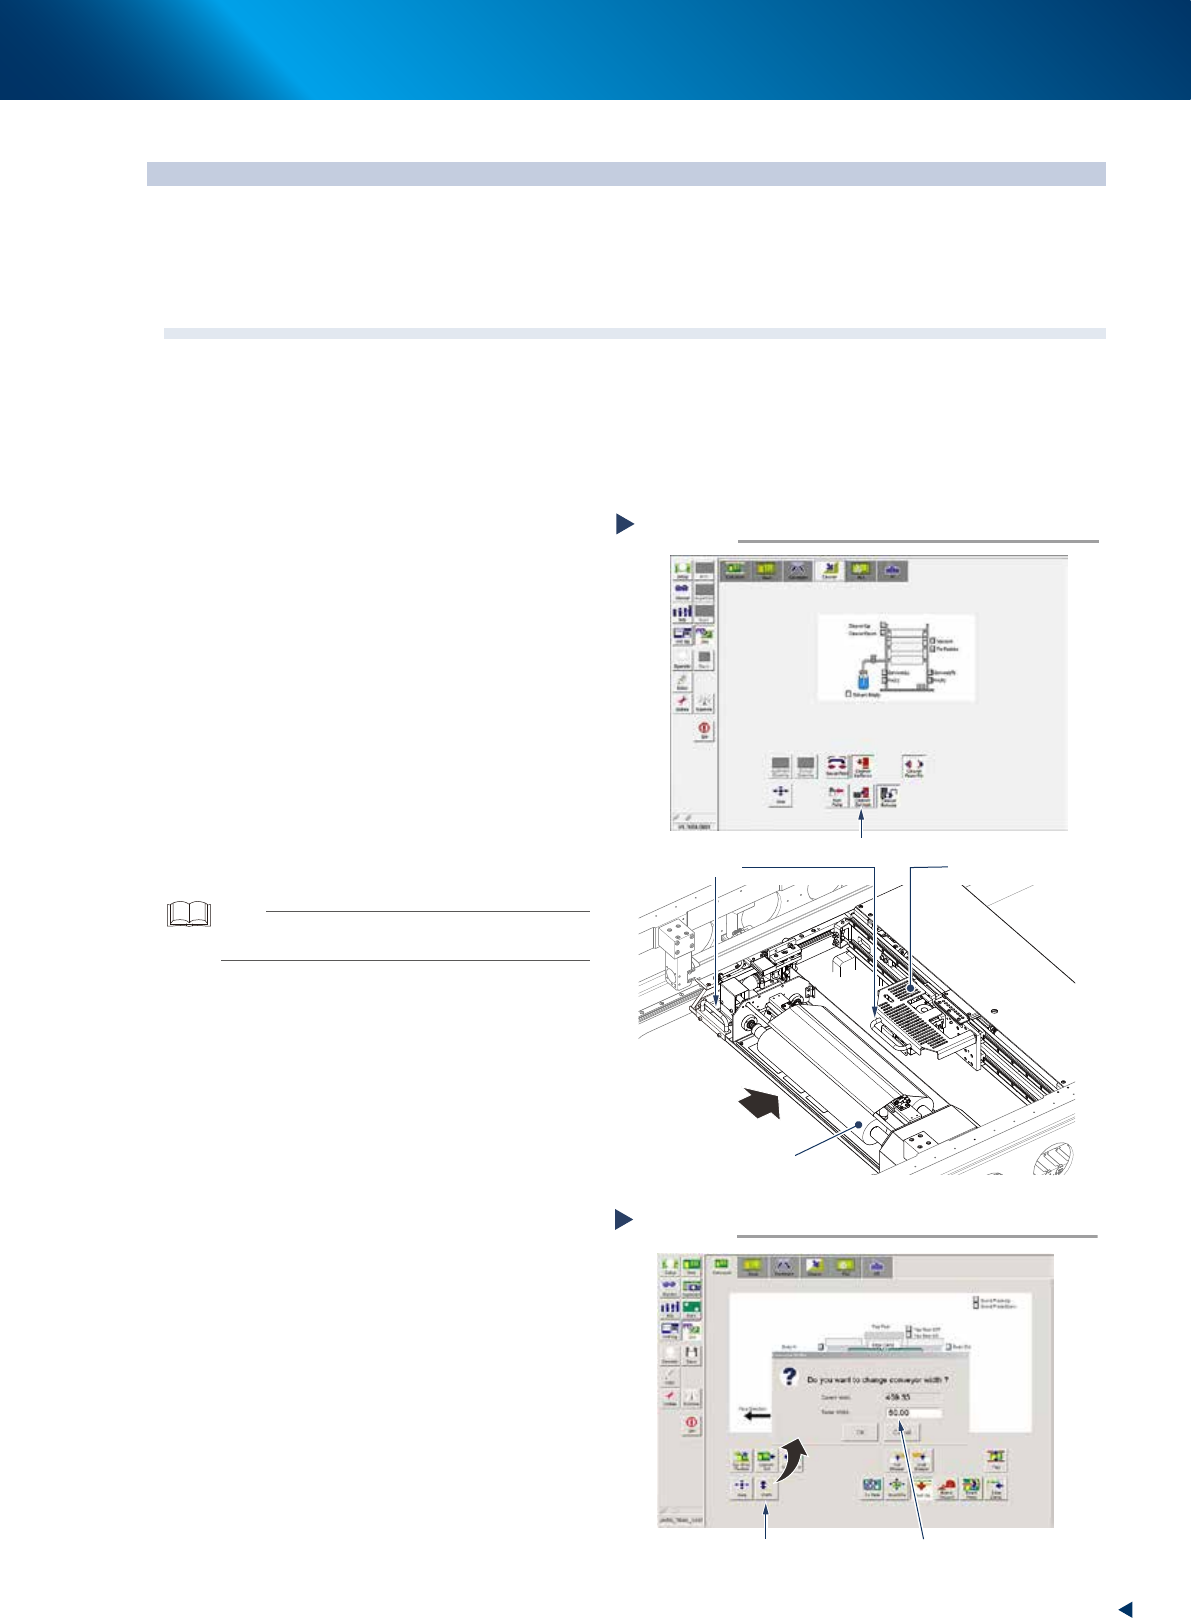
1. Press the [Cleaner Connect] button on [Unit]
- [Cleaner] screen to connect the cleaning
unit and camera unit.
2. Press the emergency stop button and open
machine safety cover and the lower door
and lift up the maintenance door.
3. Move the squeegee unit to rear side of
machine grabbing its handle.
4. Move the cleaning unit and camera unit to
rear side grabbing one of their handle.
2
Remove all the backup pins or the
board support jigs on the matrix plate.
3
Read voluntary board data.
TIP
Reading a board data makes it possible to change the
conveyor width.
4
Change the conveyor width to its
minimum width.
1. Close 3 doors which opened at Step1 to
cancel the emergency stop.
2. Press the [Width] button on the [Unit] -
[Conveyor] tab screen.
3. Input the minimum value of the conveyor
width "50mm" in the "Target width" box and
press the [OK] button.
Changing the conveyor width minimum
Step 4
Press the [Width] button Enter “50”
54305-KMJ-00
Moving cleaning unit and camera unit
Step 1
Press the [Cleaner Connect] button
Handle
Camera unit
Cleaning unit
Move to machine rear side
54304-KMJ-10