YSP10_Mainte_E.pdf - 第88页
4. 6-month maintenance 3-41 Chapter 3 Periodic maintenance items 6 Inject the X2-axis b all sc rews. 1. Usi ng a grease gun (stan dard type nozzle), inject the prescribed g rease (NSL) at the grease nipp les of the X2-ax…
4. 6-month maintenance
3-40
Chapter 3 Periodic maintenance items
2
Clean the X1-axis and Y-axis by the work
from front side.
1. Open the lower door.
2. Wipe the grease and soiling from the
X1-axis ball screw (1 position) and its guide
(2 positions), and Y direction guide with
lint-free cloth.
3. Then wipe the grease and soiling from the
Y-axis ball screw (1 position) and its guide (2
positions), and Y direction guide.
n
NOTE
Carefully wipe the lead grooves and the guide grooves of
the ball screw. Additionally, make sure that any dirt is not
produced.
3
Inject the X1-axis and Y-axis ball screws.
1. Using a grease gun (standard type nozzle),
inject the prescribed grease (NSL) at the
grease nipples of the ball screw, until the
grease seep out.
2. Then wipe away excess grease to clean.
4
Apply grease to X1-axis and Y-axis
guides.
1. Apply the specified grease (NSL) by hand
uniformly over the surfaces of the X1-axis
guides (2 positions) and the Y direction
guides (2 positions).
2. Then apply the grease uniformly over the
surfaces of the Y-axis guides (2 positions)
and the X direction guides (2 positions).
5
Clean the X2-axis by the work from rear
side.
1. Wipe away the grease and soiling from the
X2-axis ball screw (1 position) and its guide
(2 positions), and Y direction guide (2
positions) using a lint-free cloth.
2. Then wipe the grease and soiling from the X
direction guide and Y direction guide (2
positions each).
n
NOTE
Carefully wipe the lead grooves and the guide grooves of
the ball screw. Additionally, make sure that any dirt is not
produced.
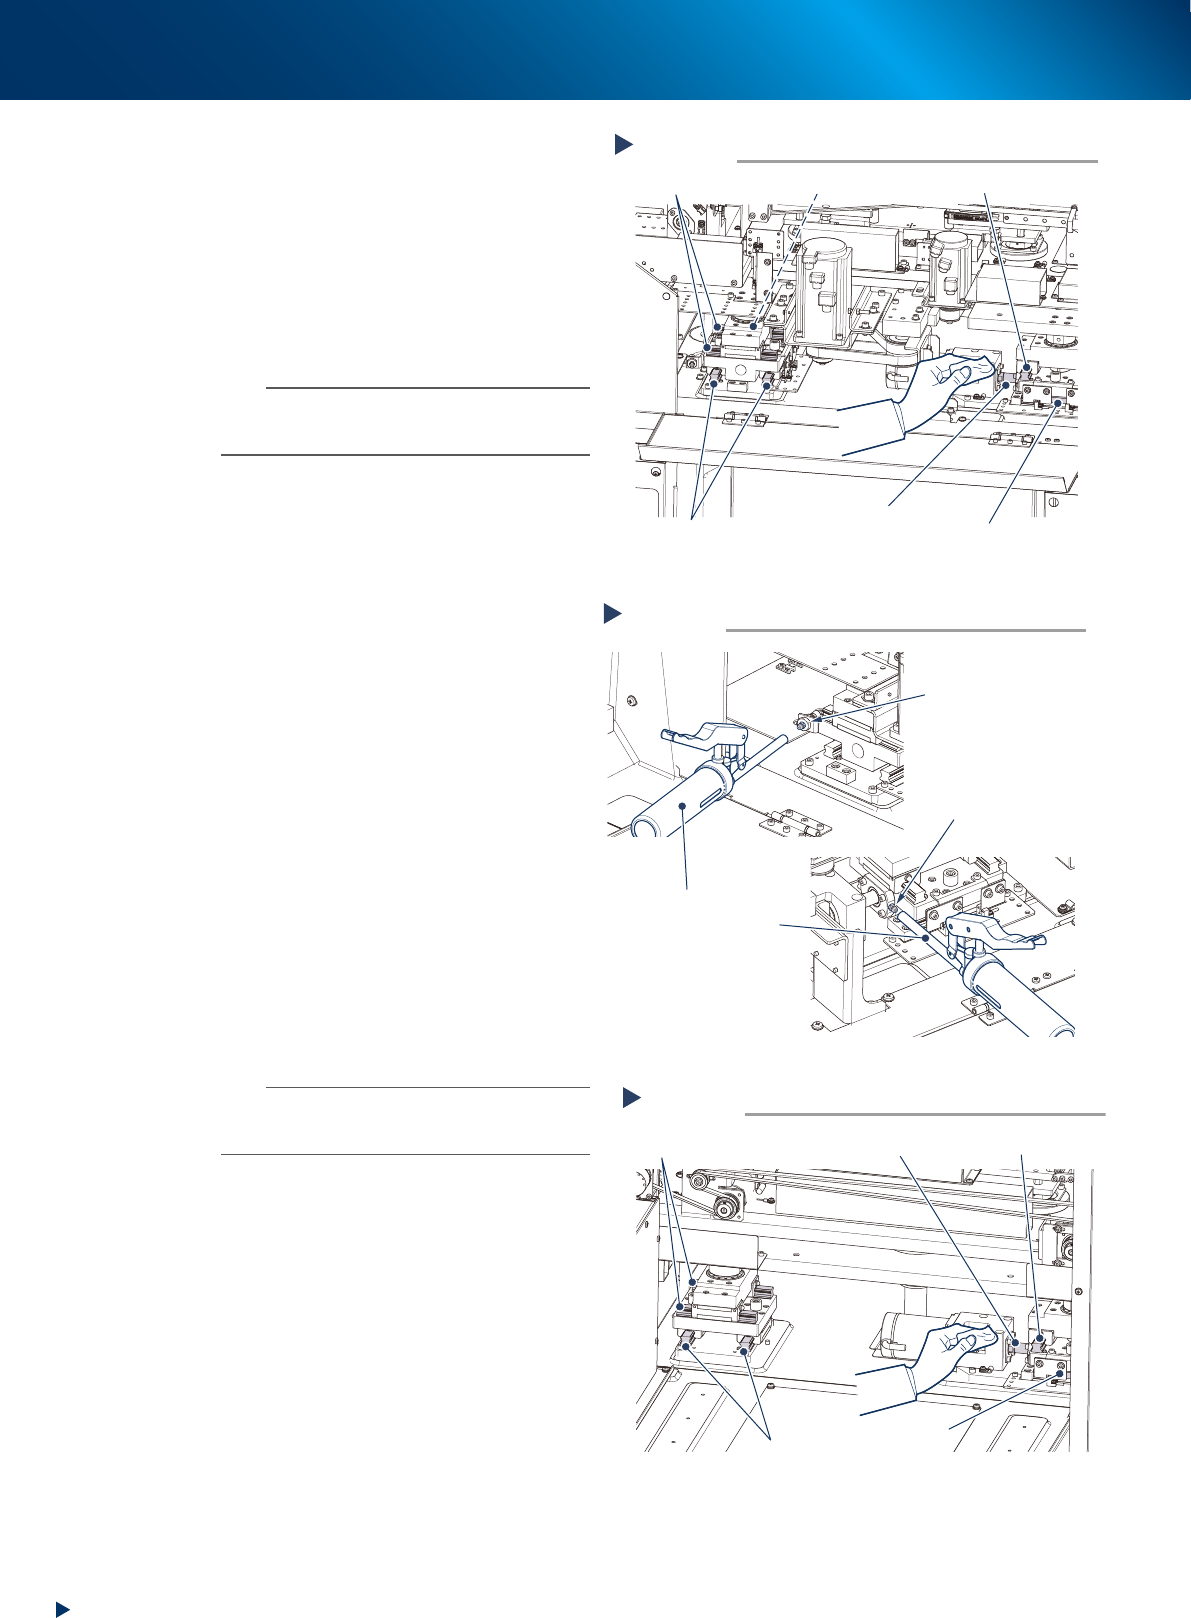
Cleaning the XY-axis from front side
Step 2
Y direction guide
X direction guides
X1-axis ball screw
Y-axis ball screw
X1-axis guide
Y-axis guides
53352-KMJ-00
Lubricating X1-axis and Y-axis ball screws
Step 3
Grease gun
(standard type nozzle)
Y-axis grease nipple
X1-axis grease nipple
53353-KMJ-00
Cleaning of X-axis (of its rear side)
Step 5
Y direction guides
Y direction guide
X direction guides
X2-axis ball screw
X2-axis guide
53354-KMJ-00
4. 6-month maintenance
3-41
Chapter 3 Periodic maintenance items
6
Inject the X2-axis ball screws.
1. Using a grease gun (standard type nozzle),
inject the prescribed grease (NSL) at the
grease nipples of the X2-axis ball screw,
until the grease seep out.
2. Then wipe away excess grease to clean.
7
Apply grease to X2-axis and Y direction
guides.
1. Apply the specified grease (NSL) by hand
uniformly over the surfaces of the X2-axis
guides (2 positions) and the Y direction
guides (2 positions).
2. Then apply the grease uniformly over the
surfaces of the Y-axis guides (2 positions)
and the X direction guides (2 positions).
8
Reattach machine covers to their
original position.
1. Close the lower door of machine front.
2. Return machine rear cover.
• Standard type:
Reattach machine rear cover to its original
position using Phillips screwdriver.
• With automatic mask exchange unit:
• Close upper rear cover.
• Reattach center rear cover using Phillips
screwdriver.
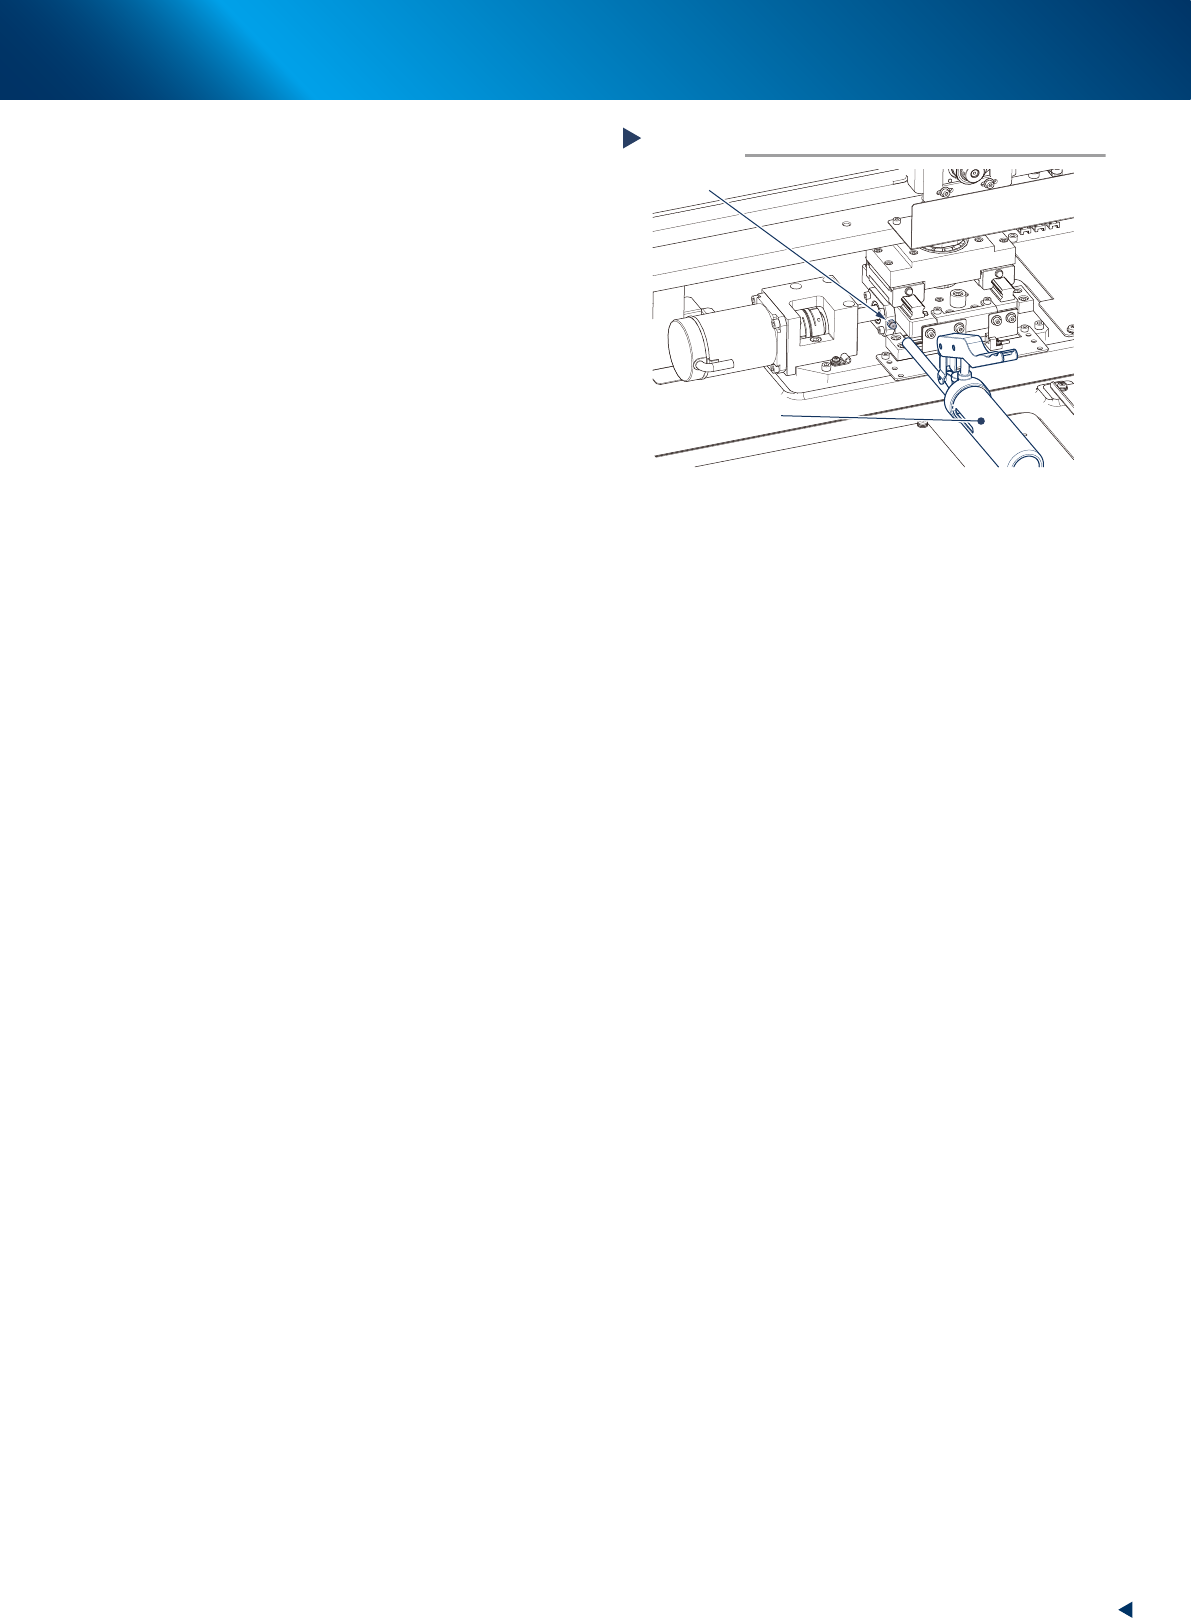
Lubricating X2-axis ball screw
Step 6
Grease gun
(standard type nozzle)
X2-axis grease nipple
53355-KMJ-00