YSP10_Mainte_E.pdf - 第96页
3. Conveyor transfer belt 4-7 Chapter 4 The parts to be replaced and its procedures █ Replace the entrance/exit conveyor belt (or extension conveyor belt) T he replacement procedure of entrance/exit con veyor belt (or ex…
3. Conveyor transfer belt
4-6
Chapter 4 The parts to be replaced and its procedures
3
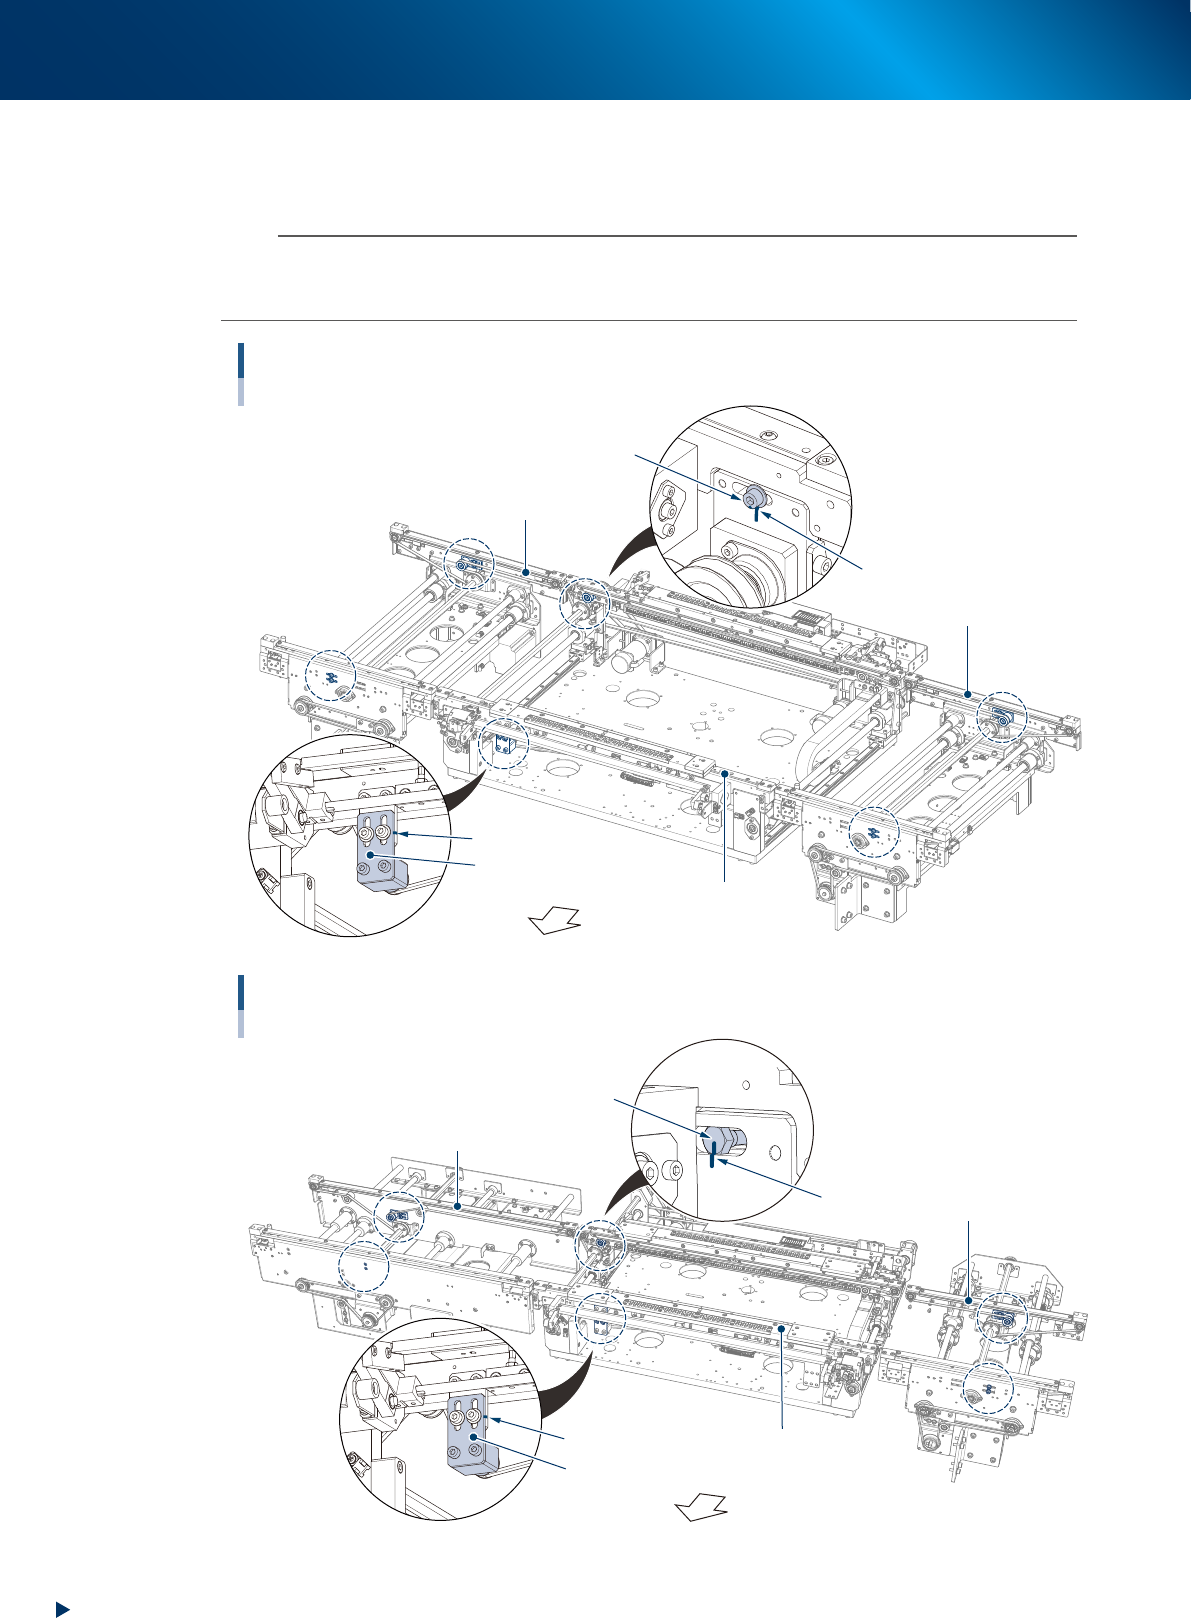
Using the permanent marker, mark the positions of the pulley bracket or pulley
mounting bolt which stay at the tension adjustment position shown below before
loosening the belt tension.
n
NOTE
As to tension pulley and pulley bracket:
The pulley on the moving side conveyor of center conveyor (both standard and L650 type) and the fixed side conveyor of
entrance/exit conveyor is directly fixed by the bolt. The pulley position of other conveyor is adjusted by the pulley bracket.
Tension marking points (R to L flow, standard conveyor type)
Circled by dash line (6 points)
Pulley fixing bolt
Pulley bracket
Marking
Fixed side
Moving side
Machine front side
Marking
Exit conveyor
Center conveyor
Entrance conveyor
53422-KMJ-00
Bolt on the opposite side of the pulley
Tension marking points (R to L flow, L650 type machine with extention conveyor)
Circled by dash line (6 points)
Pulley bracket
Extension conveyor of exit side
Marking
Fixed side
Moving side
Machine front side
Marking
Entrance conveyor
Center conveyor
53440-KMJ-10
3. Conveyor transfer belt
4-7
Chapter 4 The parts to be replaced and its procedures
█
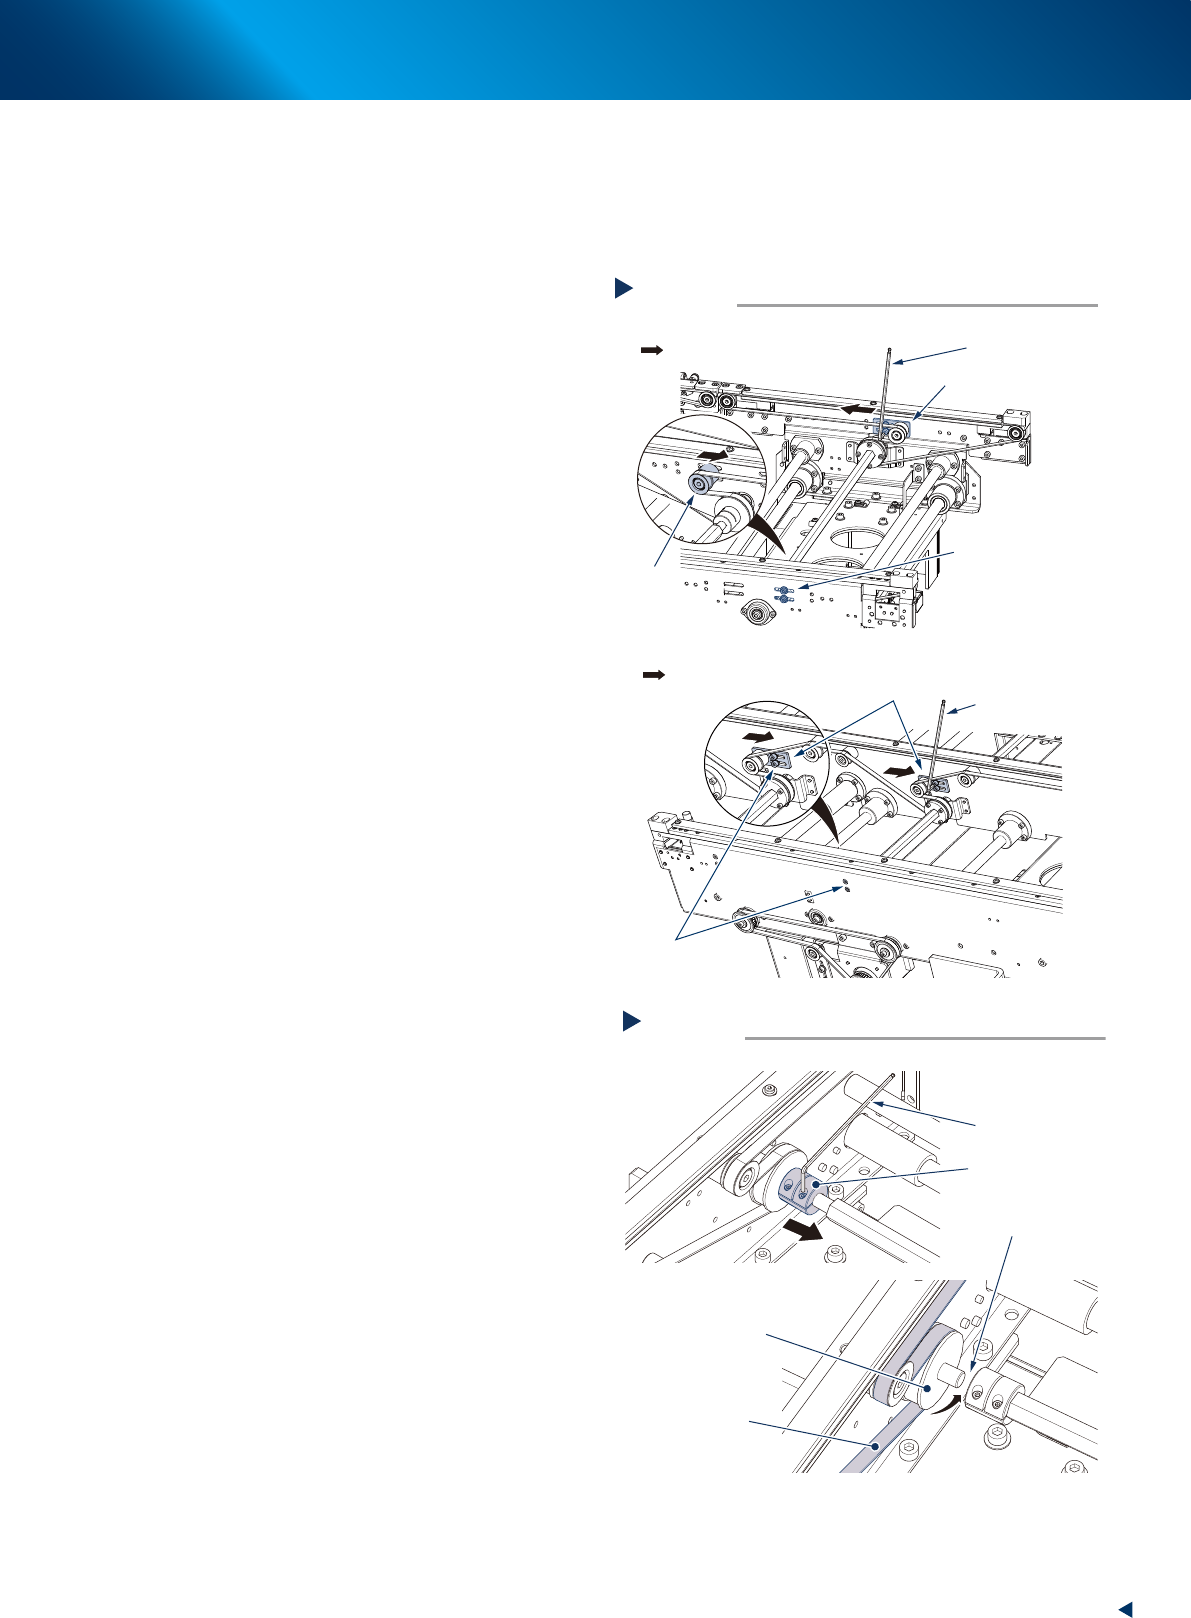
Replace the entrance/exit conveyor belt (or extension conveyor belt)
The replacement procedure of entrance/exit conveyor belt (or extension conveyor belt) is different from that
of center conveyor belt. This section describes each procedure from Step4. See "Replace the center conveyor
belt" described later to replace the center conveyor belt.
4
Using the 3mm hex wrench, loosen the
xing bolt of the tension plate and slide
it to the belt loosening direction.
5
Remove the belt.
1. Loosen the coupling fixing bolt with the 2mm
hex wrench and slide the coupling to the
rear side of the machine.
2. Remove the belt from the pulley and pull it
through the gap between the pulley and the
shaft.
Loosening belts
Step 4
Pulley mounting bolts
Pulley bracket
Direction to loosen belt
Pulley bracket
Pulley
■ Entrance/exit conveyor
■ Extension conveyor of exit side
Hexagon wrench
(3mm)
Hexagon wrench
(3mm)
Pulley bracket
mounting bolts
Direction to loosen belt
53423-KMJ-10
Remove the belt
Step 5
Belt to be removed
Driving pulley
Coupling
Gap
Hexagon wrench
(2mm)
53424-KMJ-00

3. Conveyor transfer belt
4-8
Chapter 4 The parts to be replaced and its procedures
6
Clean the belt guides and the pulleys.
1. Use a vacuum assembly (option) to suction
the belt wear debris on the belt guides and
sensors, etc.
2. Use a plastic spatula or similar tool to
remove the belt wear debris adhering to the
outer peripheral surface of the pulleys.
3. Use a brush or similar tool to remove the
belt wear debris caught in the belt guides.
c
CAUTION
Use plastic spatula or brush to avoid scratching the pulley
or guide.
c
CAUTION
Do not use any solvent (such as IPA) except of heavy
soiling. Use absolute ethanol and make sure not to pour
the solvent over the pulley bearing upon cleaning.
7
Attach the new belt by the reversed
procedure of Step4 and Step5.
1. Attach the new belt temporarily while putting
it on the pulley.
2. Reattach the coupling and tighten the bolt.
3. Move the pulley bracket (or pulley) to the
marked position and tighten the bolt
temporarily.
8
Measure the belt tension at the tension
measurement point with the tension
meter as shown on the right illustration.
►
The belt tension standard value
For entrance/exit conveyor:
17.5 to 28N (110 to 140Hz)
For extension conveyor:
17.5 to 28N (235 to 295Hz)
►
Set values (tension meter)
Weight: 1.2(g/m, mm)
Width: 7(mm)
Span (entrance/exit): 198(mm)
Span (extension): 94(mm)
9
According to the results of the belt
tension measurement, change the
tension adjustment plate position to
acquire the value in the optimal range.
Fix the temporarily tightened bolt firmly after
adjustment.
c
CAUTION
The tightening torque of the mouting bolt of entrance/exit
bolt and extension conveyor of exit side are follwing.
Make sure not to tighten the bolts excessively.
Pulley mounting bolt : 3.8N·m
Pulley bracket mounting bolt : 3.8N·m
Cleaning the belt guides and the pulleys
Step 6
Spatula (made of plastic)
Outer peripheral surface
of the pulleys
Brush
Belt guide
Belt wear debris
sticking to pulley
53425-KMJ-00
Tension measurement
Step 8
:Tension measurement point
■ Entrance/exit conveyor
:Tension measurement point
■ Extension conveyor of exit side
SPAN (94mm)
SPAN (198mm)
53426-KMJ-10