2500_Users_Manual-.pdf - 第104页
Tasks and Kits Options Pull-down Menu Figure 3-18 Commands Available from the Options Pull-down Menu Programmer Type and Handler Type Handler Sorting Error Limit ProMaster Retries... Many of the commands and options disp…
Tasks
and
Kits
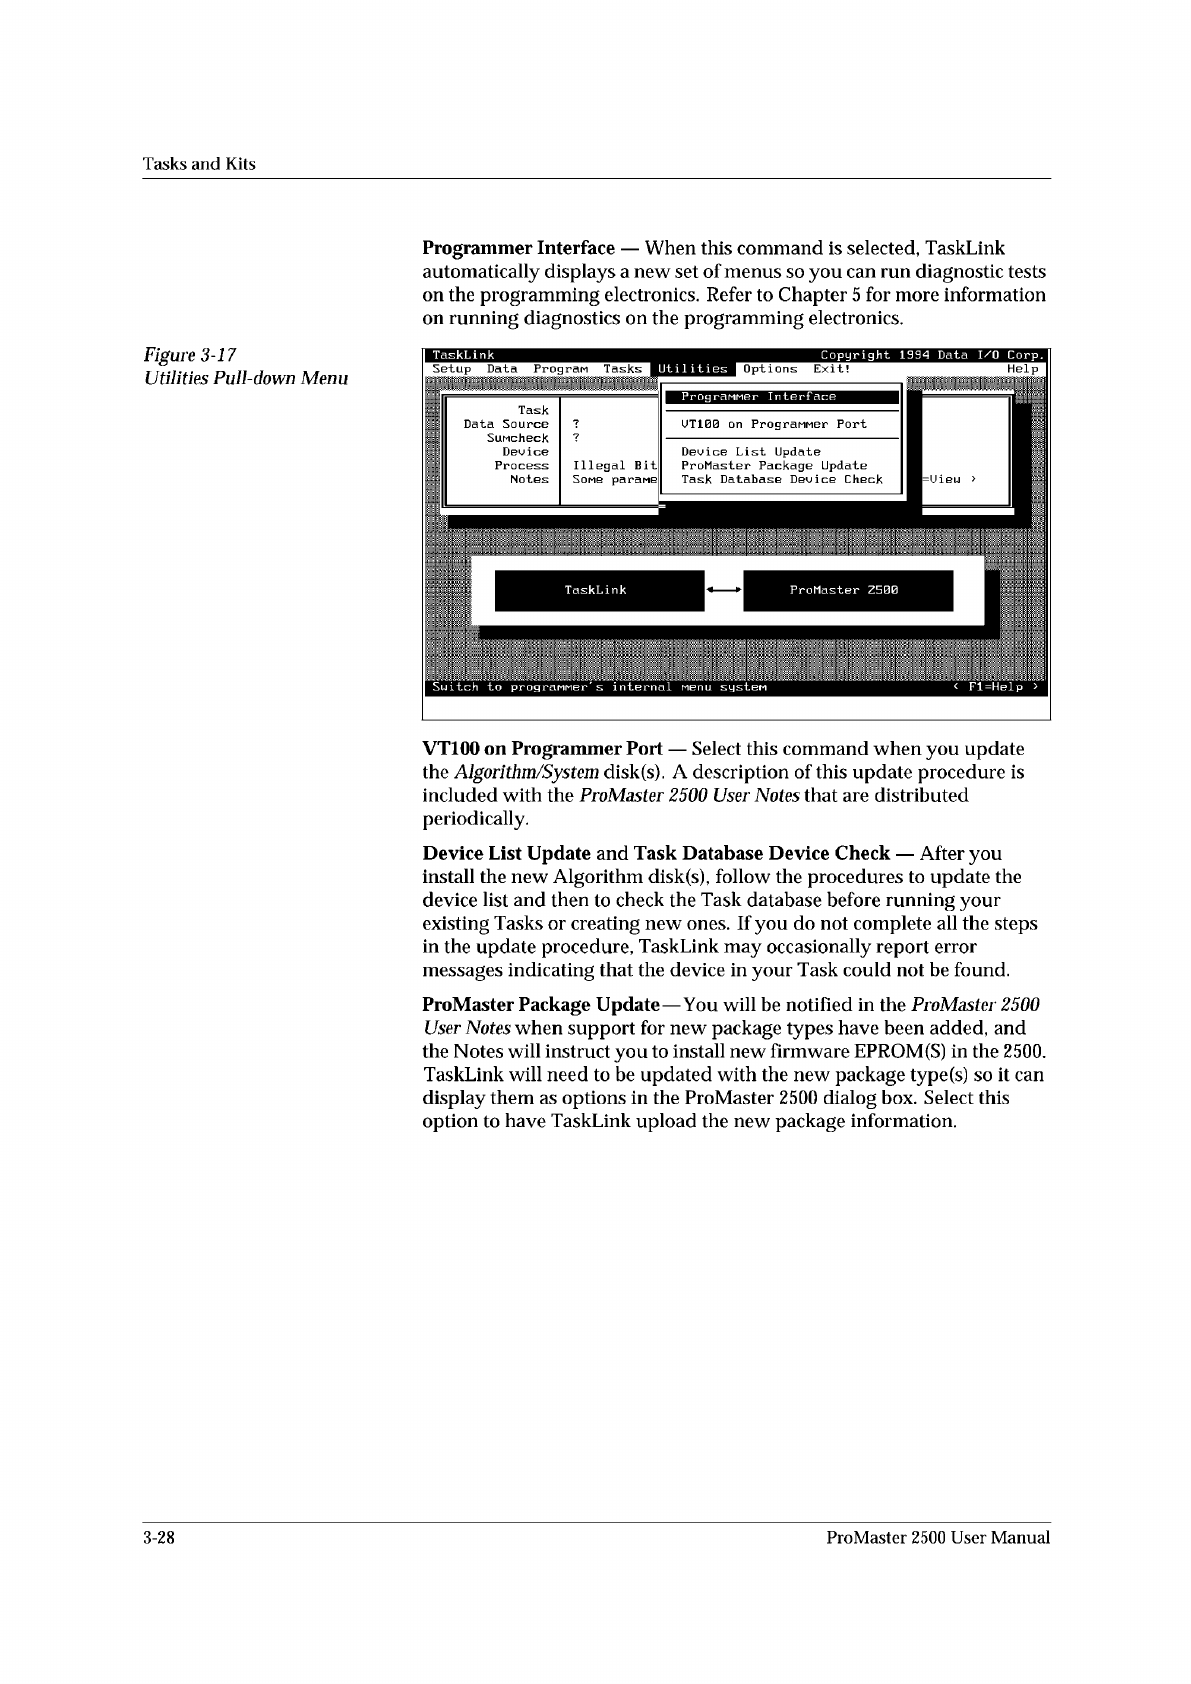
Figure
3-17
Utilities
Pull-down
Menu
Programmer
Interface
—
When
this
command
is
selected,
TaskLink
automatically
displays
a
new
set
of
menus
so
you
can
run
diagnostic
tests
on
the
programming
electronics.
Refer
to
Chapter
5
for
more
information
on
running
diagnostics
on
the
programming
electronics.
VT100
on
Programmer
Port
—
Select
this
command
when
you
update
the
Algori
thm/System
disk(s).
A
description
of
this
update
procedure
is
included
with
the
ProMaster
2500
User
Notes
that
are
distributed
periodically.
Device
List
Update
and
Task
Database
Device
Check
—
After
you
install
the
new
Algorithm
disk(s),
follow
the
procedures
to
update
the
device
list
and
then
to
check
the
Task
database
before
running
your
existing
Tasks
or
creating
new
ones.
If
you
do
not
complete
all
the
steps
in
the
update
procedure,
TaskLink
may
occasionally
report
error
messages
indicating
that
the
device
in
your
Task
could
not
be
found.
ProMaster
Package
Update
—
You
will
be
notified
in
the
ProMaster
2500
User
Notes
when
support
for
new
package
types
have
been
added,
and
the
Notes
will
instruct
you
to
install
new
firmware
EPROM
(S)
in
the
2500.
TaskLink
will
need
to
be
updated
with
the
new
package
type(s)
so
it
can
display
them
as
options
in
the
ProMaster
2500
dialog
box.
Select
this
option
to
have
TaskLink
upload
the
new
package
information.
3-28
ProMaster
2500
User
Manual
Tasks
and
Kits
Options
Pull-down
Menu
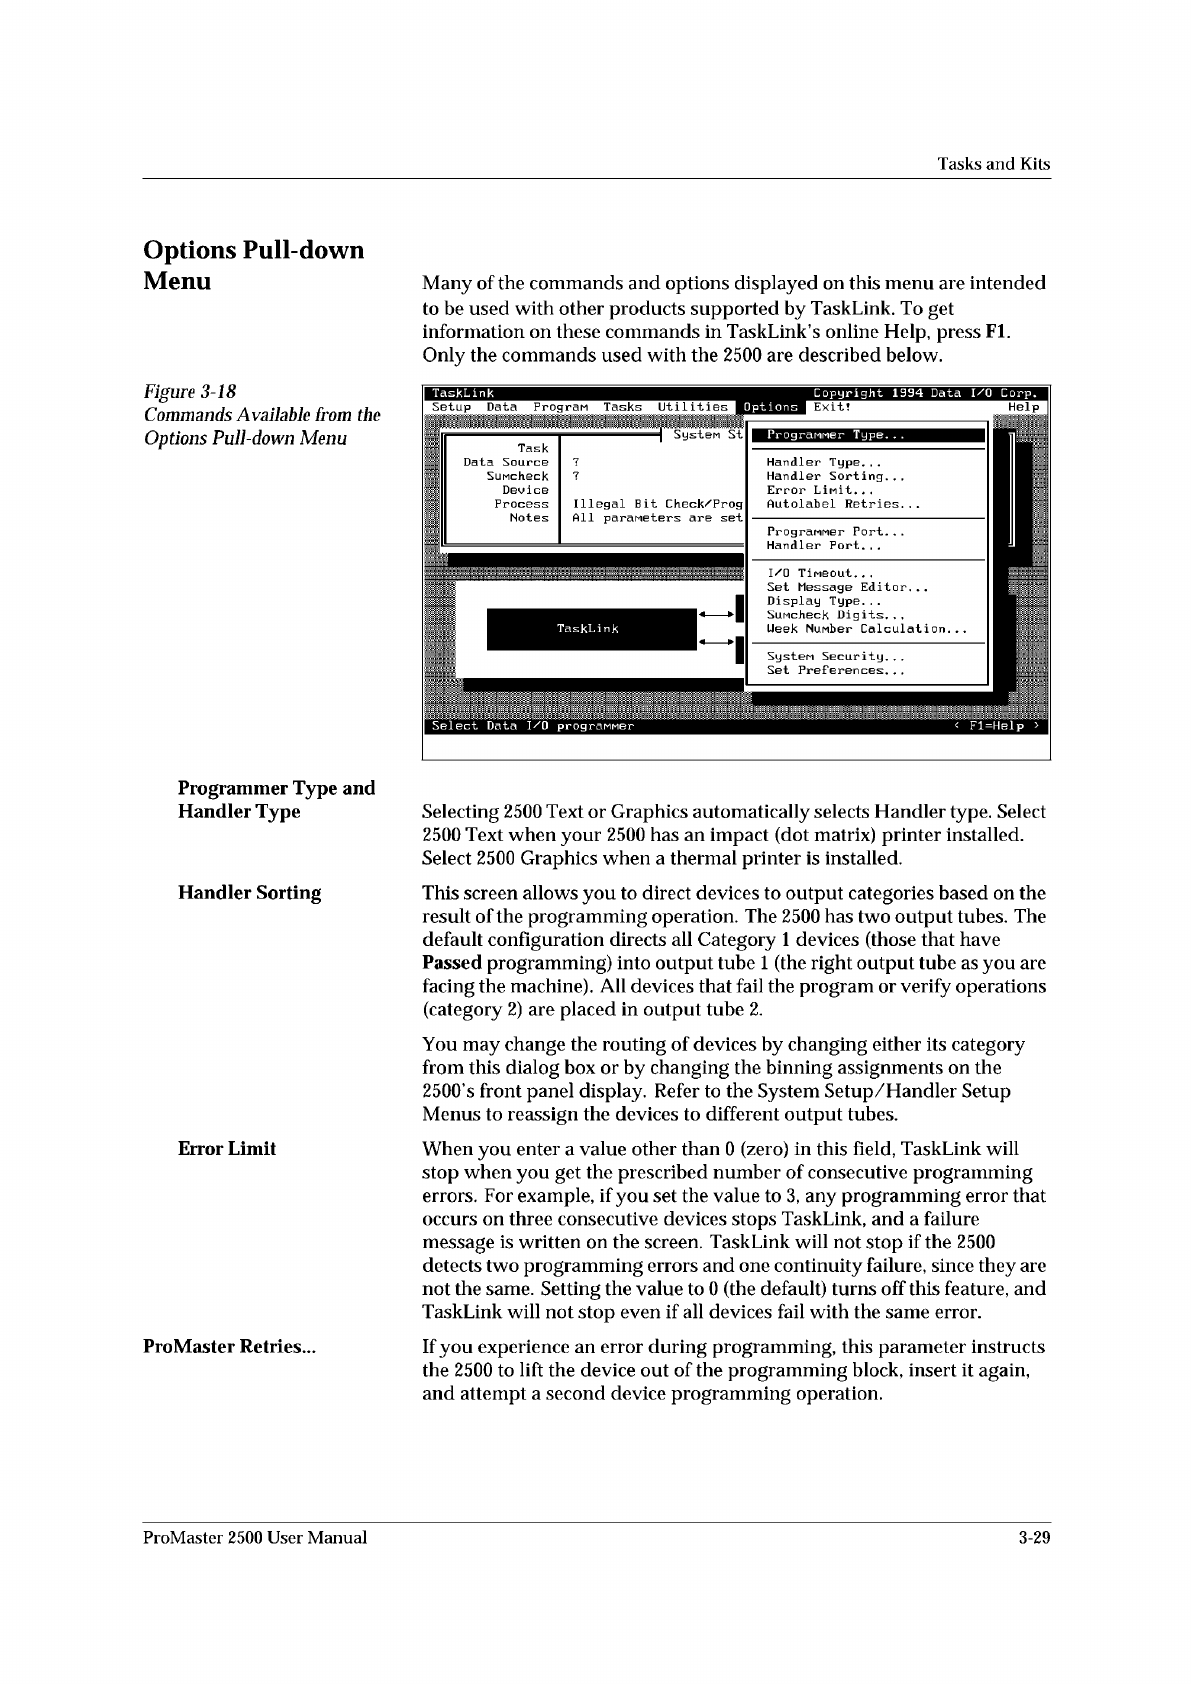
Figure
3-18
Commands
Available
from
the
Options
Pull-down
Menu
Programmer
Type
and
Handler
Type
Handler
Sorting
Error
Limit
ProMaster
Retries...
Many
of
the
commands
and
options
displayed
on
this
menu
are
intended
to
be
used
with
other
products
supported
by
TaskLink.
To
get
information
on
these
commands
in
TaskLink's
online
Help,
press
Fl.
Only
the
commands
used
with
the
2500
are
described
below.
Selecting
2500
Text
or
Graphics
automatically
selects
Handler
type.
Select
2500
Text
when
your
2500
has
an
impact
(dot
matrix)
printer
installed.
Select
2500
Graphics
when
a
thermal
printer
is
installed.
This
screen
allows
you
to
direct
devices
to
output
categories
based
on
the
result
of
the
programming
operation.
The
2500
has
two
output
tubes.
The
default
configuration
directs
all
Category
1
devices
(those
that
have
Passed
programming)
into
output
tube
1
(the
right
output
tube
as
you
are
facing
the
machine).
All
devices
that
fail
the
program
or
verify
operations
(category
2)
are
placed
in
output
tube
2.
You
may
change
the
routing
of
devices
by
changing
either
its
category
from
this
dialog
box
or
by
changing
the
binning
assignments
on
the
2500's
front
panel
display.
Refer
to
the
System
Setup/Handler
Setup
Menus
to
reassign
the
devices
to
different
output
tubes.
When
you
enter
a
value
other
than
0
(zero)
in
this
field,
TaskLink
will
stop
when
you
get
the
prescribed
number
of
consecutive
programming
errors.
For
example,
if
you
set
the
value
to
3,
any
programming
error
that
occurs
on
three
consecutive
devices
stops
TaskLink,
and
a
failure
message
is
written
on
the
screen.
TaskLink
will
not
stop
if
the
2500
detects
two
programming
errors
and
one
continuity
failure,
since
they
are
not
the
same.
Setting
the
value
to
0
(the
default)
turns
off
this
feature,
and
TaskLink
will
not
stop
even
if
all
devices
fail
with
the
same
error.
If
you
experience
an
error
during
programming,
this
parameter
instructs
the
2500
to
lift
the
device
out
of
the
programming
block,
insert
it
again,
and
attempt
a
second
device
programming
operation.
ProMaster
2500
User
Manual
3-29
↵
Tasks
and
Kits
Programmer
Port...
and
ProMaster
Port...
Set
Message
Editor...
System
Security
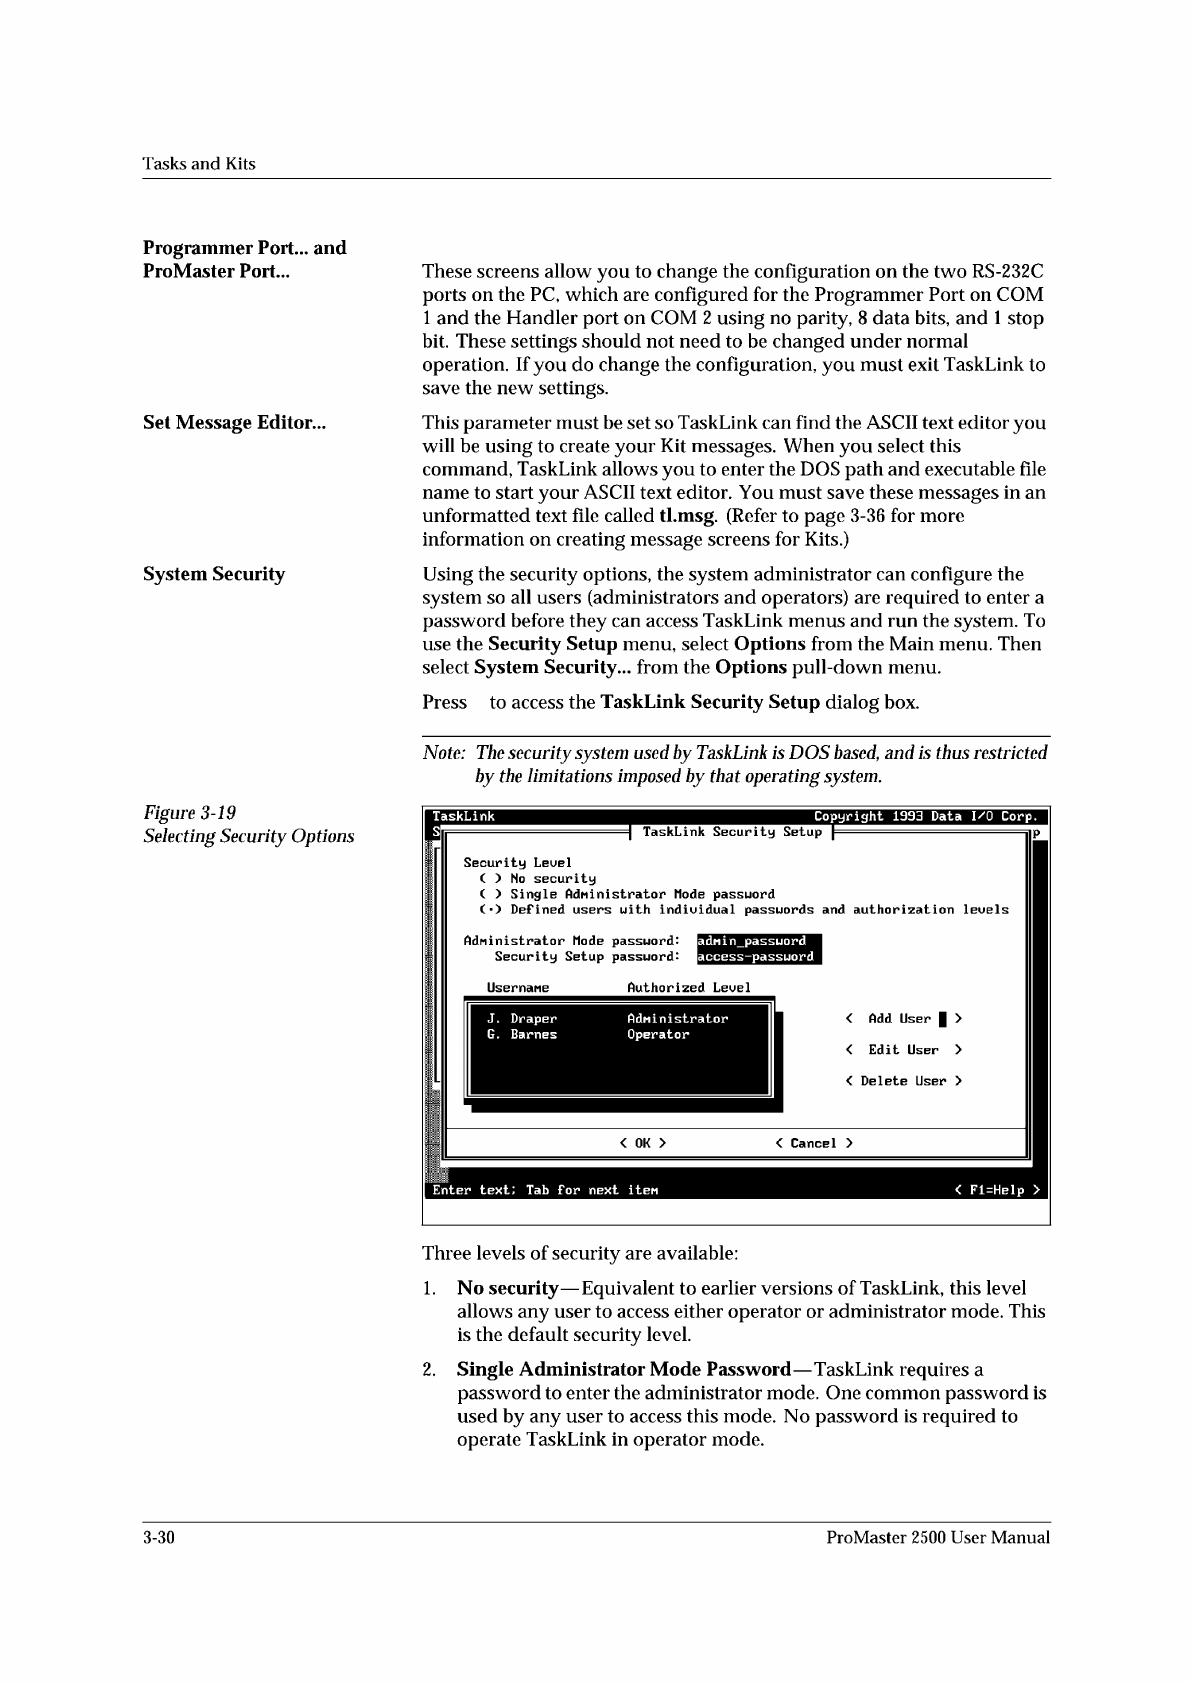
Figure
3-19
Selecting
Security
Options
These
screens
allow
you
to
change
the
configuration
on
the
two
RS-232C
ports
on
the
PC,
which
are
configured
for
the
Programmer
Port
on
COM
1
and
the
Handler
port
on
COM
2
using
no
parity,
8
data
bits,
and
1
stop
bit.
These
settings
should
not
need
to
be
changed
under
normal
operation.
If
you
do
change
the
configuration,
you
must
exit
TaskLink
to
save
the
new
settings.
This
parameter
must
be
set
so
TaskLink
can
find
the
ASCII
text
editor
you
will
be
using
to
create
your
Kit
messages.
When
you
select
this
command,
TaskLink
allows
you
to
enter
the
DOS
path
and
executable
file
name
to
start
your
ASCII
text
editor.
You
must
save
these
messages
in
an
unformatted
text
file
called
tl.msg.
(Refer
to
page
3-36
for
more
information
on
creating
message
screens
for
Kits.)
Using
the
security
options,
the
system
administrator
can
configure
the
system
so
all
users
(administrators
and
operators)
are
required
to
enter
a
password
before
they
can
access
TaskLink
menus
and
run
the
system.
To
use
the
Security
Setup
menu,
select
Options
from
the
Main
menu.
Then
select
System
Security...
from
the
Options
pull-down
menu.
Press
to
access
the
TaskLink
Security
Setup
dialog
box.
Note:
The
security
system
used
by
TaskLink
is
DOS
based,
and
is
f/ius
restricted
by
the
limitations
imposed
by
that
operating
system.
Three
levels
of
security
are
available:
1.
No
security
—
Equivalent
to
earlier
versions
of
TaskLink,
this
level
allows
any
user
to
access
either
operator
or
administrator
mode.
This
is
the
default
security
level.
2.
Single
Administrator
Mode
Password
—
TaskLink
requires
a
password
to
enter
the
administrator
mode.
One
common
password
is
used
by
any
user
to
access
this
mode.
No
password
is
required
to
operate
TaskLink
in
operator
mode.
3-30
ProMaster
2500
User
Manual