2500_Users_Manual-.pdf - 第178页
Preventive Maintenance Corrective Adjustments Changing Dot Matrix Printer Ribbon Cassette Refer to the procedure on page 5-57. Changing Thermal Printer Ribbon Refer to the procedure on page 5-59. Adjusting Dot Matrix Pri…
Preventive
Maintenance
Chuck
Is
Handling
Devices
Incorrectly
The
chuck
does
not
work
correctly
with
the
devices
you
are
using.
Ensure
that
you
are
using
the
correct
chuck
size
for
the
devices
you
are
processing.
Refer
to
the
chuck
selection
chart
on
page
4-16.
Replace
the
rubber
chuck
tip.
Confirm
that
high
and
low
air
pressure
gauges
are
set
to
the
correct
levels.
Make
sure
there
are
no
air
leaks.
Continuity
Failures
Try
a
device-related
operation
(program
or
verify)
using
a
device
from
another
manufacturer
to
make
sure
the
problem
is
associated
with
the
hardware
rather
than
the
device
or
device
algorithm.
Carefully
check
the
beam's
alignment
to
the
device
and
the
device's
alignment
to
the
programming
module
to
verify
that
the
chuck
tip
is
centered
on
the
device
(refer
to
the
device
alignment
procedure,
beginning
on
page
4-27).
Run
the
PE's
self
test.
Clean
the
contacts
on
the
programming
module.
CAUTION:
This
procedure
should
be
performed
only
by
a
qualified
service
technician.
The
contacts
may
need
to
be
replaced
by
a
service
technician.
Devices
Are
Not
Being
Picked
Up
Correctly
Carefully
check
the
beam's
alignment
to
the
device
and
the
device's
alignment
to
the
programming
module
to
verify
that
the
chuck
tip
is
centered
on
the
device
(refer
to
the
device
alignment
procedure,
beginning
on
page
4-27).
2500
Is
Not
Operating
and
Nothing
Is
Displayed
The
fuse
is
blown,
there
is
no
power,
or
the
power
supply
is
bad.
Check
the
main
fuse
(see
page
7-2),
AC
power,
power
cord
connection,
and
controller
board
LEDs.
Contact
Data
I/O
Support
(phone
numbers
listed
in
the
Preface)
for
specific
assistance.
Receiving
Tube
Overflows
The
number
of
parts
per
tube
is
incorrect
or
the
“Device
at
output
tube”
optic
is
bad.
Check
optic
diagnostic
tests
12
and
14.
Tube
was
removed
and
reinstalled
with
devices
in
it.
Insert
only
empty
tubes
in
output
tube
holders
while
a
Task
is
running.
The
number
of
parts-per-tube
parameter
on
the
TaskLink
screen
is
incorrect.
Check
the
2500's
display
for
the
number
of
parts
per
tube.
If
it
is
incorrect,
press
STOP
and
LOWER
CASE
+
T
on
the
2500's
keyboard.
Change
the
part
count
on
the
keyboard
if
it
is
incorrect.
Press
ENTER
and
then
START
to
continue
running
the
Task.
ProMaster
2500
User
Manual
5-23
Preventive
Maintenance
Corrective
Adjustments
Changing
Dot
Matrix
Printer
Ribbon
Cassette
Refer
to
the
procedure
on
page
5-57.
Changing
Thermal
Printer
Ribbon
Refer
to
the
procedure
on
page
5-59.
Adjusting
Dot
Matrix
Print
Head
Gap
The
print
head
gap
is
set
at
the
factory
and
will
not
usually
need
to
be
changed.
If
there
are
substantial
changes
in
the
thickness
of
the
label
or
label
backing,
however,
you
may
need
to
make
an
adjustment.
If
the
gap
between
the
platen
and
the
print
head
is
too
wide,
it
may
result
in
slanted
or
fuzzy
printing.
If
the
gap
is
too
narrow,
the
print
ribbon
may
rub
against
the
labels,
smudging
them
and
making
the
background
gray.
CAUTION:
Dangerous
high
voltages
are
present.
Do
not
perform
this
procedure
while
power
is
on
to
the
2500.
This
procedure
should
be
performed
only
by
a
qualified
service
technician.
To
adjust
the
print
head
height,
follow
these
steps:
1.
Turn
off
and
unplug
the
2500.
2.
Remove
the
ribbon
cartridge
and
labels.
3.
Locate
the
two
corner
screws
on
the
main
plate
that
hold
the
plate
in
position.
Loosen
these
screws
so
the
plate
is
free.
4.
Lift
the
main
plate
so
you
can
see
inside
the
2500's
base.
5.
Locate
the
four
hex
screws
on
the
back
side
of
the
print
head
that
hold
it
in
position.
Loosen
the
screws,
but
do
not
remove
them.
6.
When
the
print
head
is
free
to
move,
move
it
as
far
to
the
right
as
possible,
then
adjust
the
gap
between
the
print
head
and
the
underside
of
the
platen
to
approximately
0.018
inches.
7.
Hold
the
print
head
in
this
position
and
tighten
the
four
hex
screws.
5-24
ProMaster
2500
User
Manual
ENTER LABEL CALIBRATION VALUE (X):
ENTER LABEL ADJUST VALUE (X):
1944-1
NORMAL
HIGHER VALUE
Preventive
Maintenance
Adjusting
Position
of
Print
on
Label
(Dot
Matrix
Printer)
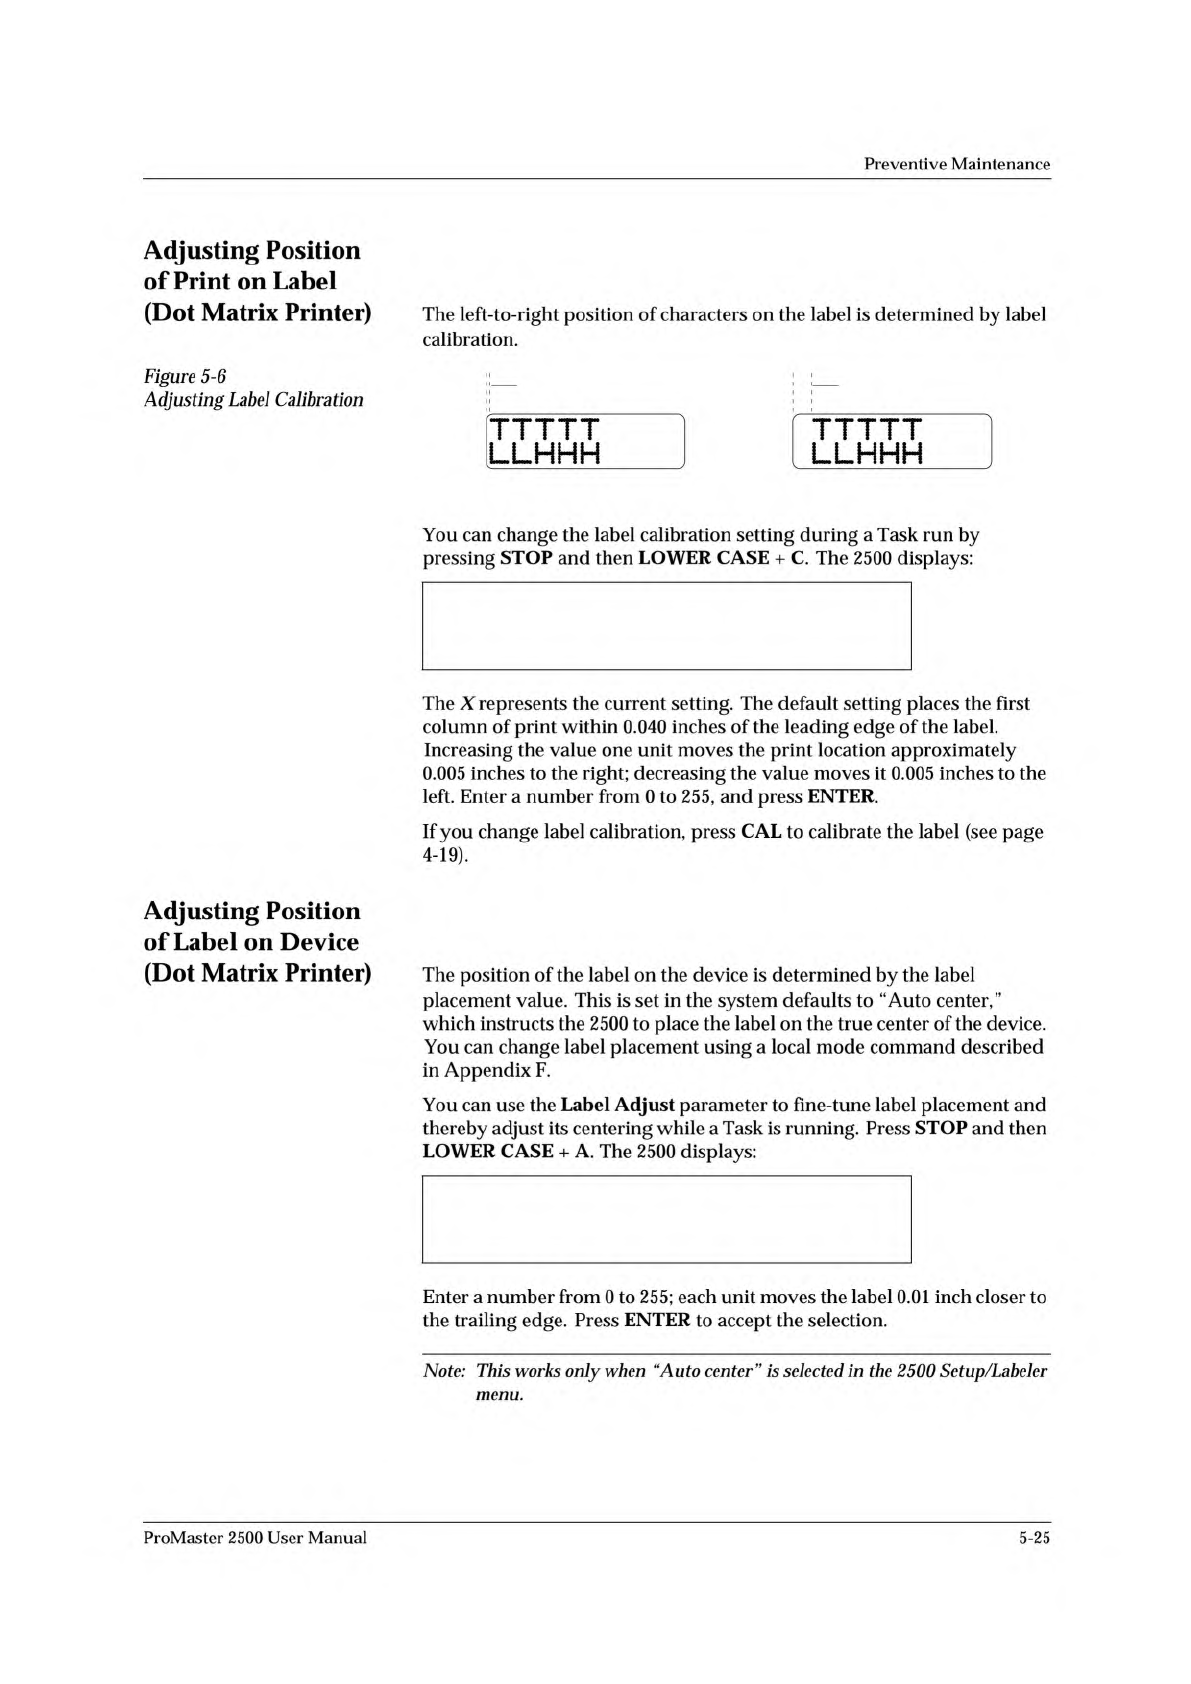
The
left-to-right
position
of
characters
on
the
label
is
determined
by
label
calibration.
Figure
5-6
Adjusting
Label
Calibration
You
can
change
the
label
calibration
setting
during
a
Task
run
by
pressing
STOP
and
then
LOWER
CASE
+
C.
The
2500
displays:
The
X
represents
the
current
setting.
The
default
setting
places
the
first
column
of
print
within
0.040
inches
of
the
leading
edge
of
the
label.
Increasing
the
value
one
unit
moves
the
print
location
approximately
0.005
inches
to
the
right;
decreasing
the
value
moves
it
0.005
inches
to
the
left.
Enter
a
number
from
0
to
255,
and
press
ENTER.
If
you
change
label
calibration,
press
CAL
to
calibrate
the
label
(see
page
4-19).
Adjusting
Position
of
Label
on
Device
(Dot
Matrix
Printer)
The
position
of
the
label
on
the
device
is
determined
by
the
label
placement
value.
This
is
set
in
the
system
defaults
to
“Auto
center,”
which
instructs
the
2500
to
place
the
label
on
the
true
center
of
the
device.
You
can
change
label
placement
using
a
local
mode
command
described
in
Appendix
F.
You
can
use
the
Label
Adjust
parameter
to
flne-tune
label
placement
and
thereby
adjust
its
centering
while
a
Task
is
running.
Press
STOP
and
then
LOWER
CASE
+
A.
The
2500
displays:
Enter
a
number
from
0
to
255;
each
unit
moves
the
label
0.01
inch
closer
to
the
trailing
edge.
Press
ENTER
to
accept
the
selection.
Note:
This
works
only
w
加避
"Aut。
center”
is
selected
in
the
2500
Setup/Labeler
menu.
ProMaster
2500
User
Manual
5-25