00196478-08_MM_SX12DX12_en.pdf - 第64页
Major Maintenance Maintenance Work on the Gantry 5.5.3 Performing Mainten ance Tasks 64 Maintenance Manual SIPLACE SX1/SX2/DX1/DX2 Head Mount from FS03 onwards: ► Remove t he protectiv e cap from the new lub rication a d…
Major Maintenance
5.5.3 Performing Maintenance Tasks Maintenance Work on the Gantry
Maintenance Manual SIPLACE SX1/SX2/DX1/DX2 63
5.5.3.7
5.5.3.7 Replacing the Loose Bearing Lubrication System X Axis
Replacing the Loose Bearing Lubrication System X Axis
Depending on the head mount, different lubrication systems can be used.
Continuous Lubrication Systems
Head Mount up to FS02:
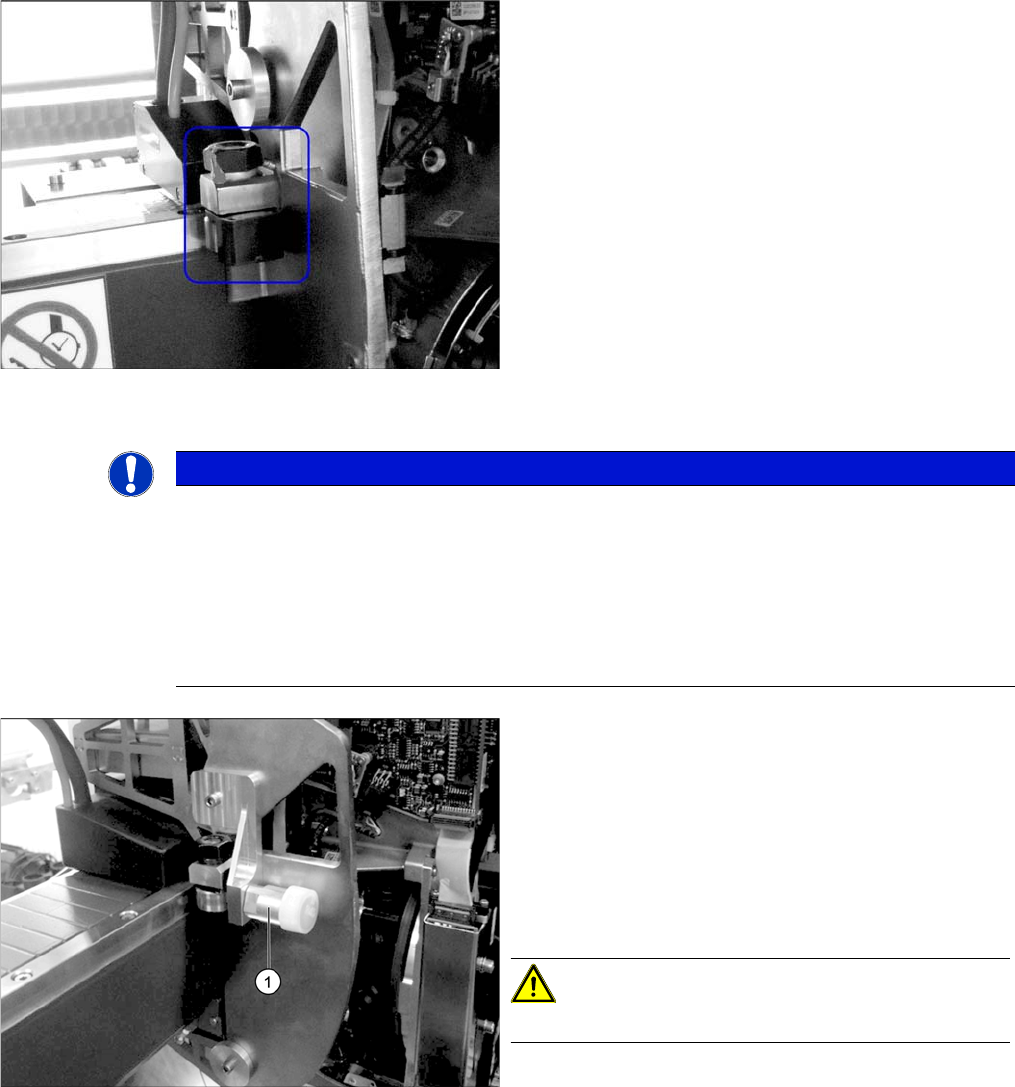
► If a continuous lubrication system is used (black cap
on the loose bearing roller), clean and grease the run-
ning surfaces weekly with a SIPLACE cleaning tis-
sue.
NOTICE
The lubrication system is optional on head mounts up to FS02.
To reduce the maintenance work required, you can replace the old lubrication adapter with a
modified version. An additional holder is fitted so that you can use the same lubrication system
as that used for the Y axis. Observe the technical information TI2011-11D04 "Retrofit solution
lubrication adapter X axis".
► This lubrication adapter can be used on head mounts up to FS02.
► A replacement must be done by your SIPLACE Service team only.
► Unscrew the lubrication system (1).
► Use a dry cloth to clean the rollers and running sur-
faces of the lubrication adapter.
► Move the head mount twice over the entire length.
Now clean the rollers and running surfaces of the lu-
brication adapter again.
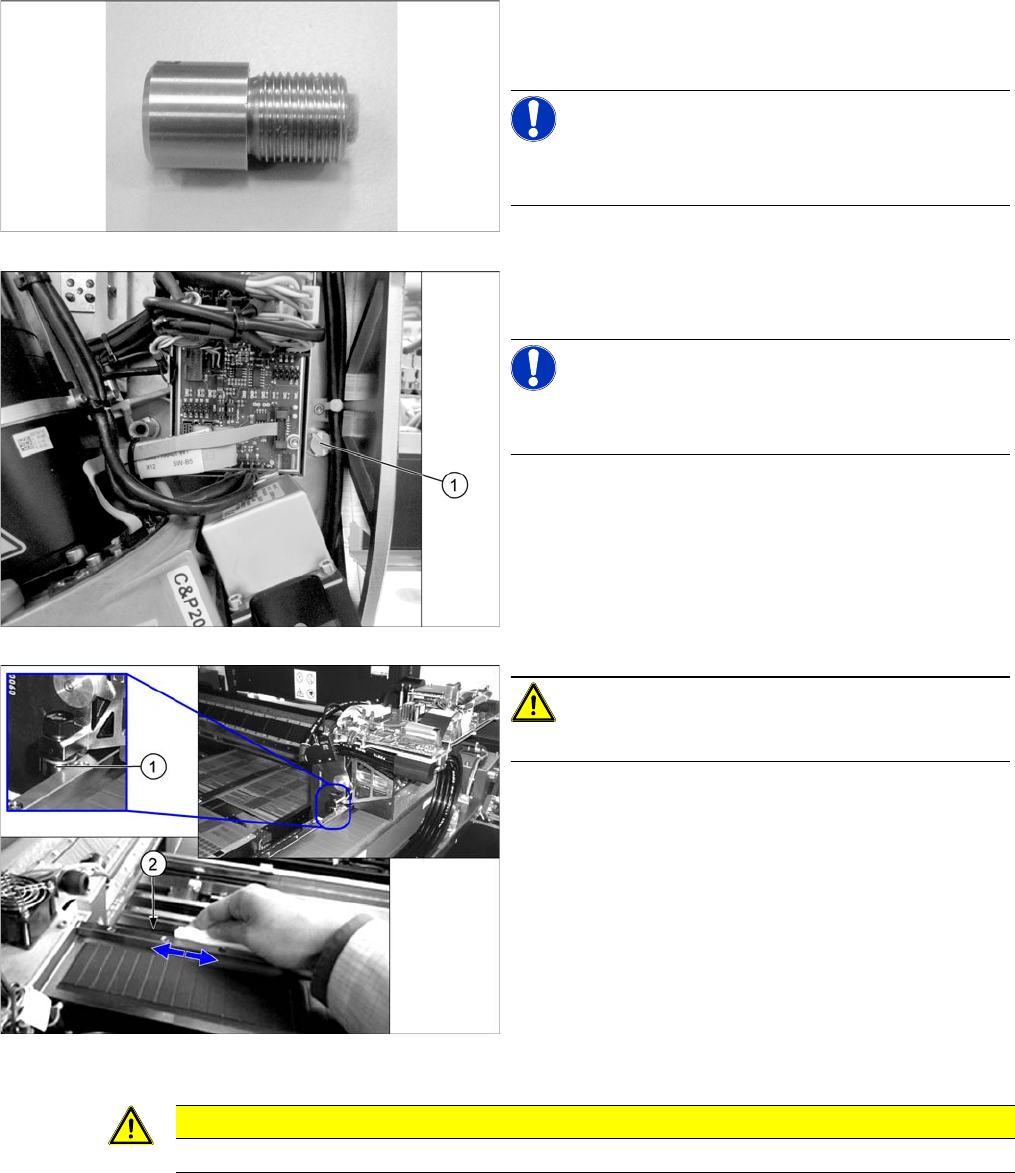
► Unscrew the protective cap from the new lubrication
system.
CAUTION!
Take care not to distort the felt insert.
► Tighten the new lubrication system by hand.
► Repeat the procedure on the second gantry, if neces-
sary.
Major Maintenance
Maintenance Work on the Gantry 5.5.3 Performing Maintenance Tasks
64 Maintenance Manual SIPLACE SX1/SX2/DX1/DX2
Head Mount from FS03 onwards:
► Remove the protective cap from the new lubrication adapter.
► Screw the new lubrication adapter hand-tight into place.
► Attach a maintenance label next to the lubrication adapter and write down the replacement day.
► Repeat these steps for all gantries.
See also
4.3.2.2 Cleaning the X Axis Loose Bearing and Contact Surface [ ➙ 30]
This lubrication adapter can be used on head mounts
from FS03 onwards. Only these head mounts have a suit-
able hole.
NOTICE!
All head mounts on SPS-capable machines have FS03 at
least.
► Remove the old lubrication adapter (1) with a slotted
screwdriver.
NOTICE!
Use a cable tie to fix any obstructing cables at the outside
of the conduit cable clip.
CAUTION!
Do not use any chemical cleaning agents!
► Use a SIPLACE cleaning tissue to wipe the loose
bearing (1) for the X axis and its contact surface (2) .
► Move the head mount twice over the entire length.
Now clean the running surfaces of the lubrication
adapter again.
CAUTION
Take care not to distort the felt insert.
Major Maintenance
5.5.4 Final Work Maintenance Work on the Gantry
Maintenance Manual SIPLACE SX1/SX2/DX1/DX2 65
5.5.3.8
5.5.3.8 Replacing the Loose Bearing Lubrication System Y Axis
Replacing the Loose Bearing Lubrication System Y Axis
See also
5.5.3.6 Cleaning the Y Axis Scale [ ➙ 62]
4.3.2.3 Cleaning the Y Axis Loose Bearing and Contact Surface [ ➙ 31]
5.5.3.4 Cleaning the Linear Guides of the Y Axis [ ➙ 62]
5.5.4
5.5.4 Final Work
Final Work
► For SW703.02 and higher only: switch the placement machine on and reset the maintenance cycle
counter for the relevant assemblies.
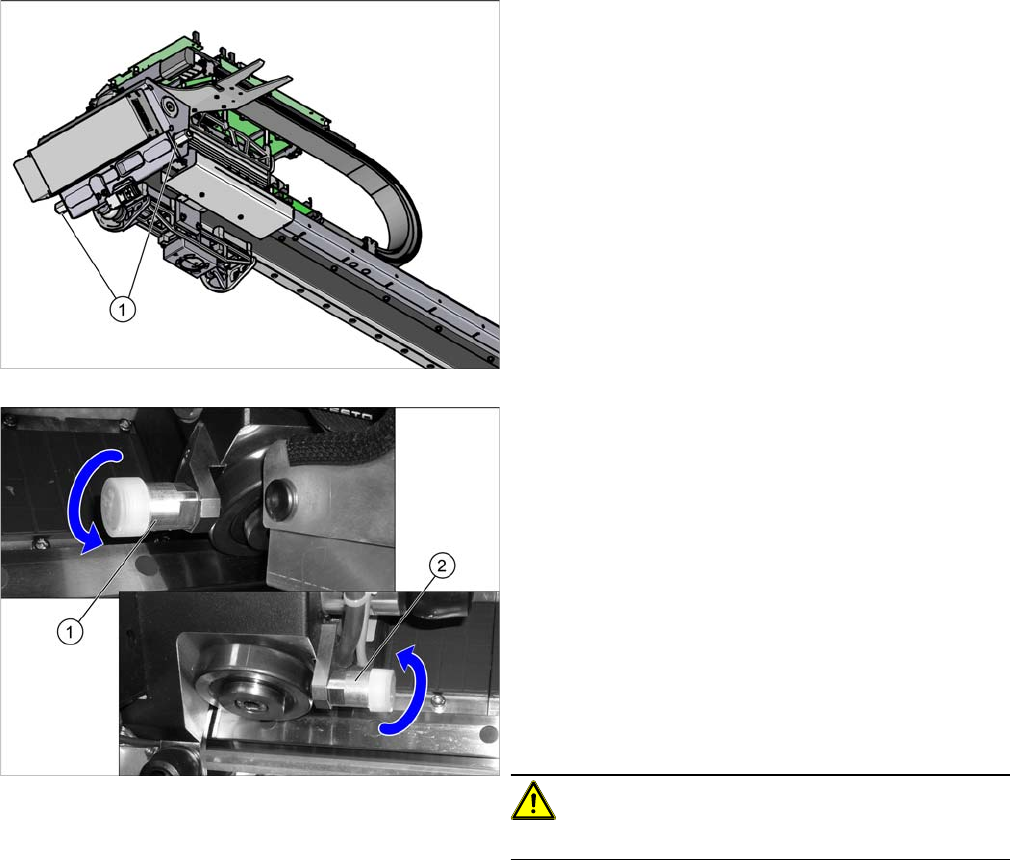
Overview of lubrication systems on the gantry
The lubrication systems are located on the loose bearing
side of the gantry! Each gantry has two lubrication sys-
tems.
► Unscrew the two lubrication systems (1) and (2) from
the gantry. One lubrication system is on the side fac-
ing you and the other one is on the side of the gantry
facing away from you.
► Use a dry cloth to clean the Y axis rollers, linear
guides and scales.
► Move the gantry twice over the entire length. Now
clean the Y axis rollers and linear guides again.
► Screw the protective caps off the new lubrication sys-
tems.
CAUTION!
Take care not to distort the felt insert.
► Screw the new lubrication systems hand-tight into
place.
► Repeat the procedure on the second gantry, if neces-
sary.