00196478-08_MM_SX12DX12_en.pdf - 第76页
Major Maintenance Maintenance Tasks for Vacuum Pump 5.8.5 Final work 76 Maintenance Manual SIPLACE SX1/SX2/DX1/DX2
Major Maintenance
5.8.5 Final work Maintenance Tasks for Vacuum Pump
Maintenance Manual SIPLACE SX1/SX2/DX1/DX2 75
5.8.5
5.8.5 Final work
Final work
► Installation is performed by following the above instructions in the reverse order. Also observe the
following instructions:
Compone nt Supply - Manual Tables - Fitting Pr otections - SW Version
SXDX12V1V2 – Tape Cutter – Waste Tape Chute – Pay Attention to the Plastic Strips – SW Version
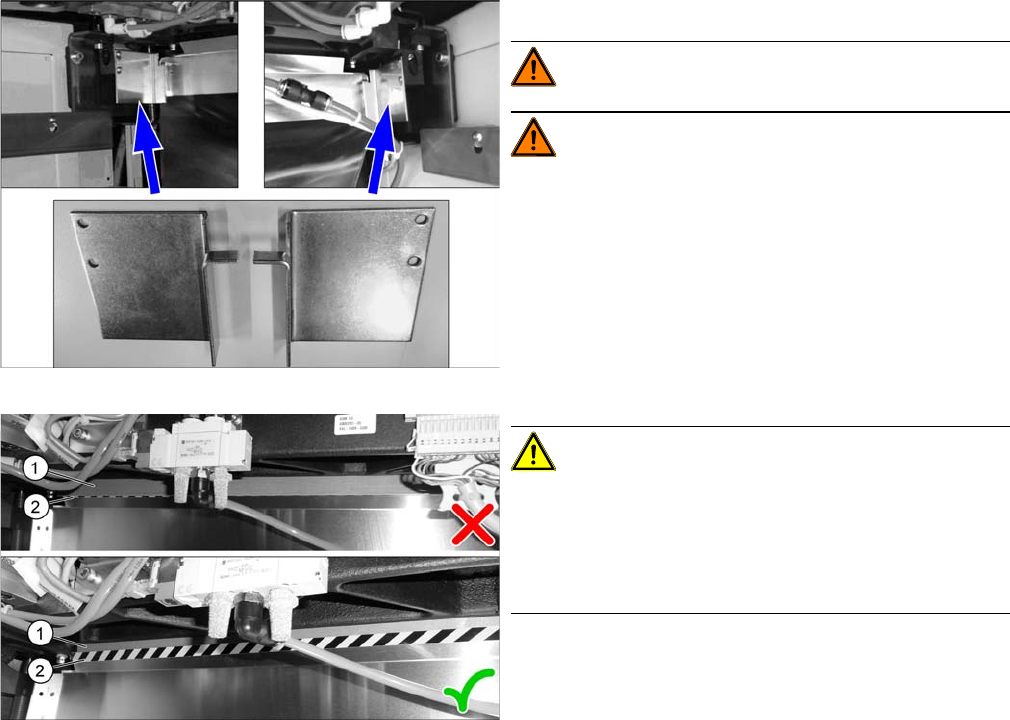
Manual tables only:
WARNING!
WARNING! There is a risk of injury on manual
tables without the two protections.
► Fit the two protections.
CAUTION!
Make sure that the plastic strips (1) (if present) are locat-
ed behind the plate (2) when you hook up the used tape
chute.
The black-yellow hatched label must be completely visi-
ble.
Major Maintenance
Maintenance Tasks for Vacuum Pump 5.8.5 Final work
76 Maintenance Manual SIPLACE SX1/SX2/DX1/DX2
General Tasks
Filling the Grease Gun
Maintenance Manual SIPLACE SX1/SX2/DX1/DX2 77
6
6 General Tasks
General Tasks
6.1
6.1 Filling the Grease Gun
Filling the Grease Gun
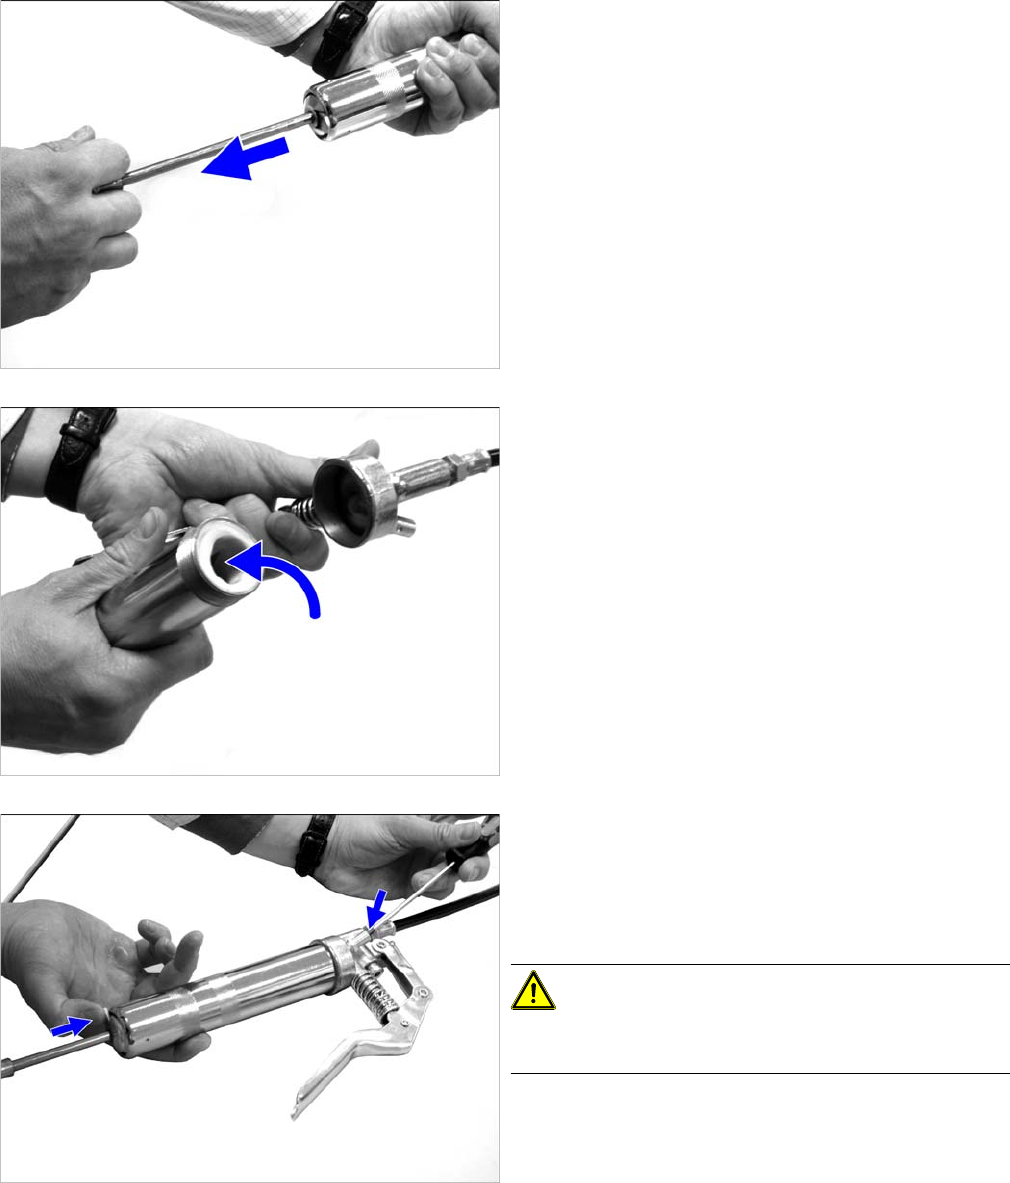
► Pull back the grease gun plunger. It must lock into
place.
► Open the grease gun by unscrewing the top section.
► Fill the grease gun with suitable grease. Use a clean
spatula.
Try to fill the gun with grease without trapping in any
air pockets.
► Close the grease gun by screwing the top section
back on.
► Loosen the lock on the back of the grease gun. The
spring force moves the plunger forward.
► Push back the ball on the vent screw to vent the
grease gun. Use a screwdriver or similar tool to help
you.
CAUTION!
Always vent the grease gun once you have finished
greasing the machine!
► Press the trigger until the grease emerges from the
front of the gun.
► Remove excess grease with a lint-free cloth.
The grease gun is now ready for use.