np134 mechanical reference-1.1e.pdf.pdf - 第51页
Notes: Part 2 Chapter 2 Changing the Back-up Pin Position Edition 1.0 2-2-2 NP-134E/134ME Mechanical

2. Changing the Back-up Pin Position
Point
Positions and quantities of the back-up pin must be changed in accordance with the
panel shape, size, and rear-side positions of pre-mounted parts. Moreover, if the panel is
warped upward, use a back-up pin with a vacuum pad in order to hold the panel flat.
Procedure
First detach the PFU-4E or PFU-5E from the machine.
1. Lower the panel lifter.
2. Adjust the conveyor width to the maximum.
3. Remove the back-up plates from the panel lifter.
4. Loosen the mounting bolt and change the back-up pin positions.
5. Reinstall the back-up plates to the panel lifter. Make sure that the plates are fit in
close contact with the lifter plate.
6. Check to be sure that the back-up pins do not interfare with the conveyor, and
make adjustments as required.
NP1MC053
NP1MC052
Vacuum pad
Back-up pin
Part 2 Chapter 2 Changing the Back-up Pin Position
Edition 1.0 2-2-1 NP-134E/134ME Mechanical

Notes:
Part 2 Chapter 2 Changing the Back-up Pin Position
Edition 1.0 2-2-2 NP-134E/134ME Mechanical
3. Attaching a PFU-4E/5E
Point
Electric and pneumatic connections are automatically established when the PFU-4E/5E
is set to the machine.
Refer to the Power Feeder 2 Maintenance Manual (MNT-PF2-∗.∗E) for instructions of
how to load Power Feeders on to the PFU-4E/5E.
Procedure
1. Use the positioning commands or the inching keys at the machine to move the
placing head to its retract position.
CAUTION
The placing head can be damaged if this procedure is not
carried out correctly.
2. At the [Main] window, press [Unit]
3. Select [Stage1] or [Stage2] then press [Power Off].
CAUTION
The power supply board may be damaged if this procedure
is not carried out correctly.
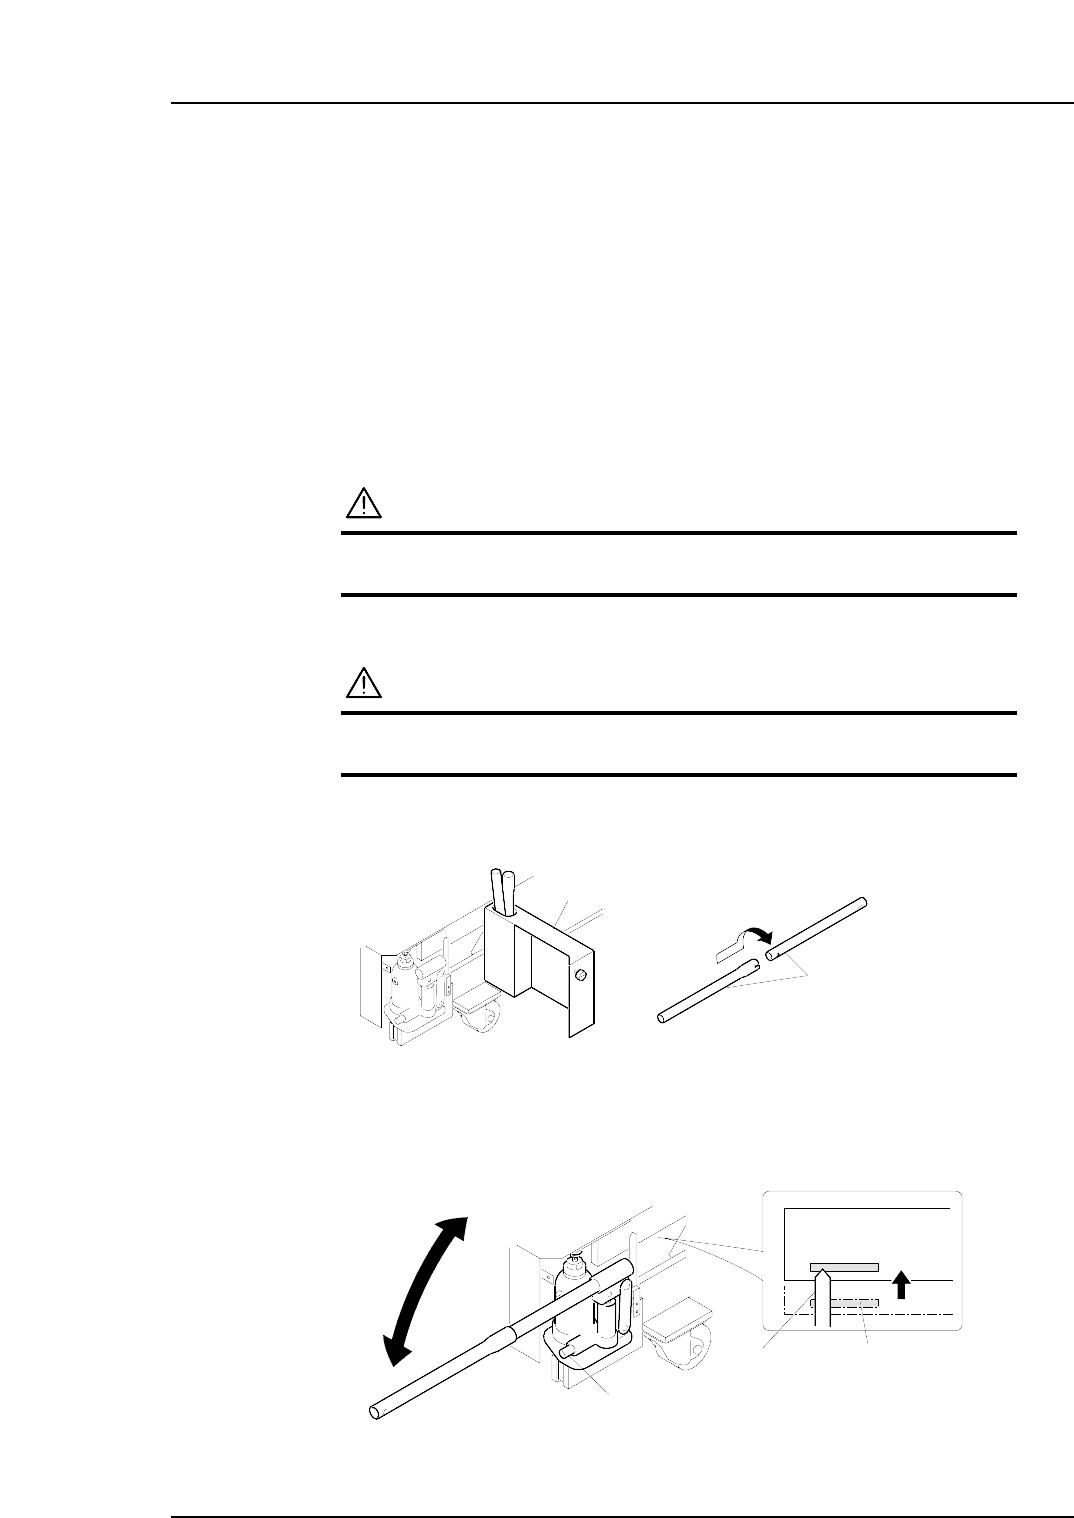
4. At the rear of the PFU-4E/5E, open the jack box.
5. Remove the parts of the jack lever and join them.
6. Attach the lever to the valve of the jack and turn it clockwise to close the valve.
7. Using the lever, jack the PFU-4E/5E up until the marker comes to the tip of the
indicator.
Marker
Indicator
Valve
NP1MS060
Jack door
Jack lever
NP1MS059
Part 2 Chapter 3 Attaching a PFU-4E/5E
Edition 1.0 2-3-1 NP-134E/134ME Mechanical