np134 mechanical reference-1.1e.pdf.pdf - 第54页
4. Detaching a PFU-4E/5E Procedure 1. Use the positioning commands or the inching keys at the machine to move the placing head to its retract position. CAUTION The placing head can be damaged if this procedure is not car…
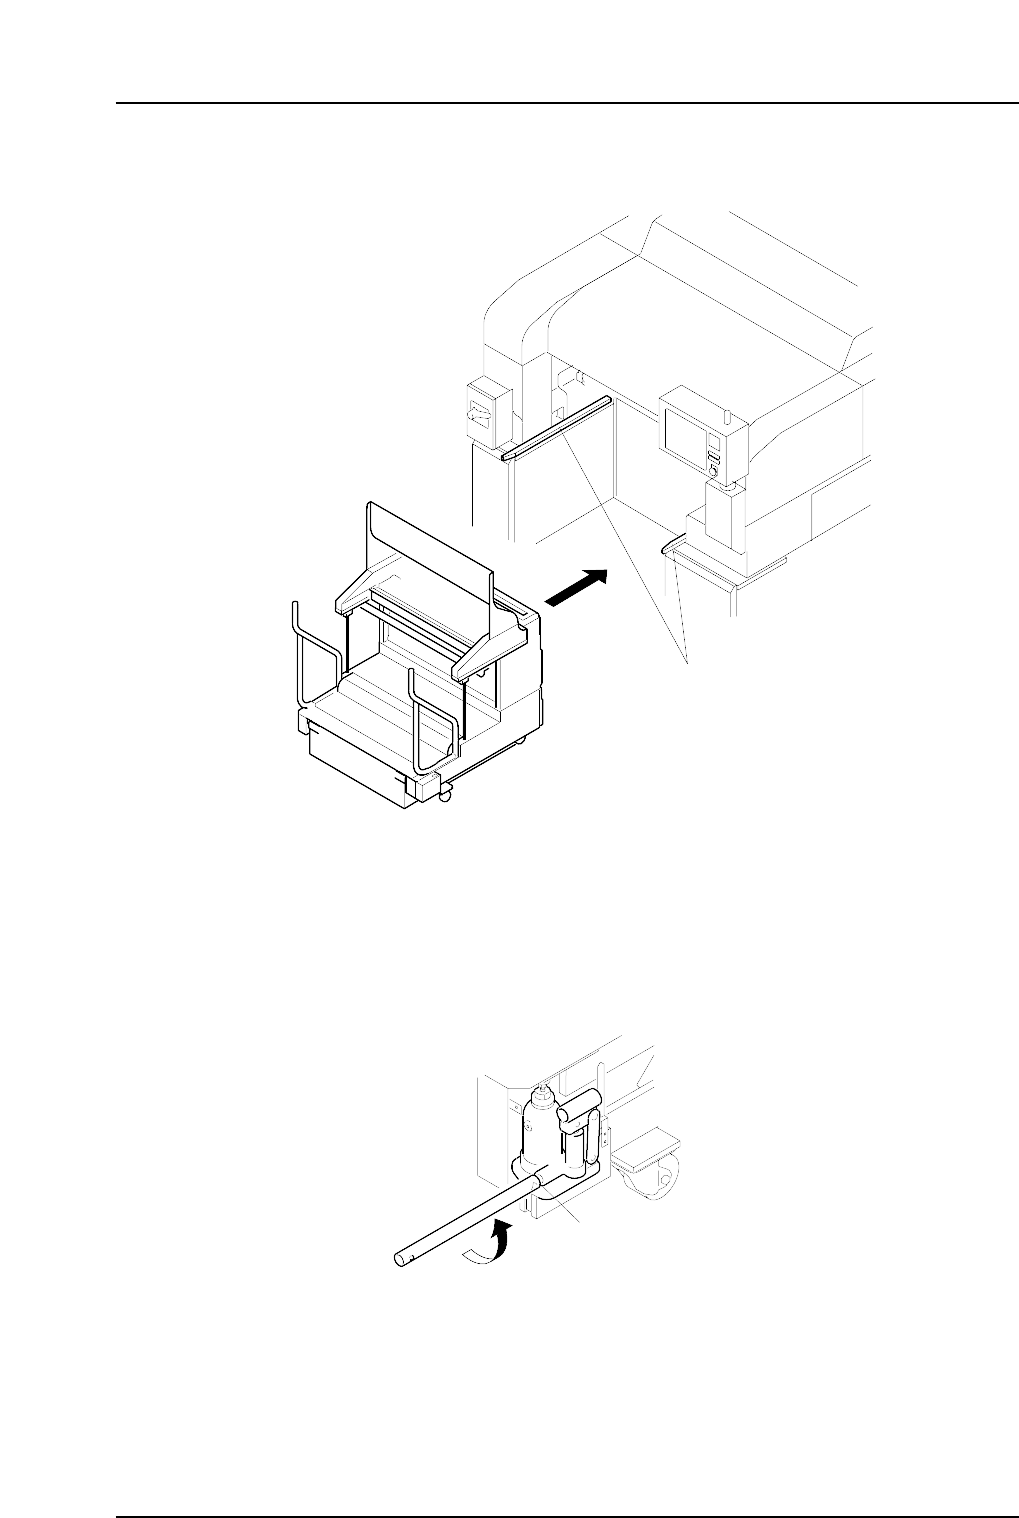
8. Slowly push the PFU-4E/5E along the guides into the machine.
9. Lower the PFU-4E/5E by attaching the lever to the valve again and turning it
counterclockwise. The unit lowers and is connected to the machine.
All electrical, data and pneumatic connections between the PFU-4E/5E and
machine are established automatically.
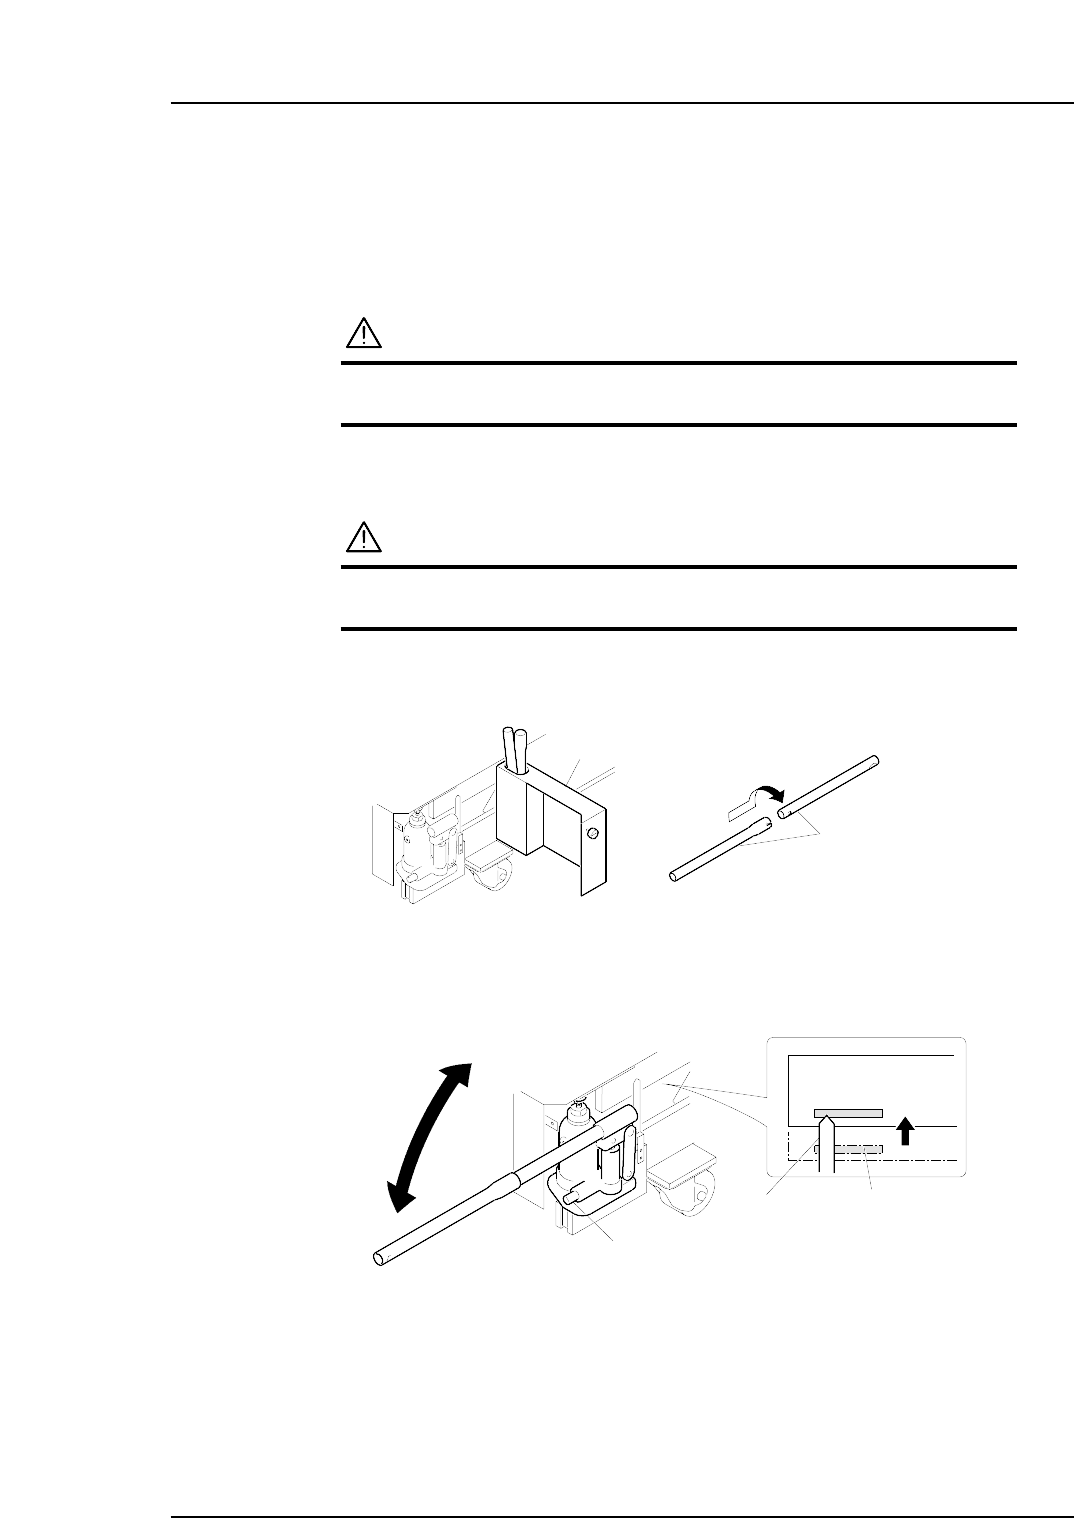
Note: The lever must not be rotated two turns or more from the position that the jack valve
is fully closed.
10. At the touch panel, press [Power on] at the screen opened in step 2.
11. Return the lever to its storage position and close the jack box door.
Valve
NP1MS062
NP1MS061
Guide rails
Part 2 Chapter 3 Attaching a PFU-4E/5E
Edition 1.0 2-3-2 NP-134E/134ME Mechanical
4. Detaching a PFU-4E/5E
Procedure
1. Use the positioning commands or the inching keys at the machine to move the
placing head to its retract position.
CAUTION
The placing head can be damaged if this procedure is not
carried out correctly.
2. At the [Main] window, press [Unit]
3. Select [Stage1] or [Stage2] then press [Power Off].
CAUTION
The power supply board may be damaged if this procedure
is not carried out correctly.
4. At the rear of the PFU-4E/5E, open the jack box.
5. Remove the parts of the jack lever and join them.
6. Attach the lever to the valve of the jack and turn it clockwise to close the valve.
7. Using the lever, jack the PFU-4E/5E up until the marker comes to the tip of the
indicator.
Marker
Indicator
Valve
NP1MS060
Jack door
Jack lever
NP1MS059
Part 2 Chapter 4 Detaching a PFU-4E/5E
Edition 1.0 2-4-1 NP-134E/134ME Mechanical
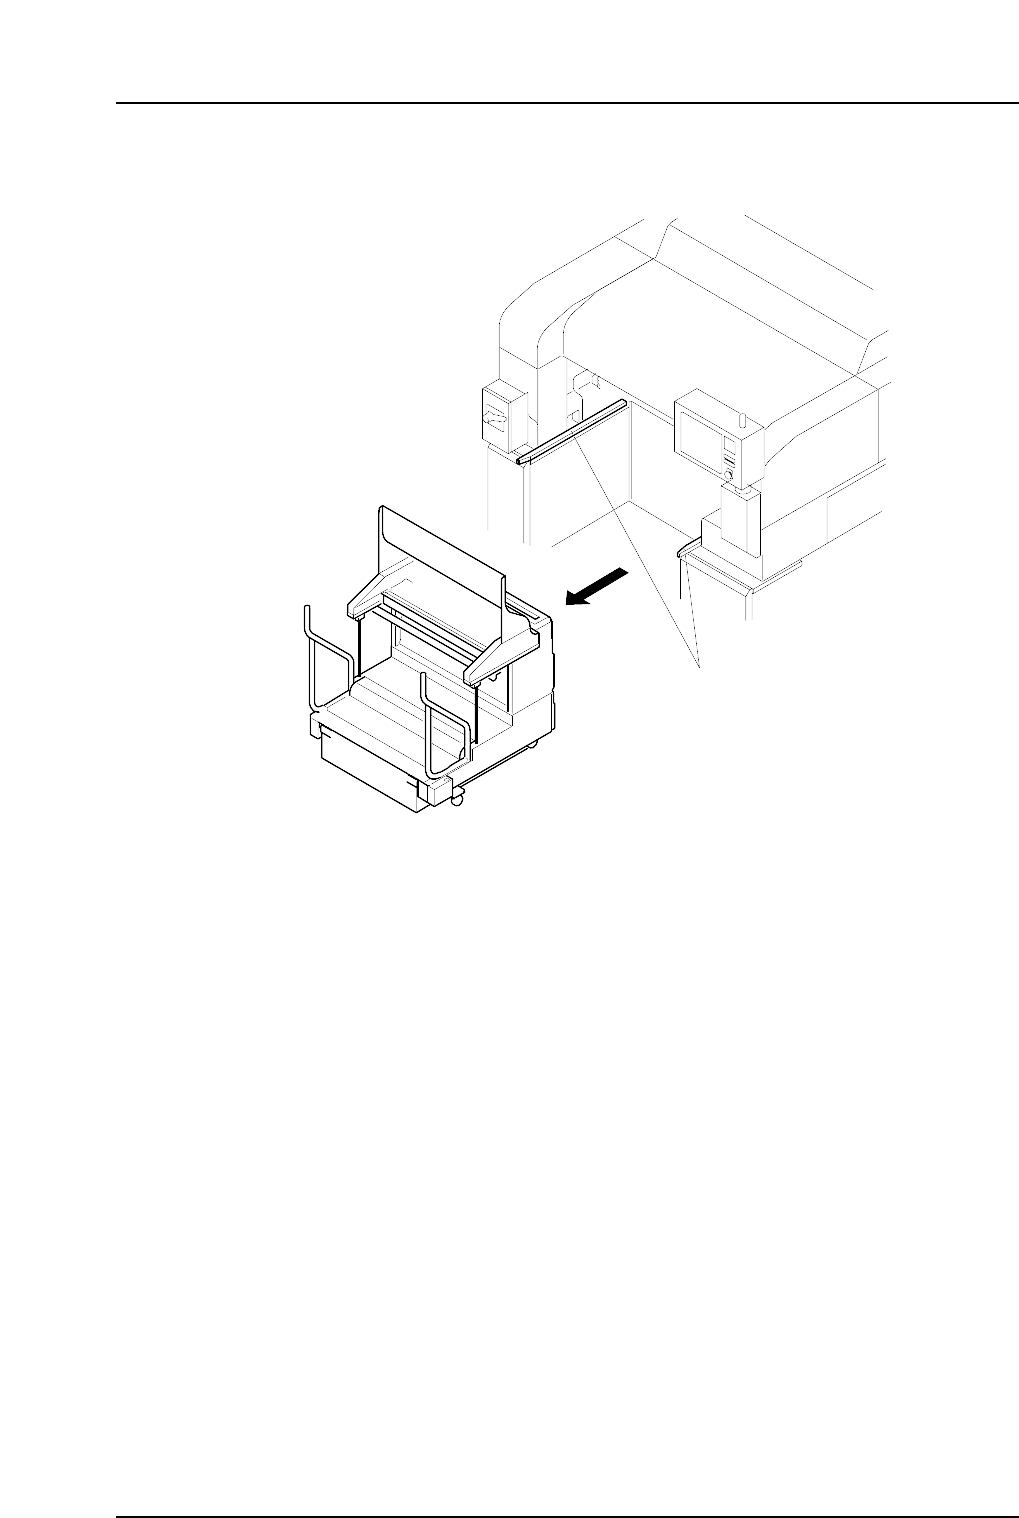
8. Slowly pull the PFU-4E/5E away from the machine.
NP1MS063
Guide rails
Part 2 Chapter 4 Detaching a PFU-4E/5E
Edition 1.0 2-4-2 NP-134E/134ME Mechanical