np134 mechanical reference-1.1e.pdf.pdf - 第94页
3.7 Replacing the V acuum Pump (Every 10000 Hours) Point Replace the vacuum pump after 10000 hours of operating the machine, or if the vacuum pressure falls below -90 kPa. Procedure W ARNING Always be sure to cut the mai…
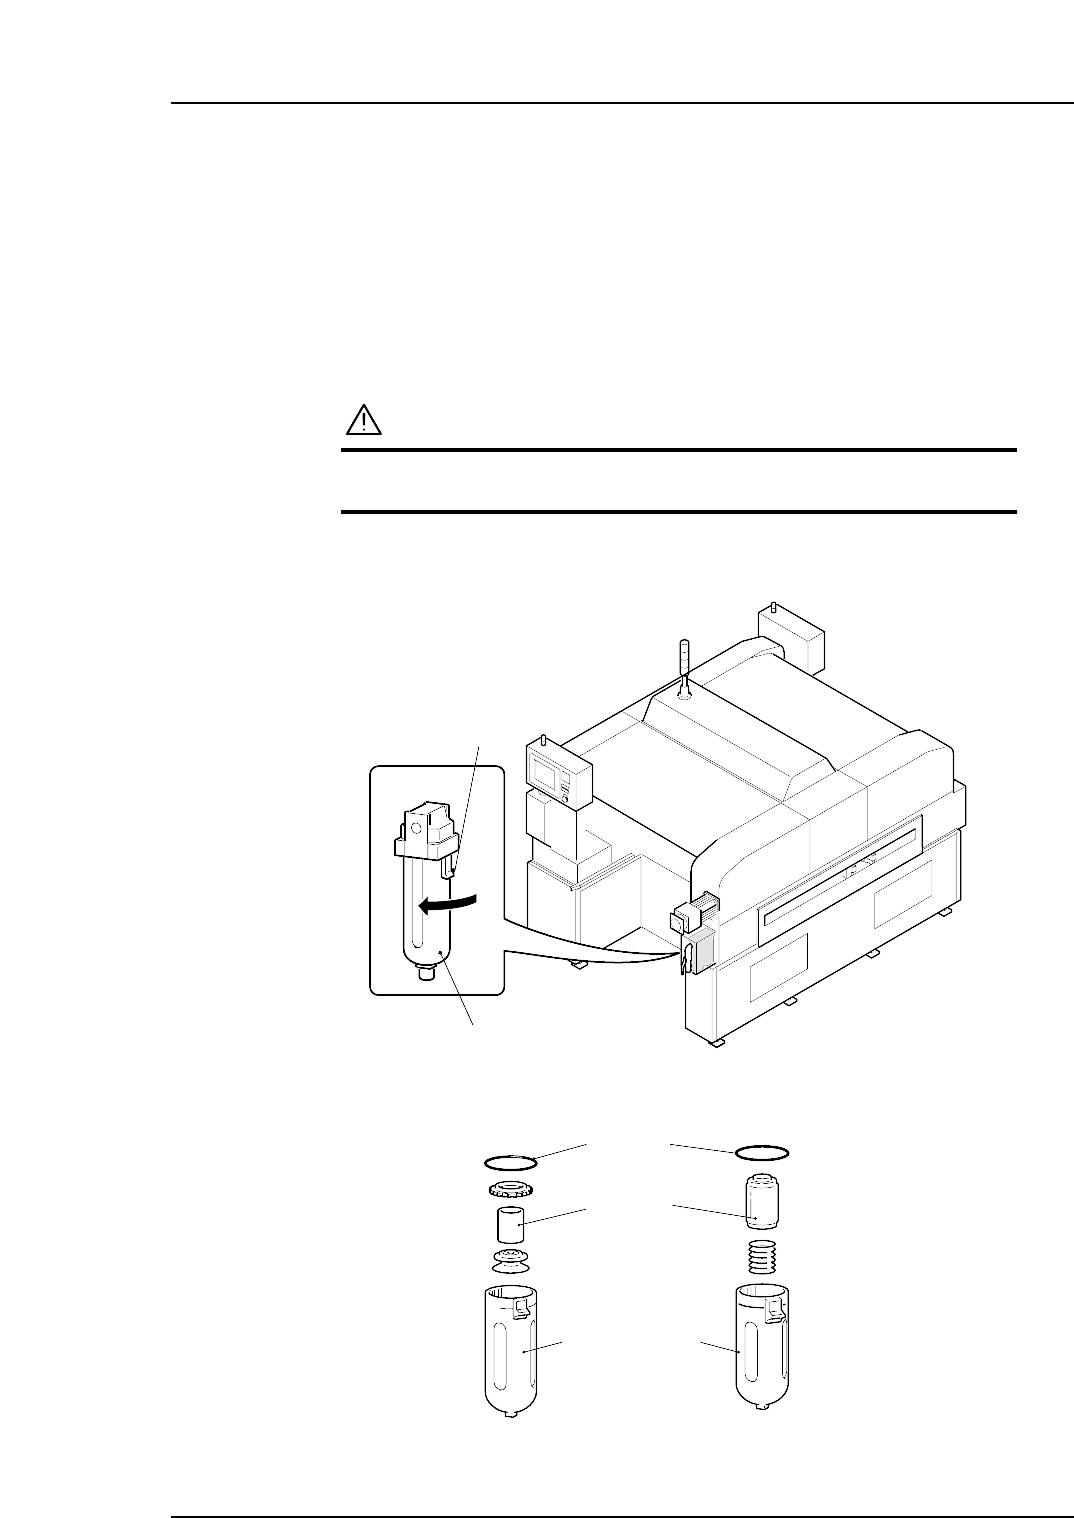
3.6 Replacing the Filter Regulator
Point
The air flowing through the pneumatics of the machine must be clean. Replace the
regulator filter if it becomes too dirty.
Procedure
WARNING
Always be sure to cut the main power before carrying out
any work.
Remove the filter regulator cover and discharge the air from the lines.
1. Remove the filter case by turning it while pressing the lock knob down.
2. Replace the filter regulator with new ones.
NP1ML056-1
O-ring
Filter
Filter case
NP1ML056
Filter case
Lock knob
Part 3 Chapter 3 Replacing Consumable Parts
Edition 1.0 3-3-9 NP-134E/134ME Mechanical
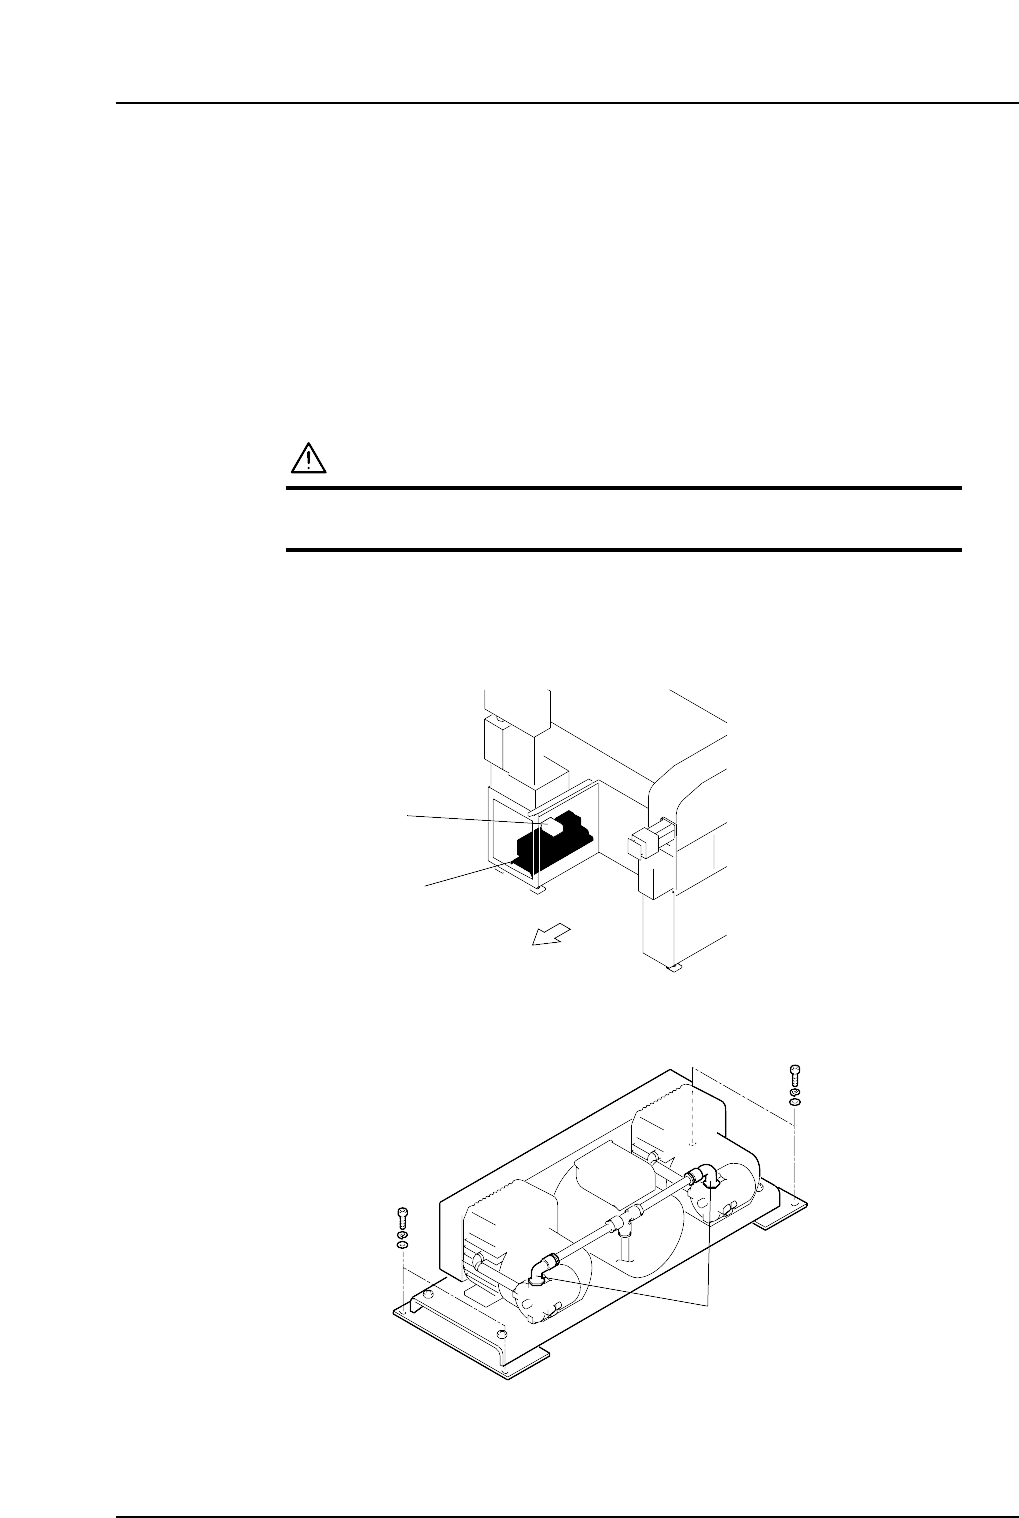
3.7 Replacing the Vacuum Pump
(Every 10000 Hours)
Point
Replace the vacuum pump after 10000 hours of operating the machine, or if the vacuum
pressure falls below -90 kPa.
Procedure
WARNING
Always be sure to cut the main power before carrying out
any work.
1. Remove the door and cover from the vacuum pump box.
2. Remove the wiring (red, white, black, and ground) from the terminal block on the
top of the pump.
3. Remove the four bolts securing the vacuum pump assembly, and detach the
assembly from the machine.
4. Remove the two elbow joints shown above from the piping.
NP1ML076
Elbow joints
Side 2
NP1ML075a
Vacuum pump
Terminal block
Part 3 Chapter 3 Replacing Consumable Parts
Edition 1.0 3-3-10 NP-134E/134ME Mechanical

5. Remove the belt cover from the vacuum pump, then detach the vacuum pump
from the assembly.
6. Detach the pulley with fan, filter, extension pipe and elbow joint from the vacuum
pump. Replace the vacuum pump, and reattach the parts to the new pump
(in reverse order).
7. Attach the vacuum pumps to the base, then attach belts 1 and 2. Belt 2 must be
attached on the inside (closest to the motor).
8. Adjust the tension of belt 1 and 2 so that, with 0.97 kgf applied at the center of the
belt, the amount of play is 2.7 mm and 3.7 mm respectively.
9. Reattach the belt cover, then secure the pump assembly to the machine using the
four bolts.
10. Reconnect the vacuum pump wiring to the terminal block.
Note: Ensure the wires R (red), S (white) and T (black) are connected correctly to the
terminal block.
Belt 1
Belt 2
Pulley with fan
Vacuum pump
Elbow joint
Extension pipe
Filter
Lock bolt plates
Elbow joint
Extension pipe
Filter
Pulley with fan
Vacuum pump
Belt cover
NP1ML076-1
Part 3 Chapter 3 Replacing Consumable Parts
Edition 1.0 3-3-11 NP-134E/134ME Mechanical