SiplaceX4_en.pdf - 第138页
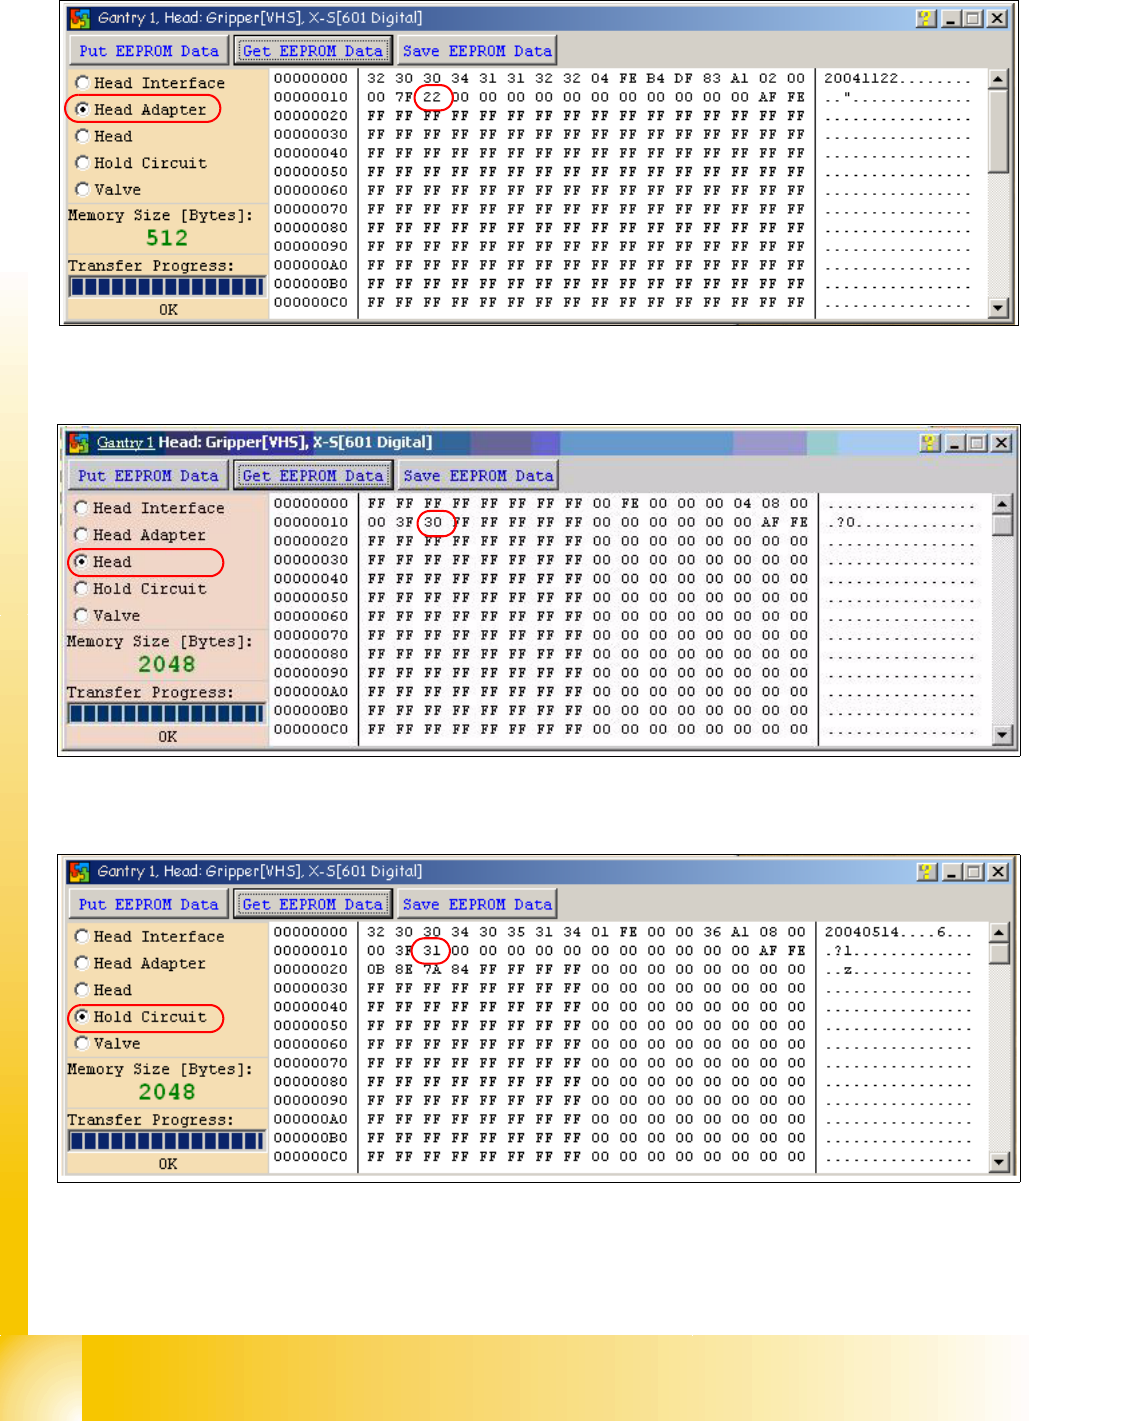
1 - 68 S tudent Guide SIPLACE X 3 Communication and Control Edition 09/2005 68 Fig. 3.6 - 7 Head adapter board type recognition ID 22 for the C&P20 head Fig. 3.6 - 8 Head C&P 20 board type ID 30. Fig. 3.6 - 9 V a…
1 - 67
Student Guide SIPLACE X
Edition 09/2005 3 Communication and Control
67
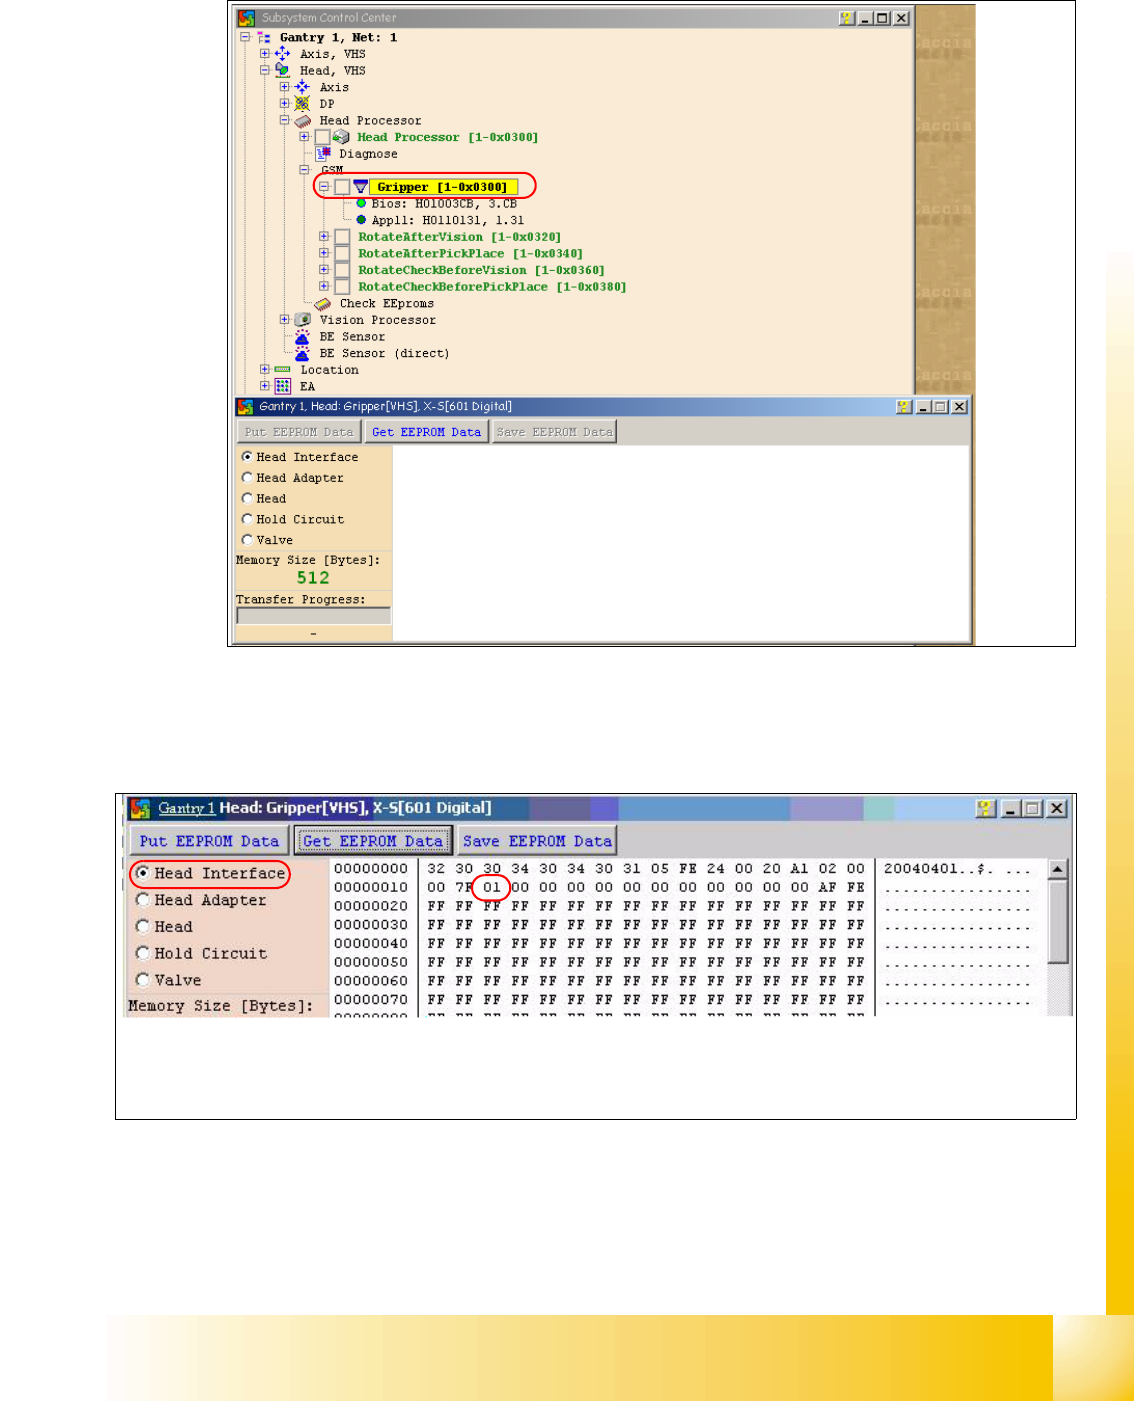
– Doubleclick on Gripper and the following dialog appears.
Fig. 3.6 - 5 Dialog Head processor Gripper
– Choose the board which you want to check and press the Button "Get EEPROM".
Fig. 3.6 - 6 Head interface board type recognition ID 01
– The ID appears in the memory space 12 , in the following image 01 for the Head interface
C500.
1 - 69
Student Guide SIPLACE X
Edition 09/2005 3 Communication and Control
69
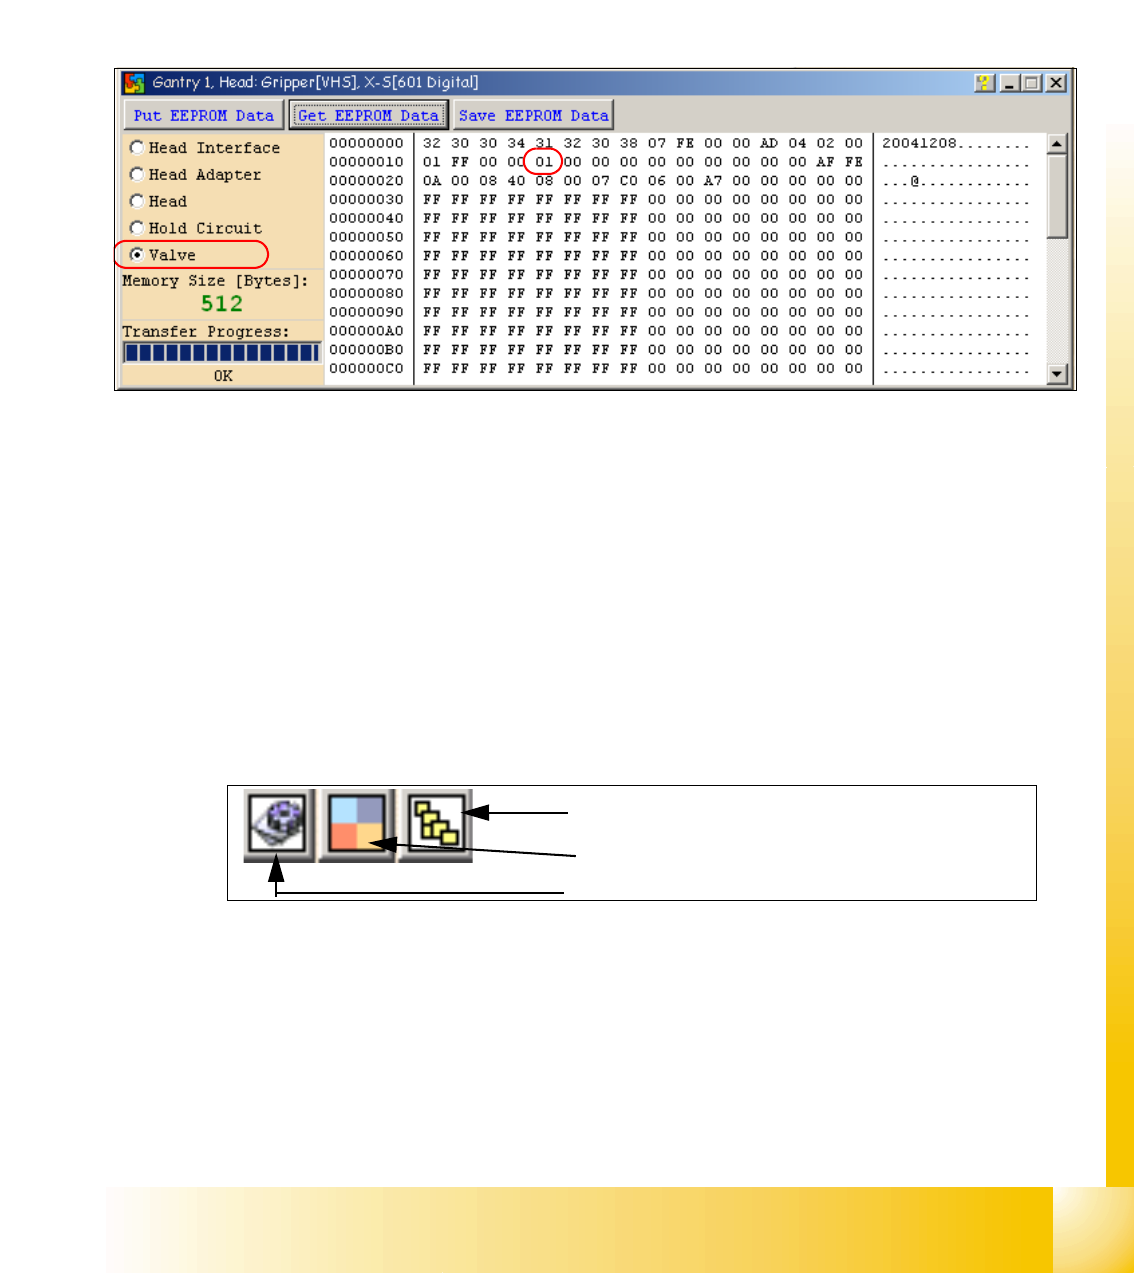
Attention: The vacuum generator digital (C&P20) and thevacuum generator analog (Twin head)
don‘t have a board type ID. In the memory space on the EEPROM stays 00.
Important: Both vacuum generators will be recognized via a device number.
The device number is saved in the memory space 14 on the EEPROM.
Device number ID 01 vacuum generator digital
Device number ID 02 vacuum generator analog
Fig. 3.6 - 10 Device number vacuum generator digital C&P20
3.6.2.2 Read and write the Board type ID with CAN commands
– Switch off the machine.
– Connect the service laptop to the machine CAN bus at PA1 and/or PA2.
Make sure that the cable is connected to channel 1 for PA1 and that, at least the transmitter is
connected to channel 2 of the Kvaser card.
– Switch on the machine
– Start the "CACCIA" software and check the machine configuration with Caccia.
– Doubleclick to open the subsystem control center.
Fig. 3.6 - 11 Icons: properties, machine configuration, subsystem control center
–Click on the "Get Versions" button.
The system will display all available subsystems with their firmware versions and CAN IDs.
Subsystem control center
Machine configuration window
Properties (settings, restart Kvaser card)