SiplaceX4_en.pdf - 第457页
1 - 25 S tudent Guide SIPLACE X Edition 09/2005 9 Component handling 25 9.3.1 1 X- Feeder operator p anel Fig. 9.3 - 1 1 X- Fe eder operator panel 1. Operator p anel X- Feeder 2. LCD- Display (In the basic view shows the…
1 - 24
Student Guide SIPLACE X
9 Component handling Edition 09/2005
24
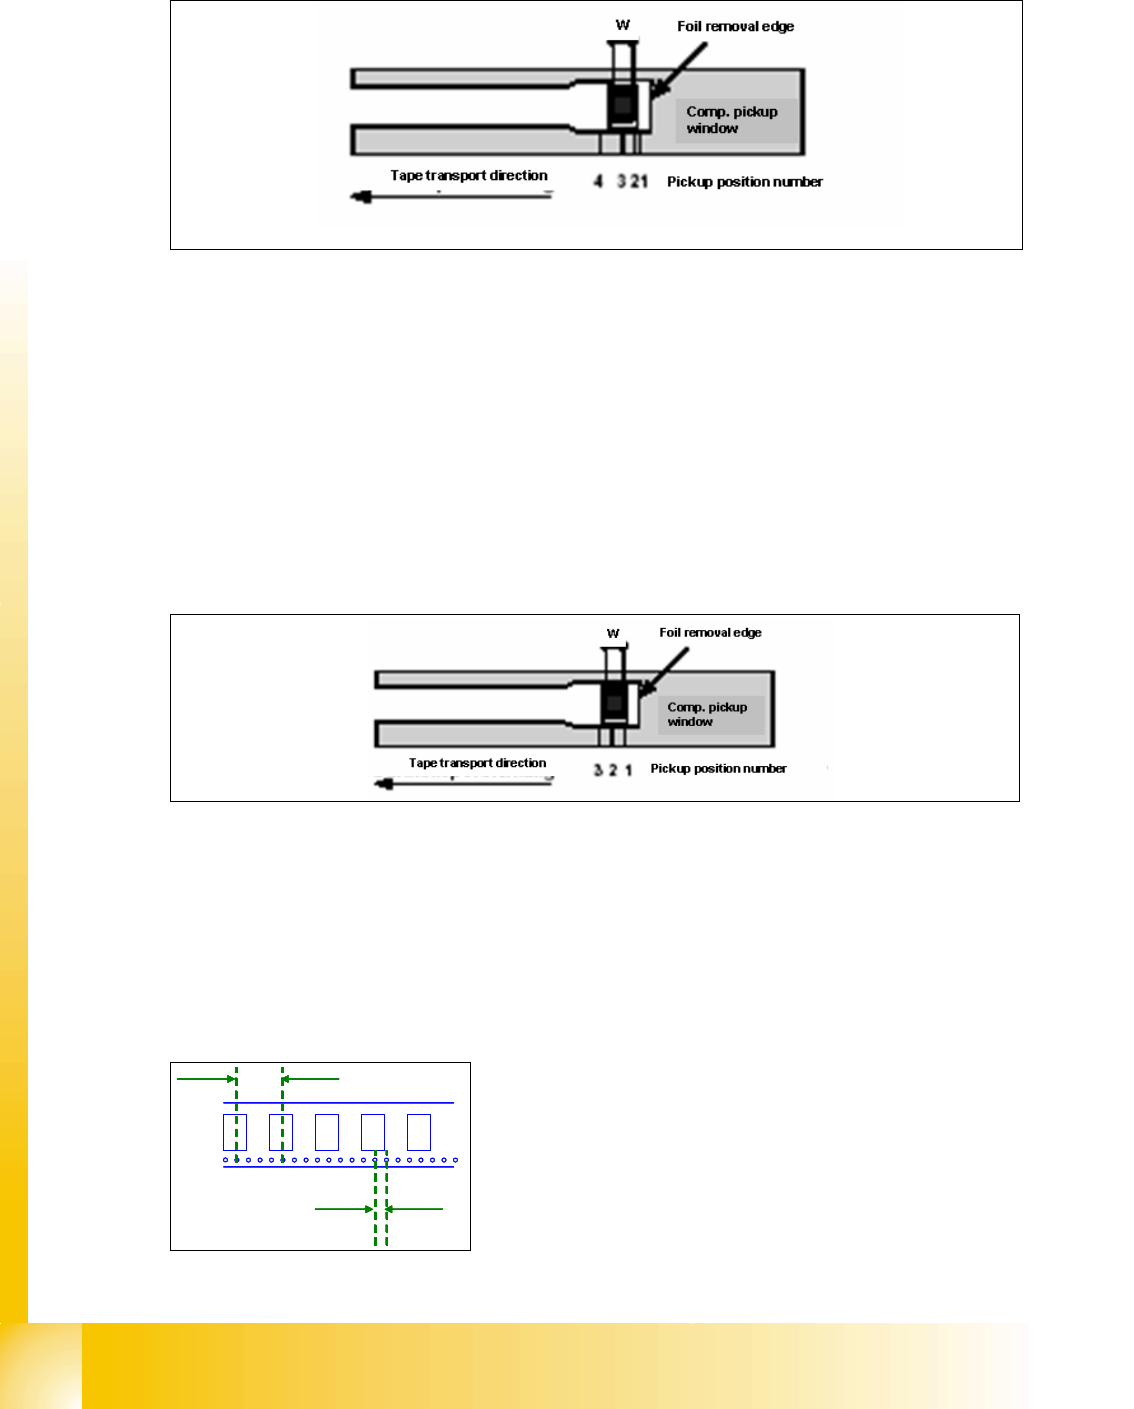
9.3.8 4 Pick up positions 8mm X- Feeder
Fig. 9.3 - 8 Pick up positions 8mm X- Feeder
– Comp. in 2 mm step in the reel are picked from Pos. 1. (e.g.0201, 0402)
– Comp. in 4 mm step and cross (short comp. width W) in the reel are picked from Pos. 2.
(e.g. 0603, 0805, Micro-,Mini-Melf)
– Comp. in 4 mm step and along (long s. SOT23) in the reel are picked from Pos. 3.
(e.g. 1206, SOT23)
– Special-comp. in 8 mm step in the reel are picked from Pos. 4.
9.3.9 3 Pick up positions 12mm X- Feeder
Fig. 9.3 - 9 Pick up positions 12mm X- Feeder
Comp. with comp.width W up to 3mm (in feed direction) are picked from Pos. 1.
Comp. with comp.width W from 3 mm up to 7mm (in feed direction) are picked from Pos. 2.
Comp. with comp.width W from 7mm up to 11.5 mm (in feed direction) are picked from Pos. 3
9.3.10 One pick up position in all other X- Feeder
Fig. 9.3 - 10 Pick up position for other X- Feeder
4mm
z.B. 16mm
4mm
z.B. 16mm
1 - 25
Student Guide SIPLACE X
Edition 09/2005 9 Component handling
25
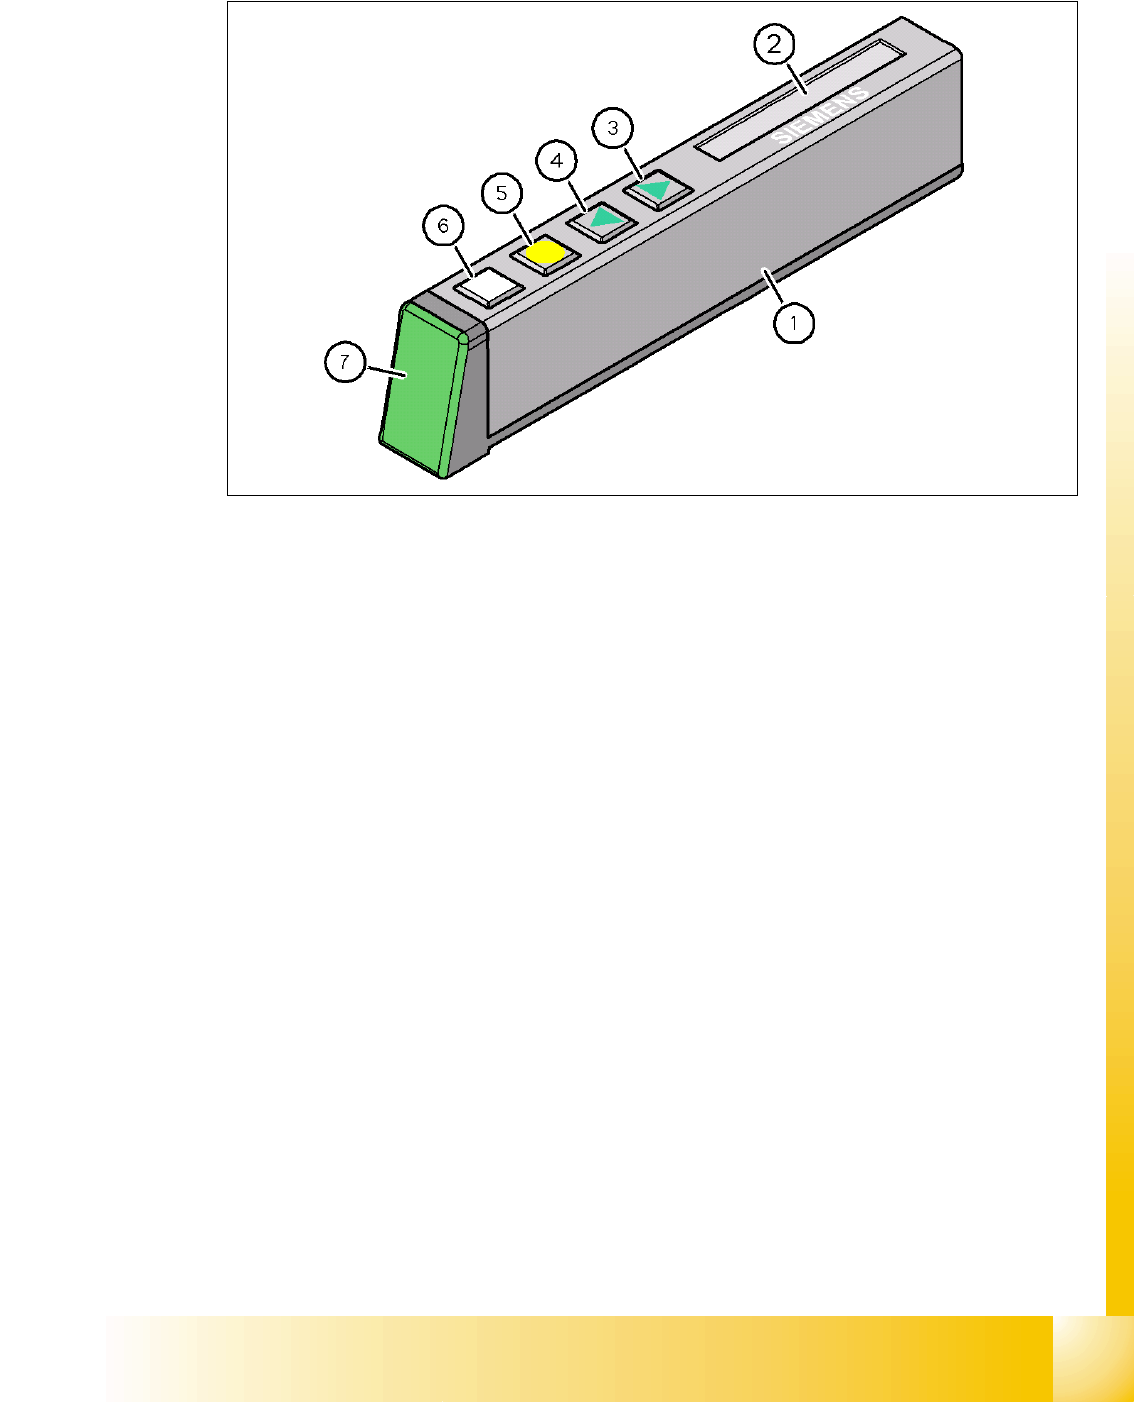
9.3.11 X- Feeder operator panel
Fig. 9.3 - 11 X- Feeder operator panel
1. Operator panel X- Feeder 2. LCD- Display (In the basic view shows
the display the track number and the
step)
3. Button "Forward" 4. Button "Backward"
5. Button "FOIL" 6. Button "SET"
7. Status LED:
– green ---> ready, and the feeder is
used in the current set up
– orange ---> Warning
– red ---> Error
– Display Off ---> Feeder isn‘t use in the
current set up

1 - 26
Student Guide SIPLACE X
9 Component handling Edition 09/2005
26
9.3.12 Settings and function in the Main Menu X- Förderer
Fig. 9.3 - 12 Control panel for X-feeder
Description of the buttons X-feeder 9
1. "Forwards" button:
Press briefly to move the tape by the set cycle step.
Press for longer to move the tape forwards. Make sure the cover foil is not clamped in.
2. "Backwards" button:
Press briefly and the tape is move backwards by the set cycle step.
Press for longer to move the tape backwards. (Only perform these functions when the cover
foil is not clamped in)
3. "Foil" button:
Press to start the drive motor for cover foil. This runs until the foil has been stretched tight and
the motor toggle switch turns off or until the timer has counted 30 seconds.
4. "SET" button:
Briefly press you switch to the next menu in the main menu
Press for longer to request component verification.
Please Note:
If you defined the correct Pitch in Siplace Pro the Software send the corret value to the 8mm X-
Feeder automatically.
Transportdirection
Cycle step
Display showing track on location
1
2
3
4