SiplaceX4_en.pdf - 第459页
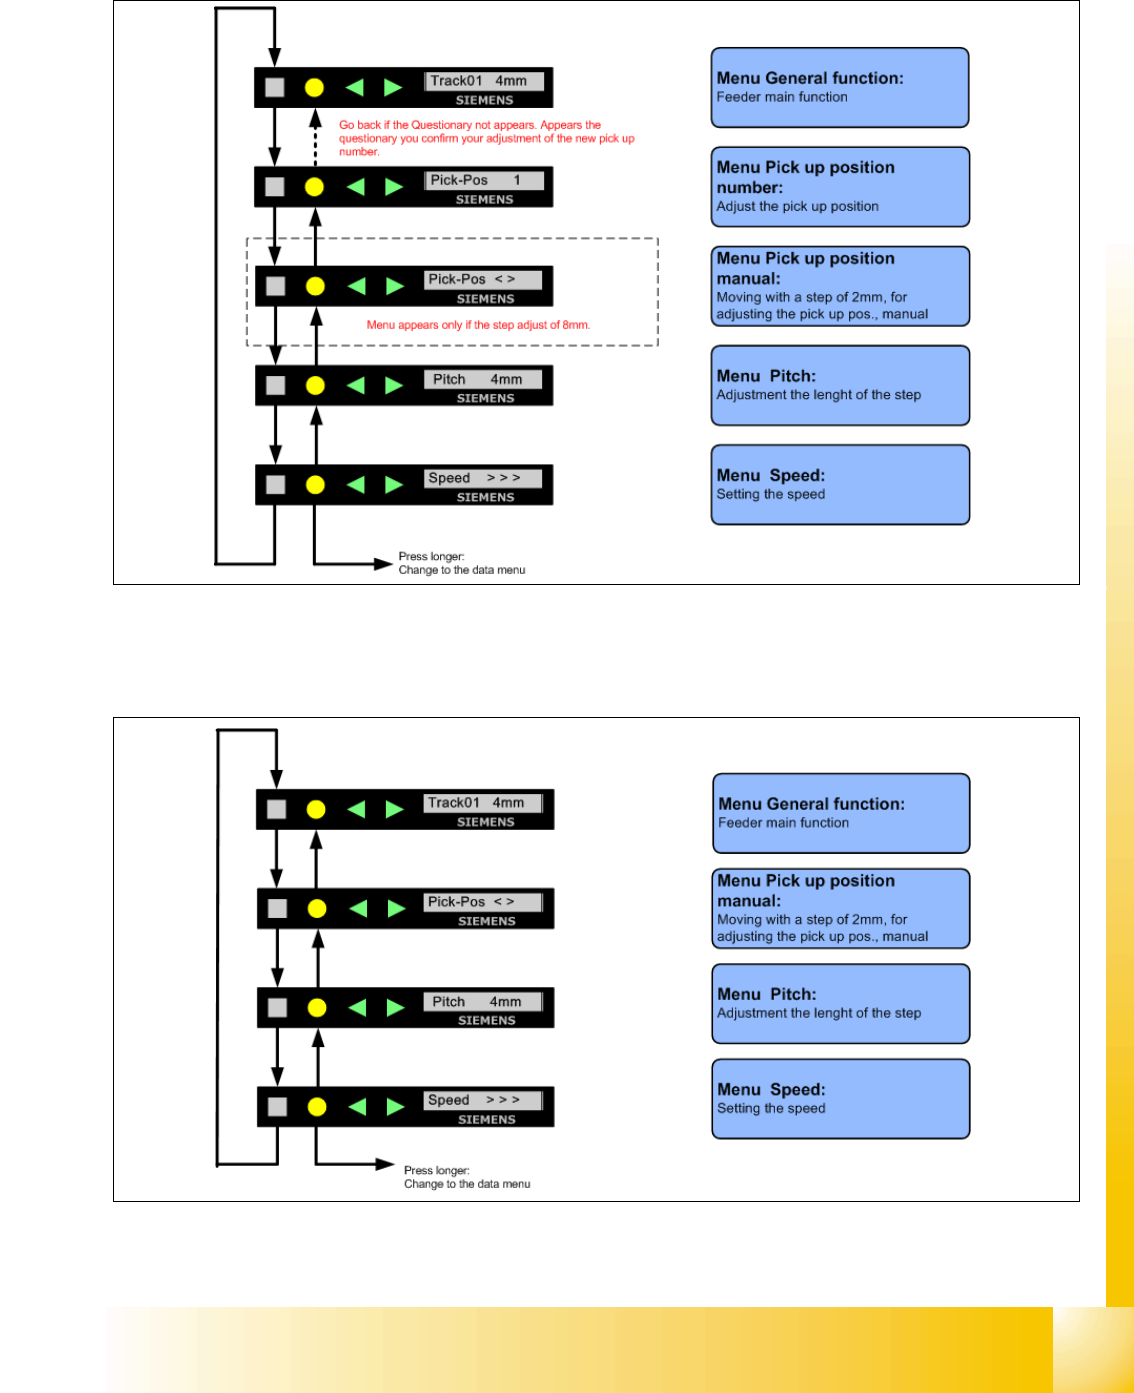
1 - 27 S tudent Guide SIPLACE X Edition 09/2005 9 Component handling 27 9.3.12.1 Sequence in the 8mm X-feeder main menu Fig. 9.3 - 13 Sequence main menu 8mm X-feeder 9.3.12.2 Sequence in the 12mm X-feeder main men u Fig.…

1 - 26
Student Guide SIPLACE X
9 Component handling Edition 09/2005
26
9.3.12 Settings and function in the Main Menu X- Förderer
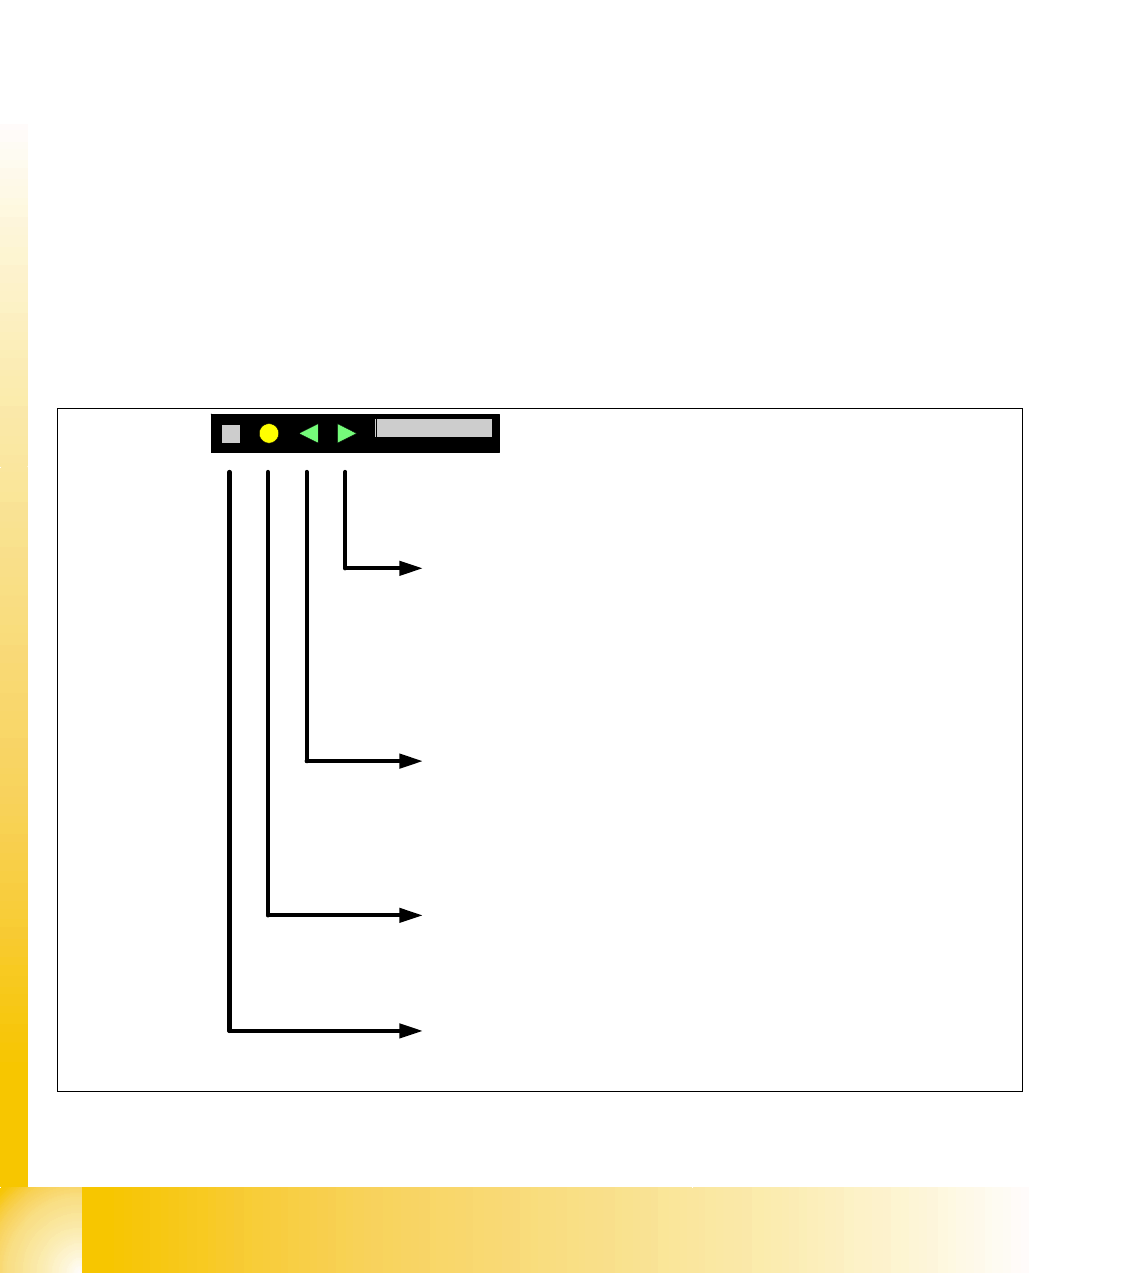
Fig. 9.3 - 12 Control panel for X-feeder
Description of the buttons X-feeder 9
1. "Forwards" button:
Press briefly to move the tape by the set cycle step.
Press for longer to move the tape forwards. Make sure the cover foil is not clamped in.
2. "Backwards" button:
Press briefly and the tape is move backwards by the set cycle step.
Press for longer to move the tape backwards. (Only perform these functions when the cover
foil is not clamped in)
3. "Foil" button:
Press to start the drive motor for cover foil. This runs until the foil has been stretched tight and
the motor toggle switch turns off or until the timer has counted 30 seconds.
4. "SET" button:
Briefly press you switch to the next menu in the main menu
Press for longer to request component verification.
Please Note:
If you defined the correct Pitch in Siplace Pro the Software send the corret value to the 8mm X-
Feeder automatically.
Transportdirection
Cycle step
Display showing track on location
1
2
3
4
1 - 28
Student Guide SIPLACE X
9 Component handling Edition 09/2005
28
9.3.12.3 Adjustments of the Pick up position only on 8mm X- Feeder
– Press the "SET" Button
– It appears the current pick up position on the display (e.g.
Pick-Pos 3)
– With the buttons "FORWARD" or "BACKWARD" you can set the new pick up position.
– If you change the pick up position from Pick-Pos 3 to Pick-Pos 2 it appears the following
e.g.
Pick-Pos 2 ? on the display.
– Confirm the new pick up position with the yellow button, it appears
Pick-Pos 2 ! on the display.
– Only in the pick up position 4 and pitch 8mm appears the following menu, if you press the
"SET"- Button on the display
"Abholpos < >"
– Depend on the Pick up position you can adjust in 2mm steps the correct pick up position.
– Was the pick up position correct appears the menu "Pitch" now and you can set the correct
pitch 1,2,4,8mm with the buttons "FORWARD" or "BACKWARD".
– Press two times the button "SET" and you confirm your settings.
9.3.12.4 Menu pick up position manual in the main menu
Fig. 9.3 - 15 Setting the pick up position manual
Button Backward press briefly
After release the button, the tape move one transport cycle with the actual
pitch backward.
Button Backward press long
After 1sec. the tape drive move backward again until the button is not
released.
Attention: These function are not possible if the cover foil in the removal
unit tensioned.
Button FOIL
Change to the previews menu in the main menu
Button Forward press briefly
After release the button, the tape move one transport cycle with the actual
pitch forward.
Button Forward press long
After 1sec. the tape drive move forward again until the button is not
released.
Button SET press briefly
Change to the next menu in the main menu
Button SET press long
No function
SIEMENS
Abholpos < >Pick-Pos < >