SiplaceX4_en.pdf - 第539页
1 - 34 S tudent Guide SIPLACE X 1 1 Sitest Edition 09/2005 34 1 1.2.17 New function in the Sitest program 1 1.2.17.1 Menu of transport Fig. 1 1.2 - 19 T ransport - option and configuration a Change widening of conveyor (…
1 - 33
Student Guide SIPLACE X
Edition 09/2005 11 Sitest
33
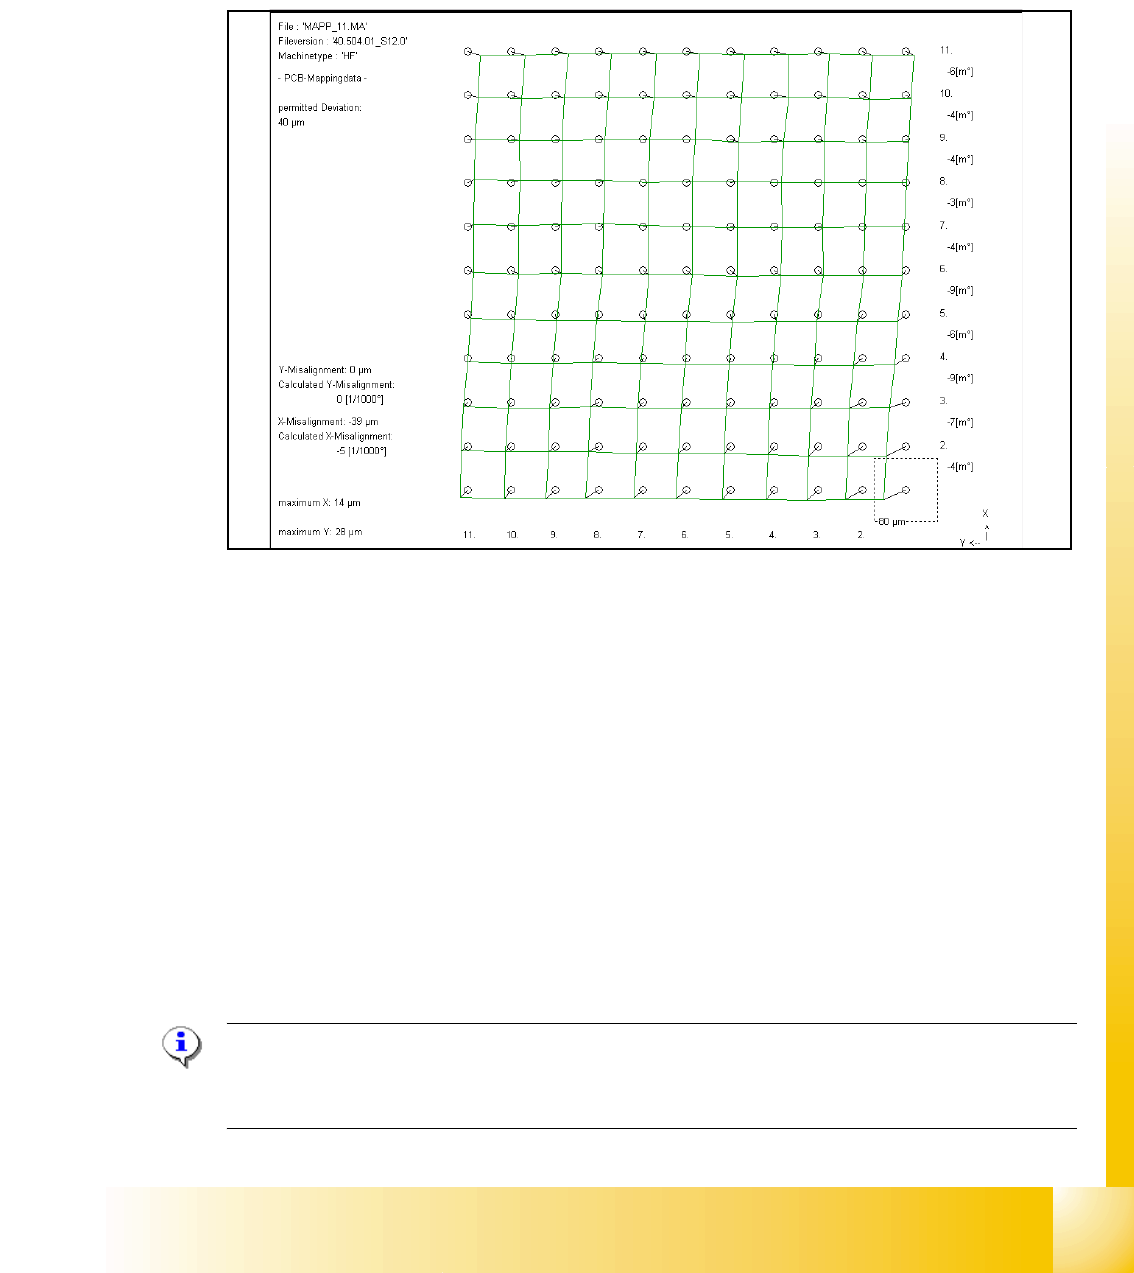
➠ PCB mapping is running.
➠ Then the gantry axes move the camera up to the start position. This is centered according to
the synthetic picture of the bright cross structure at this position.
➠ This results are set for the nominal coordinates. 40.000 µm in X- respectively Y- direction
added for the next fiducial nominal position.
➠ The deviation of the structure to this theoretical position is measured.
Fig. 11.2 - 18 Result of PCB mapping
The result are saved in the mapp _xy.ma ( x= number of the gantry , y= transport track)
11.2.16 Head mapping( C&P,Twin head)
With the head mapping the linearity of the X- and Y-guidance for C&P head movement is mea-
sured in the placement area.
The C&P head place the calibration tool on the mapping glass board exact to the nominal posi-
tions of the glass plate. The PCB-camera measure the placement accuracy of this placements for
the whole placement area.
➠ After the PCB mapping the placement head place at the theoretical positions of the PCB-map-
ping the calibration tool.
➠ The PCB-Camera look for the placement accuracy on the 4 fiducials at the calibration tool cor-
ner.
Note:
All described automatically calibration steps above, can you do manually step by step under the
sub menus (see chapter 12.1).
1 - 34
Student Guide SIPLACE X
11 Sitest Edition 09/2005
34
11.2.17 New function in the Sitest program
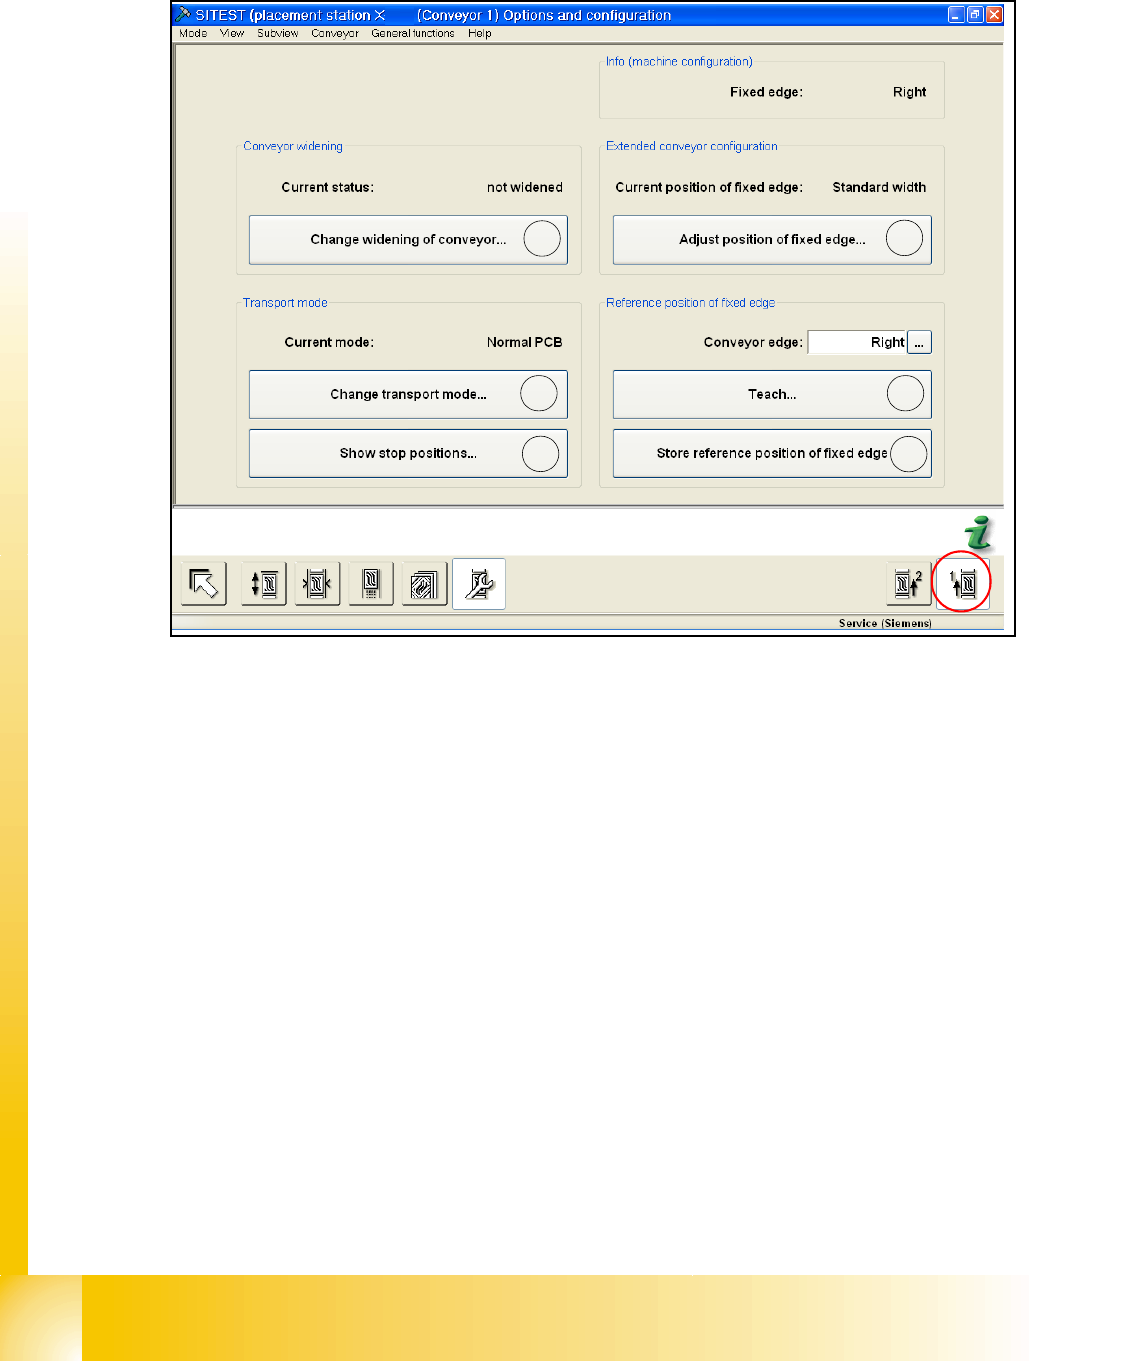
11.2.17.1 Menu of transport
Fig. 11.2 - 19 Transport - option and configuration
a Change widening of conveyor (only track 1 for dual conveyor):
It appears a next menu, in which you can choose "widened" or "not widened" (Standard width).
Widened that means, you configure your dual conveyor as an single conveyor. Track 2 will be
move together (limit switch). The fixed conveyor rail (Track1) has the same position like before.
If you choose the point 4 at first (Excess width) a max. width of 450 mm is possible.
s Change Transport mode:
This function do you need to configure the long board option.
Next menu: normal PCB/ long PCB
d Show Stop positions:
shows the number of position in PA 1 and PA2, additional the offset depend on the standard
position (PCB Reference- corner). The offset of the long board option will be send by Siplace
Pro.
f Here you can move the fixed conveyor rail in his standard positon for standard width and Ex-
cess width (Values are from the Machinendata of the transport control board). Excess width
that means, the fixed conveyor rail will be move 34mm more outside (Dual conveyor Track1
and 2= 250mm, flexible dual conveyor Track1= 450mm, Single conveyor =508mm).
g Point 5 and 6 only with Siemens Service Passwort active! You can teach the fixed conveyor
rail (left, right).
h Save the teach data from point 5.
1
2
3
4
5
6

1 - 35
Student Guide SIPLACE X
Edition 09/2005 11 Sitest
35
11.2.17.2 Function Firmware download
Choose "Settings"of the menu- bar in Sitest and afterwards "Firmware Download".
Fig. 11.2 - 20 Firmware Download
In the Can FW folder there are all current Firmware versions of all axes, tables etc.
(1) In this directory will be automatically checked up if there exist a newly firmware version of the
seperate axes,tables etc. compared to the already existing version. If there exist a new firmware
version, this new version will be offered and could be downloaded for example to the star- axis.
(2) It is also possible that you can manually copy a new firmware version in the Can FW folder.
Therefore just click on the button "Copy firmware file to pool...". A Explorer menu will appear,
where you can copy the firmware version from disk or USB-Stick into the Can FW folder. This one
inserted by you is now present in the selection menu (see
(1)).
1
2