IT Feeder Manual-SM320(English V2.0)Ver1 - 第58页
Samsung Intelligent Feeder System There are two types of barcode scanners; keyboard type and serial type. KeyBoard Edge type is supported by PartS tation. If help is needed to specify Serial Para meter when setting up th…
Part Station
2-17
2.4.1. Configuration [F10]
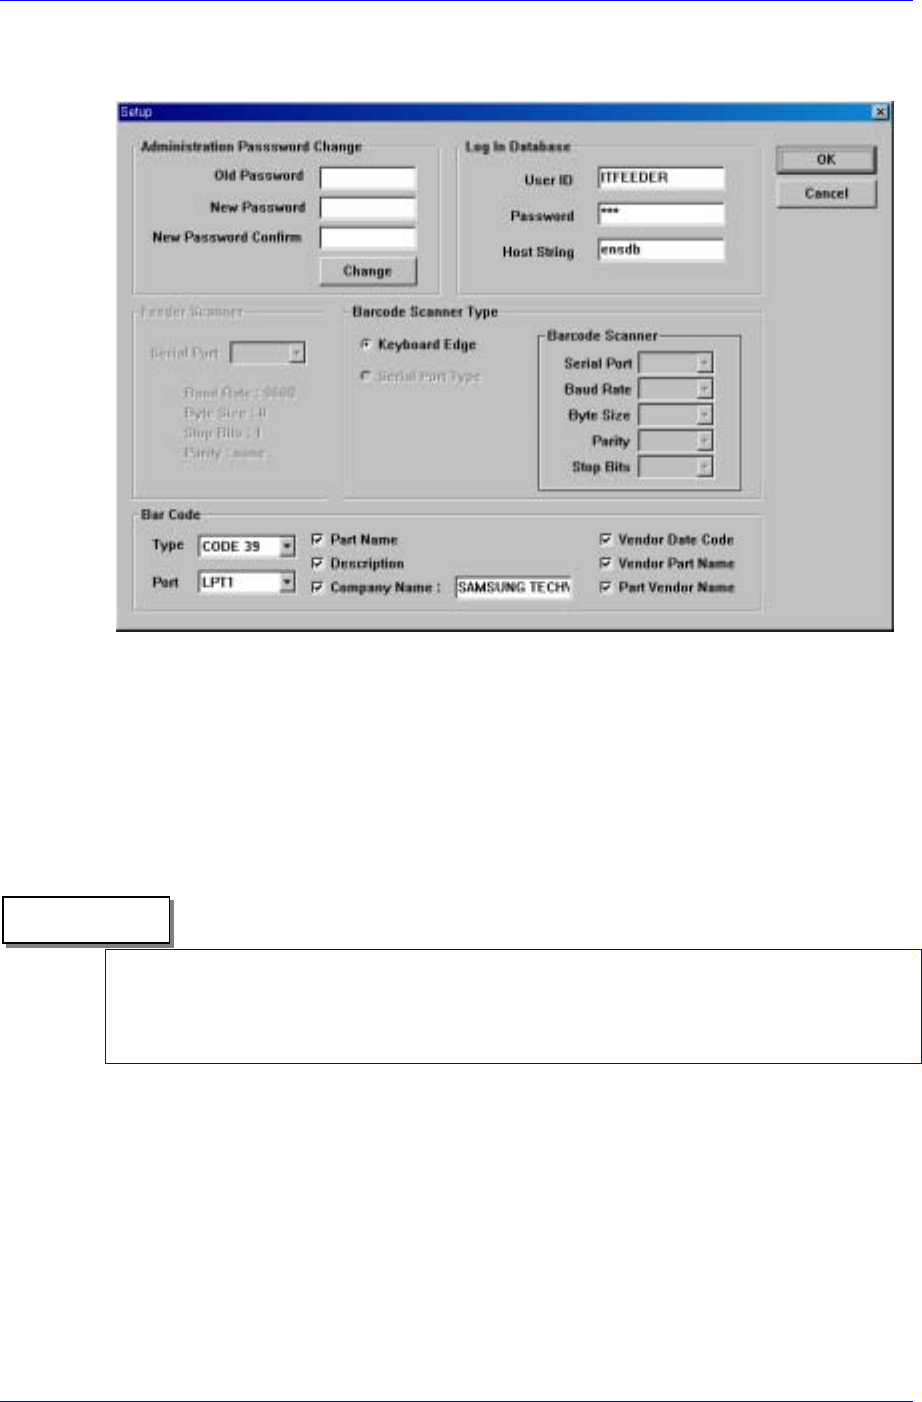
When Configuration is selected from the Option menu, the following screen appears.
Figure 2-14.Configuration screen
The configuration screen consists of 7 areas.
Administration Password change: Changes the password for the management mode.
The 3 edit boxes underneath are codified so that the letters entered are not visible.
<Old Password> edit box: Enter the previous password.
<New Password > edit box: Enter the new password.
<New Password Confirm> edit box: Enter the new password to confirm.
<Change> button is used for changing to a new password.
Reference
A password can be composed of a maximum 7 characters including Alphabets, Korean
characters and number keys. Special keys cannot be used. If setup is performed without
pressing any key, the password cannot be changed afterward.
Log In Database
<User ID> edit box: Enter the user ID to access the Oracle Database.
<Password> edit box: Enter the password to access the Oracle Database.
<Host String> edit box: Enter the host string to access the Oracle Database.
Feeder Scanner
The set up screen for the Feeder RF-ID scanner, it is not used in PartStation. It is used
in FeederStation.
Barcode Scanner Type
Samsung Intelligent Feeder System
There are two types of barcode scanners; keyboard type and serial type. KeyBoard
Edge type is supported by PartStation.
If help is needed to specify Serial Parameter when setting up the Serial Port type,
please consult with Samsung Techwin.
It is programmed to support only the keyboard edge type supplied by us.
Bar Code
Sets the barcode printer type, port, and the contents to be output when printing the
barcode.
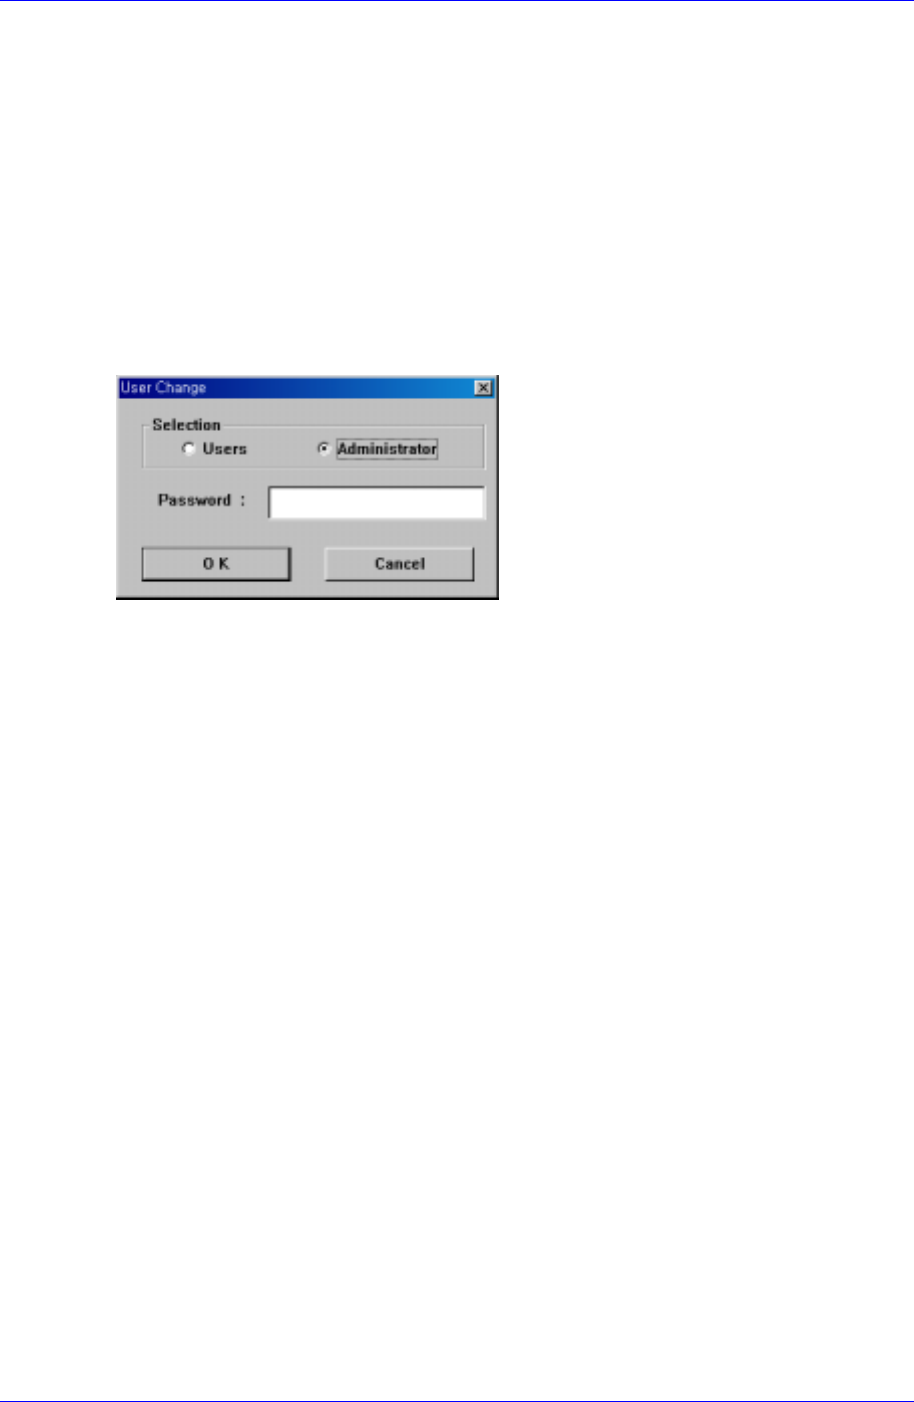
2.4.2. User Change [F11]
Selecting User Change in the Option menu will display the following screen.
Figure 2-15. Configuration screen
Users
Perform Part Station in the general user mode.
In the general user mode, the part/reel cannot be deleted (it is possible in the case of
waste part-reel), and the setup cannot be performed.
Administrator
Perform Part Station in the administrator mode.
In the administrator mode, the part/reel can be deleted and setup can be performed.
2.4.3. Connect Database [F12]
Retry connection to the Oracle Database when it is disconnected.
2-18
Part Station
2-19
2.5. View Menu
When the View menu is selected on the Main menu bar, the following submenus appear.
The View menu consists of both a tool bar and status bar that are basically provided by
the Windows.
As default, the tool bar and the status bar are displayed. When the check button is
removed, the tool bar and status bar are invisible on the screen.
Figure 2-16.View submenus
2.5.1. Toolbar submenu
By turning On/Off the Toolbar in View of the Main menu, the user can have a screen with
the tool bar visible or invisible. Major commands of the Main menu are represented by
icons in the tool bar. Pressing an icon executes the respective menu just as selecting it in
the Main menu.
Also, it provides a brief description of the menu. When the mouse pointer is located on
the icon button, tool tip appears in a small box as shown in the figure below. And a
description of the menu where the mouse pointer is located appears in the status bar at the
bottom. (Refer to Status bar).
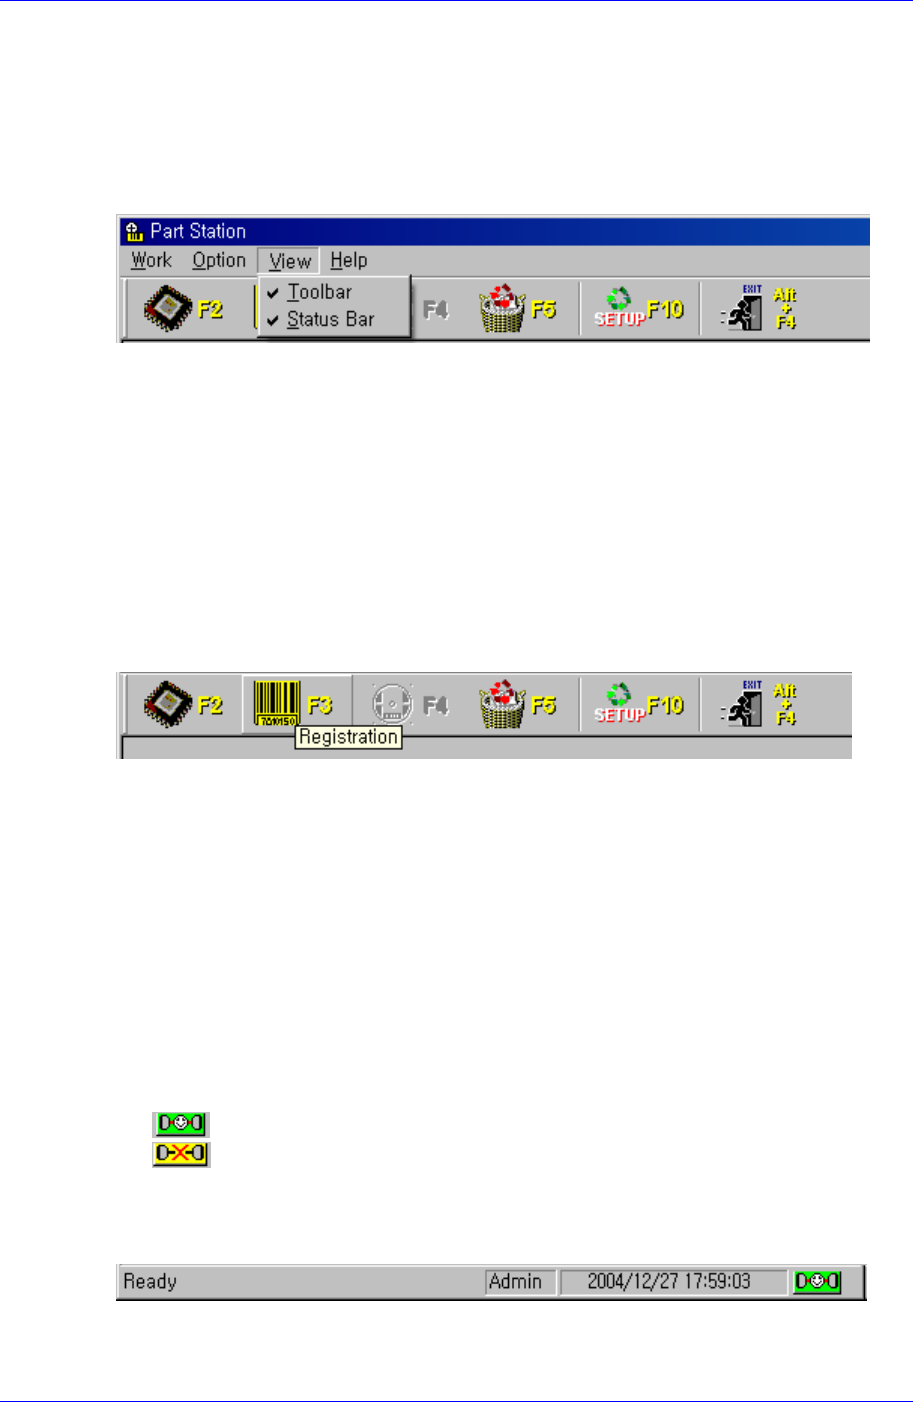
Figure 2-17. ToolBar window
2.5.2. Status Bar submenu
By turning On/Off the Status bar in View of the Main menu, the user can have a screen
with the status visible or invisible.
The status bar consists of the status display window that gives a description of the menu
or result, user mode window, and time window.
Status display window: Displays a description of the menu or the result
User mode window: Displays or changes the current user mode.
Time display window: Displays current time.
Database display window: Indicate the status of connection with the database
: When connecting to the database
: When disconnecting to the database
To change the user mode, click the user mode with a mouse, then a window the same with
the user change window of the Main Menu appears. When the user is changed here, it is
processed just the same.
Figure 2-18.
Status Bar window