EUS0153210_YFact_Standard_E.pdf - 第47页
2-13 2 Board Explorer 4 Enter the line name. 1. Click the right mouse button on the newly cr eated line in the tree view, to display the context menu. 2. Select "Change Line Name" from the menu and type the lin…
2-12
2
Board Explorer
3.
Registering or deleting “lines” and “machines”
When using the Board Editor of the Factory Tools to edit Board data or optimize data, you must register
“machines” connected with a “line”. This section explains how to register or delete “lines” and “machines”.
3.1 Registering “lines” and “machines”
1
Create a board data disk or board folder for each machine.
For a description of how to create a board data disk or board folder, refer to the programming manual
for each series.
n
NOTE
When registering a machine stored on the network, browse the "No.1" folder on the network to register the line and
machine. You do not have to create a board data disk or board folder in this case.
2
Start the Board Explorer.
3
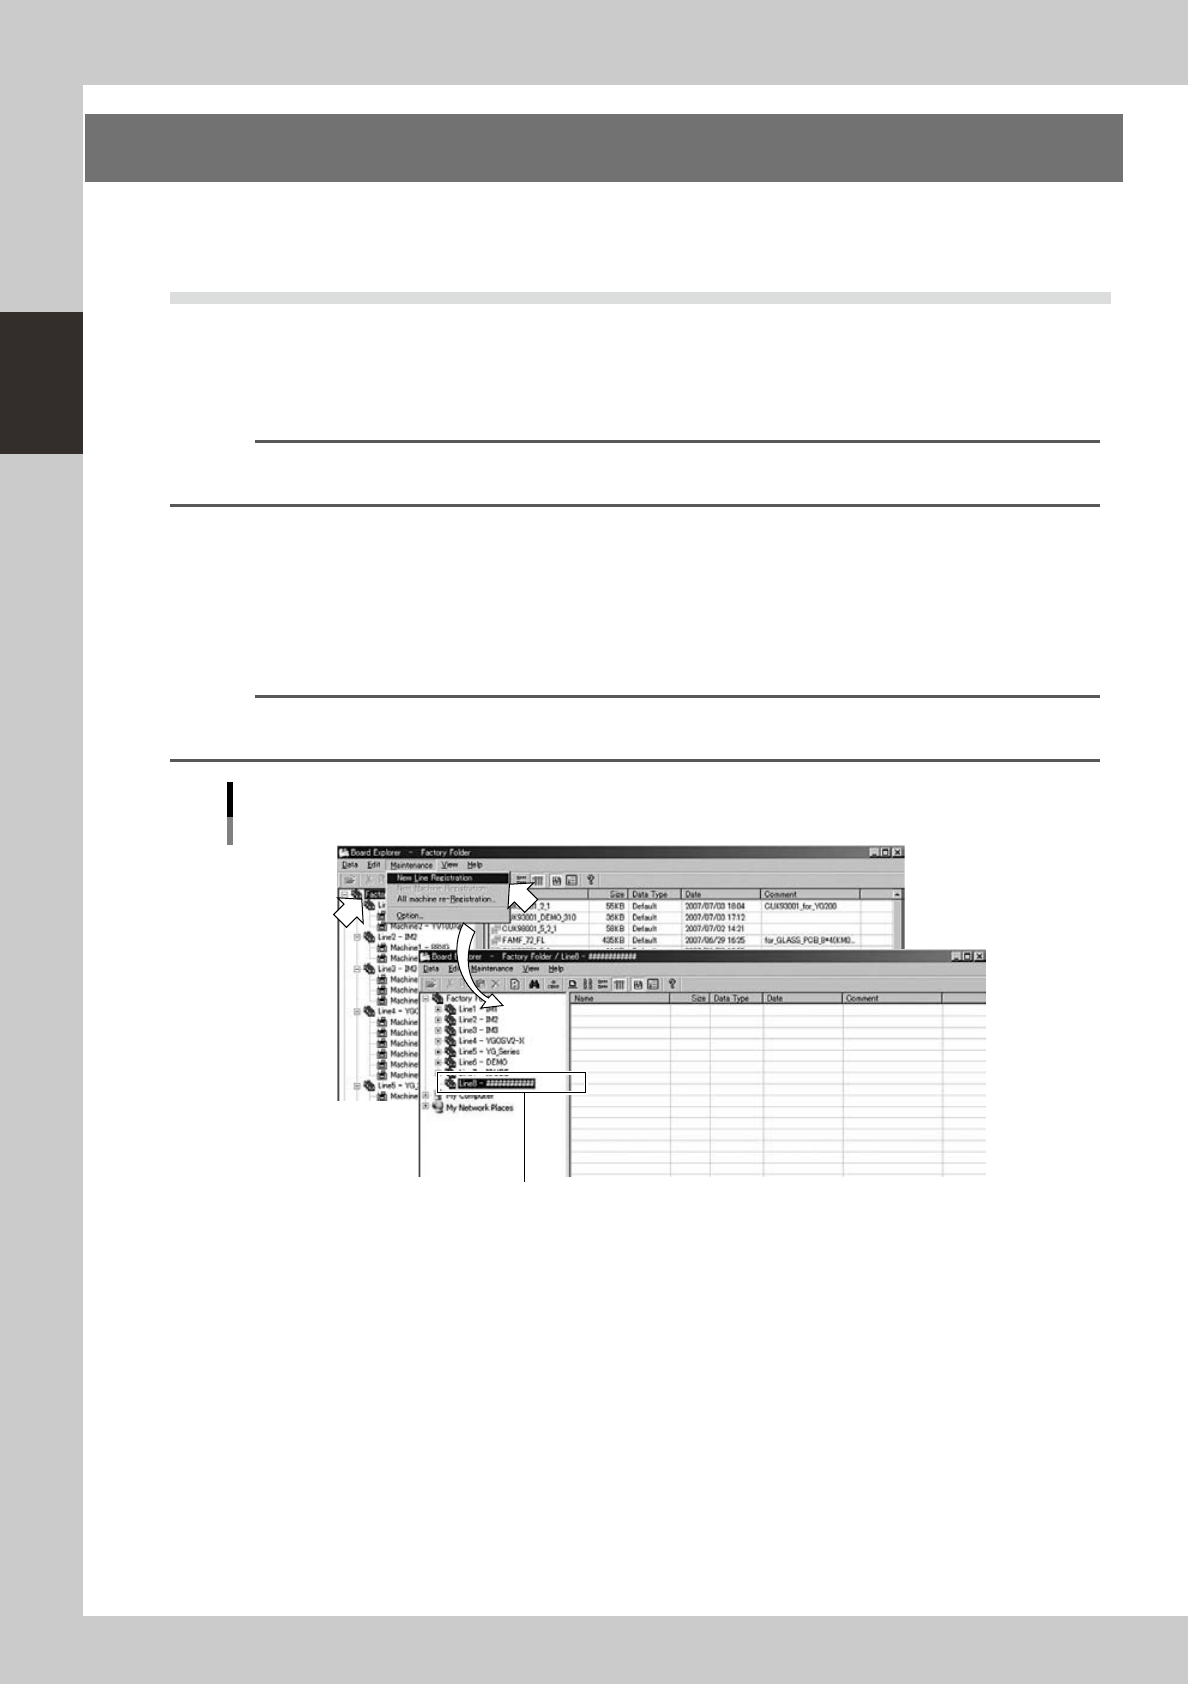
Register a new line.
1. Click the Factory Folder in the tree view.
2. Select "New Line Registration" from the Maintenance menu.
A new line is created and displayed in the tree view.
Reference
You can select the same command from the context menu that appears by clicking the right mouse button on the
Factory Folder.
Maintenance menu
Selecting "New Line Registration"
A new "line" is displayed.
64221-S0-00
2-13
2
Board Explorer
4
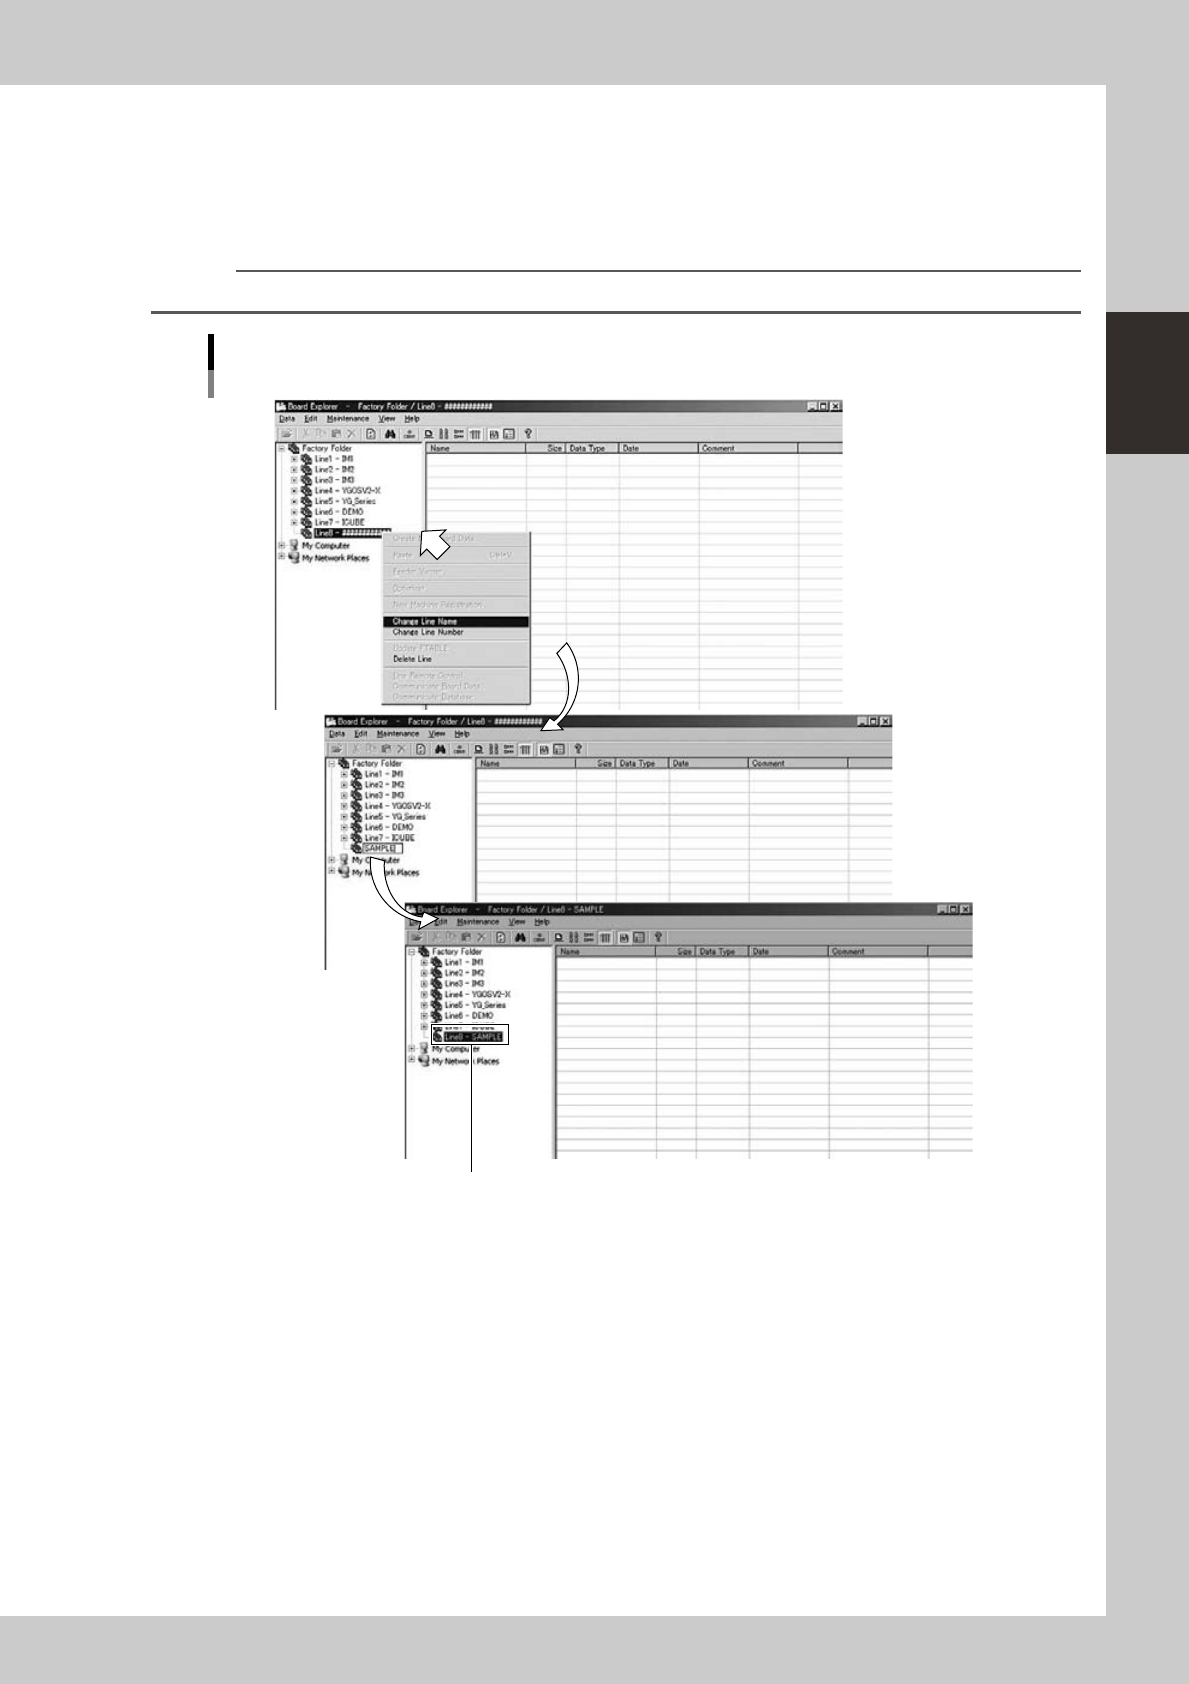
Enter the line name.
1. Click the right mouse button on the newly created line in the tree view, to display the context menu.
2. Select "Change Line Name" from the menu and type the line name.
3. Press the [Enter] key to register the line name.
The line name is displayed in the tree view.
Reference
The line name can be up to 12 alphanumeric characters including underbars.
Menu operation
Registering a new line
Registered line name is displayed.
64222-S0-00
2-14
2
Board Explorer
5
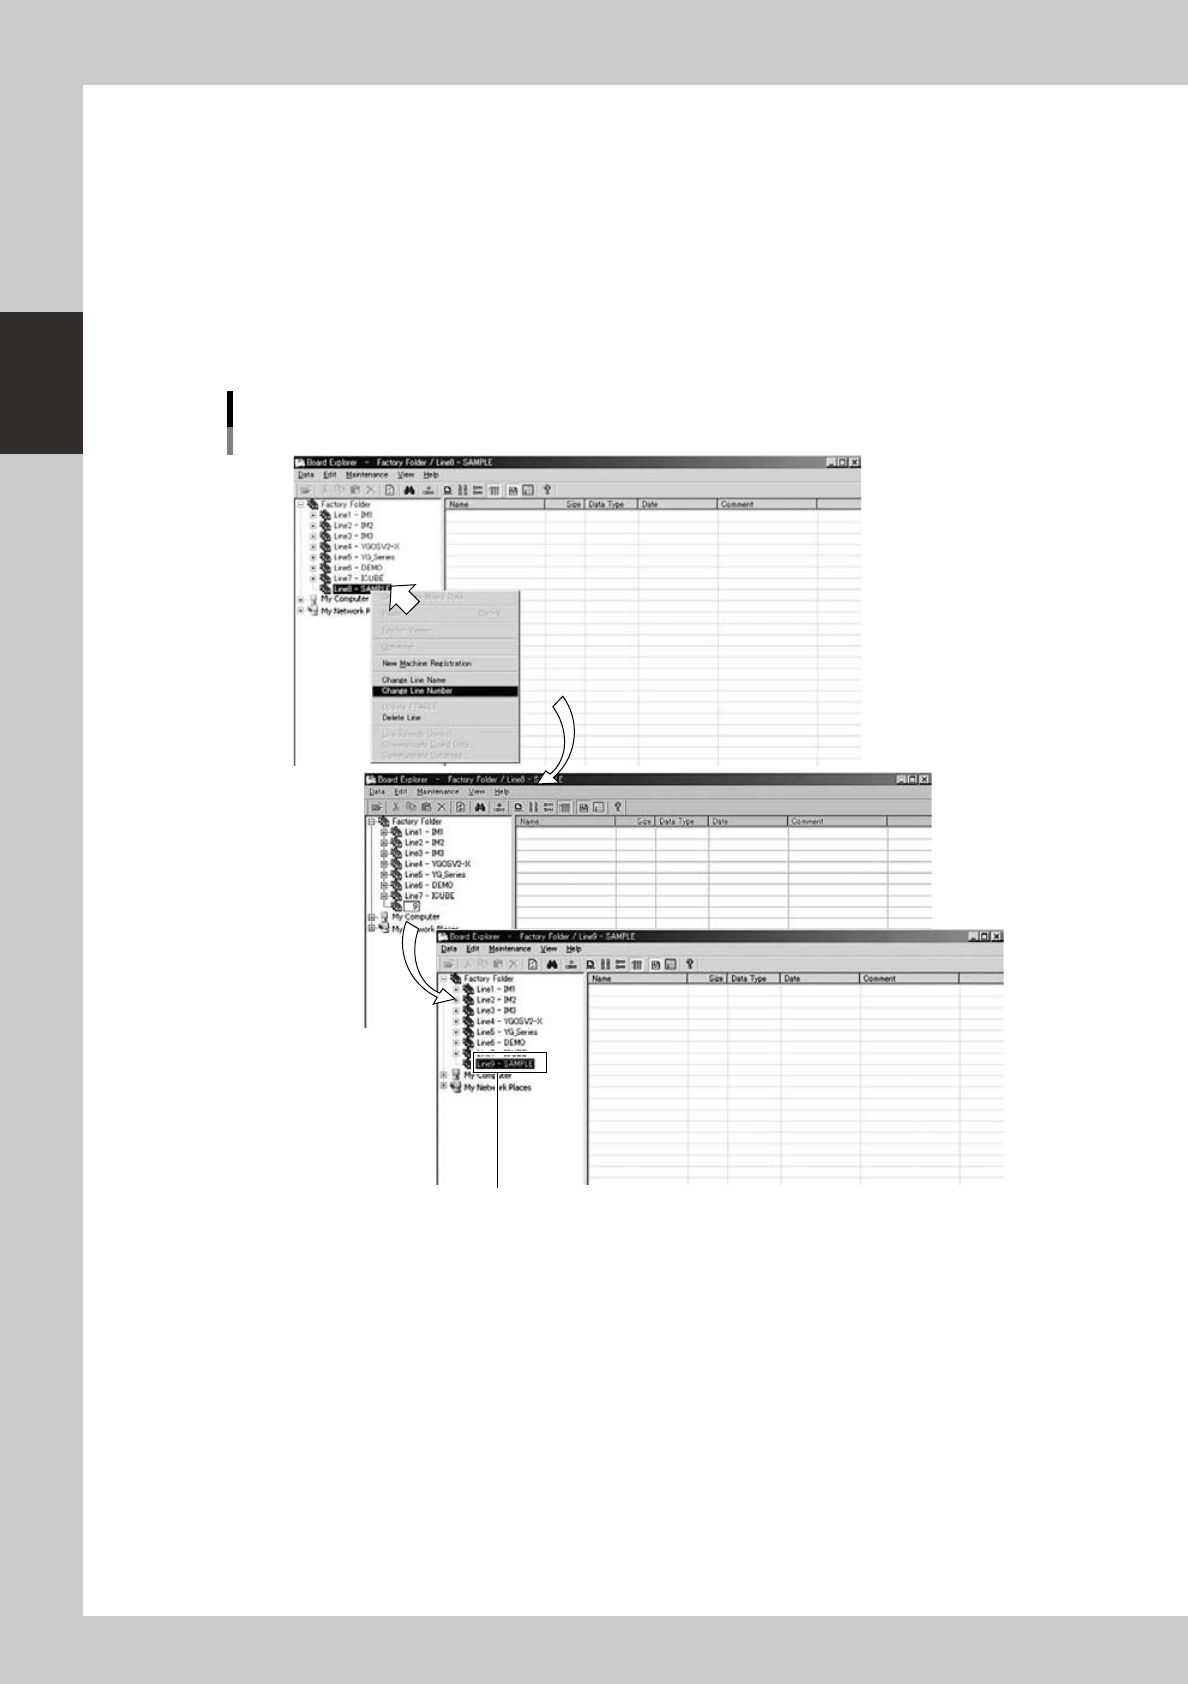
Change the line number.
The line number can be changed as needed.
1. Select the line in the tree view and click the right mouse button to display the context menu.
2. Select "Change Line Number" from the menu and type the new line number.
As the initial line number, "Line 1" has automatically been assigned to the new line when no lines are
registered. When one or more lines are already registered, the smallest number that is not used has
been assigned to the new line.
Any line number up to "50" can be used if not yet registered.
3. After changing the line number, press the [Enter] key to register the new line number.
The new line number is displayed in the tree view.
Menu operation
Changing the line number
New line number is displayed.
64223-S0-00