Nordson_EFD_Automated_Dispensing_Systems_Maintenance_Guide - 第12页
Automated Dispensing Systems Maintenance & Parts Guide 12 www.nordsonefd.com info@nordsonefd.com +1-401-431-7000 Sales and service of Nordson EFD dispensing systems are available worldwide. Applying Gr ease to the Gr…
11www.nordsonefd.com info@nordsonefd.com +1-401-431-7000 Sales and service of Nordson EFD dispensing systems are available worldwide.
Automated Dispensing Systems Maintenance & Parts Guide
Linear Guideway Cleaning: Z and R Axes (continued)
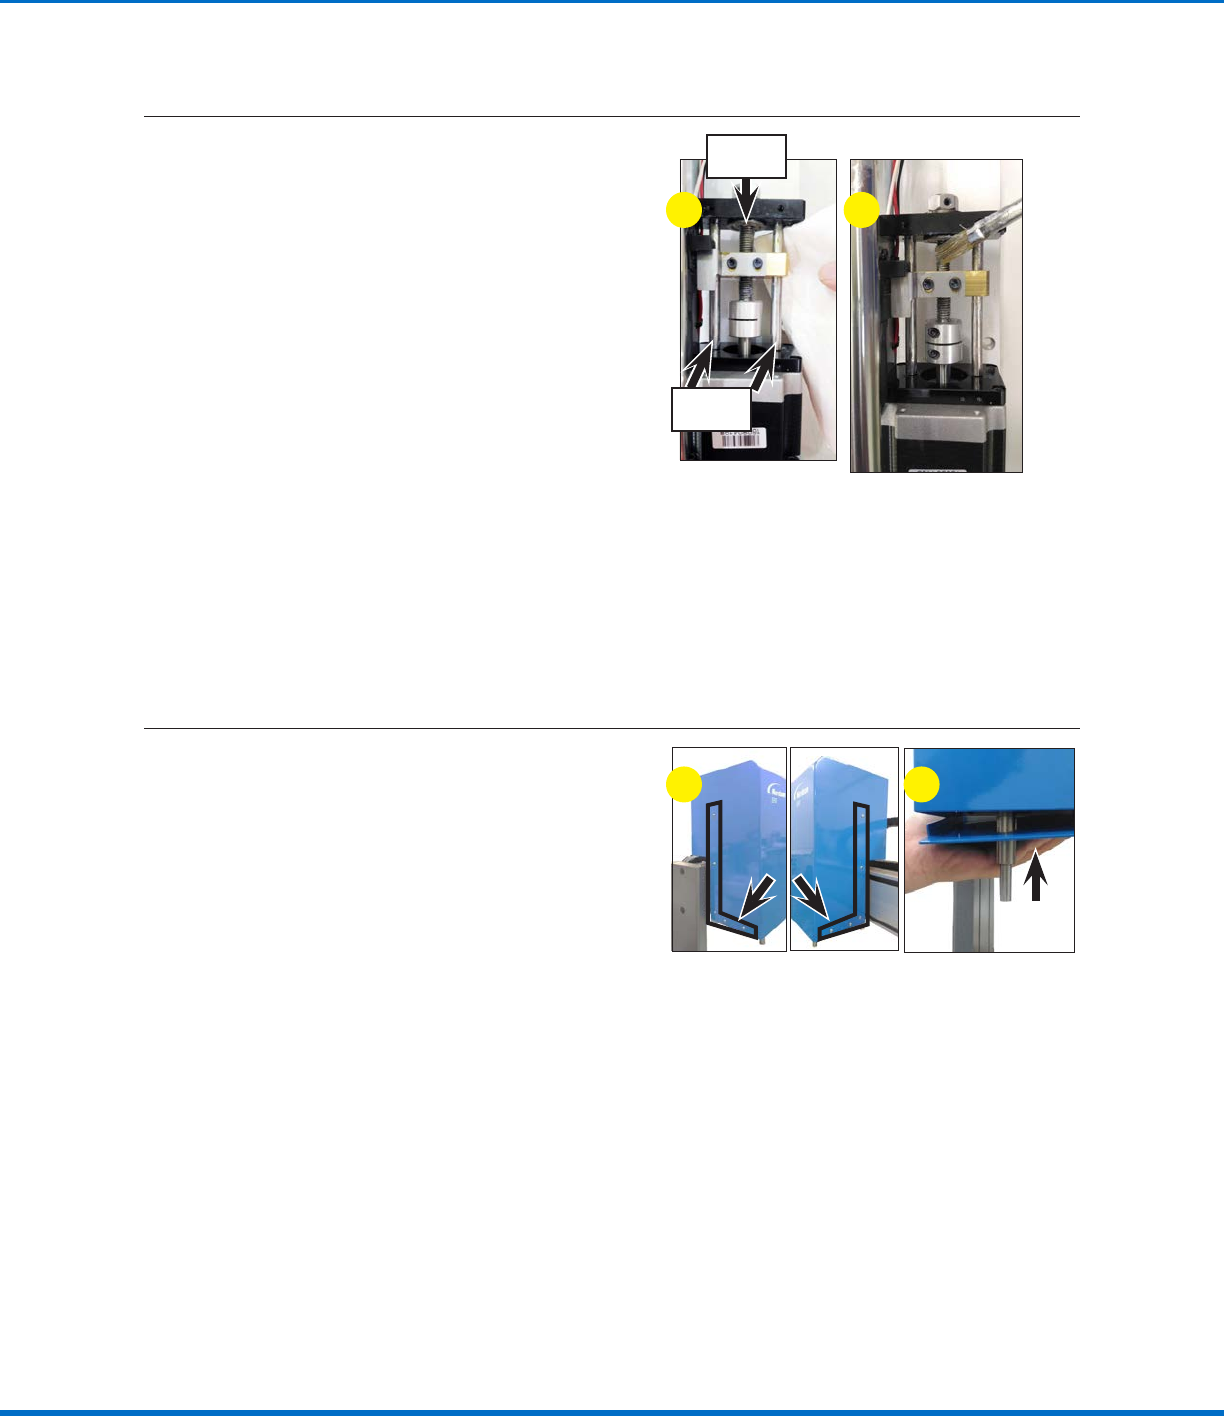
Clean and Grease the RAxis Components
3
Clean the Raxis as follows:
a. Use a clean nonwoven cloth to clean any
dust and grease from the rotational ball
screw and rotational shafts.
b. Rotate the Raxis multiple times to expose
the parts of the rotational ball screw and
rotational shafts previously inaccessible
and clean the grease and dust with the
nonwoven cloth.
NOTE: Keep the Raxis in the rotated
position.
c. Use the brush and grease from the
maintenance grease kit to liberally apply
grease to the rotational ball screw and
rotational shafts.
d. After greasing, release the Raxis from the
rotated position and then rotate the Raxis
clockwise and counterclockwise to disperse
the grease evenly on the two components.
e. Use a clean nonwoven cloth to remove
excess grease.
c
Rotational
ball screw
Rotational
shafts
a
Reinstall the ZAxis Cover (R / RV Series Only)
4
a. Position the Zaxis cover over the Zaxis
module and vertically lower it to its correct
orientation.
b. Lift up the Zaxis bottom plate and secure
the two components with the 10 screws
removed previously.
ba
Automated Dispensing Systems Maintenance & Parts Guide
12 www.nordsonefd.com info@nordsonefd.com +1-401-431-7000 Sales and service of Nordson EFD dispensing systems are available worldwide.
Applying Grease to the Grease Fittings
CAUTION
Risk of injury or equipment damage. Before performing any service procedure, complete the steps under
“Preparation for all Service Procedures” on page3.
1
Before performing this procedure, complete the previous procedures for linear guideway cleaning and
greasing:
• “Linear Guideway Cleaning: XAxis” on page4
• “Linear Guideway Cleaning: YAxis” on page6
• “Linear Guideway Cleaning: ZAxis” on page8
2
Using the syringe and grease provided in the maintenance grease kit, fill the syringe with the correct
amount of grease based on the robot model. Refer to the table below.
Model
X Axis Y Axis Z Axis
Grease
Weight (g)
Grease
Weight (g)
Grease
Weight (g)
E2 0.95 0.95 0.95
E3 0.95 0.95 0.95
E4 0.95 0.95 0.95
E5 0.95 0.95 0.95
E6 0.95 0.95 0.95
R3 / R3V 0.95 0.95 0.95
R4 / R4V 0.95 0.95 0.95
R6 / R6V 0.95 0.95 0.95
PRO / PROPlus 0.76 0.57 0.57
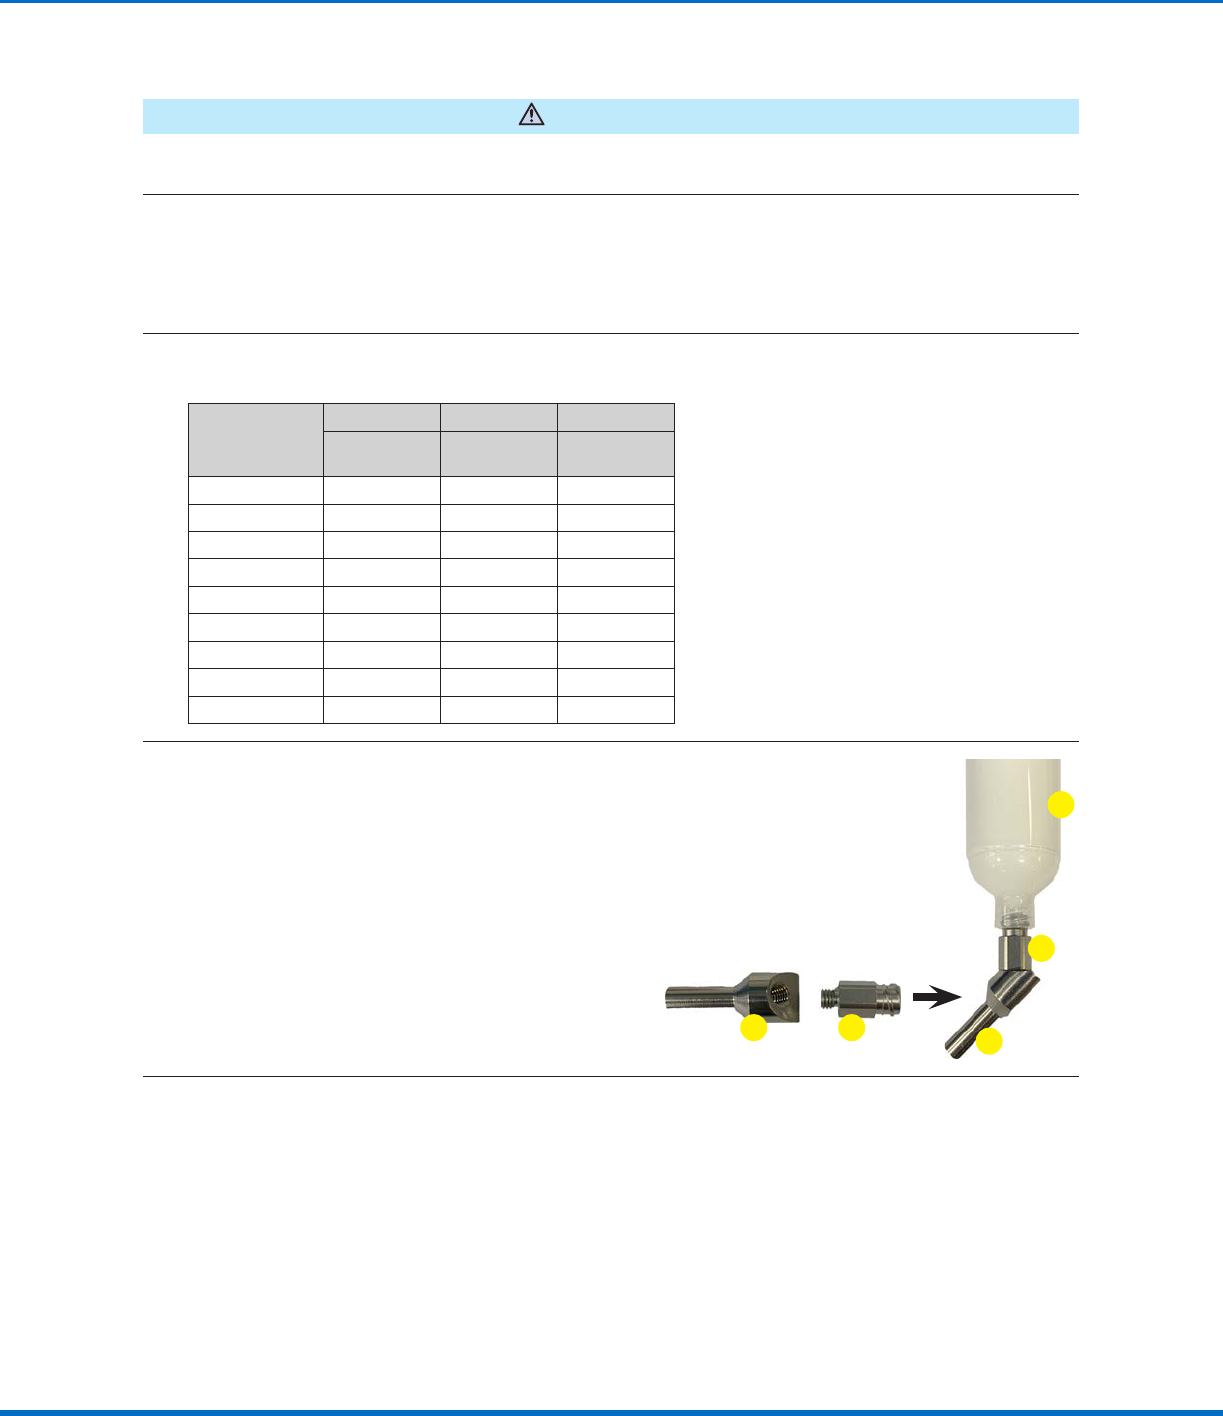
3
Attach the luer fitting (a) to the grease fitting (b),
and then attach the fittings to the syringe (c).
a
b
c
ab
Continued on next page
13www.nordsonefd.com info@nordsonefd.com +1-401-431-7000 Sales and service of Nordson EFD dispensing systems are available worldwide.
Automated Dispensing Systems Maintenance & Parts Guide
Applying Grease to the Grease Fittings (continued)
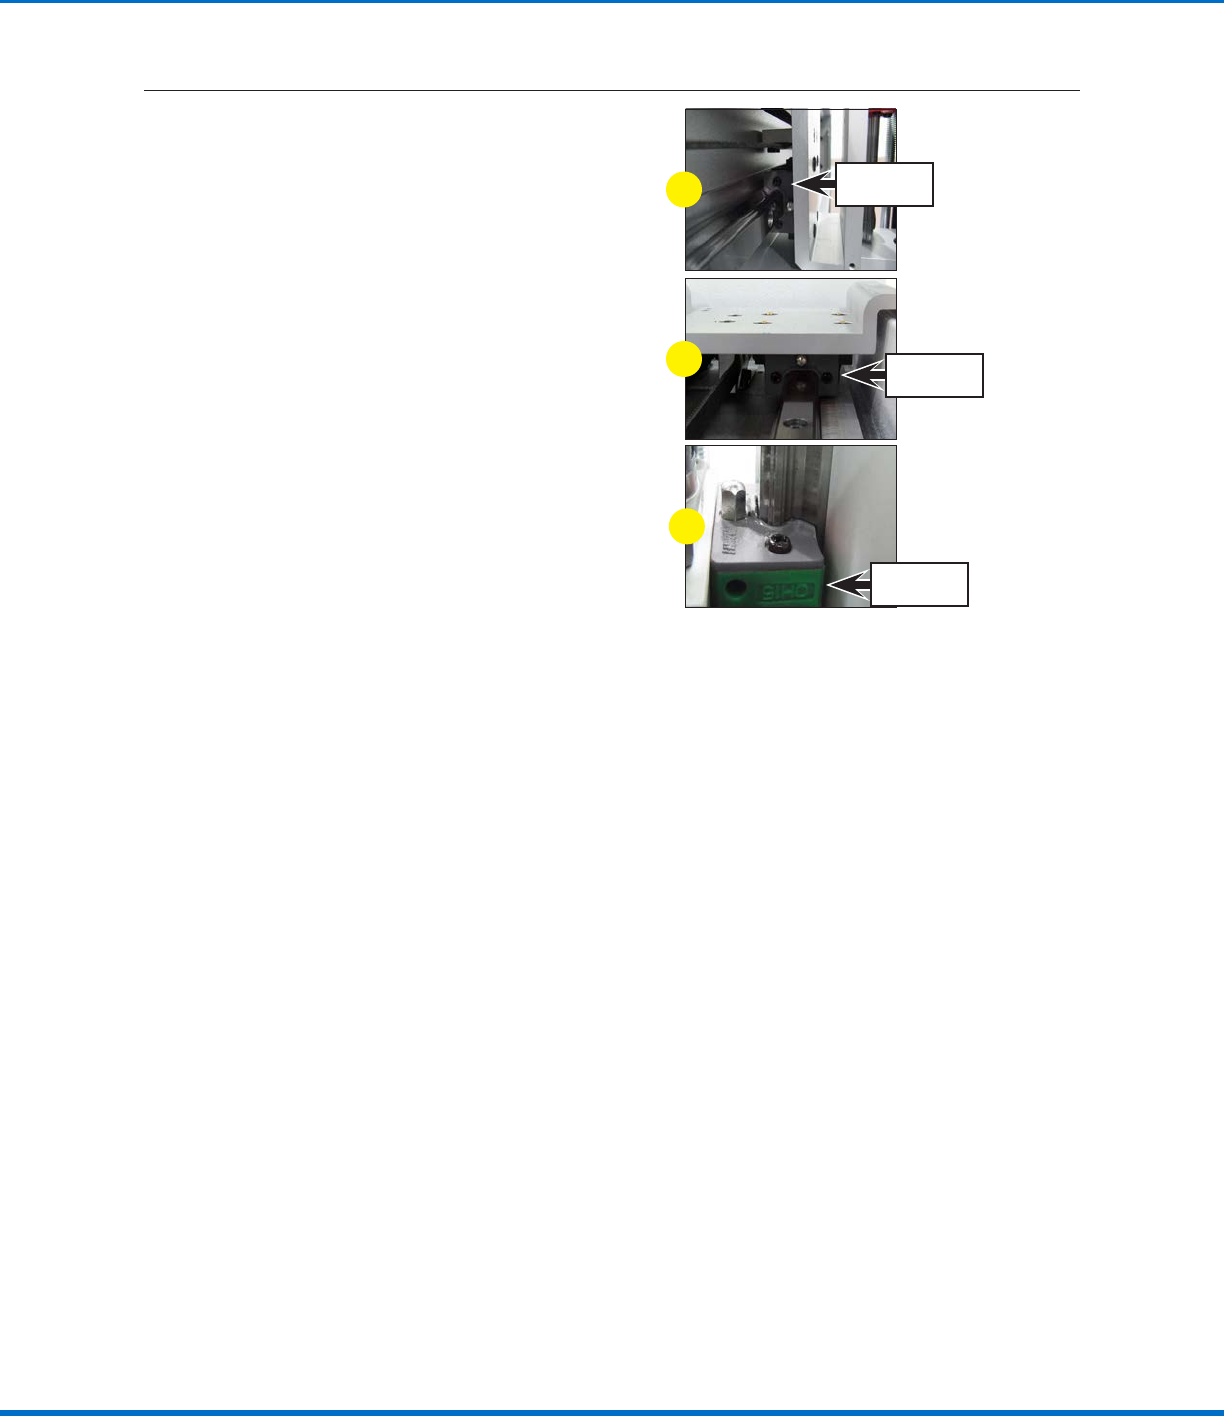
4
Refer to the removal steps in the previous
procedures to remove the X, Y, or Zaxis
covers. If applicable, remove the four screws
that secure the fixture plate and remove it.
As you remove each cover (and the fixture
plate, if applicable), use the syringe to apply the
grease to the grease fitting of each linear guide
slider, located as follows:
• Xaxis linear guideway grease fitting —
behind the sliding panel.
• Yaxis linear guideway grease fitting —
below the sliding panel.
• Zaxis linear guideway grease fitting —
behind the ball screw.
NOTE: There are no Zaxis linear guideway
fittings in R / RV Series units.
a
b
c
Xaxis grease
fitting
Yaxis grease
fitting
Zaxis grease
fitting