00197454-01_AI_Portal_40mm_TwinVHF_SX12_de_en - 第111页
assembly 3.2.5 Fitting the HCUs and HCU Base Adapter Converting the Cover Reconfiguration Kit Twin VHF with Gantry Re configuration Kit Twin VHF mit Portal 111 ► Connect the head boards with t he HCU head adap ter, using…
assembly
Assembly Twin VHF 3.2.5 Fitting the HCUs and HCU Base Adapter
110 Reconfiguration Kit Twin VHF with Gantry Reconfiguration Kit Twin VHF mit Por
-
TF SX12 hoses Twin VHF - 01 1013
► Connect the discharged air connections for the two modules to the silencer.
► Connect the two return units, vacuum generator and digital valves with the pneumatic distributor.
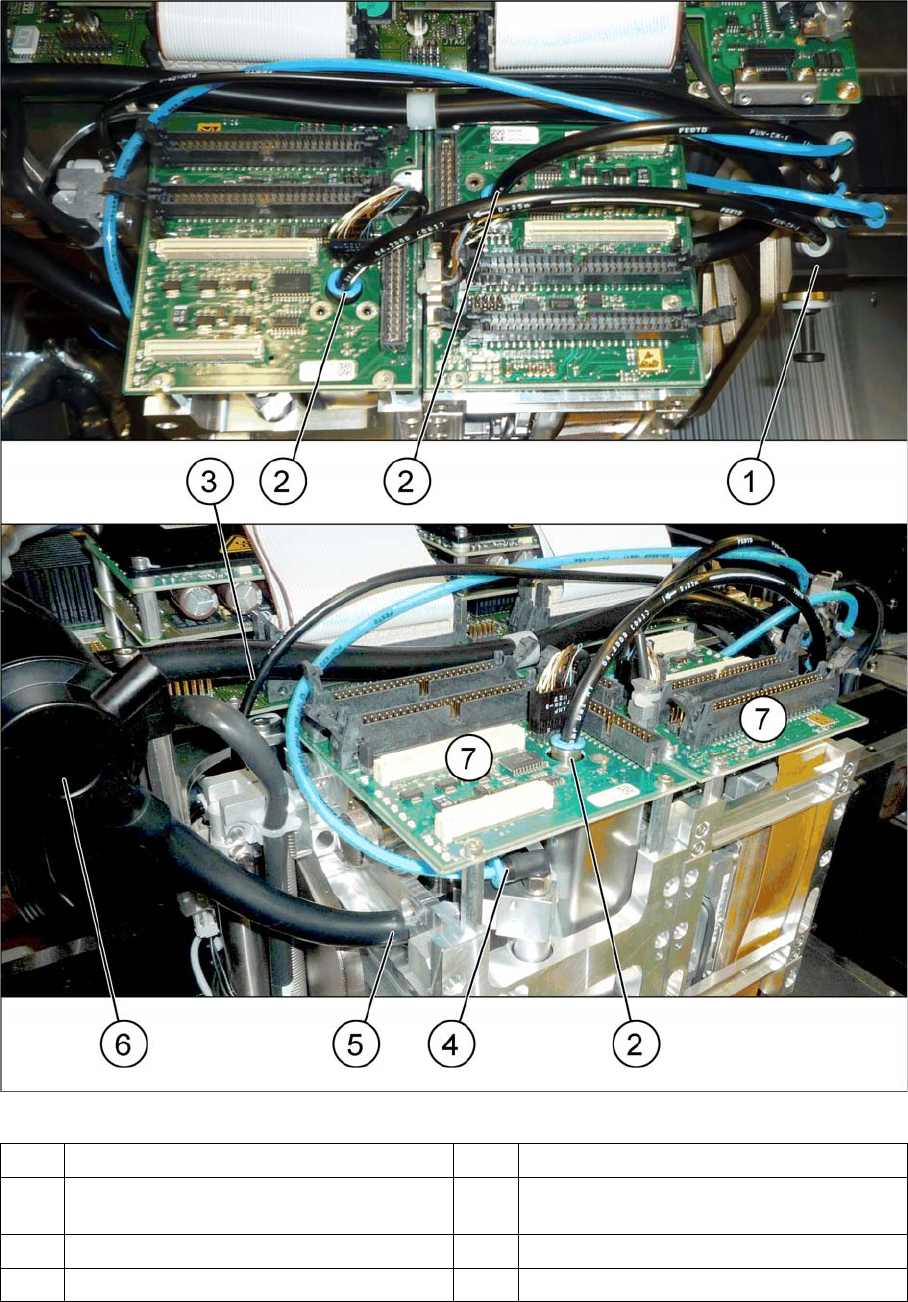
1 Pneumatic distributor 2 Connection digital valve
3 Hose to Pin Picker (Smart Pin Support op
-
tion)
4 Connection for return unit
5 Connection for exhaust tube 6 Silencer discharged air
7 Head boards
assembly
3.2.5 Fitting the HCUs and HCU Base Adapter Converting the Cover
Reconfiguration Kit Twin VHF with Gantry Reconfiguration Kit Twin VHF mit Portal 111
► Connect the head boards with the HCU head adapter, using 2 flat ribbon cables in each case.
See also
1.2 Preparatory Work... [ ➙ 76]
3.4
3.4 Converting the Cover
Converting the Cover
When using the WPC5/6 for high components, you need to convert the cover. The new cover has a re
-
cess for the WPC on the disk.
Proceed as follows:
CAUTION
No WPC
If no WPC is fitted, you will not be able to feed in components with a height of 40 mm.
The cover may not be converted if there is no WPC.
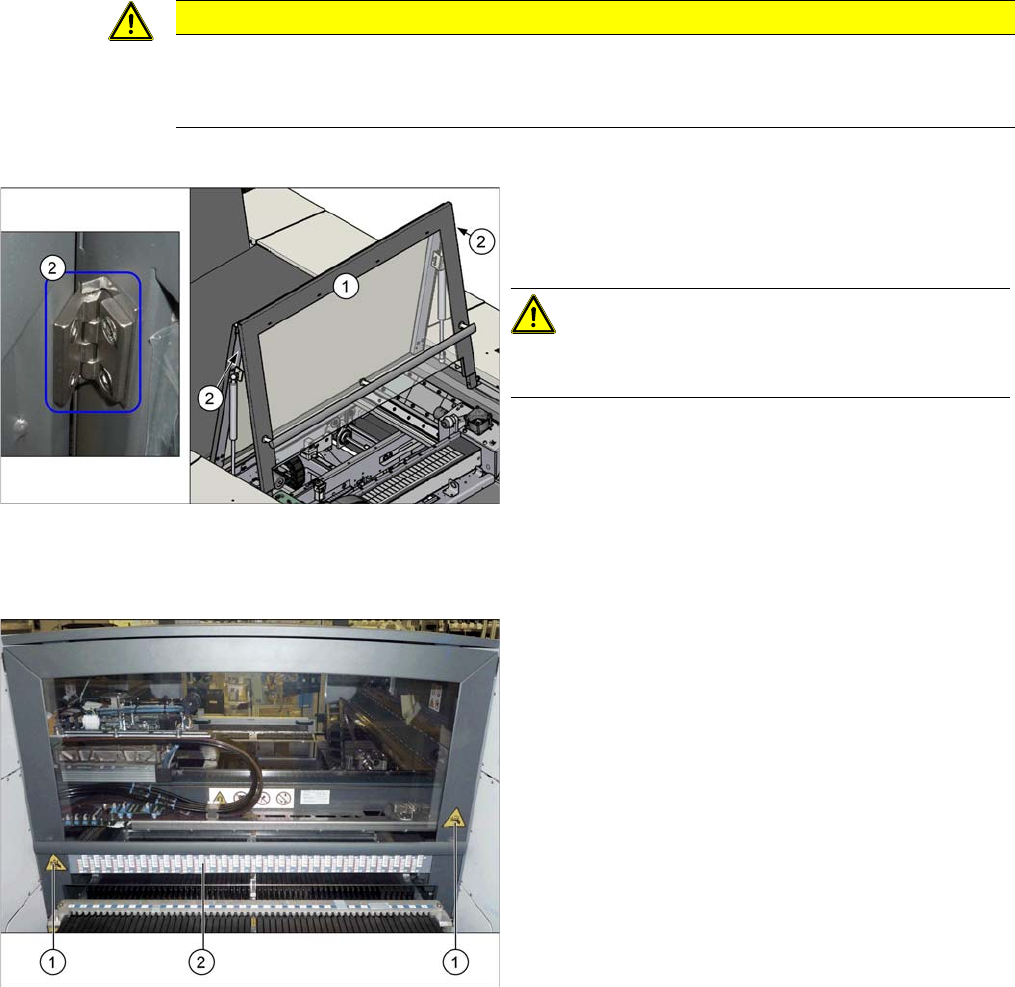
1. Cover.
2. Hinges on the cover (2x)
CAUTION!
You may need to enlist the help of a second person for
this job.
► Loosen the screws fastening the hinges at the top of
the cover. While doing this, hold the front section of
the cover tight.
► Remove the front section of the cover.
► Insert the new front section of the cover into the ma
-
chine and screw into place.
1. Danger of crushing label (2x)
2. Barcode adhesive label
► Attach the following adhesive labels to the new cover.
For their exact positions, refer to the old cover.
assembly
Fitting the Gantry 3.2.5 Fitting the HCUs and HCU Base Adapter
112 Reconfiguration Kit Twin VHF with Gantry Reconfiguration Kit Twin VHF mit Por
-
3.5
3.5 Fitting the Gantry
Fitting the Gantry
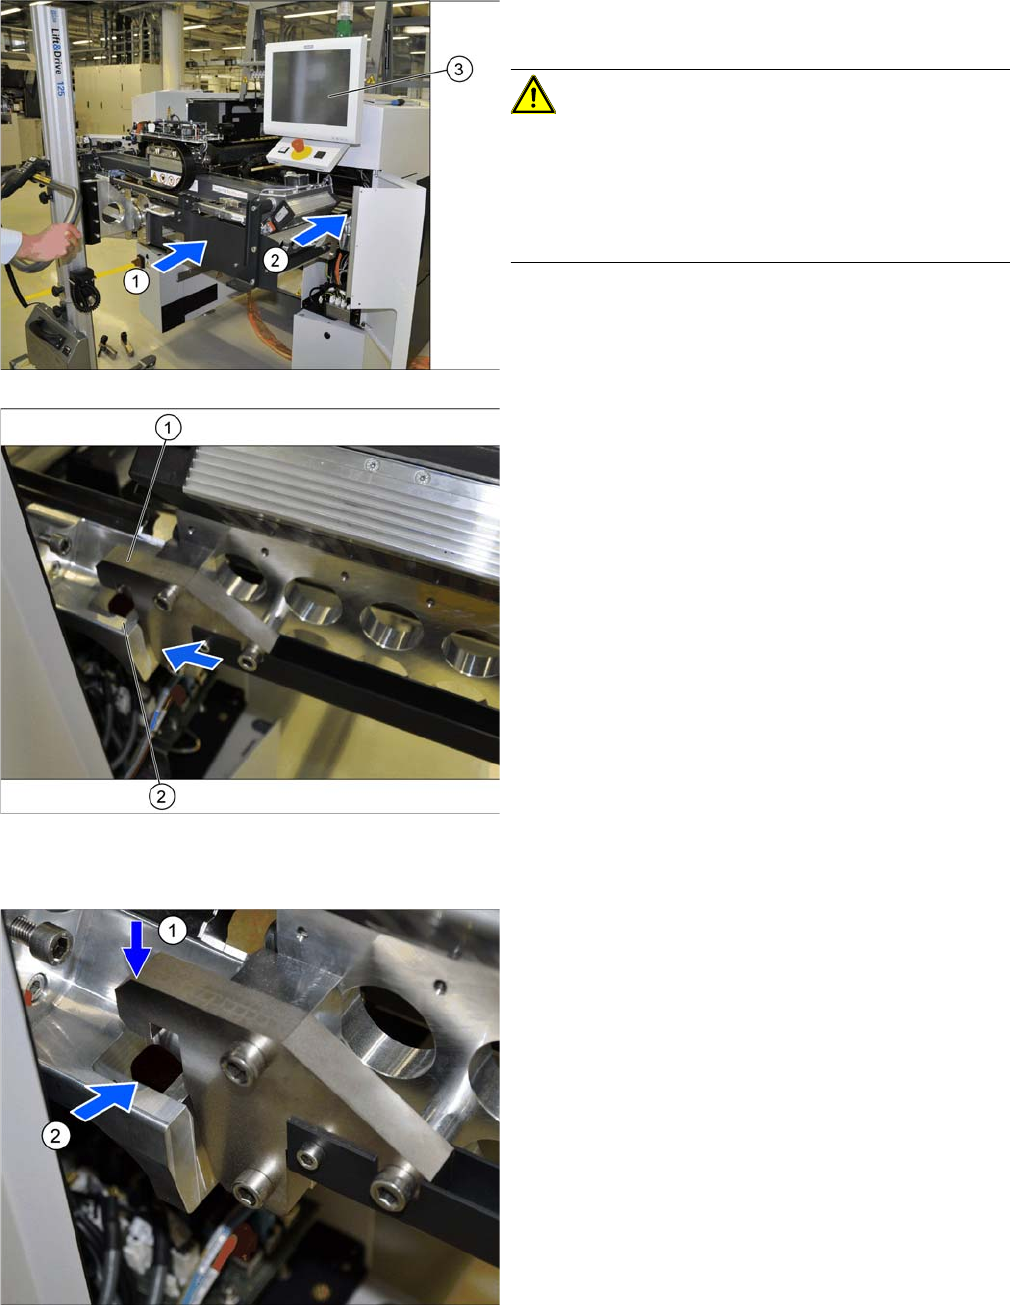
Hooking the gantry carrier into place on the machine
► (1) Use the gantry lift to move the gantry in front of the
machine location.
CAUTION!
Move the gantry carefully
Make sure that you do not damage the monitor (3).
Make sure that you do not hit the gantry anywhere and do
not move it too far into the machine (2). Always check the
right and left sides.
1. Docking hook on the gantry carrier
2. Docking unit on the machine linear guides
► Move the gantry forwards so that the gantry carrier
docking hooks (1) are in front of the machine docking
unit (2).
► Always check the right and left sides.
► Lift the gantry so that the gantry carrier docking hooks
(1) are above the machine docking unit (2).
► Carefully lower the gantry so that the two docking
hooks (1) slide reliably into the openings in the dock
-
ing unit (2).
► Always check the right and left sides.