工作头自动清洗机使用说明书.pdf - 第62页
6. 运转方法 INS-HDCLN-002S0 52 工作头自动清洗机使用说明书 3. 点击 「Next」按钮。 4. 显示下一清洗准备向导。请 按照向导,将贴装工作头放置到工作头自动清洗机内。 备注 ) 作业方法请参照 “5.1 安装和卸下贴装工作头 ” 。 5. 工作头自动清洗机开始识别贴装工 作头,画面返回到主菜单。请确认工作头序列号的显 示。 01NST -2548E [ Cleaning preparation details…
INS-HDCLN-002S0 6. 运转方法
工作头自动清洗机使用说明书 51
6.2 开始工作头的清洗
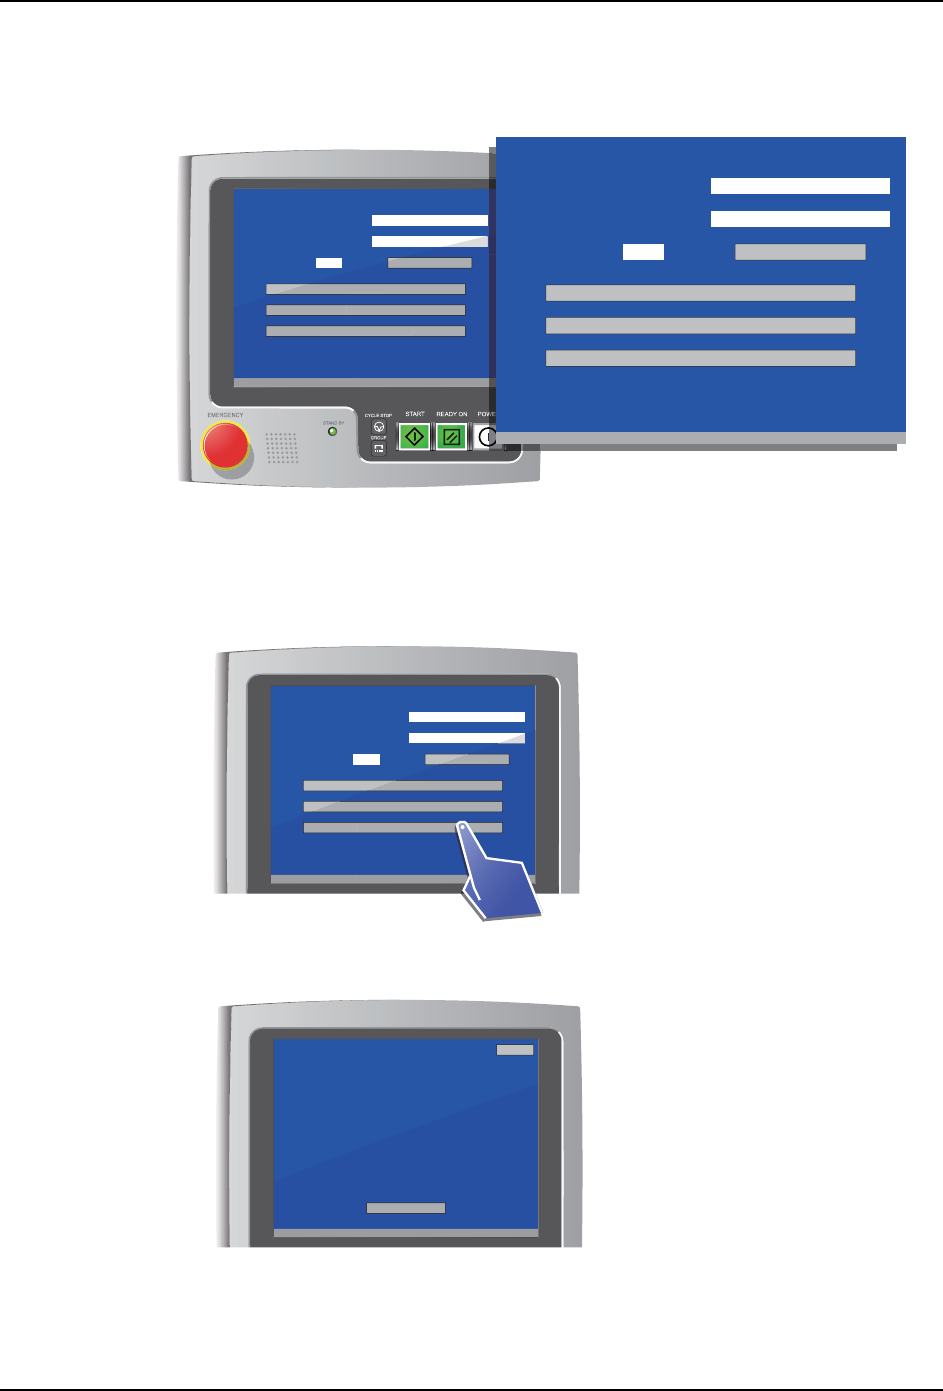
在将贴装工作头放置到清洗部之前,请启动工作头自动清洗机,显示主菜单画面。
6.2.1 清洗准备向导
确认是否处在可以清洗贴装工作头的状态。
1. 从菜单中选择 「Cleaning preparation details」。
2. 显示清洗准备向导画面。请按照向导进行作业。
备注 ) 作业方法请参照
“6.1 预先准备 ”
。
[ Menu ]
V3.00 [ Filter exchange notice ]
Head serial number
Cleaning count
/ 999
Filter exchange guidance
S/N
Counter reset
Air cleaning
Oil cleaning
Cleaning preparation details
V
3
.
00
[
Fi
l
ter exc
h
an
g
e notice
]
Cou
nter rese
t
Air c
l
eaning
Oi
l
c
l
eaning
Cl
eaning preparation
d
etai
l
s
01NST-1922E
[ Menu ]
V3.00 [ Filter exchange notice ]
Head serial number
Cleaning count
/ 999
Filter exchange guidance
S/N
Counter reset
Air cleaning
Oil cleaning
Cleaning preparation details
01NST-1926E
[ Menu ]
V3.00 [ Filter exchange notice ]
Head serial number
Cleaning count
/ 999
Filter exchange guidance
S/N
Counter reset
Air cleaning
Oil cleaning
Cleaning preparation details
V3.0
0
[
Fi
l
ter exc
h
ange notice
]
Counter reset
Air cleaning
Oi
l
c
l
eanin
g
Cl
eaning preparation
d
etai
l
s
01NST-1923E
[ Cleaning preparation details 1/2 ]
V3.00 [ Filter exchange notice ]
Perform head cleaning preparations as directed below.
1 Remove the head filter
2 Attach dummy filter covers to the head
3 Remove the head vacuum sensor
4 Attach dummy plugs to the head
5 Attach dummy nozzles to the head
6 To procedure 2
Next
Back
V3.0
0
[
Fi
l
ter exc
h
ange notice
]
head
um sensor
my plugs to the head
Attach dummy nozzles to the head
6
To
p
roce
d
ure
2
Next

6. 运转方法 INS-HDCLN-002S0
52 工作头自动清洗机使用说明书
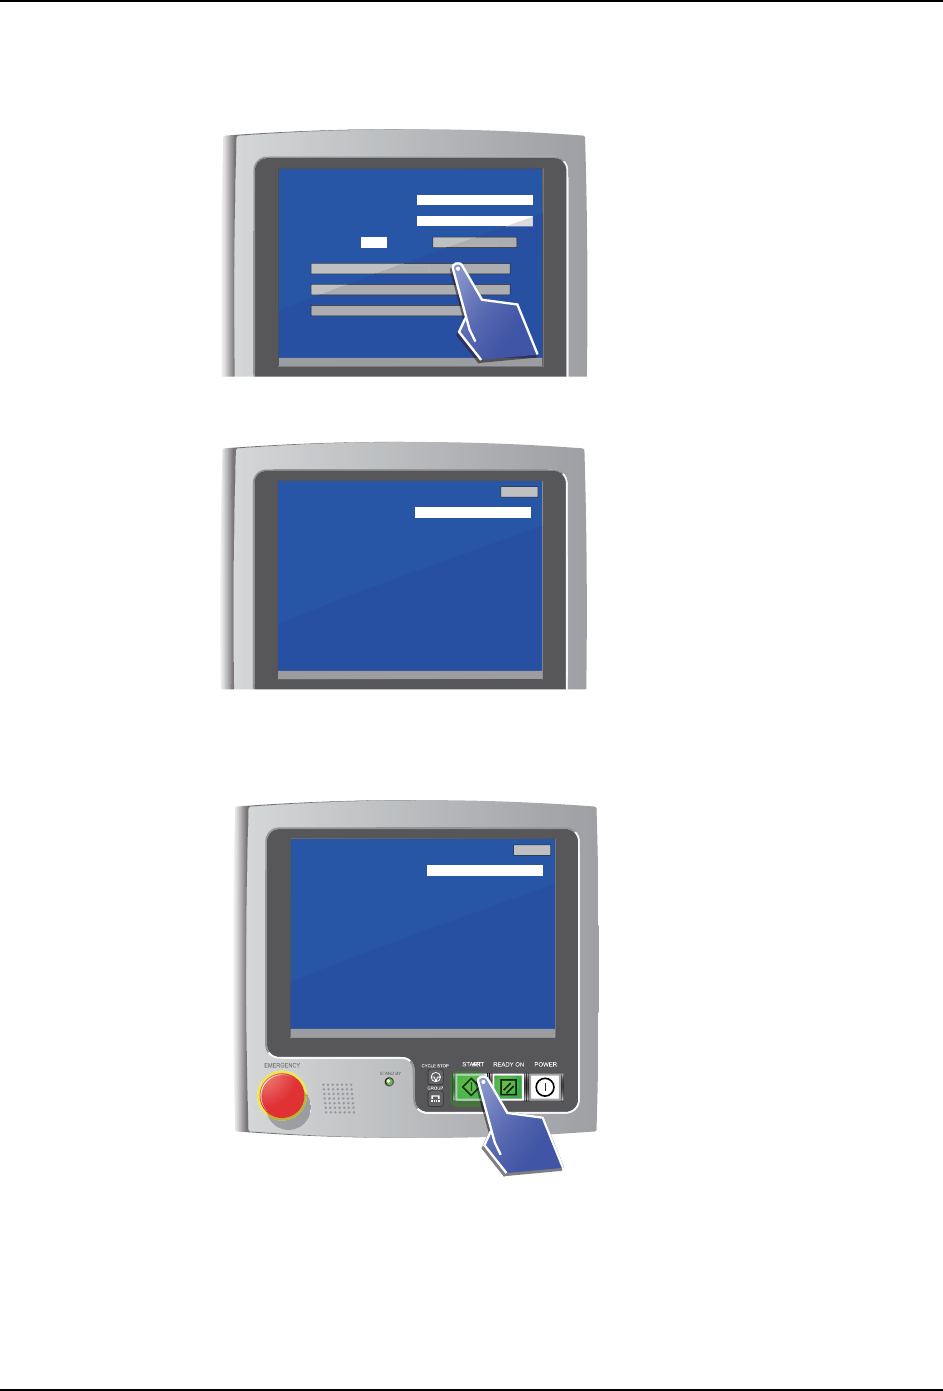
3. 点击 「Next」按钮。
4. 显示下一清洗准备向导。请按照向导,将贴装工作头放置到工作头自动清洗机内。
备注 ) 作业方法请参照
“5.1 安装和卸下贴装工作头 ”
。
5. 工作头自动清洗机开始识别贴装工作头,画面返回到主菜单。请确认工作头序列号的显
示。
01NST-2548E
[ Cleaning preparation details 1/2 ]
V3.00 [ Filter exchange notice ]
Perform head cleaning preparations as directed below.
1 Remove the head filter
2 Attach dummy filter covers to the head
3 Remove the head vacuum sensor
4 Attach dummy plugs to the head
5 Attach dummy nozzles to the head
6 To procedure 2
Next
Back
V3
.
00
[
Fi
l
ter exc
h
an
g
e notice
]
head
um sensor
my plugs to the head
Attach dummy nozzles to the head
6 To
p
rocedure
2
N
e
xt
01NST-1924E
[ Cleaning preparation details 2/2 ]
V3.00 [ Filter exchange notice ]
Perform head recognition by following the steps below.
1 Open the door.r
2 Attach the head.
3 Connect the three connectors to the head.
4 Close the door.
5 The head will be recognized automatically.
Return to cleaning menu
Back
V3
.
00
[
Fi
l
ter exc
h
ange notice
]
ectors to the head.
or.
The head will be recognized automatically.
Return to c
l
eaning men
u
[ Menu ]
V3.00 [ Filter exchange notice ]
Head serial number
Cleaning count
/ 999
Filter exchange guidance
HS0A3 123456
Counter reset
Air cleaning
Oil cleaning
Cleaning preparation details
V
3
.
00
[
Fi
l
ter exc
h
an
g
e notice
]
Cou
nter rese
t
Air c
l
eaning
Oi
l
c
l
eaning
Cl
eaning preparation
d
etai
l
s
01NST-1925E
[ Menu ]
Head serial number
Cleaning count
/ 999
Filter exchange guidance
HS0A3 123456
Counter reset
Air cleaning
Oil cleaning
Cleaning preparation details
INS-HDCLN-002S0 6. 运转方法
工作头自动清洗机使用说明书 53
6.2.2 空气清洗
1. 从菜单中选择 「Air cleaning」。
2. 显示清洗准备确认画面。请确认是否准备就绪。
备注 ) 如果没有准备就绪,请进行作业。作业方法请参照
“6.1 预先准备 ”
。
3. 按下 START 按钮。开始清洗。
备注 ) 工作头清洗机的正面门敞开,或者 EMERGENGCY 按钮被按下时,即使按下 START 按钮也不会开始
清洗。
01NST-1927E
[ Menu ]
V3.00 [ Filter exchange notice ]
Head serial number
Cleaning count
/ 999
Filter exchange guidance
Counter reset
Air cleaning
Oil cleaning
Cleaning preparation details
HS0A3 123456
V3.0
0
[
Fi
l
ter exc
h
ange notice
]
Counter reset
Air cleaning
Oi
l
c
l
eanin
g
Cl
eaning preparation
d
etai
l
s
01NST-1928E
[ Air Cleaning preparation check ]
V3.00 [ Filter exchange notice ]
Head serial number
START: Begin Cleaning
Check the following items for the head.
Push START to begin cleaning.
1 The head filter has been removed.
2 Dummy filter covers are attached to the head.
3 Dummy nozzles are attached to the head.
Back
HS0A3 123456
V3.0
0
[
Fi
l
ter exc
h
ange notice
]
S
TART: Be
g
in Cleanin
g
n removed.
er covers are attached to the head.
Dummy nozzles are attached to the head.
01NST-1929E
[ Air Cleaning preparation check ]
V3.00 [ Filter exchange notice ]
Head serial number
START: Begin Cleaning
Check the following items for the head.
Push START to begin cleaning.
1 The head filter has been removed.
2 Dummy filter covers are attached to the head.
3 Dummy nozzles are attached to the head.
Back
HS0A3 123456
V
3.0
0
[
Fi
l
ter exc
h
ange notice
]
S
TART: Be
g
in Cleanin
g
n removed.
er covers are attached to the head.
Dummy nozzles are attached to the head.