00196351-06_UM_ACT_DE_EN.pdf - 第161页
ACT - Accurac y Check Tool / User Manual 09/2015 Edition 71 4.2.6.3 Saving the Report under Station Soft ware 703.xx and H igher ► Click the Save results button ( see Figure 4- 47 ). The report will be saved in PDF forma…
ACT - Accuracy Check Tool / User Manual 09/2015 Edition
70
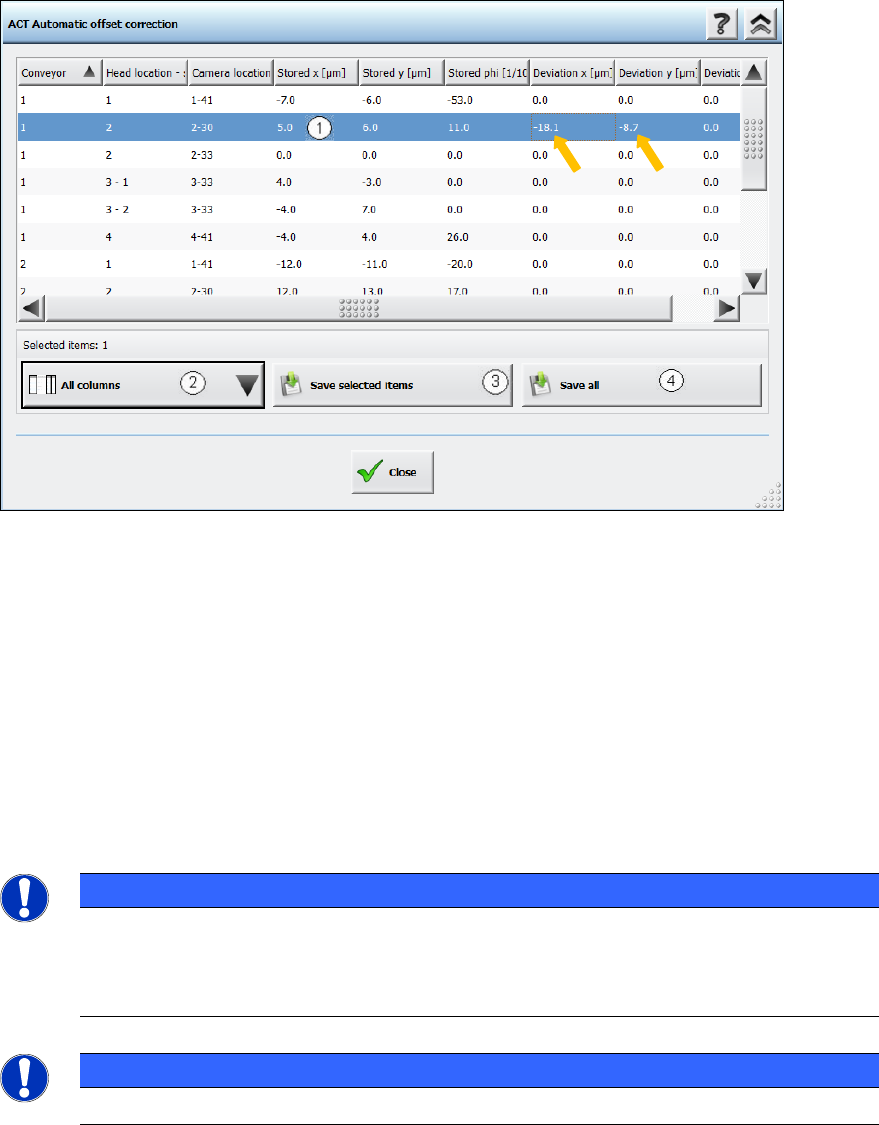
4.2.6.2 Correcting the Measured Offsets
► Click the Automatic offset correction button (
see Figure 4-48).
The following dialog box is opened:
Figure 4-49: Correction of the measured offset values (median)
Key:
(1) Clicking on a line highlights it in blue. Clicking on the same line again cancels the
highlighting. To select multiple lines, click them while holding down the (Ctrl) key.
(2) Here you can customize the view, e.g. hide individual columns.
(3) Transfers all selected offset values to the machine data.
(4) This transfers all offset values to the machine data whether they are selected or not.
The corrected values are active immediately after having been stored.
► Terminate the current measurement and assemble and measure the plate again.
NOTICE
If you are using a dual conveyor and want to run the ACT with the next conveyor lane, all
you need to do is insert the glass plate into the input conveyor of the current lane once
the com
ponents have been removed. This triggers the ACT. You do not need to select a
new mode for the measurement.
NOTICE
The transparent foil, with adhesive on both sides, can be used multiple times.
ACT - Accuracy Check Tool / User Manual 09/2015 Edition
71
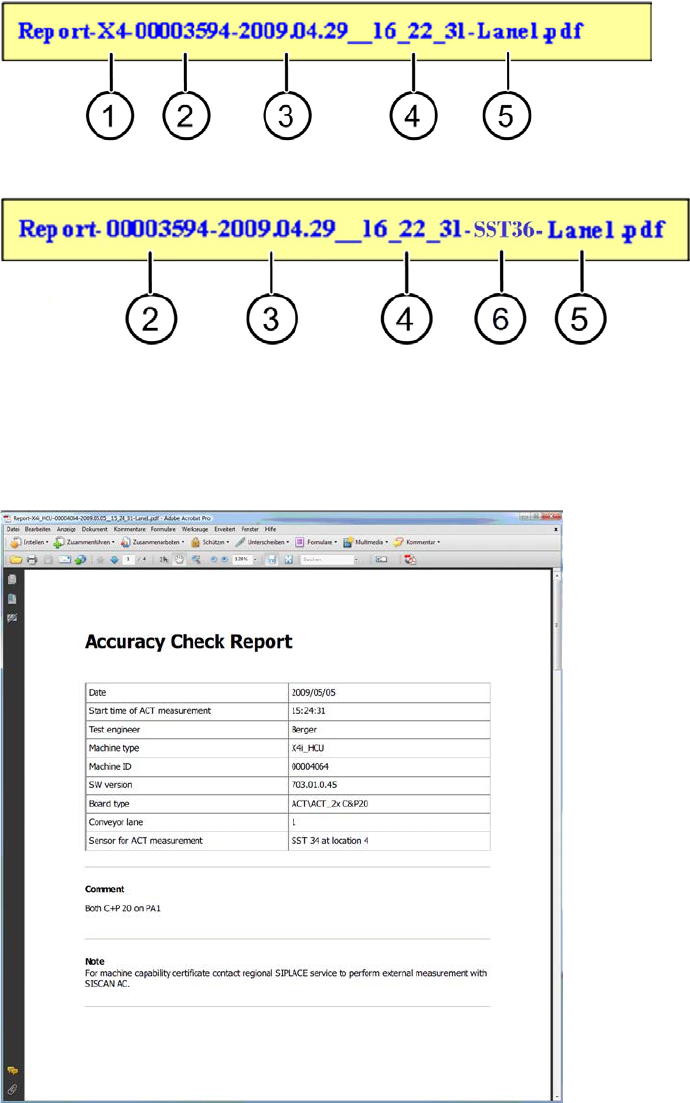
4.2.6.3 Saving the Report under Station Software 703.xx and Higher
► Click the Save results button (
see Figure 4-47).
The report will be saved in PDF format.
The first time you save a report, you must specify a path in which the pdf file shall be stored.
(Example: C:\ACT\Reports)
Up to SW 707.1, the file name for the report is made up as follows:
As of SW 707.1, the file name for the report is made up as follows:
Key:
(1) Machine type (4) Time
(2) MID (5) Measured lane
(3) Date (6) Kameratyp / Sensorsystemtyp
Figure 4-50: Accuracy Check Report
ACT - Accuracy Check Tool / User Manual 09/2015 Edition
72
4.2.7 Finishing the ACT – Returning to Production
4.2.7.1 Finishing (e.g. under Station Software 70x)
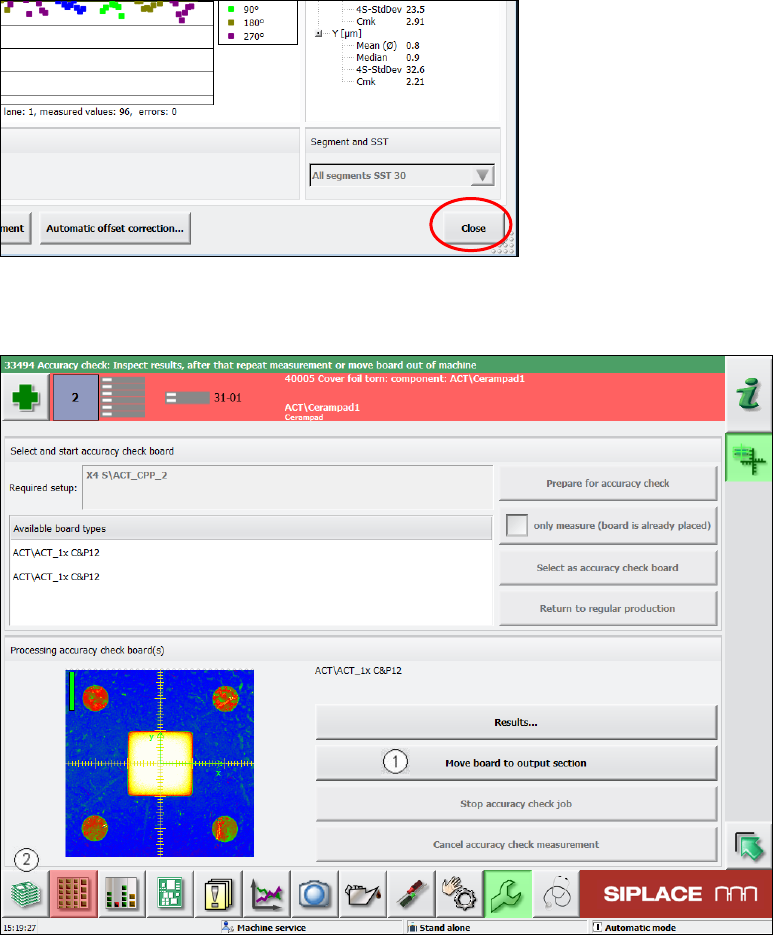
► Click the Schließen (Close) button in the measurement results view to close it.
Figure 4-51: Closing measurement results view
► Load the board into the output section (1).
Figure 4-52: Loading board into the output section
► Click on the button to the left at the bottom (2) to return to the main view of the GUI.