Spectrum Operating Manual - 第63页
S2-9 XXX Se ri es Dispensing Sys te m IOM Man ual Installation © 2023 Nordson Co rporat ion 3-11 3.10 Instal lin g the Laptop Computer NO TE The l ap t op c o mput er i s ship pe d from the f actor y ful ly ch ar g ed …
S2-9XXX Series Dispensing System IOM Manual Installation
3-10 © 2023 Nordson Corporation
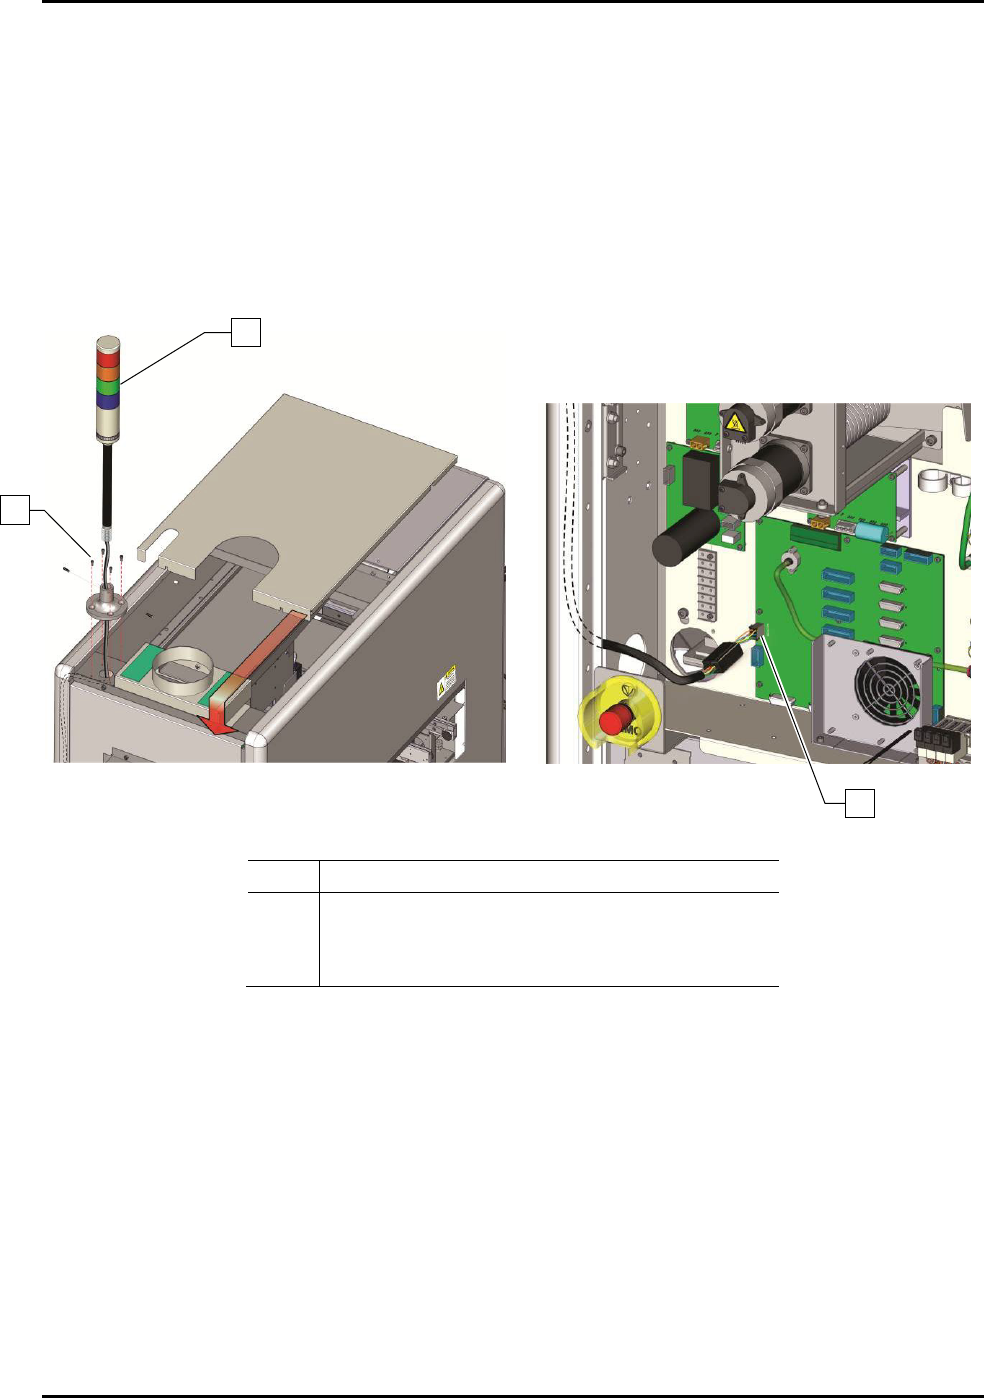
3.9 Installing the Light Beacon
1. Remove the light beacon from the storage area behind the front door panel and unwrap.
2. Remove the dispensing system top cover (Figure 3-9A).
3. Attach the light beacon to the top panel using the four (4) screws temporarily installed
(Figure 3-9A).
4. Make the beacon electrical connection to J24 on the main board (Figure 3-9B).
Figure 3-9A
Figure 3-9B
Item Description
1 Light Beacon
2
Screws (4)
3 Beacon Electrical Connection
Figure 3-9 Installing the Light Beacon
1
2
3
S2-9XXX Series Dispensing System IOM Manual Installation
© 2023 Nordson Corporation 3-11
3.10 Installing the Laptop Computer
NOTE The laptop computer is shipped from the factory fully charged.
To install the laptop computer:
1. Remove the laptop computer from its packaging.
2. Remove the keys from the lock and give them to the person responsible for the machine.
The keys are used to lock the laptop computer to the dispensing system tray.
3. Power on the laptop computer.
4. Open Windows Explorer.
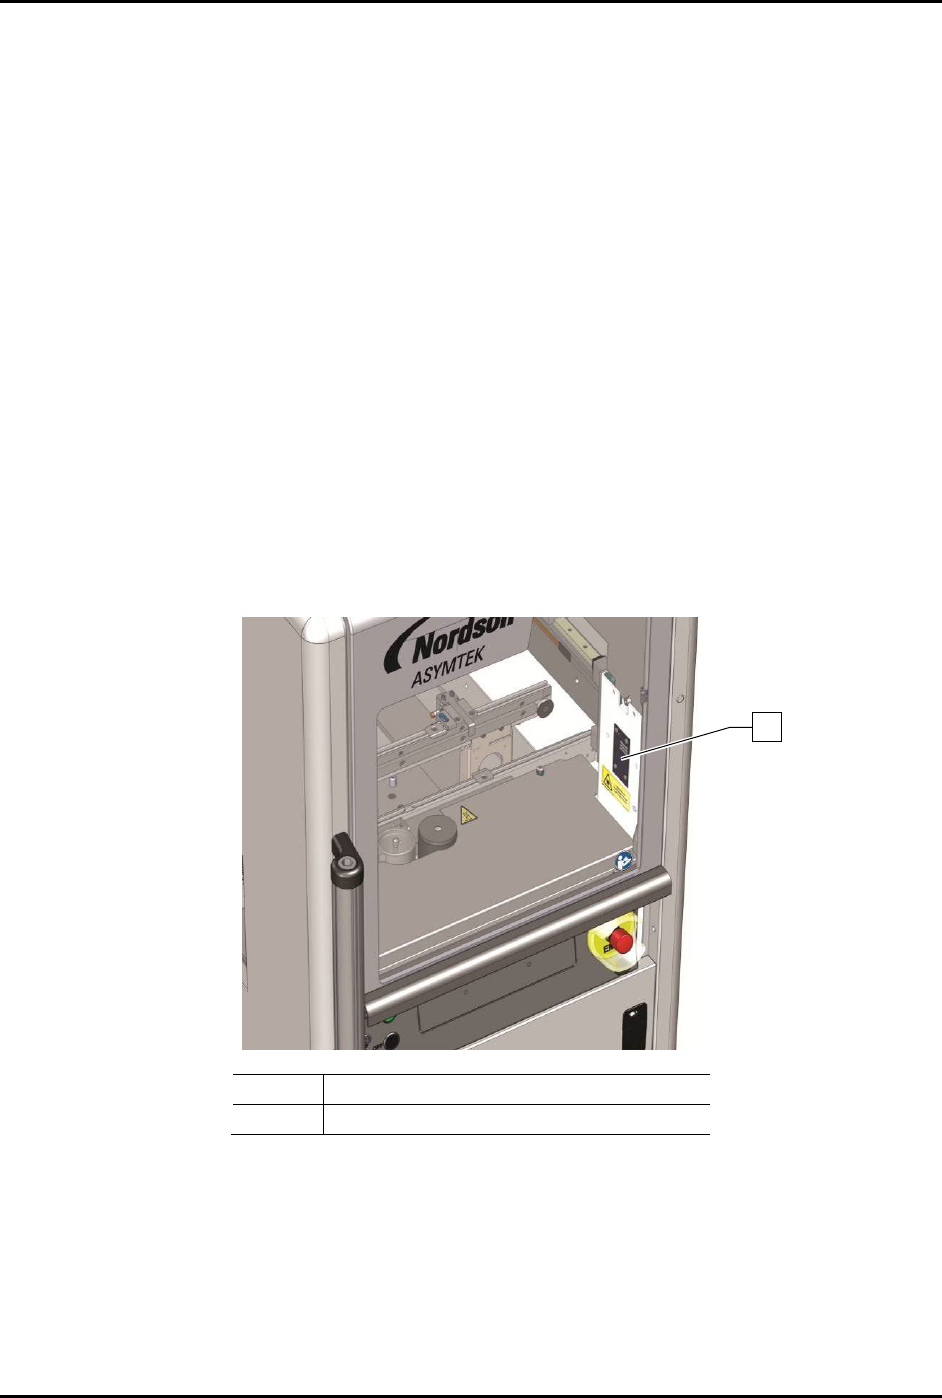
5. Follow the steps below to verify the serial number of the dispensing system and the laptop
computer are the same.
a. Locate C:\Asymtek\Recovery\SNXXXXX.ACL.
b. Compare the serial number located in the name of the ACL file with the serial number
on the dispensing system (Figure 3-10). If the numbers are not the same, contact
Asymtek Technical Support.
Item
Description
1
Serial Number Label
Figure 3-10 Dispensing System Serial Number Label
6. Power off the laptop computer.
7. Move the laptop tray arm bracket on the dispensing system so that the laptop tray is facing
forward (Figure 3-11).
8. Attach the USB and network cables and grounding wire attachment to their respective ports
on the computer.
1
S2-9XXX Series Dispensing System IOM Manual Installation
3-12 © 2023 Nordson Corporation
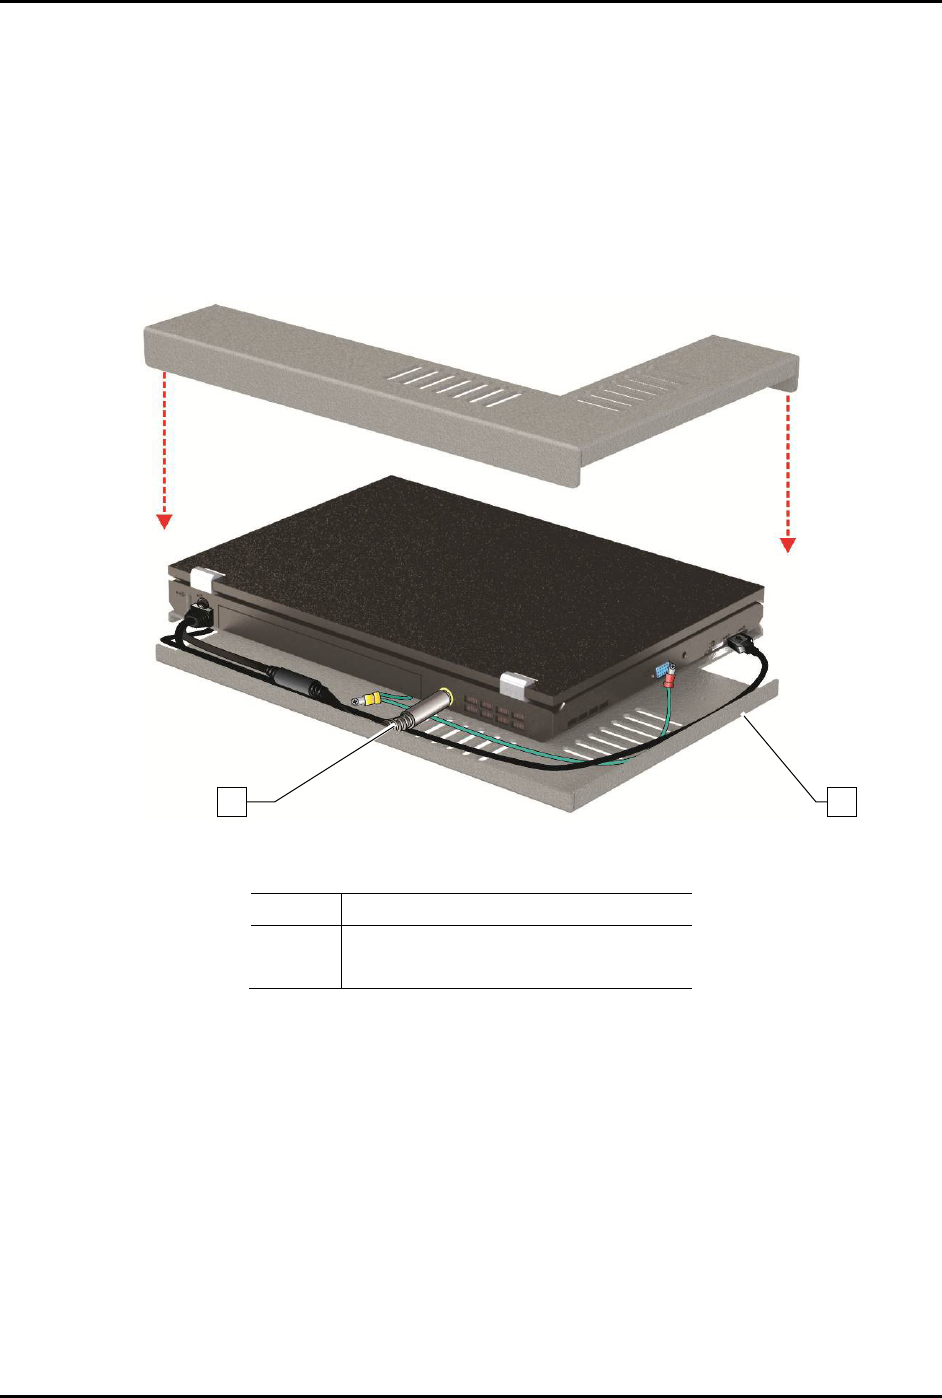
9. Attach the power cable to the rear of the computer.
NOTE The laptop is adhered to the tray with a hook and loop fastener. Align the laptop
computer before placing it on the tray.
10. With the laptop lid closed, align the computer with the covers so that no gaps exist on the
left side or the back edge.
11. Gently press the laptop onto the base.
12. Attach the locking cable to the laptop.
Item
Description
1 Power Cable
2
Laptop Tray
Figure 3-11 Aligning the Laptop Computer to the Tray
2
1