7OM-1625-004_w - 第62页
7OM-1603 Chapter 1 : 3. Name of Each Section and Handling 1-21 • Detachment Procedure of Magazine Procedure (1) Move the magazine to be replaced to the magazine change position by means of the operation monitor . Note Wh…
7OM-1603
1-20
Chapter 1 : 3. Name of Each Section and Handling
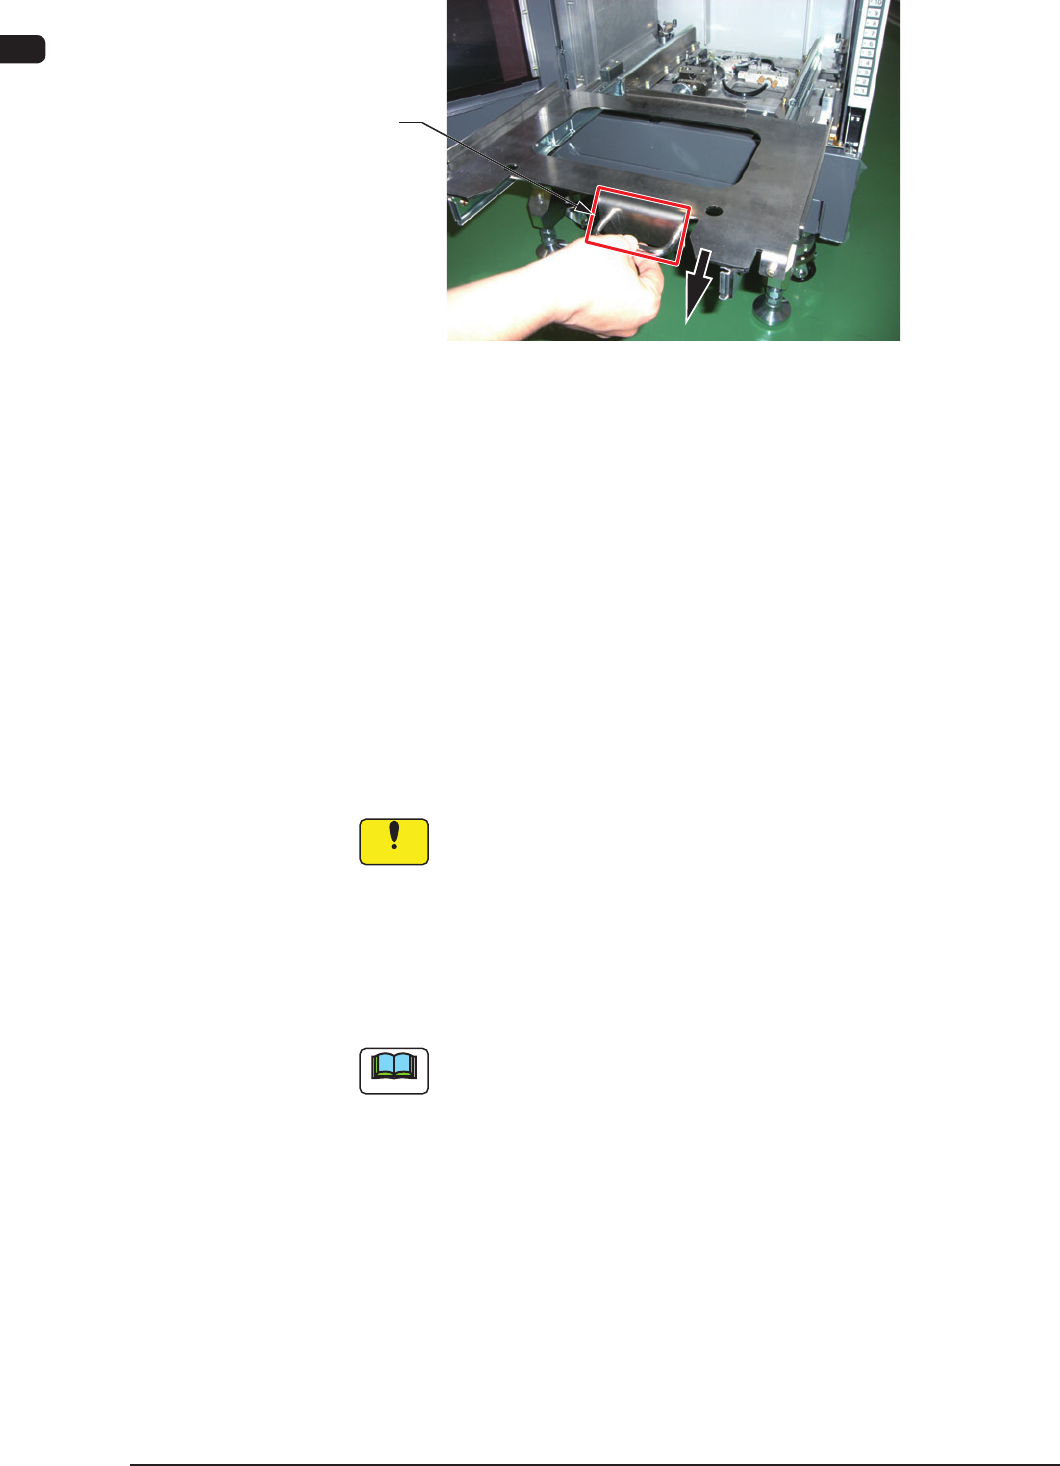
(3) Hold the handle in the magazine base and slowly pull it out until it stops.
Handle
Magazine Base (Drawer) F7A8
(4) Hold the magazine handle and put the magazine slowly on the magazine
loading section. Then, press the magazine against the stopper on the rear side
to conrm that the magazine is completely housed in the loading space and it
does not inclined.
(5) Hold the handle of the magazine base and slowly push the base toward the
rear side until it touches the rear side.
(6) While pulling the magazine stopper knob forward, turn it counterclockwise
by 90°. Then, return the magazine stopper back in place.
(When the magazine is located at its home position, it is locked by the
magazine stopper.)
Notice
The use of the magazine for GXH-1/3 is not available.
Even when the magazine for GXH-1/3 is setup, it is not recognized
as a magazine.
(7) Close the magazine exchange door and press the ready switch.
(The magazine exchange door is locked electromagnetically and the LED of
the ready switch illuminates.)
Note
This machine keeps the last component ID matrix position in memory even
after the current program (model) is changed to another one.
Before reloading the tray in the middle of process with some components
after the current program (model) is changed to another one, it is required
to change the matrix because some components are left behind (not picked
up).
1003-002
7OM-1603
Chapter 1 : 3. Name of Each Section and Handling
1-21
•
Detachment Procedure of Magazine
Procedure
(1) Move the magazine to be replaced to the magazine change position by means
of the operation monitor.
Note
While the magazine is moving, the LED of the Ready switch ickers in
green.
When the magazine reaches the magazine change position, the LED of the
Ready switch extinguishes.
(2) Conrm that the LED of the Ready switch is "OFF" and pull the door handle
forward to open the door.
Make sure that there is no gap between the tray and pallet.
(3) While pulling out the magazine stopper knob forward, turn it clockwise by
approximately 90° .
(4) Hold the handle in the magazine base and slowly pull it out until it stops.
Notice
Be sure to pull out the magazine base slowly. Otherwise, the
magazine will drop forward by itself.
(5) Shift the magazine a little forward and take it out.
1007-002
7OM-1603
1-22
Chapter 1 : 3. Name of Each Section and Handling
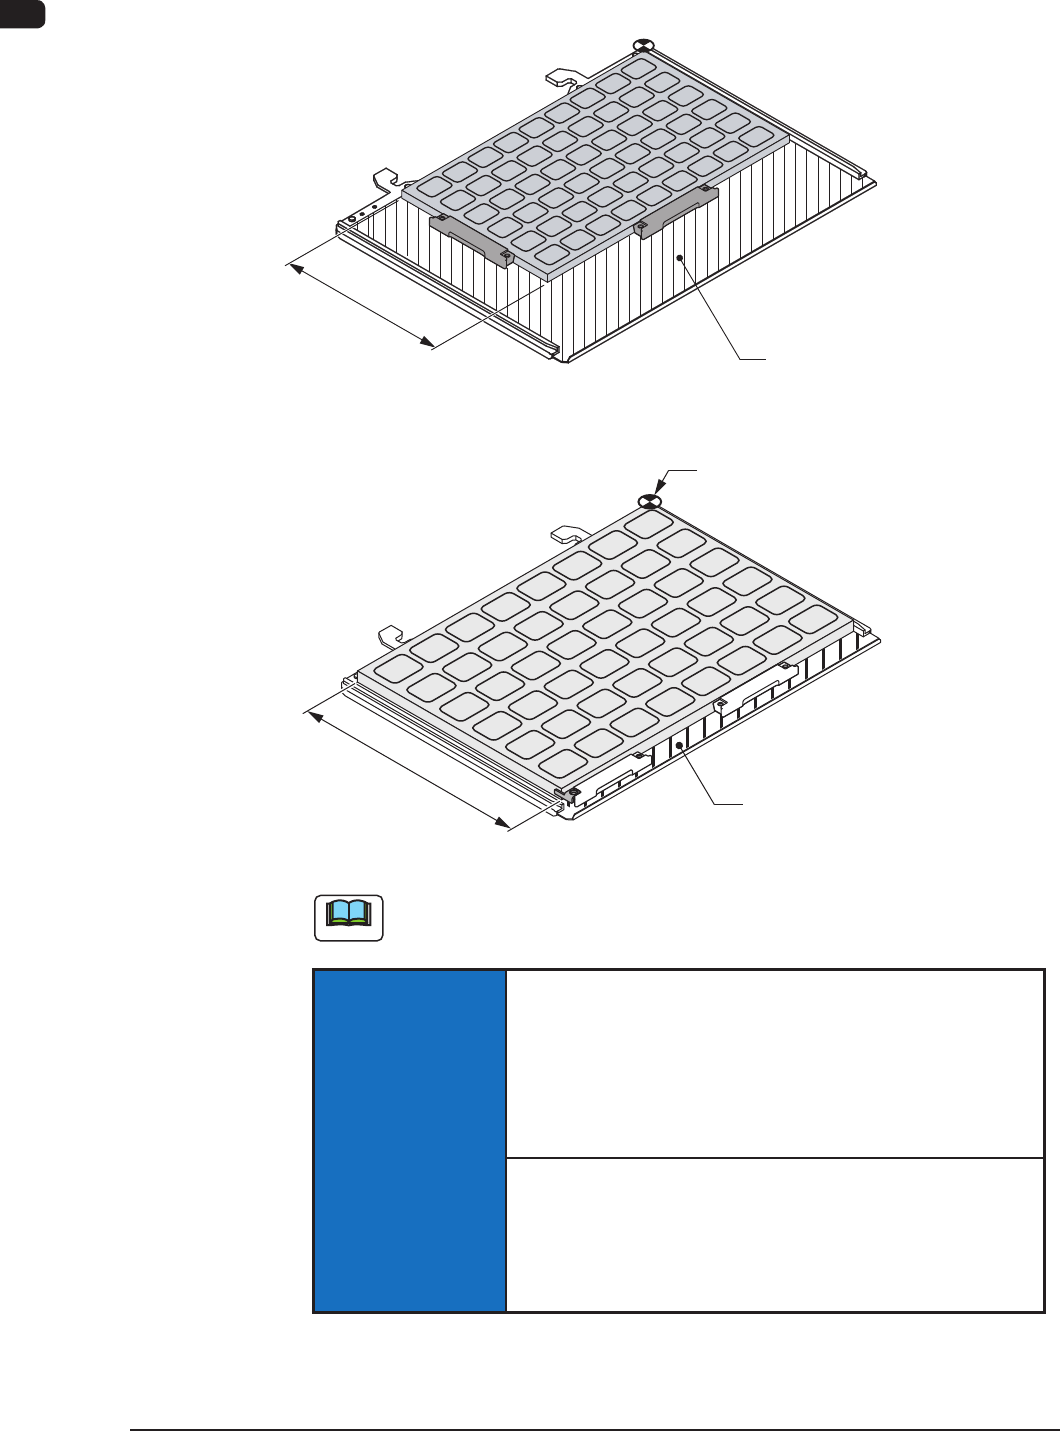
3.5 Pallets
•
JEDEC Size Multi-Layer Feeder (GS-FP100)
mm631
Area where no tray should be put
•
FULL Size Multi-Layer Tray Feeder (GS-FP200)
Area where no tray should be put
mm032
Pallet Origin
Pallets F7A9
Note
No tray should be put in the shadowed area.
NOTICE
Handle the pallets carefully.
Otherwise, the pallets may be deformed.
•
Do not drop the pallet onto the oor, etc.
•
Do not apply any force partially to any area of the pallet.
•
Do not store the pallets in a pile.
When a deformed pallet is used, a component pickup error
may occur.
When a component pickup error occurs frequently, replace
the pallet with a new one.
1003-002