YG200_YG200L_Mainte_E.pdf - 第77页
Chapter 4 How to replace consumable par ts Contents 1 . N o z z l e l e a f s p r i n g s 4 - 1 2 . A i r j o i n t 4 - 2 3 . E j e c t o r v a l v e s 4 - 3 4 . F e e d e r v a l v e s 4 - 5 5 . C o n v e y o r b e l t …
3-36
3
Periodic maintenance items
e
Reattach the nozzles.
Attach the nozzles back to the head after
checking one more time that there is no oil
remaining there.
r
After assembly, check the vacuum
levels.
1. Change the nozzle of each FNC head to
Type 203F, while leave nozzles detached
from the standard heads.
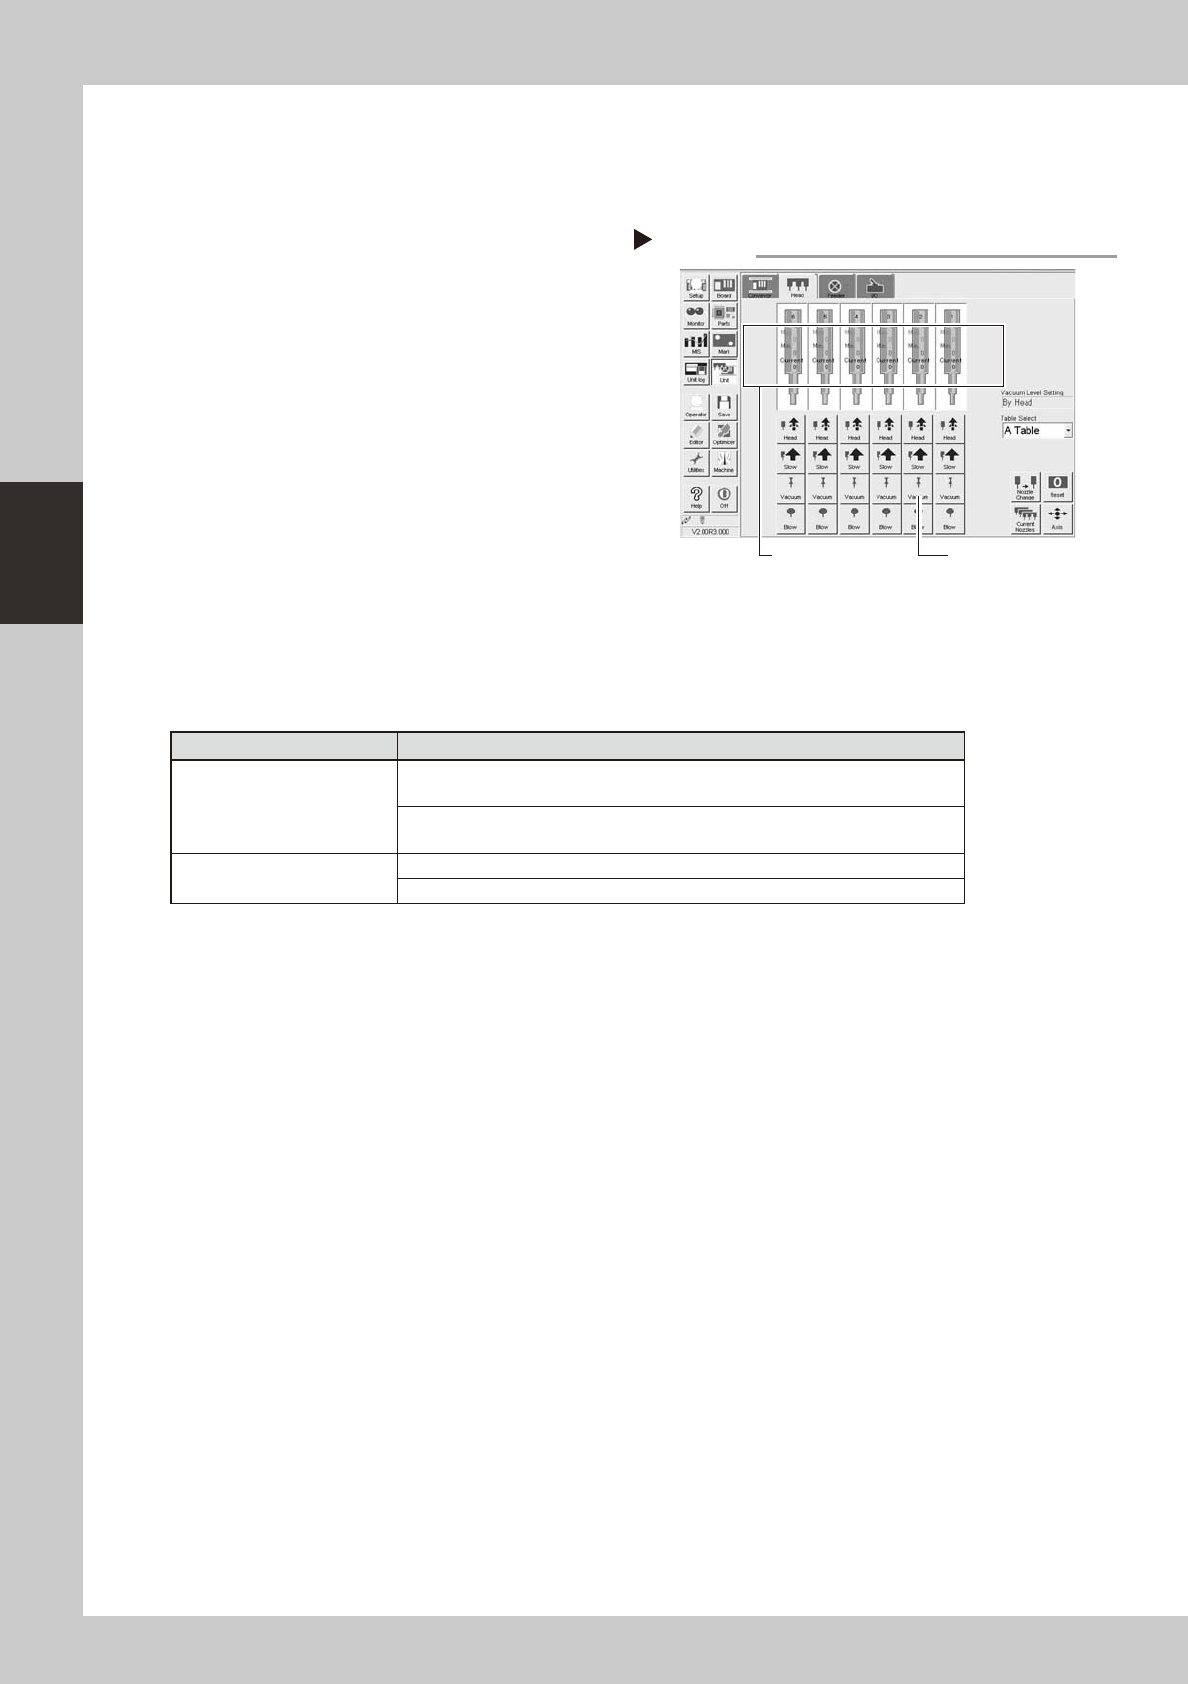
2. Open the [Unit]-[Head] tab screen and
press the [Vacuum] button to generate a
negative pressure. Read the "Max" values
shown in red on the screen and
determine whether the vacuum levels
are appropriate by referring to the table
below.
54302-
F
8-00
t
Perform nozzle change.
On the [Unit]-[Head] tab screen, press the
[Nozzle Change] button to perform nozzle
change and make sure that the nozzles are
changed correctly.
n
Vacuum level in spline shaft air path
Nozzle
Typical criteria
FNC head with Type 203F
nozzle
If the "Max" value is less than 100 while the nozzle is open, the vacuum level is
normal.
If the "Max" value is more than 170 while the nozzle is sealed, the vacuum level
is normal.
Standard head with no nozzle
If the "Max" value is less than 80 while open, the vacuum level is normal.
If the "Max" value is more than 180 while sealed, the vacuum level is normal.
* The vacuum level in the spline shaft air path might sometimes differ slightly depending on the air source and
operating conditions. Use the above criteria values for reference during maintenance.
Step 14
Checking the negative pressures
[Vacuum] button
Read "Max. values".

4-1
4
How to replace consumable parts
1. Nozzle leaf springs
1
Press the emergency stop button.
e
The machine must be in emergency stop to
ensure safety during work.
2
Remove the nozzle.
Remove the nozzle attached to the leaf
springs to be replaced, by pulling it
downwards by hand.
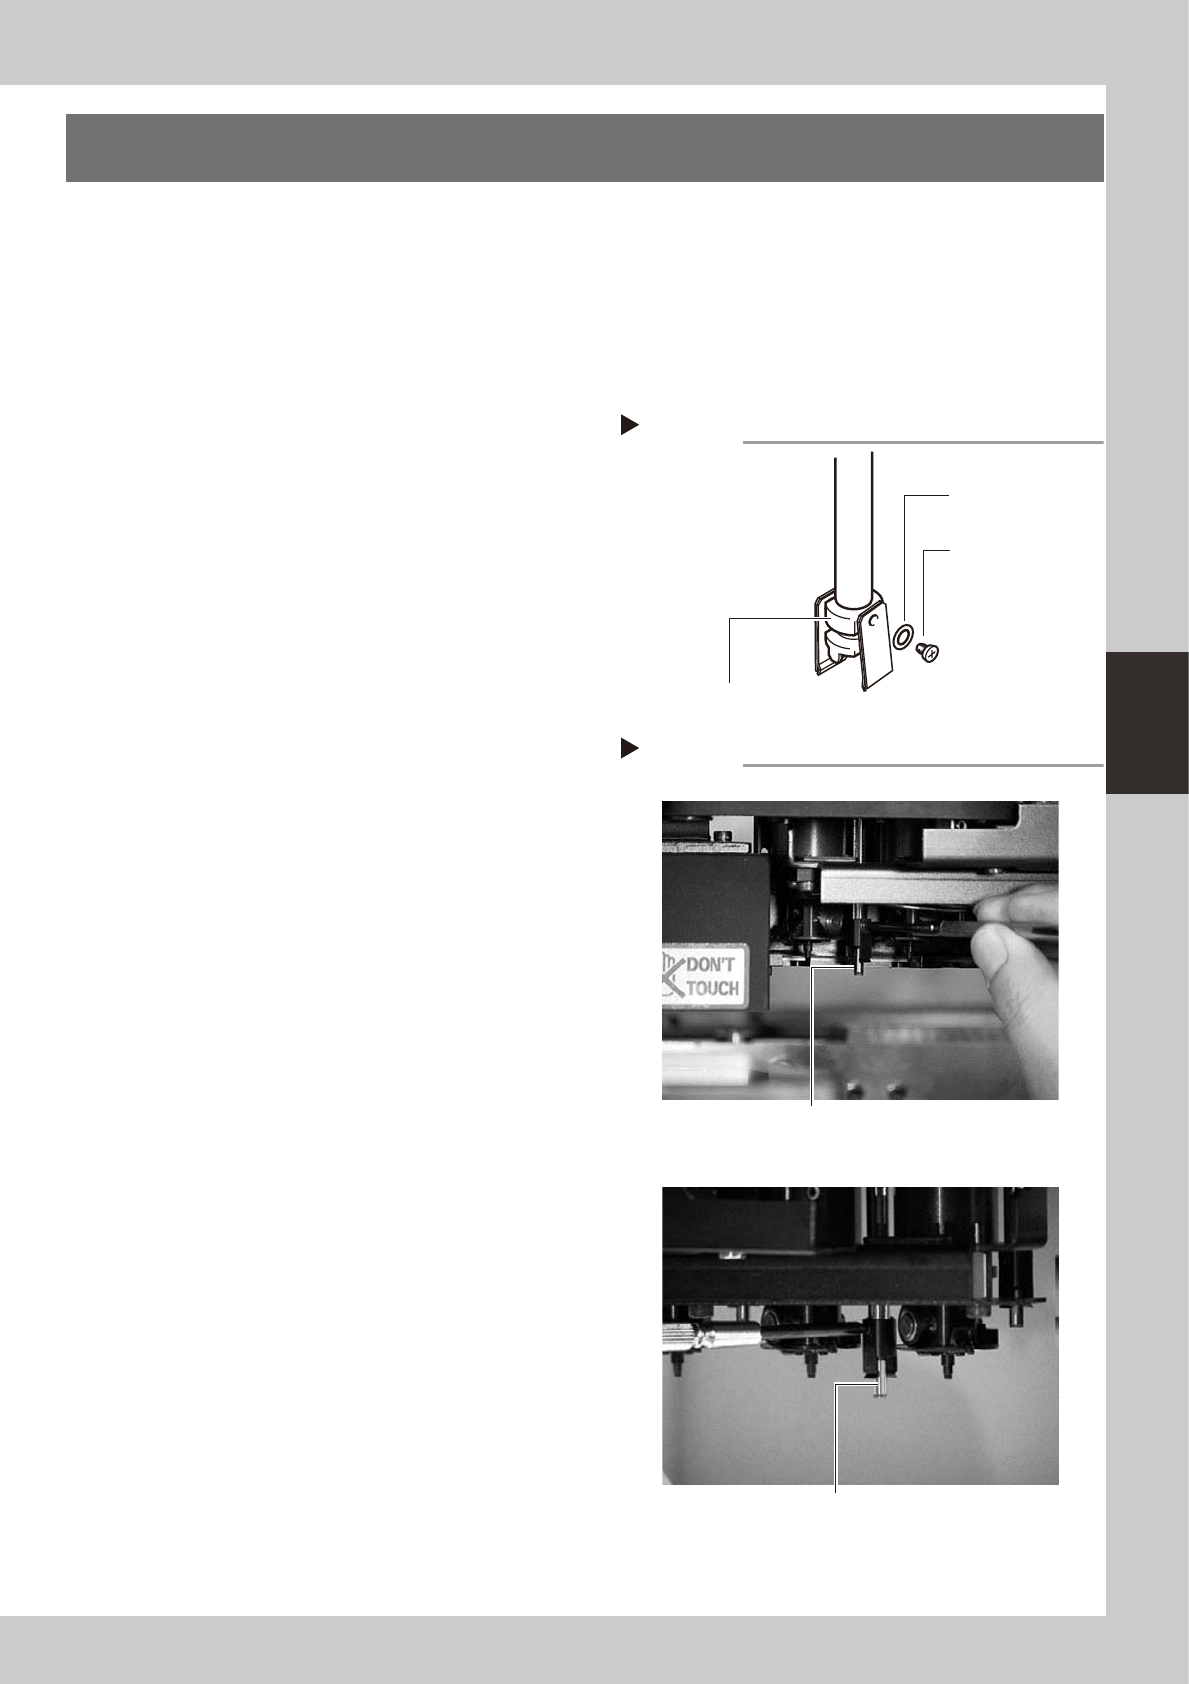
3
Remove the leaf springs.
Use a Phillips precision screwdriver to loosen
the screws securing the defective leaf
springs and remove the leaf springs from the
nozzle holder while pressing the nozzle shaft
from the back.
53400-F8-00
4
Attach new leaf springs.
While pressing the nozzle shaft from the
back, tighten the screw with the Phillips
precision screwdriver to assemble the leaf
spring. At this point, do not forget to fit the
washer.
53401-F4-00
5
Check the assembled condition.
1. Check the gap between the leaf springs
and nozzle.
2. Attempt detaching and attaching a
nozzle several times to check that there
is no looseness.
Removing leaf springs
Step 3
Nozzle leaf spring
mounting washer
Nozzle holder
Nozzle leaf spring
mounting screw
Step 4
YG200
YG200L
Attaching leaf springs
Attach the leaf spring while pressing the opposite
side of the screw.
Attach the leaf spring while pressing the opposite
side of the screw.