FUJI 24 HEAD Replacing ALL syringe_IPS.pdf - 第41页
Edition 2.0 NXT/NXT2 Repair Training T ext H12HS(Q) Hea d FK-9F98-61-0E 7-13 FUJI MACHINE MFG . CO., L TD. 24. With the engraved lines still aligned, attach the syringe gear to the syringe. Ensure that the pin is fully i…
Edition 2.0 NXT/NXT2 Repair Training Text
H12HS(Q) Hea
d
FK-9F98-61-0E 7-12 FUJI MACHINE MFG. CO., LTD.
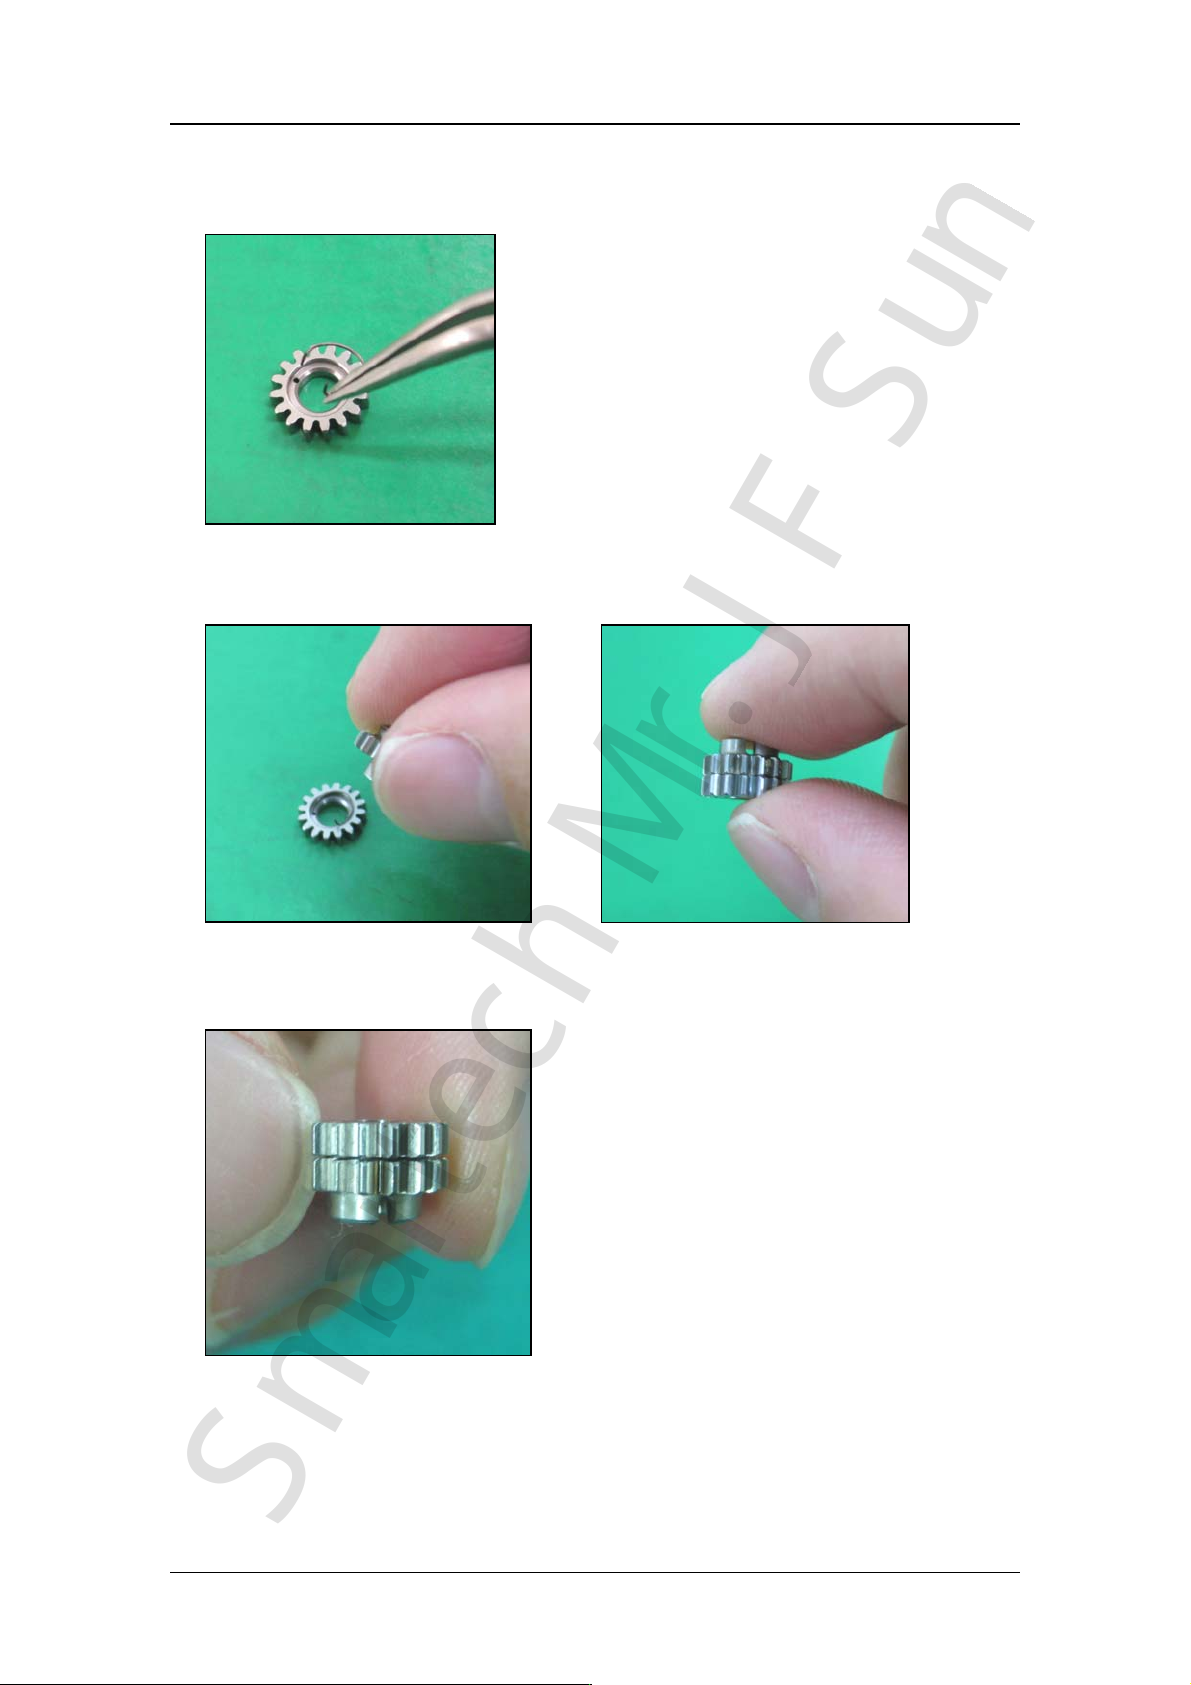
21. Install the new spring (PZ3439*) in the syringe gear. Insert the end of the spring into
the hole in the upper gear.
22. Attach the lower gear to the upper gear so that the end of the spring goes into the hole
in the lower gear.
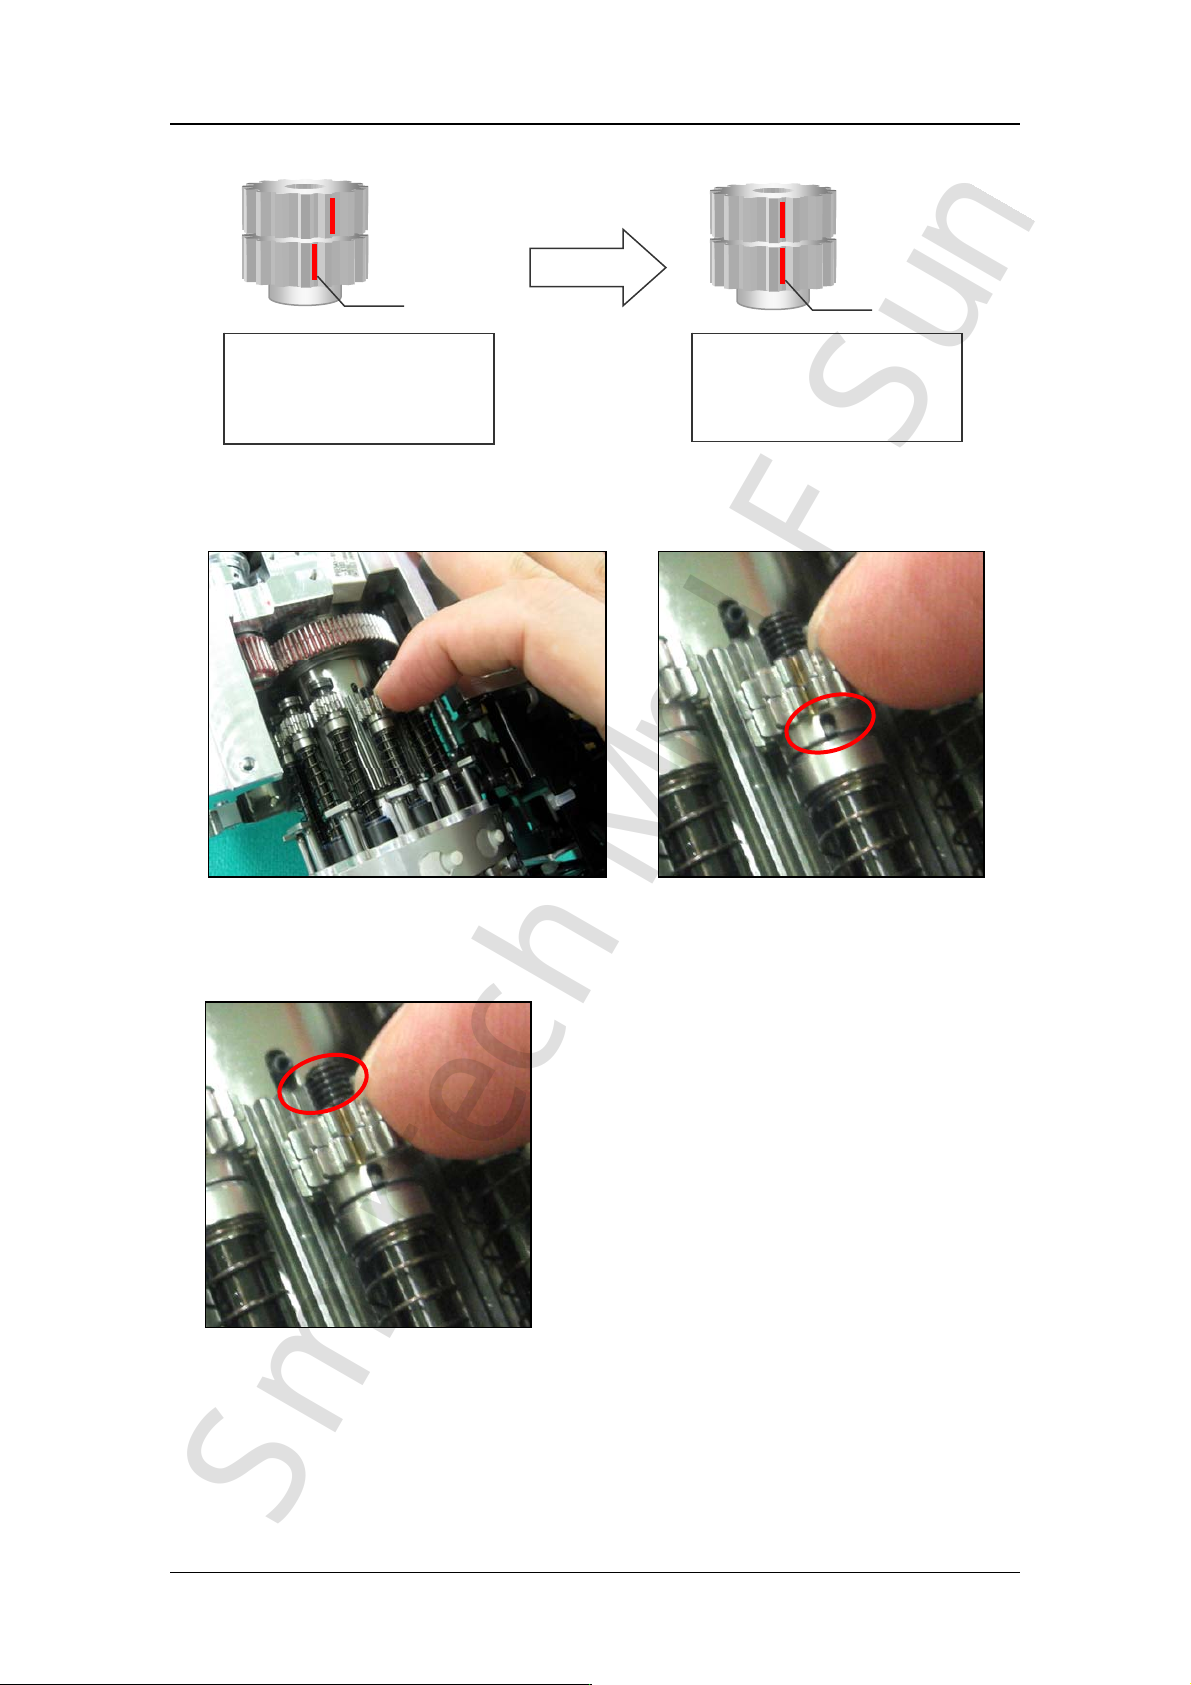
23. The upper and lower gears of the scissors gear are marked with an engraved line.
Align the engraved line on the upper gear with the engraved line on the lower gear.
CONFIDENTIAL
SmartechMr.J FSun
Edition 2.0 NXT/NXT2 Repair Training Text
H12HS(Q) Hea
d
FK-9F98-61-0E 7-13 FUJI MACHINE MFG. CO., LTD.
24. With the engraved lines still aligned, attach the syringe gear to the syringe. Ensure that
the pin is fully inserted into the gear cutout section.
25. Remove the H12HSθ-axis phase alignment jig(PM07RA*).
26. Apply a small amount of Loctite 222 to the thread of the upper part of the syringe.
Engraved line
Engraved lines on the
upper and lower gears
are misaligned
Engraved line
Engraved lines on the
upper and lower gears
are aligned
CONFIDENTIAL
SmartechMr.J FSun
Edition 2.0 NXT/NXT2 Repair Training Text
H12HS(Q) Hea
d
FK-9F98-61-0E 7-14 FUJI MACHINE MFG. CO., LTD.
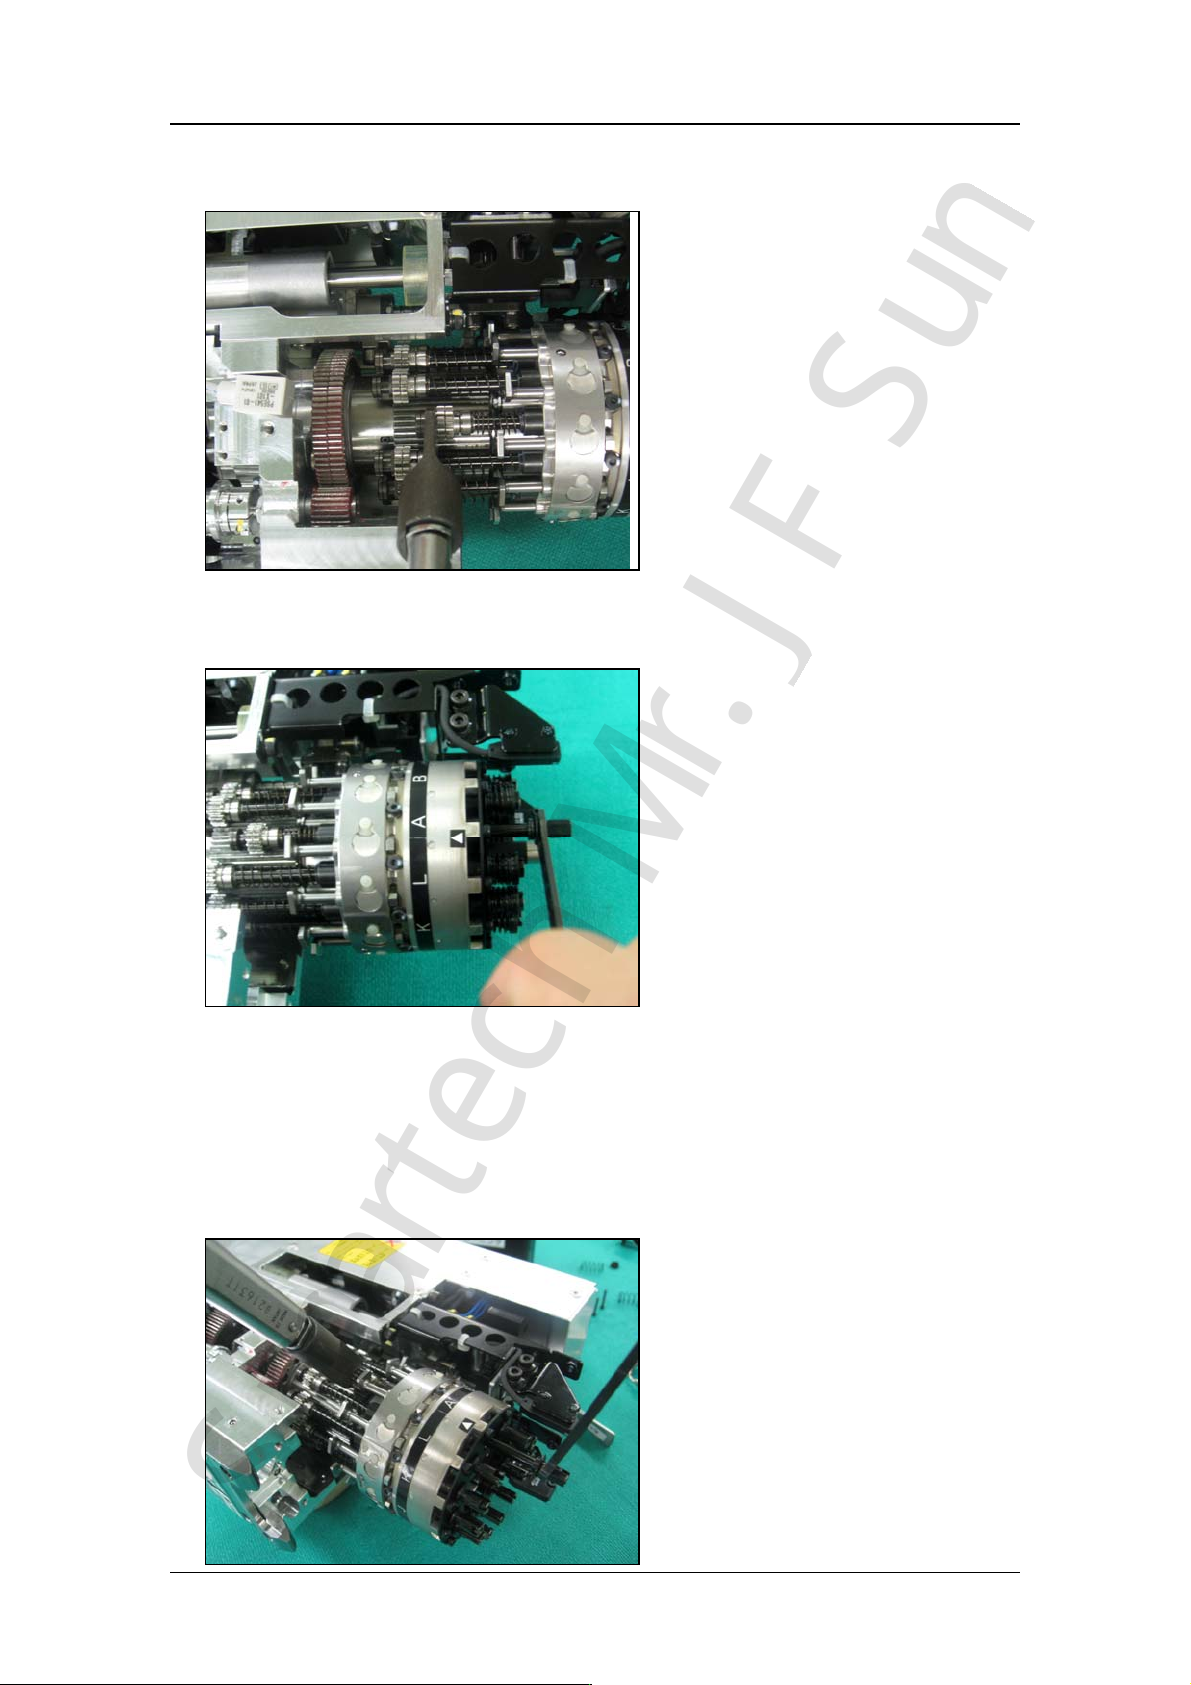
27. Attach the pusher to the syringe. Firstly, set a torque spanner (AA6KK0*) at the
position shown in the following photo.
28. Next, set a 4.0 mm spanner (PB9769*) at the position shown in the following photo.
29. Tighten the pusher with 1.0 Nm torque force.
Caution!
When tightening the pusher, hold the upper torque wrench and turn the
lower spanner anti-clockwise as viewed from above the head. Take care to
ensure that the lower spanner does not interfere with the nozzle existence
check sensor.
CONFIDENTIAL
SmartechMr.J FSun