MR8740T_user_manual_eng_20191016H.pdf - 第182页
177 10 Conguring the System Environment Settings Y ou can congure the system environment settings for the instrument. IMPORT ANT Do not change any Windows ® setting unless otherwise indicated in this document. Doing so…
176
Displaying Waveforms
177
10
Conguring the System
Environment Settings
You can congure the system environment settings for the instrument.
IMPORTANT
Do not change any Windows
®
setting unless otherwise indicated in this document.
Doing so may cause unstable system operation.
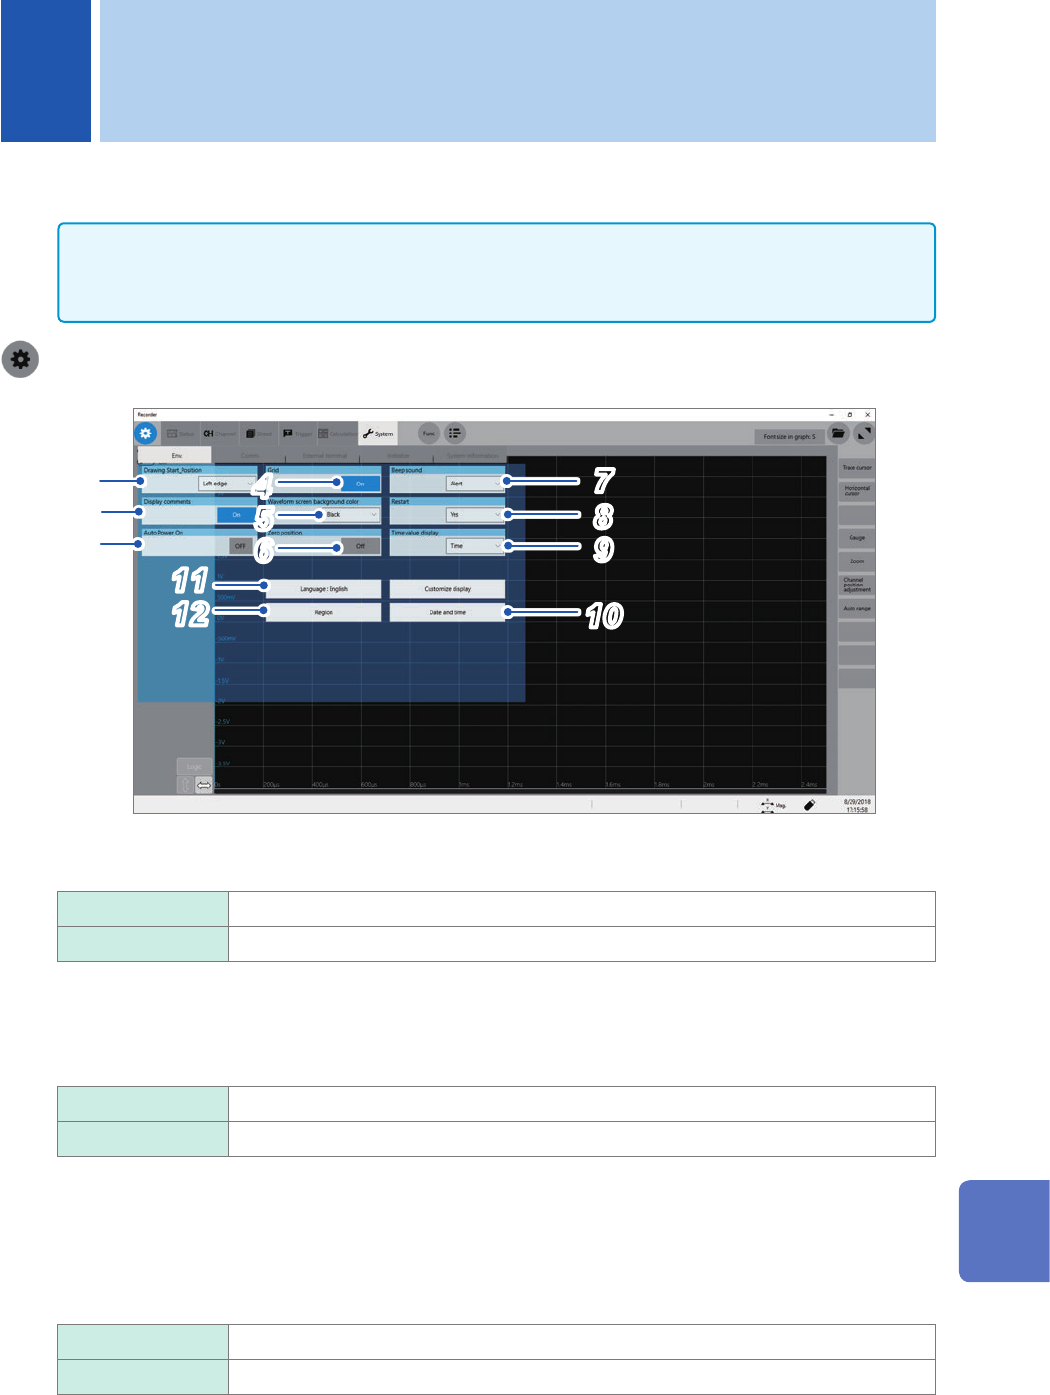
> [System] > [Env.]
71
2
3
4
5
6
8
10
11
9
12
1
Click the [Drawing Start_Position] box, and then choose a start position of the scrolling
display from the list.
Left edge
Starts scrolling through waveforms from the left side of the waveform screen.
Right edge Starts scrolling through waveforms from the right side of the waveform screen.
2
Click the [Display comments] button to choose a comment display setting.
You can display a title comment and each channel comment on the waveform screen. Each channel comment
appears along with each input-channel marker.
On
Displays comments.
Off Does not display any markers.
3
Click the [Auto Power on] button, and then congure the automatic power-on setting.
When you choose [On], just supplying power allows the instrument to start Windows
®
and to be ready for
measurement. You do not have to operate the start button on the front side or the main power switch on the
rear side. Always set the switch on the rear side to on.
The instrument does not store the [Auto Power On] setting in any le.
Off
Disables the auto-power-on setting.
On Enables the auto-power-on setting.
10 Conguring the System Environment Settings
10
Conguring the System Environment Settings

178
4
Click the [Grid] button to choose a grid display setting of the waveform screen.
On
Displays the solid-line grid.
Off Does not display any grids.
5
Click the [Waveform screen background color] box, and then from the list, choose a
background color of the waveform screen.
Some background colors of waveforms may cause waveforms to get difcult to see. Change the waveform
colors in such a case.
Black
Sets the background color of the waveform screen to black.
White Sets the background color of the waveform screen to white.
6
Click the [Zero position] button to set it to [On] or [Off].
You can display markers at the zero position of each input channel on the time-axis waveform display.
Off
Does not display any markers.
On Displays markers at the zero position on the right side of the waveform screen.
7
Click the [Beep sound] box, and then choose a beep setting from the list.
Off Does not allow the instrument to beep.
Alert
Allows the instrument to beep in the following cases:
• If an error message or warning appears
• If a fail judgment is given
Alert+Action Allows the instrument to beep when the instrument starts a measurement, is triggered,
stops the measurement, and completes auto-saving, in addition to the cases described
above.
8
Click the [Restart] box, and then from the list, choose whether to immediately restart the
measurement after changing a setting that affects measurement during the measurement.
No Does not restart any measurement.
You cannot change any settings during measurement.
Yes
If you change a setting during measurement, the instrument conrms the changes and
then restart the measurement.
9
Click the [Time value display] box, and then from the list, choose a display format for the
lapse time from a trigger point.
Time
Displays the lapse time from the trigger point (the unit is xed).
Mod 60 Displays the lapse time from the trigger point (in the sexagesimal [base 60] system).
Date Displays the time when the instrument acquired a waveform.
Samples Displays the number of data points acquired during the period from the trigger point.
• During the external sampling is used, this setting is xed to [Samples].
• These settings are also applied to the values of the trace cursors.