MR8740T_user_manual_eng_20191016H.pdf - 第185页
180
179
10
Click [Date and time], and then set the clock.
Refer to “2.7 Setting the Clock” in Quick Start Manual.
11
Change the display languages.
(1) Click [Language: English].
The setting dialog box appears.
(2) Click the [Display language] box, and then choose a user interface language from the list.
English
, Japanese
(3) Click [OK].
The instrument is turned off.
(4) Press the start button on the front side.
The instrument starts up with the display in the selected language.
12
Click [Region].
Choose characters that represent the decimal point and the separator used in data included in waveform les
(text format) and numerical calculation result les.
Click the [Decimal point], and then from the list, choose a character that represents the decimal symbol.
Period .
Designates the period (.) as the decimal point.
Comma , Designates the comma (,) as the decimal point.
Click the [Separator], and then from the list, choose a character that represents the separator.
Comma ,
Designates the comma (,) as the separator.
Space Designates the space character as the separator.
Tab Designates the tab character as the separator.
Semicolon ; Designates the semicolon (;) as the separator.
• Either the decimal point or separator, but not both, can be set to [Comma ,].
• For the [Comma ,] setting, the instrument saves les with a CSV extension; for the other separator settings
than [Comma ,], with a TXT extension.
10
Conguring the System Environment Settings
180
181
11 Connecting the Instrument to Computers
11
Connecting the Instrument to
Computers
Familiarize yourself with the section “Before connecting to an external device” in “Operation
Precautions” of Quick Start Manual.
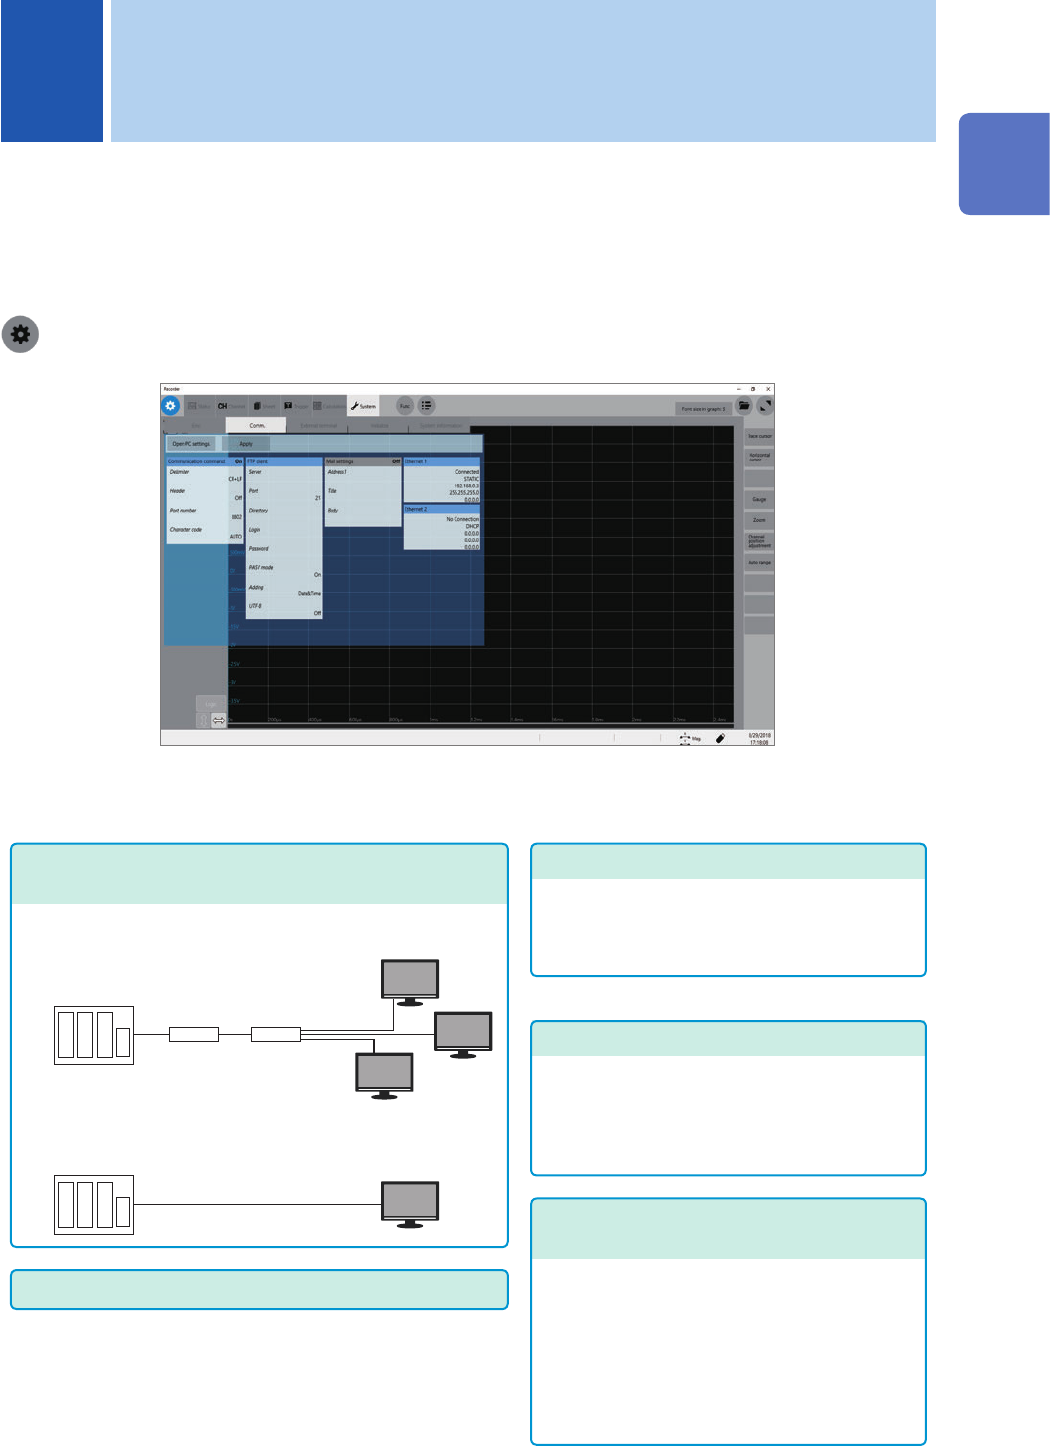
This instrument is equipped with the Ethernet 1000BASE-T interface for LAN communications.
You can control the instrument using computers or other devices connected to your network with
10BASE-T, 100BASE-TX, or 1000BASE-T cable (maximum length: 100 m).
> [System] > [Comm.]
Operation available on the [Comm.] screen
Conguring the LAN settings and connecting the
instrument via LAN (p. 182)
Controlling the instrument with the
command communications (p. 203)
You can control the instrument using programs
you have created after connecting your
computer to the command communications
port using the TCP.
For more information about the communication
commands, refer to the Communications
Command Instruction Manual on the
accompanying application disc.
Sending email messages
(
p. 198
)
• Connecting the instrument to your computer via the
network
• Directly connecting the instrument to your computer
FTP server function (p. 186)
Using an FTP client software installed on your
computer allows you to transfer les from a
storage device inserted to the instrument to the
computer, and handle the les.
FTP client function (p. 192)
Using this function allows you to send data to
the FTP server of the computer. The instrument
can send measured data on completion of
each measurement. You can also send data
manually.
11
Connecting the Instrument to Computers