MR8740T_user_manual_eng_20191016H.pdf - 第207页
202 Sending Email messages 6 Make sure that the email can normally be sent. Click [Send test mail] . A test email that includes the specied contents is sent. Make sure that the specied destination can correctly receive…

201
Sending Email messages
Conguring the authentication, compression, and encryption settings
for email messages to be sent
1
2
4
5
3
6
1
Click [Advanced].
2
Click the [Encrypt attached le] box, and then choose an attachment setting from the list.
Off
Attaches les in original format.
ZIP Attaches ZIP-compressed les.
ZIP+AES Attaches les in encrypted ZIP format. The instrument does not compress les.
3
(To encrypt attachments)
Enter an encryption password in the [Password] box.
Number of characters: up to 16
4
(When an email authentication is required)
Click the [Authentication ] box, and then choose a authentication protocol from the list.
Off
Sends mails with no user authentication.
POP Sends mails using POP (APOP) before SMTP.
SMTP Sends mails using SMTP (supports CRAM-MD5, PLAIN, and LOGIN).
5
Congure the authorization information settings.
• When you use the POP authentication
Click the [POP server] box and the [Port] button in turn, and then enter a POP server name and its port
number, respectively.
When the [POP server] is left blank, the instrument uses the gure entered in the [Mail server] box.
Click the [Account] and [Password] boxes in turn, and then enter an authentication user name and
password, respectively.
• When you use the SMTP authentication
Click the [POP server] box and the [Port] button in turn, and then enter a POP server name and its port
number, respectively.
Click the [Account] and [Password] boxes in turn, and then enter an authentication user name and
password, respectively.
11
Connecting the Instrument to Computers
202
Sending Email messages
6
Make sure that the email can normally be sent.
Click [Send test mail].
A test email that includes the specied contents is sent.
Make sure that the specied destination can correctly receive the test email message. If the specied
destination cannot receive the test email message, review your settings.
If encryption is enabled for the attached le, images in the test email are encrypted.
Be sure to decompress the attachment to check whether the password is correctly set.
203
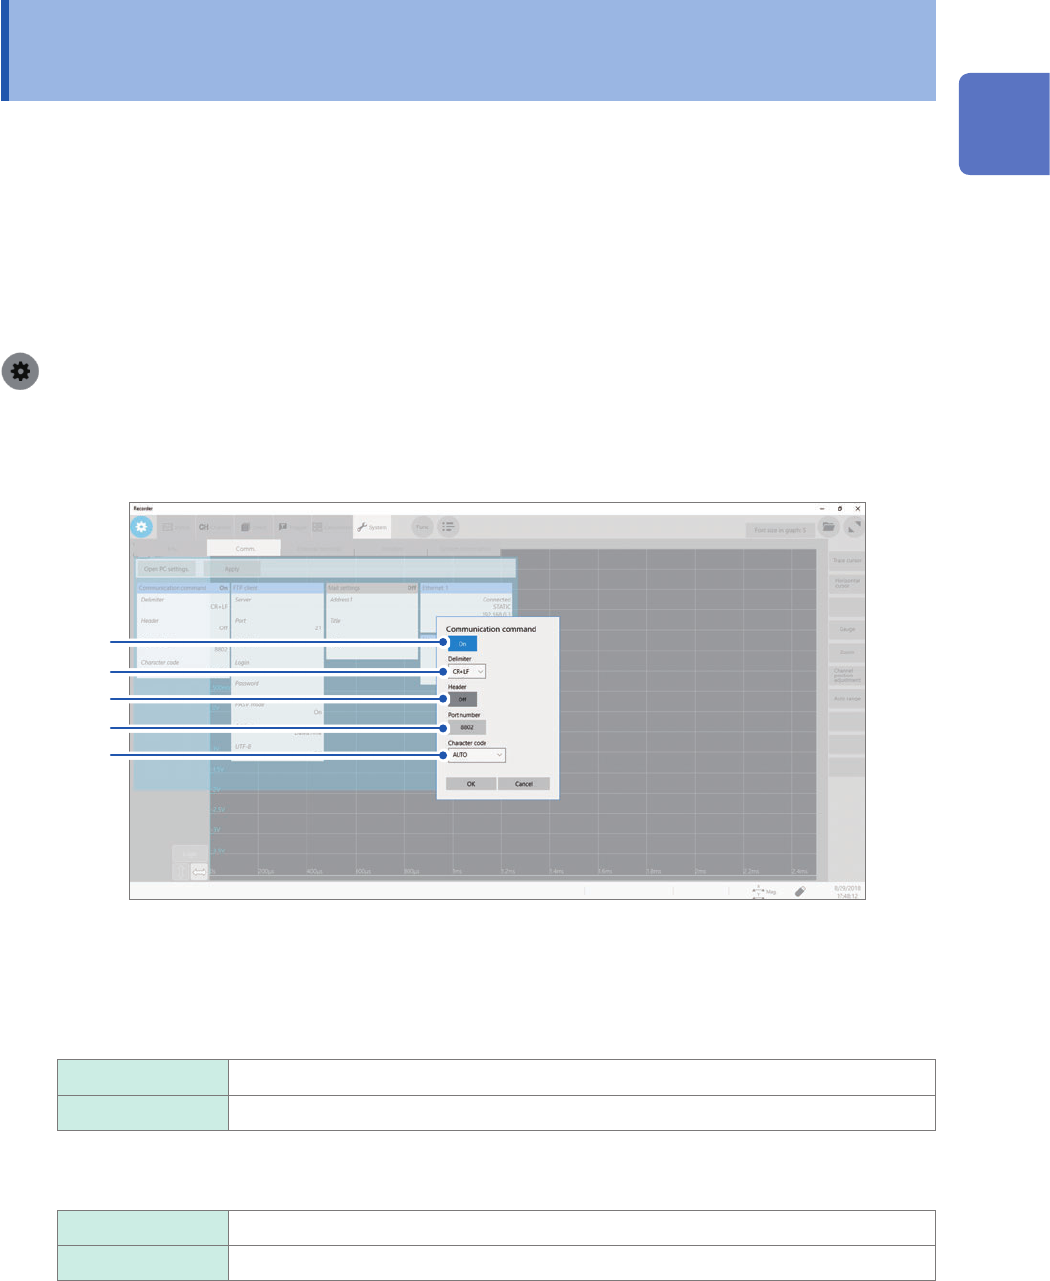
Controlling the Instrument with Command Communications (LAN)
11.5 Controlling the Instrument with Command
Communications (LAN)
You can externally control the instrument using commands via the communication interface.
Communications can be established with a LAN connection.
For details, refer to the Communication Command Instruction Manual on the accompanying
application disc.
Congure the LAN settings and connect the instrument before using the command communications.
Refer to “11.1 Conguring the LAN Settings and Connecting the Instrument to the Network”
(p. 182).
> [System] > [Comm.]
1
Click [Communication command].
The setting dialog box will appear.
2
3
4
5
6
2
Click the [Communication command] button to set it to [On].
3
Click the [Delimiter] box, and then choose a character code (line feed code) that represents
the data delimiter.
CR+LF
Sends the character codes 0x0d and 0x0a.
LF Sends the character code 0x0a.
4
Click the [Header] to choose whether to prex a header to command responses.
Off
Does not prex any header to response data.
On Prexes a header to response data.
11
Connecting the Instrument to Computers