MR8740T_user_manual_eng_20191016H.pdf - 第49页
44 Inverting a W aveform (Invert Function) 3.4 Inverting a W aveform (Invert Function) Y ou can invert a waveform relative to the X axis. This function can be used for analog channels only . Measured data saved in les i…
43
Fine-Adjusting Input Values (Vernier Function)
3.3 Fine-Adjusting Input Values (Vernier Function)
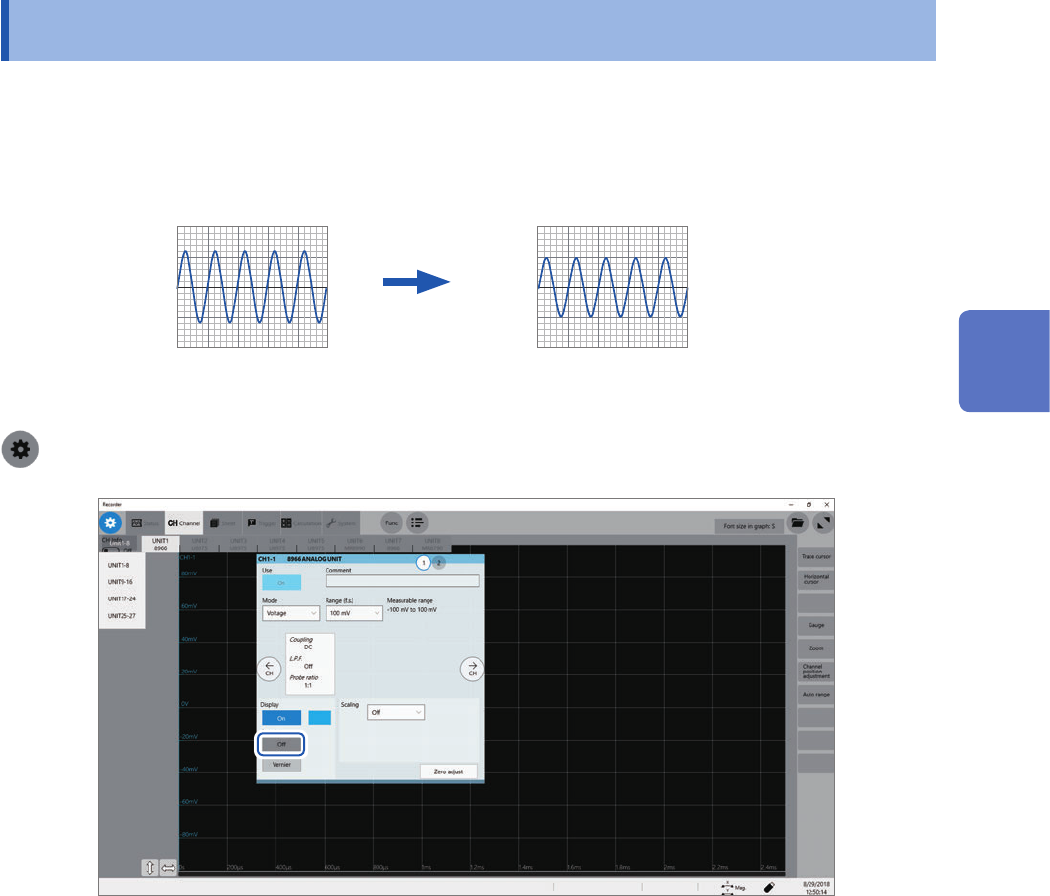
You can freely ne-adjust input voltage on the waveform screen. When recording physical values,
such as noise, temperature, and acceleration, with sensors, you can adjust those amplitudes, which
facilitates calibration.
Normal display Waveform processed by the vernier function
When an input voltage of 1.2 V is displayed
as a voltage of 1.0 V
1.0 V
1.2 V
> [Channel]
1
Click [Vernier].
The adjustment keypad appears.
2
While observing the waveform, you can ne-adjust its amplitude by clicking [−−], [−], [+],
and [++].
Click [C] to revert the ne-adjusted amplitude to its original.
• The adjustable range is from 50% to 200% of an original waveform.
• You cannot check if waveforms are adjusted by the vernier function by observing waveforms only.
• Waveform data (data saved as les) is that adjusted by the vernier function.
3
Advanced Functions
44
Inverting a Waveform (Invert Function)
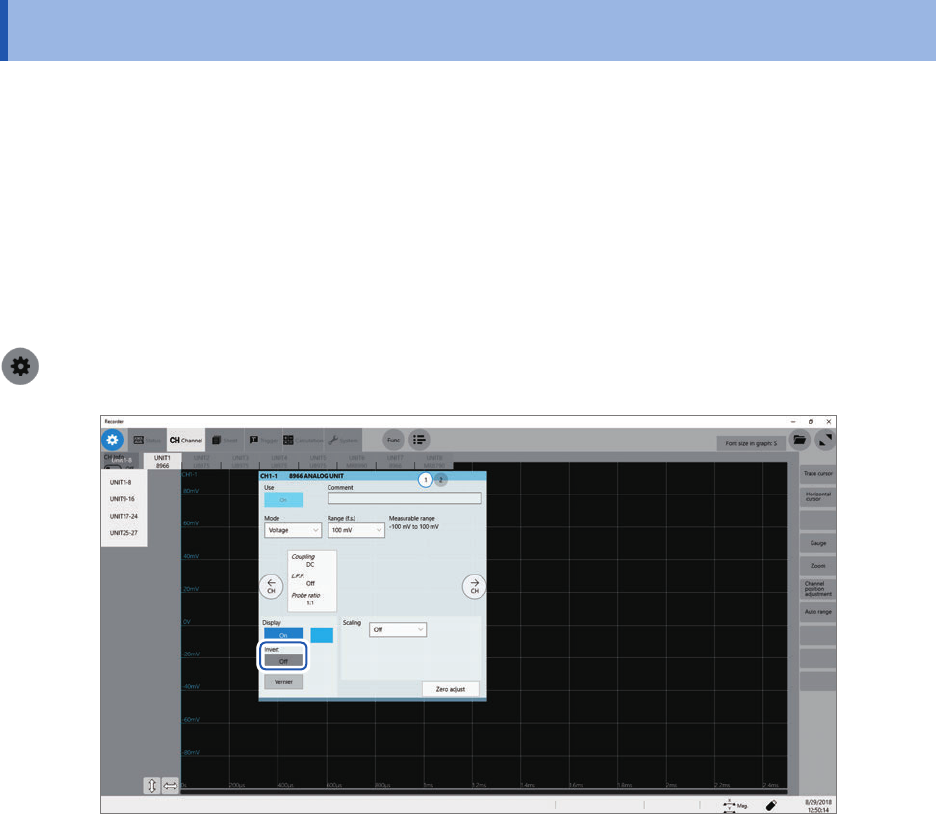
3.4 Inverting a Waveform (Invert Function)
You can invert a waveform relative to the X axis. This function can be used for analog channels
only.
Measured data saved in les is that inverted by the invert function.
Example:
• When a current sensor is clamped around a wire with its current direction mark mistakenly in the
direction opposite to the current ow
• When a signal is inputted with spring-pulling force negative and spring-compressing force
positive; however, you would like to display the results with spring-pulling force positive and
spring-compressing force negative
> [Channel]
Click the [Invert] button to set it to [On].
This setting is not available for Model 8967 Temp Unit, Model 8970 Freq Unit, and Model 8973
Logic Unit.
45
Copying Settings (Copy Function)
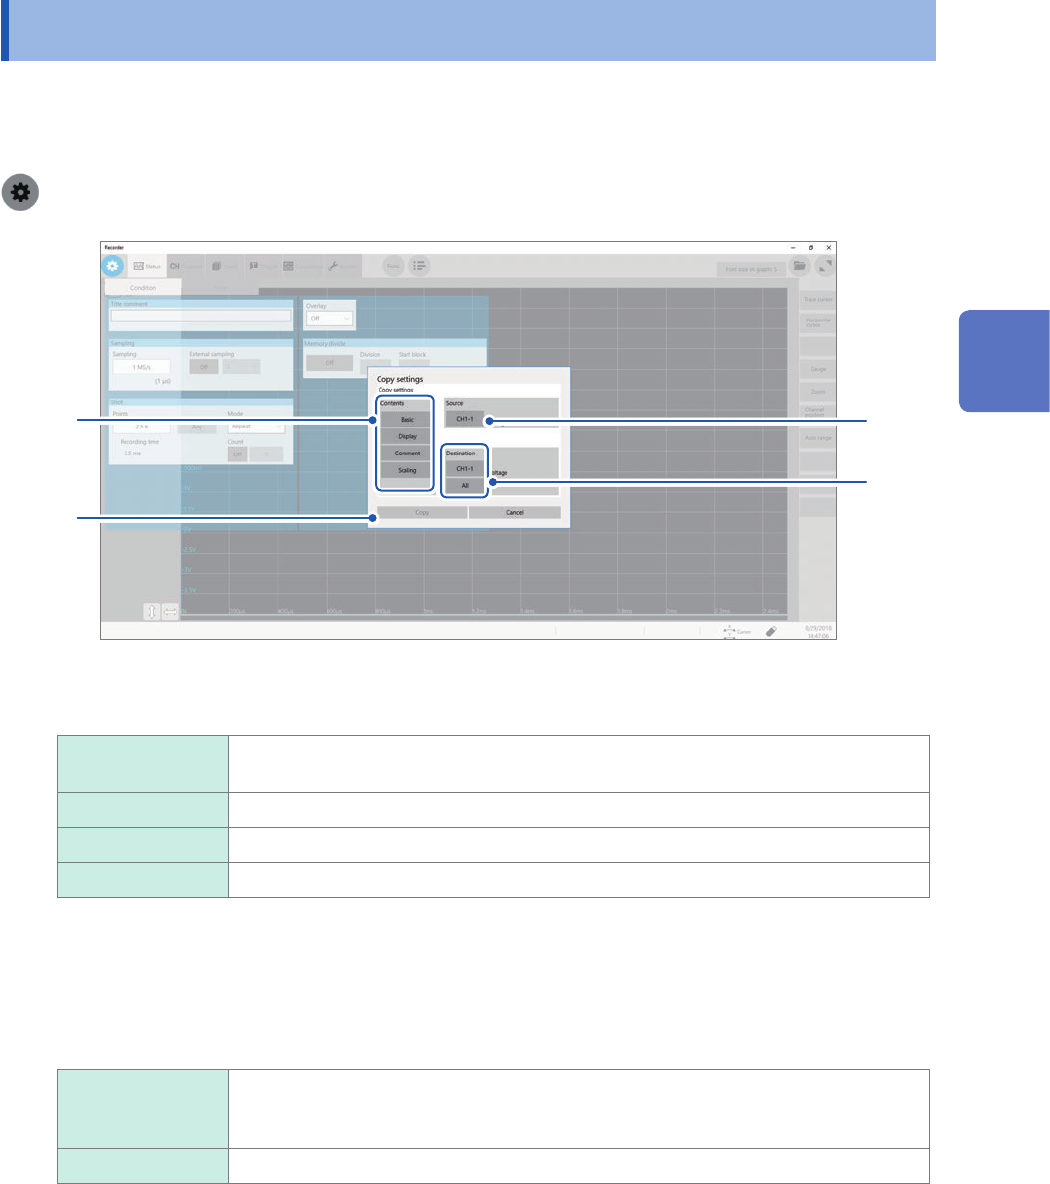
3.5 Copying Settings (Copy Function)
You can copy settings of other channels, as well as the trigger settings.
The following procedure explains how to copy settings of another channel.
> [Func] > [Copy] > [Channel]
3
2
1
4
1
In the [Contents] area, click one or more of items that you want to copy.
Depending on module types, some items may not be able to be copied.
Basic Copies the mode, measurement range, coupling, L.P.F., division ratio, and module-
specic settings.
Display Copies the display setting (excluding comments).
Comment Copies a comment.
Scaling Copies the scaling setting.
2
Click the [Source] box, and then choose a source channel from the list.
3
Click the [Destination] box, and then choose a destination channel from the list.
Otherwise, click [All].
CH1-1
(Channel
selection)
Click this option when you would like to copy the settings to any one of the channels.
Select a destination channel from the list.
All Copies settings to all channels of UNIT 1 through UNIT 27.
4
Click [Copy].
After copying the settings, check that levels and setting values, which includes upper and lower values, and
the measurement range are appropriately set.
3
Advanced Functions