MR8740T_user_manual_eng_20191016H.pdf - 第60页
55 Conguring Measuring-Module-Specic Settings 4 Click the [Range (f.s.)] box, and then choose a measurement range from the list. IMPORT ANT The gure of each measurement range name represents the maximum current Model …
54
Conguring Measuring-Module-Specic Settings
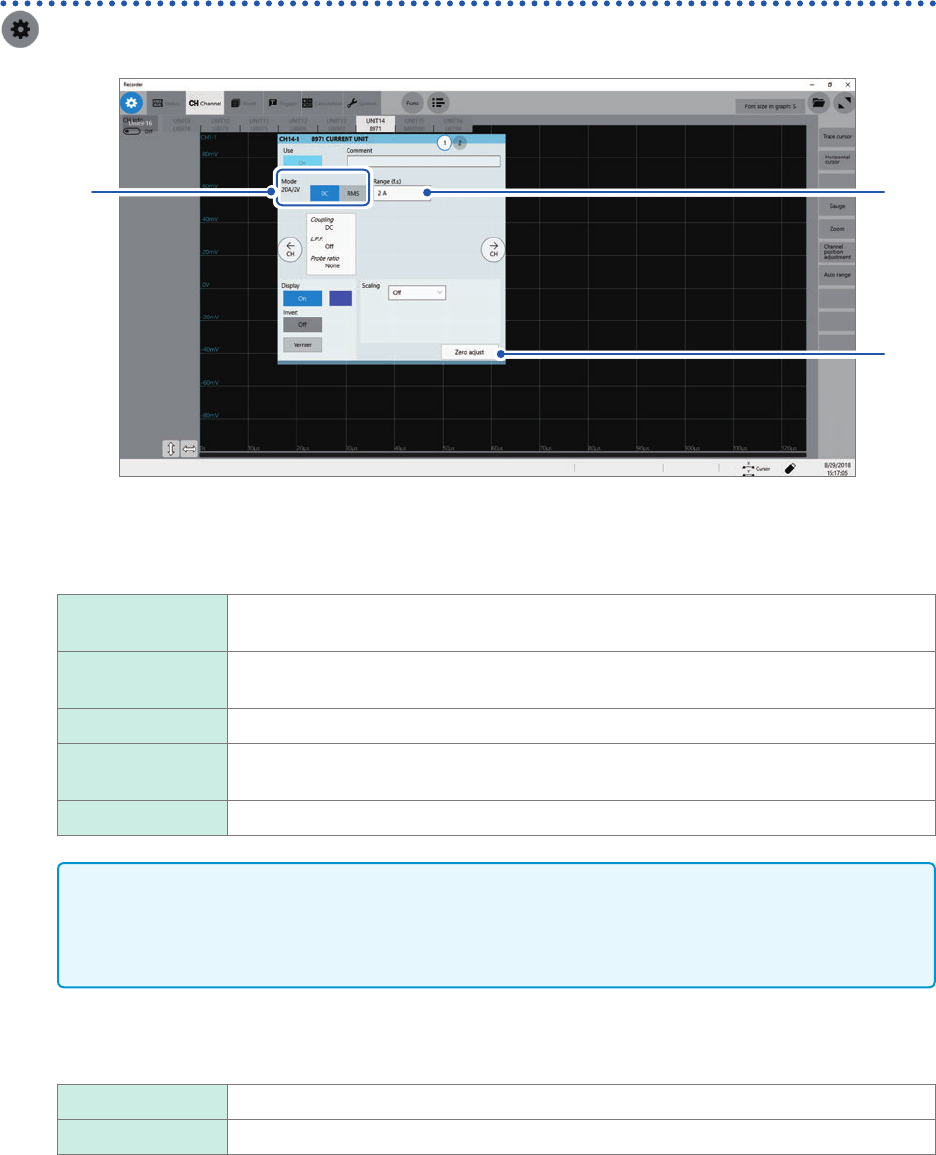
Conguring Model 8971 Current Unit settings
> [Channel] > [8971]
4
1, 2
3
1
Conrm the output rate displayed in the [Mode] area.
The instrument automatically recognizes a current sensor connected to Model 8971 Current Unit and displays
it as follows:
20A/2V When one of the following current sensors is connected: Model 9272-10 (20 A range)
and Model CT6841.
200A/2V When one of the following current sensors is connected: Model 9272-10 (200 A range),
Model CT6843, and CT6863.
50A/2V When Model CT6862 AC/DC Current Sensor is connected
500A/2V When one of the following current sensors is connected: Models 9709, CT6844,
CT6845, CT6846*, and CT6865*.
None When no current sensor is connected.
IMPORTANT
*: When Model CT6846 or Model CT6865 connects to Model 8971 Current Unit via Model 9318
Conversion Cable, the instrument recognizes the sensor as a 500 A AC/DC sensor. Set the
conversion ratio at 2.00 in the scaling setting to obtain correct current values.
2
In the [Mode] area, click the [DC] or [RMS] to choose a measurement mode.
DC
For current measurement
RMS For RMS measurement
3
(When you have changed the measurement mode) Click [Zero adjust].
The instrument performs zero-adjustment. Execute zero-adjustment without any input.

55
Conguring Measuring-Module-Specic Settings
4
Click the [Range (f.s.)] box, and then choose a measurement range from the list.
IMPORTANT
The gure of each measurement range name represents the maximum current Model 8971 can
measure using the range. However, the instrument cannot measure currents that exceed the rated
current of a connected current sensor. Check the specications of the current sensor used.
3
Advanced Functions
56
Conguring Measuring-Module-Specic Settings
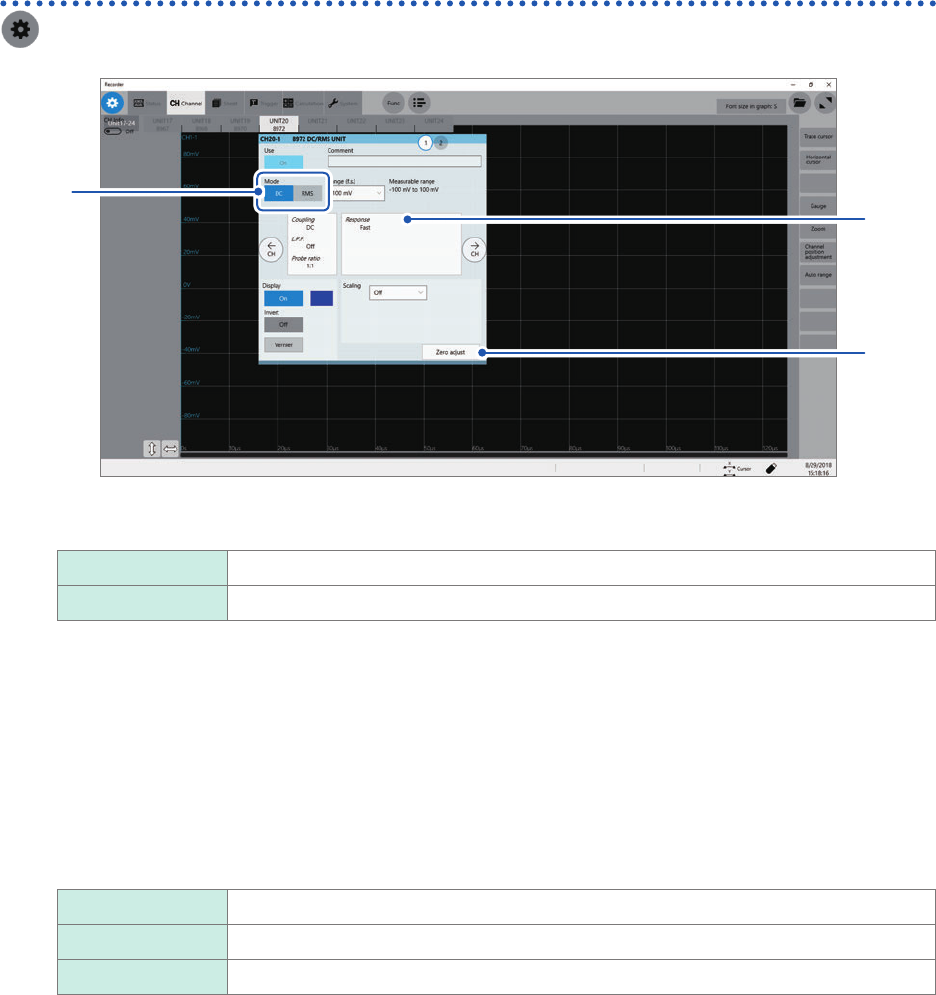
Conguring Model 8972 DC/RMS Unit settings
> [Channel] > [8972]
3
1
2
1
In the [Mode] area, click the [DC] or [RMS] to choose a measurement mode.
DC
For voltage measurement
RMS For RMS measurement
2
(When you have changed the measurement mode) Click [Zero adjust].
The instrument performs zero-adjustment. Execute zero-adjustment without any input.
3
Click the area that includes [Response].
The setting dialog box appears.
4
Click the [Response] box, and then from the list, choose a response time for RMS
measurement.
Fast
Sets the response time to about 100 ms.
Normal Sets the response time to about 800 ms.
Slow Sets the response time to about 5 seconds.
Usually, use [Fast]. Setting the response time to [Normal] or [Slow] can stabilize the measured values if the
frequency is relatively low or the voltage uctuates severely.
5
Click [Close].
The setting dialog box closes.