MR8740T_user_manual_eng_20191016H.pdf - 第8页
3 1 Measurement Method 1.1 Measurement Procedure Inspecting the instrument before measurement Conguring the basic settings for measurement Choose a sampling rate. (p. 5) Choose a recording length (shot). (p. 6) Advanced…
2
How to Refer to This Document
How to Refer to This Document
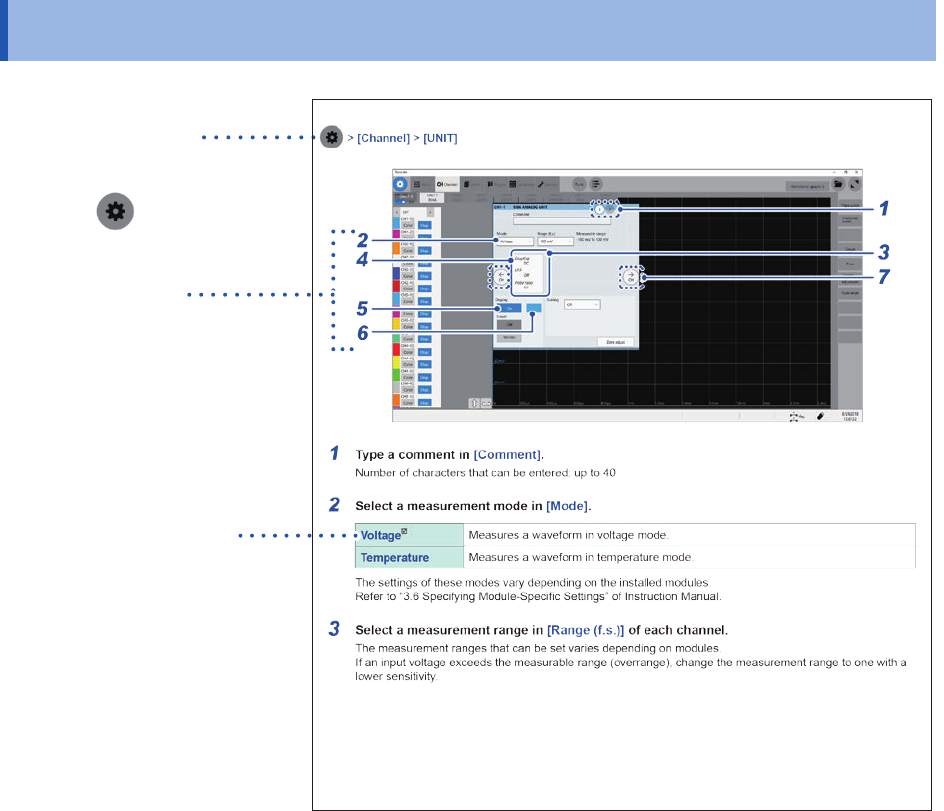
How to open a screen
Indicates the order of clicking the
screens.
The button
represents the
setting key.
Procedure numbers
Numbered same as a
corresponding step-by-step
instruction.
Options and explanations
Describes options available
when an item is clicked.
The icon
indicates the default
setting of the item.
3
1
Measurement Method
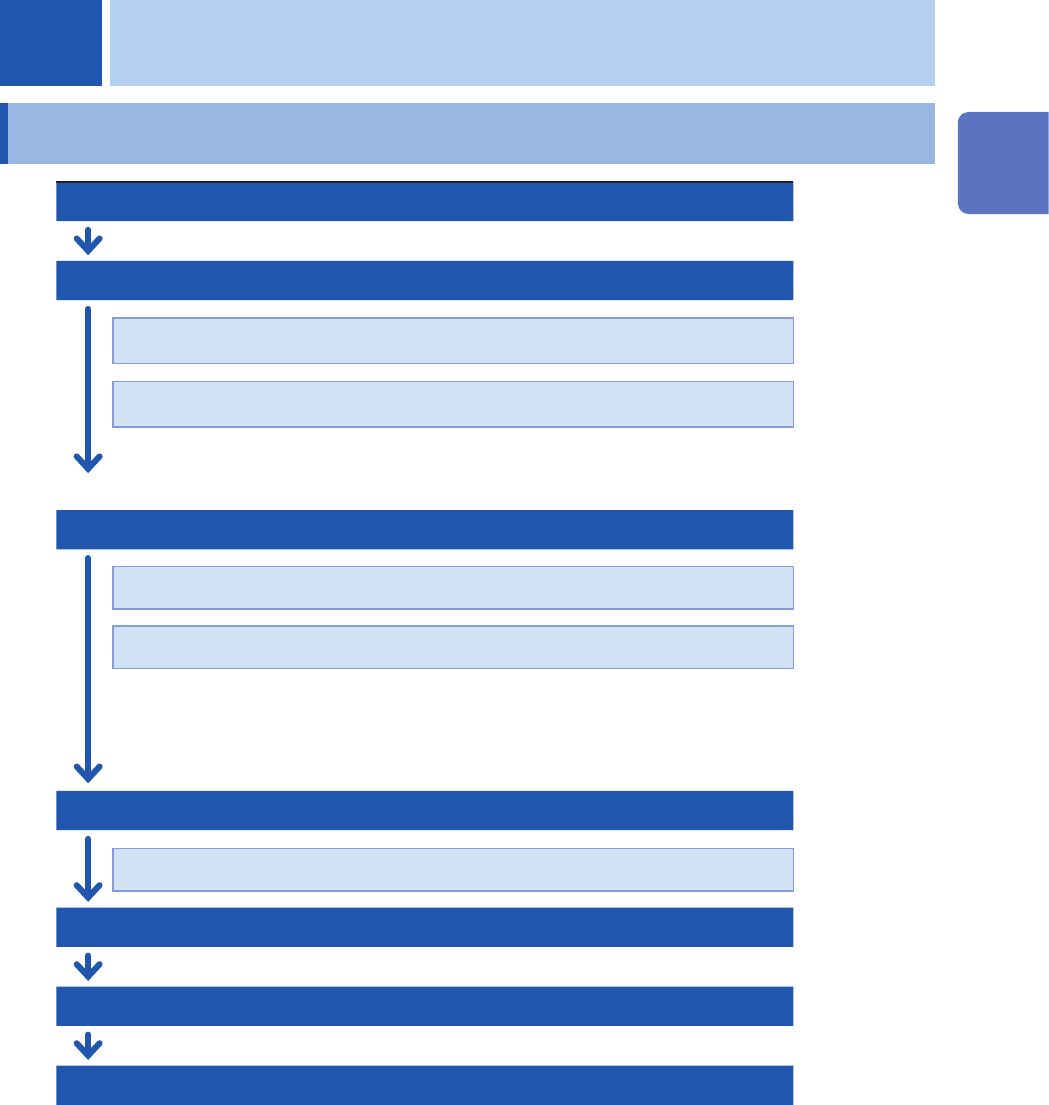
1.1 Measurement Procedure
Inspecting the instrument before measurement
Conguring the basic settings for measurement
Choose a sampling rate.
(p. 5)
Choose a recording length (shot).
(p. 6)
Advanced settings: “3.1 Overlaying New Waveforms With Previously Acquired
Waveforms”
(p. 36)
Conguring the input channel settings
(p. 9)
Congure the analog channel settings.
(p. 11)
Congure the logic channel settings.
(p. 15)
Advanced settings: “3.2 Converting Input Values (Scaling Function)” (p. 38)
“3.3 Fine-Adjusting Input Values (Vernier Function)” (p. 43)
“3.4 Inverting a Waveform (Invert Function)” (p. 44)
Conguring the sheet settings
Choose a display format of waveforms.
(p. 16)
Conguring the trigger settings
(p. 97)
Starting measurement
(p. 18)
Finishing the measurement
Advanced operation: “Scrolling through waveforms” (p. 27)
“2.4 Changing the Display Position and Display
Magnication of Waveforms”
(p. 29)
“4 Saving/Loading Data and Managing Files” (p. 81)
“7 Numerical Calculation Function” (p. 133)
1 Measurement Method
1
Measurement Method

4
Measurement Procedure
To conguring measurement settings automatically
Clicking [Auto range] on the waveform screen automatically species the sampling rate,
measurement range, and zero position of the input waveform and start a measurement.
Refer to “3.7 Measuring Signals With the Auto-range Setting” of Quick Start Manual.
To load settings previously registered
Load the settings le on the le screen.
Refer to “4.3 Loading Data” (p. 94).
To automatically load saved settings at the time of startup
Congure the setting for the instrument so as to load the le containing the instrument settings at
the time of startup.
Refer to “Automatically loading the settings (Auto-setup function)” (p. 95).
Initializing the instrument (Restoring the basic settings)
Select > [System] > [Initialize] to restore the instrument settings to the factory default.
The setting after the initialization is suitable for simple measurement.
If any unexpected or complicated behavior is observed, initialize the instrument.
Refer to “6.2 Initializing the Instrument” in Quick Start Manual.