00198611-02_IM_712.1_R19-1_EN.pdf - 第62页
Station Software Version 7 12.1 (R19-1) / Installation Manual 05/2019 Edition 62 Thus, the installation files a re locally available on the Vision computer (required for succe ssful installation). The actual installation…
Station Software Version 712.1 (R19-1) / Installation Manual 05/2019 Edition
61
6.2.2 Establishing a Connection to the Vision Computer
► Log in to the station computer under the ASM_Admin user account.
Figure 6-9: Establishing connection
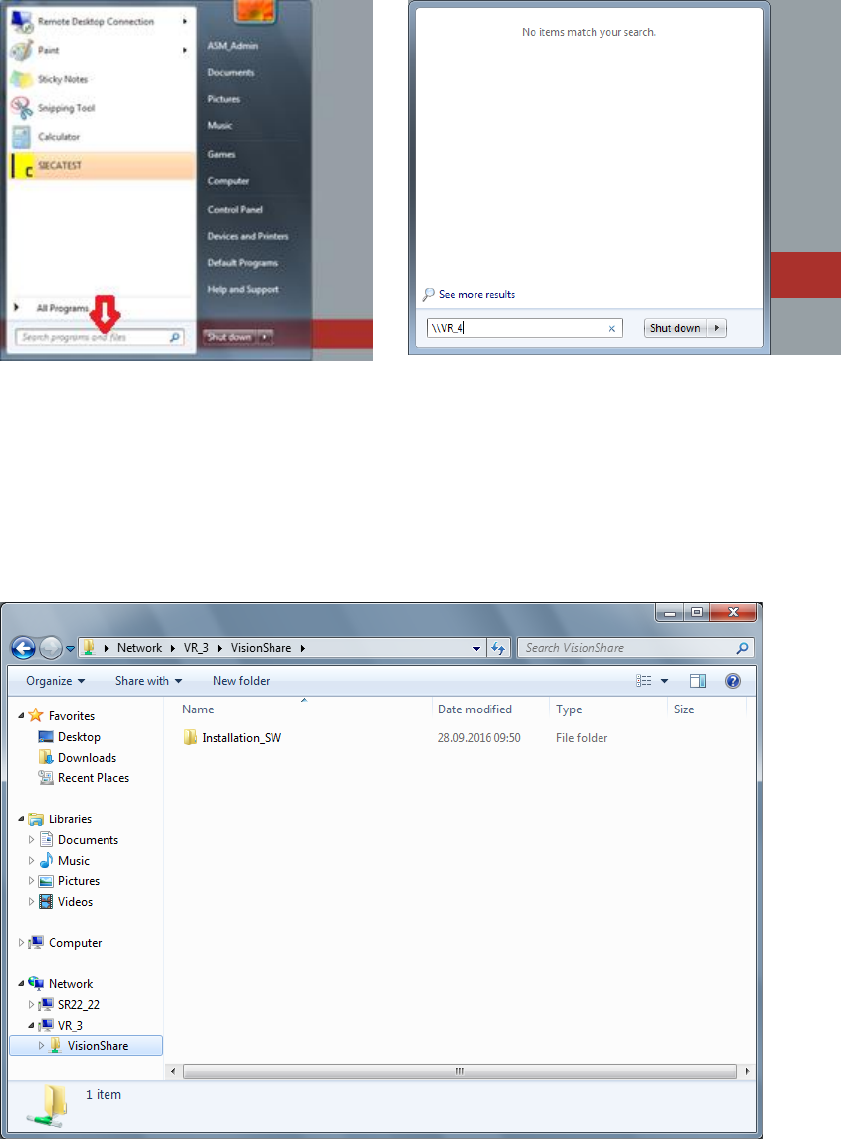
► Enter the current Vision computer or the respective IP address in the input box of the Windows
Start menu:
\\VR_3 or IP address 192.168.255.253 (for Coplan computer)
\\VR_4 or IP address 192.168.255.251 (for feeder computer)
A Windows Explorer dialog box with access to the VisionShare directory opens on the Vision
computer.
Figure 6-10: VisionShare directory on the Vision computer
► Copy the installation files to the shared D:\VisionShare directory on the Vision computer.
(Called Installation_SW in the example above).
Station Software Version 712.1 (R19-1) / Installation Manual 05/2019 Edition
62
Thus, the installation files are locally available on the Vision computer (required for successful
installation). The actual installation then must be performed via a remote desktop connection.
If the disk space on the D: drive on the Vision computer is insufficient, this problem can be solved
by using the Remote Desktop Connection Windows feature. With this feature, the installation files
can also be copied to the Vision computer as described in the following section.
6.2.3 Opening the Remote Desktop of the Vision Computer
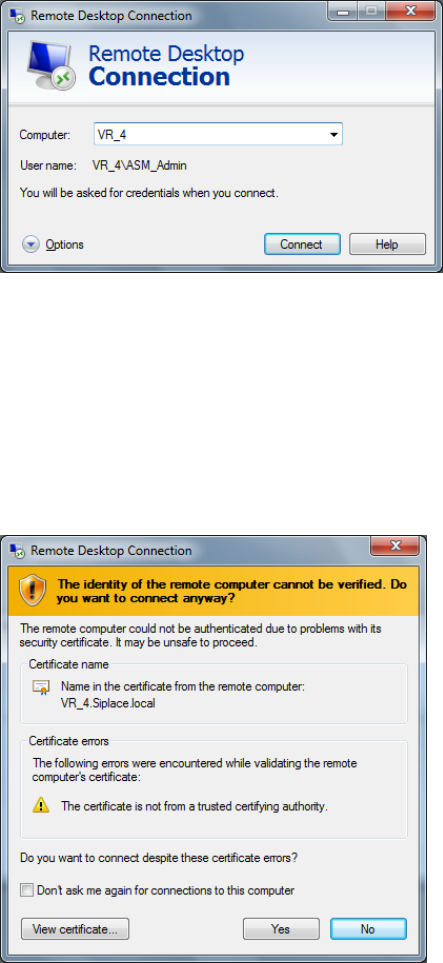
► Select Start – All programs – Accessories – Remote Desktop Connection to open a remote
connection.
The following dialog box opens.
Figure 6-11: Remote Desktop Connection dialog box
► Enter the current Vision computer or the respective IP address as Computer:
\\VR_3 or IP address 192.168.255.253 (for Coplan computer)
\\VR_4 or IP address 192.168.255.251 (for feeder computer)
► Log in as ASM_Admin user.
► Click the Connect button.
The following dialog box opens.
Figure 6-12: Computer verification
► Click the Yes button to confirm the query.
After the Remote Desktop of the Vision computer has been opened, the Windows Explorer can be
opened there. The available space on the D: drive can be checked now and, if necessary, not
required files deleted.
Station Software Version 712.1 (R19-1) / Installation Manual 05/2019 Edition
63
The station software installation files for installing the Vision computer software can now also be
locally stored on the Vision computer.
► On the station computer, copy the installation files from the Windows Explorer into the cache
with the right mouse button – Copy or with the Ctrl + C keys.
► Switch to the Remote Desktop of the Vision computer.
► Insert the files into the D:\Visionshare directory with the right mouse button – Paste or with the
Ctrl + V keys.
6.2.4 Installing the Software on the Vision Computer via the Remote Desktop
► Open a Windows Explorer in the Remote Desktop connection of the Vision computer.
► Double-click the BundeInstallerVision.exe file in the installation directory under D:\VisionShare.
► Install the respective software as described in section 6.1.
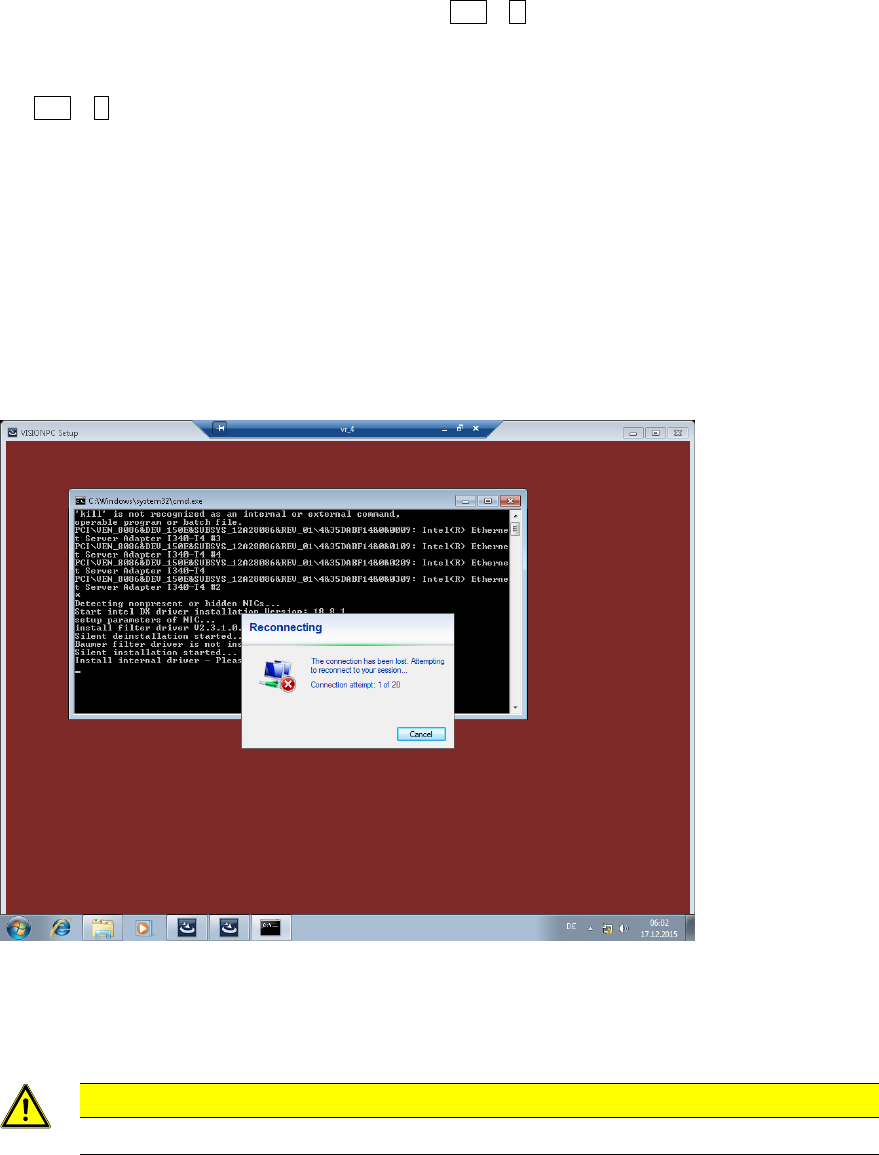
Due to the network card settings, the remote connection might hang up during the installation. If
nothing has changed on the screen after a minute:
► Move the mouse until the following message is displayed.
Figure 6-13: Reconnecting remote connection
After a short waiting time, the connection will be automatically re-established.
The necessary files for the respective software will be installed on the Vision computer.
CAUTION
The Vision computer must not be simply switched off!
► Open the Command Prompt window under Start – All programs – Accessories.
► Run the shutdown/s command.
The shutdown starts and the Remote Desktop is terminated.