M1series_ServiceManual_e.pdf - 第37页
3 Mechanical Section 3-9 Flange Seal The Flange Seal is affixed to cover and protect t he mat black film, which covers the back of the nozzle flange to avoid Vision Process error, m ay caused by re flecting. This seal m …

3 Mechanical Section
3-8
Cleaning Nozzle Recognition Stickers
Dirt on nozzle ID/presence stickers can be a cause of vision recognition failure. Regularly clean the nozzle
ID/presence stickers.
ACTION:
① Clean the sticker with cotton swab soaked with alcohol.
② Wipe off the remaining alcohol on the sticker with dry cotton swab.
NOTE: Particularly the nozzle ID stickers are liable to get dirty. If a nozzle ID sticker becomes too dirty to be
cleaned, replace it with new one.
NOTE: The nozzle ID/presence stickers are easily peeled off when they get wet. Be sure to dry them with cotton
swab whenever they get wet.
3 Mechanical Section
3-9
Flange Seal
The Flange Seal is affixed to cover and protect the mat black film, which covers the back of the nozzle
flange to avoid Vision Process error, may caused by reflecting. This seal may cause a Vision Process error
when it is damaged with scratches or when it turns reflective after long term use with nozzle changes.
Follow the procedure below when it needs to be replaced.
ACTION:
① Peel off the old Flange Seal thoroughly and clean off the dirt, such as oil, dust and moisture, from the
back of the nozzle flange using industrial alcohol. Do not use tools, such as an edged tool and
tweezers, to peel off the seal or damage the black film.
② Slide up the ring of the Flange Seal Set Tool (Optional) and turn it clockwise.
③ Remove the Flange Seal off the exfoliative paper using tweezers.
④ Set the Flange Seal, the adhesive side up, onto the Flange Seal Set Tool. Do not touch the seal with
hand.
⑤ Confirm that the seal is set evenly flat onto the inside bottom of the ring.
⑥ Insert the nozzle, nozzle tip down, into the tool.
⑦ Turn the ring counterclockwise, with the nozzle pressed onto the tool, and slide it down to attach the
nozzle flange and the Flange Seal.
NOTE: The Flange Seal comes off easily when it touches liquid, such as oil and water. Wipe them off quickly and
well using something like dry cotton-swab.
NOTE: There are 3 types of Flange seal. Please refer to the list below.
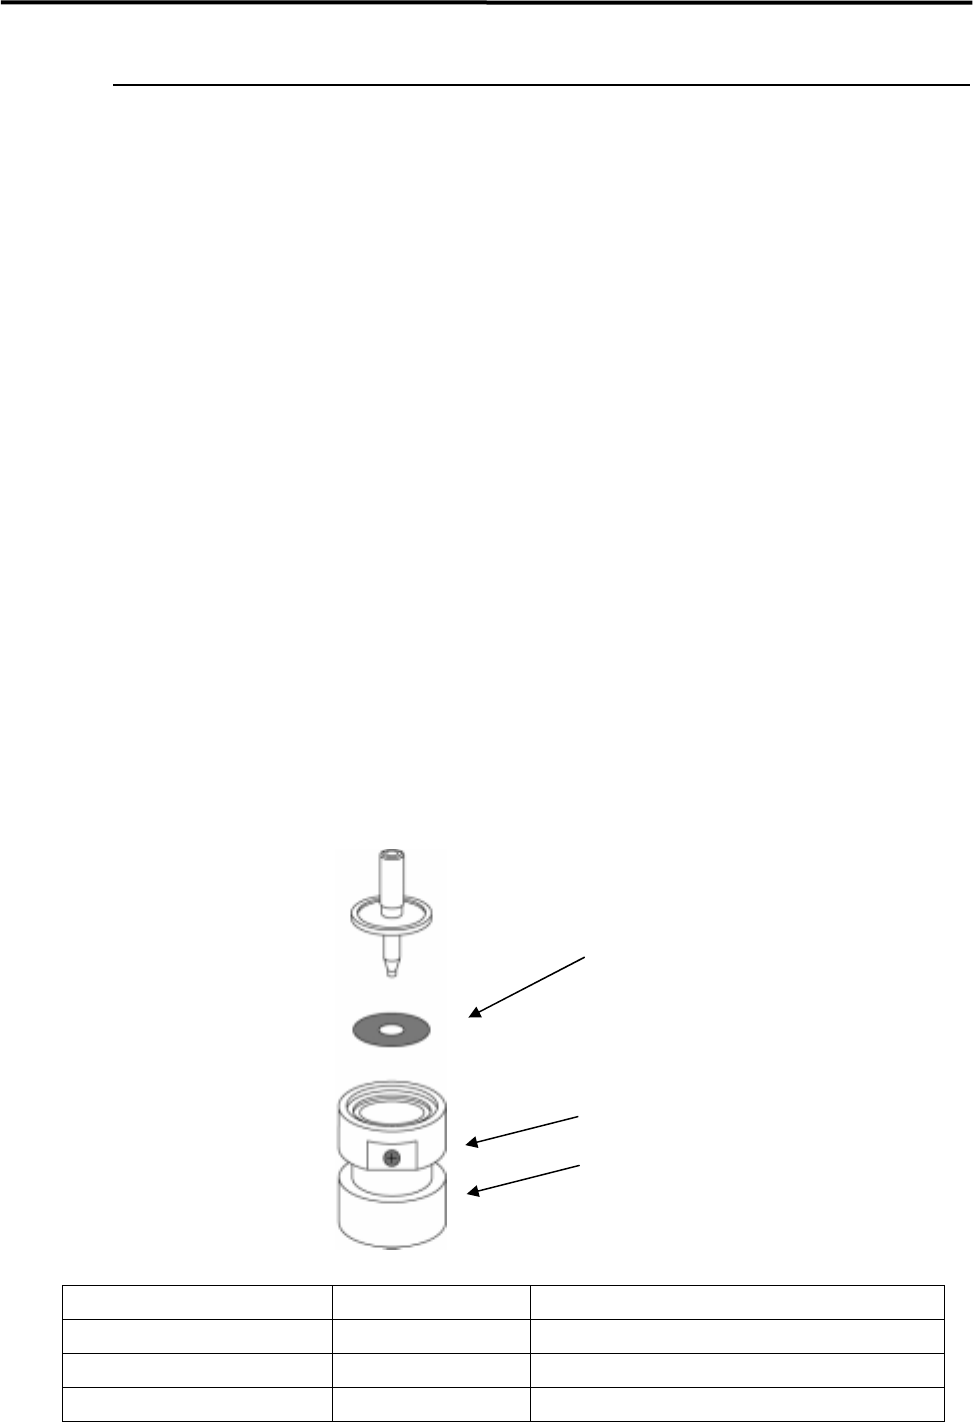
Flange Seal
Ring
Flange Seal Set Tool
Flange Seal Parts Number Parts Name Supported nozzle types
LG0-M77A6-000 FLANGE SEAL 1 M001~M005,M012,M013,M021,M022
LG0-M77A7-000 FLANGE SEAL 2 M006,M017,M018,M019
LG0-M77A8-000 FLANGE SEAL 3 M020

3 Mechanical Section
3-10
Head Choke / Nozzle Choke and Solenoid Valve Failure
Perform the following checkups about once a week.
■ Solenoid Valve Failure
A dust or dirt may be caught in the switching valve of solenoid valves, which causes the air to leak. And the
leaking air may cause the [Suction OFF] state to be the [Suction ON] state. This problem will increase the
possibility of remaining components on the head.
● Checkup by "Manual > Air Pressure"
(1) Checking maximum air pressure
Press your finger on the tip of the head with "Vacuum On" state, then check the air pressure. The normal
value is 600 or more.
(2) Checking head choking
Check the air pressure without a nozzle on the head. The normal value is about 40 or less.
If the value is 120 or more, the error occurs at the time of nozzle changes.
(3) Checking nozzle choking
Check the air pressure with a nozzle on the head. "Choke Threshold" is specified for each nozzle. If the
value is larger than the specified one, the nozzle choke error occurs.
(4) Checking failure in switching valve
Check to see if the air pressure changes with the [Suction OFF] state.
- Press your finger on the tip of the head/nozzle, and check if the air pressure varies.
- Switch the ON/OFF state several times and check if the air pressure varies.
If the pressure varies when the solenoid valve is in the OFF state, there may be an air leakage.
NOTE: To check the air pressure precisely, you need to use a digital pressure gage.